Far Cry 3

MEET CITRA
BAD SIDE OF TOWN
KICK THE HORNET'S NEST
A MAN NAMED HOYT
SAVING OLIVER
PIECE OF THE PAST
DOWN IN THE DOCKS
THE MOTHERLODE
LIN CONG I PRESUME?
UNHAPPY REUNION
THE KNIFE'S FOR YOU
==========================
COLLECTIBLES
Relics
Memory Cards
Lost Letters
Lost Letters
.
MAIN MISSIONS
MAIN MISSIONS
MAKE A BREAK FOR IT
After Vaas is done entertaining you, Grant takes initiative and gets out of the cage. Follow him out and crouch to avoid detection. You'll get the Detection Meter tutorial now, just hit the "esc" button when you see tutorials or info messages pop up because they give you some great information. Keep following Grant thru the place and do as he tells you. When you come into a room, he asks you to pick up the map. It's on the table so get near it and hold E -

Keep going and the next tutorial is that of distracting guards using stones. Hold T to aim and throw a rock which will distract a guard after which you can slip past them or after a little while - kill them. Next, you'll need to repeat the same thing with the next set of guards. Once you come to the exit, you'll meet Vaas -

Next thing you need to do is run like hell into the Jungle, keep going thru the obstacles and you'll soon run away from all the madness...
DOWN IN AMANAKI TOWN

You'll meet Dennis - the closest person to a friend right now. He'll take you into town and give you some cash to buy weapons. Head into the store and buy the 1911 handgun. Go back to Dennis and follow him out of the village.

Dennis asks you to go to the radio tower and disable the scrambler on top of it. Head towards the tower on the path ahead and once you reach it, start you ascent. Just use the ladders and broken up gangway to get to the top till you come to the scrambler -

There are a total of 18 radio towers on the islands so you'll need to disable all of the scramblers thru the game. For now, hold near near this one to stop it and you'll get a cool 500XP for disabling the scrambler and activating the tower. Next, use the zip line here to get back to ground level -

Now, once you are back with Dennis, he tells you how things work. Open your map and a small section of it is now visible -

You can see the many things in this area now. Likewise, to view other sections of the map and to reveal it completely, you'll need to activate the other radio towers. After you activate a tower, you'll be able to see the routes clearly and also, you will see various animal symbols on the map which mark hunting regions for those animals - more on that in the "HUNTING" section of the guide.
HARVEST THE JUNGLE
You'll now set a waypoint to the Boar icon on the map. Once you come out of the map, you'll be able to see the waypoint on your screen. You just need to follow it to get to the location. Grab the car nearby and take it to the waypoint. Once you reach the hunting grounds you'll need to -
Kill and Skin two Boars
Collect three types of Plant Leaves
Animal skins and Plant leaves are two of the most important things in the game next to your weapons. They help you build your inventory and leaves allow you to craft potent syringes which make you stronger and better in many different ways. You'll know the recipes of new types of syringes as you complete the main missions. You will also see the color of plants marked on your minimap as you move thru the world. This way, you can just go to one of them and gather the leaves. Collect all the leaves and kill the Boar and skin it. You may need to move around a bit to get the leaves so just look around.
After you gather all the stuff open your map and double click on the fast travel icon which is on the Amanaki Village. Once back move out of the house and talk to Dennis. Then open the Crafting menu and craft the medicine syringe and then open the skills menu and use the points you have to get skills of your choice (unlock the TAKEDOWN skill first). More skill unlock as you complete certain tasks or progress thru the game.
SECURE THE OUTPOST
The next mission is a tutorial which deals with securing outposts. There are a total of 34 outposts in the islands. Once you secure an outpost, it will act as a fast travel location and safe house. Also, various missions and tasks are unlocked on notice boards and such once each outpost is liberated and a store is also made available at each location. Once you move to the outpost stay crouched and note that you will get 500 XP for each outpost freed, 550XP of no alarm was triggered and 1500XP if you liberated the outpost without being detected - you can do this once you unlock the takedown skill - you'll just need to move close to a pirate without him seeing you and then hit F to silent kill him. Anyway, for now just concentrate on kill the enemies in the outpost and it will be libeerated. This will open a Path of the Hunter quest (many many more to follow) -

MUSHROOMS IN THE DEEP
As you get quests, you will need to travel from one area of the map to the other and this is when you may need to go into an uncovered territory. So, whenever you find the necessity to go into the uncovered territory, first go to the radio tower of that territory and activate it and only then get to the mission. If you ask me, I'd tell you to even liberate the outposts so that you get new side-mission and you can complete the main and side missions of an area at a single time. After you do what you want to, go to Earnhardt's Mansion and then into the greenhouse to meet with the doc -

After you speak to him, move into the house and go upstairs to find Daisy. She not in a great position to say hello so let's move on with the mission. The Doc asks you to get him some shrooms to fix an antidote for Daisy. He points you to the entrance of a cave so go ahead and jump into the water and dive thru it to reach the cave. Then you'll come to some vines which you need to climb - just move near them and you will climb onto them automatically like ladders -

The next few minutes will be spent in a state of where Jason gets stoned. Anyway, after a bit of walking around, you'll come to the mushrooms. Just grab them and head back to the mansion to fix Daisy up for good.
THE MEDUSA'S CALL
-- Avoid detection and use stealth to kill the radio operators and get their intel.
Throughout this mission you should be using your camera and marking the targets ahead. The ones marked with the yellow icon are the radio operators who have the intel which we are looking for. Kill the first on ahead -

Just move close behind them and take them down. The first guard is in front of the ship and there are two or three more to the right side of the ship. After you kill them, loot them to get their intel and climb the ship from the right using the ramp -

Go up all the way to the control room and grab the papers here. Once you come out a huge firing squad is waiting for you so be careful. Move back out and to the right of where you are and pick out enemies one by one if they use the stairs to come to you.-

Once you survive the ambush, you'll finish the quest.
.
PLAYING THE SPOILER
PLAYING THE SPOILER
Talk to Dennis back in the village and he'll point you to a Logging Camp. The camp would be in undiscovered territory so follow the standard protocol and activate the radio tower in the area before going for the mission.
The Radio tower here is a bit tricky to climb, just look for the ledges you can ump onto -

Go to the logging camp after you activate the tower. Go to the vantage point shown on your screen now and takedown the lone gunner here. After killing him, look into the camp thru your cam using Z and zoom in. Look around the whole camp from the left to the right. There should be eight guards here and a Tiger on top past the camp -

Now to go for the alarm. Head straight near the entrance ahead -

Takedown the lone gunner sitting here and head into the camp. Go near the alarm box slowly and deactivate the alarm -

You can takedown the next guard nearby to the right sitting on a bench if you want to. Then head into the storeroom nearby and place the c4 -

Run out immediately after you put the c4 and put as much distance as you can or you'll be caught in the explosion. You can now get away from the place or kill the rest of the pirates (a nice thing to do). Once you do either of the things, the mission ends.
NOTE: Before you go to the next mission, it's best if you liberate the stronghold of this region - Mosquito Yard and Northview Gas next.
PRISON BREAK-IN
Head to the location and kill the guard near the high point and look thru the cam to tag the enemies ahead -

Disable the alarm which is here to the right -

You can either do this mission all guns blasting or take it slow and incognito. Move to the camp guard's locaiton and take him out anyway you want to, maintaining a bit of secrecy is advised though. Loot him to get the camp key and then head into the prison area.

In the prison - you'll see that the area is linear so just keep going and killing till you reach your goal. In the end you'll see that the person you are looking for is not here but wait....

ISLAND PORT HOTEL
Once you're free, move straight ahead and go up the steps -

Conitnue along till you come to the fire and you'll see that water from the pipe will extinguish it - seems helpful. Move to the next fire and shoot the pipe nearby to release water -

Then you'll need to go up a ladder to the left of the room ahead -

Use the wooden platforms to move to the blue door. Then you'll come to a narrow area where you need to hold W to move ahead. Keep going and soon you'll need to shoot a ppipe above you to take out the fire. Then you'll come to a ledge where you need to hold A to move to the left and progress. Keep going and use the narrow beam below you to move to the next place and jump up the ledge -

You'll meet Liza just ahead and then jump off the building....rather drastic!
After you get into the car (which isn't starting by the way) you come out and push it. Keep mashing the SPACE bar to get the car moving. Now, you get a great grenade launcher so use it on the vehicles which pursue you and also on the occassional group of guards shooting at you. Just keep firing like a maniac till the pirates stop pursuing you. Once you are out of their range you can move on to the next mission.
KEEPING BUSY
You'll come to the mansion and your friend tells you that the doc moved her to a safe cave below the mansion. You'll need to find the entrance of the cave too. Just move to the right and come onto where you can see the yellow objective icon circle on your mini map. Now, move a bit ahead and jump to the area below and you'll fall infront of the entrance -

Then, there's a little happy time. Now, we need to find a tool for the ship to repair it. Go ahead and jump into the water. Swim to the far end - go straight to the end and dive in and you should see the tool glowing yellow -

Take it back to the ship and give it to Daisy.
MEET CITRA

This quest takes place in an uncovered territory so go to the Radio Tower below the Cliffside Overlook strong hold and activate it -

Then liberate the Cliffside Overlook Stronghold and continue to the Temple Gateway where the quest will take place. Move into the temple and you'll come to Citra -

After going around the world.... You're head stops spinning and you'll come to a man in a white tux. Follow him into the Spready Gold inn and walk on the wood plank bridge -

Once you are past the bridge, you'll come to the knife - take it -

Now, you get the next objective and quest so move out of the temple for now.
BAD SIDE OF TOWN
This quest takes place in a far away area and if you have not been activating the other radio towers till now, then you'll need to do it now. You'll probably need to activate three radio tower to get to the quest area. You should also liberate all of the enemy outposts as you move along the areas so take your time and do things at your own pace.
Rust Yard
Cradle View
AM 12
Old Mines
Camp Murder
Tequila Sunrise
are the outposts you come across.
Once you are ready to do the quest then head to the marked location and enter the Spready Gold inn. Wait for a man in white to show up and then follow him outside. You'll need to slowly follow him while maintaining a healthy distance to see where he goes so keep enough distance between the two of you - he's not going anywhere so take it slow. Follow him and he leads you into a small shack. Go in and down the steps to meet the guy who then gives you one of the most awesome weapons in the game -

.
KICK THE HORNET'S NEST
KICK THE HORNET'S NEST
NOTE: Grab the Rocket Launcher from a store before you start this mission.
This objective takes place in the next uncovered location so go there and activate the radio tower first. Once you do that, continue to the objective marker and behold -

You can shoot at the exploding barrels below but that won't finish the job and you will need a personal touch. First kill of any of the guards or dogs you can see and then go down to the plants and start torching them - you don't need to spend a lot of time, just move along the line of plants while holding the fire button and they will eventually burn down -

Then move ahead to the next area where you'll need to burn five more crops -

The pirates always keep stock of fllame thrower fuel so just head into one of their shacks to find more fuel. Explode all the barrels first and then move to the crops and burn them. You'll encounter a lot of enemies this time so be careful and some of them come up shootin at you while yo uare busy burning. Just burn all of the crops and move ahead to the boat. Take out your Rocket Launcher and fire it as the boat starts to move. This way you'll not need to pursue it. Also, you will find a launcher just ahead on top of a box near the edge of the pier but if you brought one along then it'll be faster and easier. After you destroy the boat, the mission ends.
A MAN NAMED HOYT
The next few missions including this one take place in previously uncovered locations so you won't have to go to radio towers and liberate outposts for now and a little while from now. Go to the next objective location and you should come on top of a mountain overlooking empty fields and a burning village -

To the left is a shack which has the objective marker on it so go down the mountain carefully and get to the shack. Then use your cam to look at Hoyt. Now, we need to save the guy who was in the middle so go ahead and you'll come to the two pirates. Just kill them from behind and move ahead. You'll have to go thru the mine field now so walk ahead and stay crouched. The mines are in the water and can be both seen and heard. However, move very slowly and if you hear the mines, it means they are detecting you and you are close to them so move a bit and resume moving ahead -

Then you'll come to Rongo - the guy we need to rescue. Follow him thru the fields and keep killing the enemies. You better follow the footsteps of Rongo to avoid becoming bird feed after a mine blows you up. You'll soon come into a hut where Rongo searches for the documents and you'll need to defend the hut from the pirates. Go into the hut and look towards the exit and aim your gun at the door since it's the only way the enemies are going to come from. Shoot them one by one as they come infront of the door -

After a lot of killing, Rongo finally finds the documents you need so you can get out of this place now,
SAVING OLIVER
Go to the objective marker and then open your cam and zoom into the trucks which come from the right and you'll spot Oliver soon. Also, get ready to use a sniper. Once Oliver starts running, start shooting all the pirates. Oliver has a gun to defend himself so just look at where he's shooting and you'll find the pirates he's shooting at and you can kill them. Then he move ahead a bit and more pirates keep coming. He'll reach the boat in the water to the left and get in it. Go to the boat and enter it. You'll man the machine gun on the boat and you know what to do. Just shoot everything that moves or flies - copters I mean. After which, you'll take Oliver back to the cave.
PIECE OF THE PAST
-------------------
----- A Small Diversion -----
You can do this immediately after you get Oliver back to the cave. Look to the left side of the cave to see this arrangement -

Interact with the Eat Me board to eat a pill and recollect the past.
-----------------------------
Time to talk to Buck -

Go to the marked location and talk to Buck who proposes a deal -

You'll need to infiltrate a ship which is called "Nostalgia". Head to the beaches and grab a Jet Ski and go to the Ship. Once you reach it, make sure you don't ram the ski or your boat against the ship or you'll alert the pirates on it. There's a ladder to get to the top of the ship so use it and go into the ship. You can either act like a maniac and straight massacre everone on the ship or takedown the enemies one by one slowly. Either ways, the ship is well guarded so take your time killing everybody. You can use any of the syringes like Enhanced Perception to track enemy movement too. After the area is clear, from the lower deck, go to the locked door -

Head into the ship now and keep going from one checkpoint to the next till you reach the laptop in the end and a compass -

The bomb explodes, cracking the hull and the ship gets filled with water. You'll have to swim thru the ship and there's no air except for the oxygen canisters you come across -

Make sure to go to each of the canisters as you move thru the ship. You'll also fight one of the pirates in the water and just hit the buttons which are prompted on the screen to ged rid of the pirate and continue out of the ship.

DOWN IN THE DOCKS
Go to the next marked location and talk to Buck again. Head inside and use the boxes to the side of the wall with the Chinese script to get up and then use the ledge to go further up -

Keep going and you'll have to swim thru water. Once you come out the other side, you'll come to pirates. So be careful and get on top of the platform and start killing them -

The place is spacious enough for a good firefight so there's no need for stealth although you can go that if you want to. Kill all the pirates in your way and keep going inside and further inside and you'll come to one last area. Climb the rocky path to the rigth of the area and look below -

There are six enemies in this place including one on the machine gun to the left. If you have a grenade launcher or RPG then take it out and start devastating the area. The grenade launcher is faster and easier to use though... Once you clear the area. Go below and hit the detonator to blow up the door. Then go thru in and fall into the water where you'll fight a croc. This is probably the first croc you fight in the game and if yo uhave fought against sharks before - it's similar. Just hit the buttons shown on the screen to kill it and come out the other way to the next area.
Go near the door and interact with the panel. Go inside and you'll soon come into a large area with the door ahead high up -

There are two doors - one to your left and the other to your right. Go thru both doors and break the poles which glow yellow -

One of the rooms will not open fully - it may be the one on the left. Just go to the other one and break the poles in that place to release water and go back to the other room and swim from above the previously blocked door -
After you complete both rooms, the area will be filled with water and you can reach the top ledge and go ahead. You'll come to the compass piece finally. Then go along the ledge to the left and continue out of the ruins and get back to Buck.
THE MOTHERLODE

Our main objective is to find the third and possible final piece of the compass. Head thru the rails and you'll come to a lift which will take you to a lower area. If you move ahead, you can push the cart and distract the guard or better yet, shoot the woodedn poles to his right which will make the rocks over his head collapse. Keep moving ahead slowly and take down the rest of the enemies. Soon, you'll come to a cart filled with gas ccylinders -

Push it in and it will explode, rush in after it explodes and take care of any remaining pirates. Then you'll come to a large area outside - stay crouched. You should be able to see some sniper's laser infront of you. There are two snipers and a molotover there. Crouch and move ahead behind a cart and shoot them with a sniper if you have one or try with any other weapons. There are also two more enemies to the left past the wood bridge -

Make your way thru this area and you'll come to a strange door. Open it and move ahead. You'll see Comodo Dragons from now on reaming about the cave so be careful. Keep moving until you use a lever -

Then go to the lift which came down and go deeper into the mines -

Go into the large pagoda and you'll find the third piece. Now, time to run out so keep moving ahead on the only path available and you'll meet Buck again.
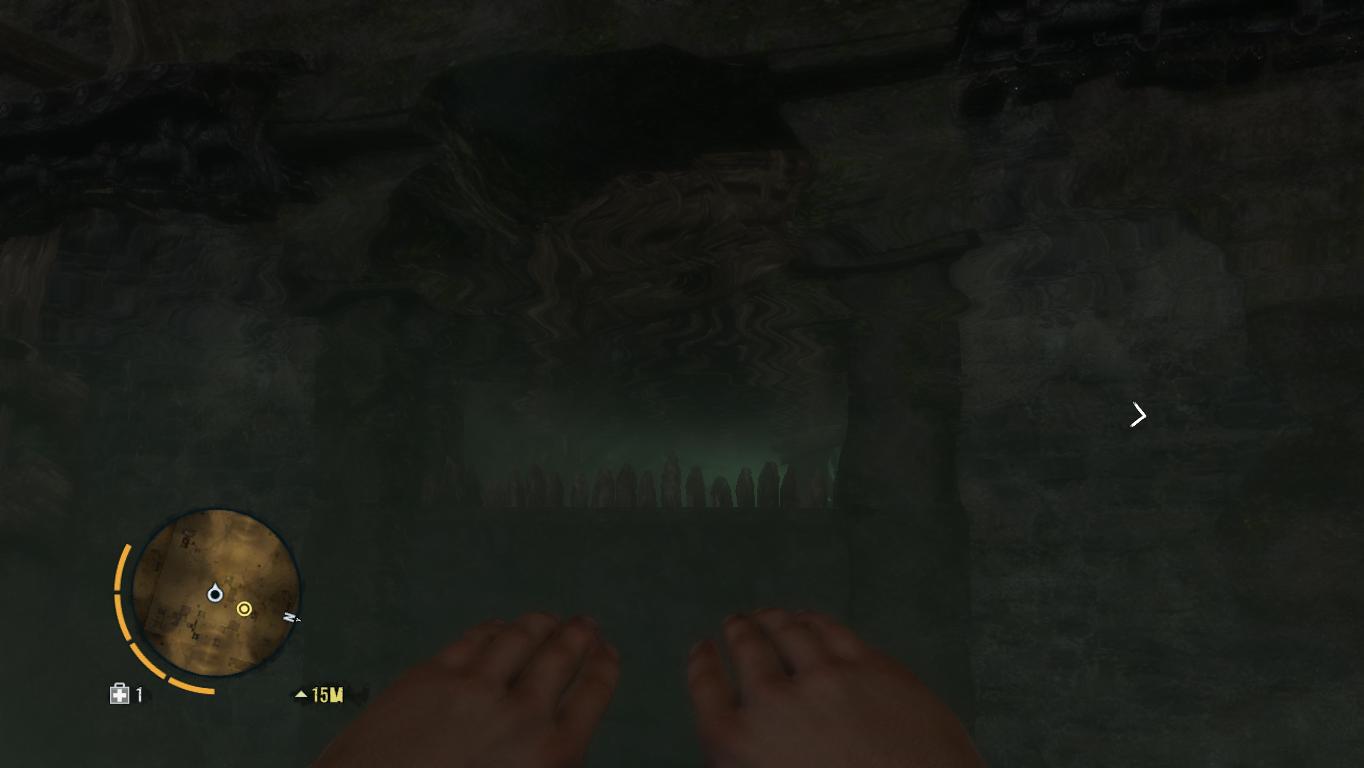
LIN CONG I PRESUME?
Meet up with Buck and then jump into the water to the right. After you're in the water, look around for a rock you can come up on -

Move ahead on it and you'll come to a vine you can climb up on -

You'll come to a cave entrance and you can go thru it. On the wall ahead you'll come to another vine you can climb on. Keep going and you'll come to a zipline, use it. You'll see a lot of enemies around the area. Silent Takedowns may be difficult on higher difficulties so start shooting them. Keep going on the ziplines until you reach a scaffolding which will take you into hot water -

fig:-54
Move ahead and look for enemies above you. There are a lot of them so kill them all - you amy even be able to tage them if you move silently and then start your assault. Move along the stones forming your path -

Go to the end of this area where you'll come to more vines which you can climb. Then you'll come to the same strange door. Go thru it and you'll come to another chinese structure and house -

Go to the area marked by the pointer on your minimap and you'll see a vine you can climb on -

Then you'll come into a tomb. Go straight to the statue in the far end and use it. Then a set of steps opens below it. You'll come to the main casket to the left in which you'll finally find the knife -

The cave starts to cave-in, you'll be stuck under a rock and the game prompts you to hit the left and right clicks alternatively so do it to get out and this leaves us with one last thing to do - exchange the knife for our friend.
UNHAPPY REUNION
Go to Buck's hut and inside. Give Buck the knife but he seems persistant on keeping you with him so let's just kill him and get it over with...
You'll enter a quick sequence with Buck in a knife fight -

You better look at your screen carefully and hit what's shown or Buck will make you his b.
THE KNIFE'S FOR YOU
You'll get a bit of bad news about your younger brother too. Time to go to Citra.

Get to the temple and talk to Citra who has a few things to tell you but we need to scratch her back first. Go back out of the temple and you'll meet Dennis who tells you about an Ambush.
AMBUSH
NOTE: Grab C4 before you start the mission.
NOTE: Grab C4 before you start the mission.
Head to the marked location and you'll be asked to talk to the guy in the church nearby. Go in and get the mission briefing. Then head out to the marked truck and place the C4 on it -

Now, quickly go to the water tank which is to the left of town and climb it using the ladder. The convoy comes from the right so look that way and in a few seconds, they should be arriving. Kill the soldiers and when the Cargo Truck goes past you, quickly go back down and grab another vehicle and follow the truck. If you can't spot it ahead of you then look into your map for the location.
Kill the enemies outside and then go into the truck -

WARRIOR RESCUE SERVICE
After a series of unfortunate incidents, you somehow end up inside water. Keep hitting SPACE to free yourself up and come up on top of the water. Move out from under the waterfall. Stay crouched as there are a few enemies ahead past the waterfall. Take them down - you should come across four guys. Then head on to the marked location and move to a high point. Look below and start tagging enemies with your cam -

You do not have your own weapons so you must have picked up the ones which the four guys you killed were carrying. Using them in the open will cause problems so move down slowly and go left towards the stream of water -

You might want to kill the one guy on the roof of the shack here. Then look at the patrol route of the guard by the water and kill him once you know when to go after him. Move ahead on the water and go right - remember to stay hidden. You'll come to the chopper where you need to kill all of the enemies and then board the chopper. Killing them may be difficult straight on so try to go to the sniper tower to the left of the area and take out the heavy gunner near the copter with a head shot. Then aim for the other sniper ahead and shoot out the rest. When the coast is clear you can head to the chopper - mind the time though -

After another unfortunate incident, you'll end up below a pile of dead bodies. alternately left and right click to get out. Then you'll meet Dennis. Now, our gear was lost the first time Vaas captured us so it's time to get all of it back. Move to the marked location and you'll come to an enemy camp. Stay crouched and move into the shacks and search for your weapons. There is a heavy moving around so be careful and your equipment is probably in the shack next to which the heavy is standing. After you get your guns though, kill everyone and the mission ends.
NEW RITE OF PASSAGE

Go to the temple and talk to Citra. She gives you something to drink again and you'll end up... well check it out.
Time to kill a monster, use your arrows and shoot the monster in it's face. If you hit it anywhere else then it'll be of no use. Only the face part hurts it -

Also, when you see it throw something at you just run to the sides to avoid the balls. After a while, it disappears and takes a smaller form and keeps coming from your right. The whole area is smeared dark so you may not be able to see it coming except for it's eyes. But you can still know where it's coming from if you keep an eye on the indicator arrow - keep an eye on where the pointer is pointing and look there and shoot the arrows.
After this part the monster takes the bigger form again and this time it's more aggressive. It keep throwing the ink balls faster. You have to keep running in circles to avoid the balls and you'll only have a limited time inbetween when it'll stop for a few seconds to shout. This is your time to hit it. Anyway, take your time in shooting at it and once it's hand falls, run on top and reach the face of the monster. Keep hitting the SPACE bar to cut it's head off.
PAYBACK
NOTE: A shotgun will be very useful...
Head to the island and kill the lone soldier on the docks. The number of soldiers here is rater timid in the beginning and you can slowly make your way without any hassel. As you go ahead, you'll come across two pirates who are harrassing a woman. Kill them both and go ahead into the compound where you see a party going on in the side. Enter thru the large metal door and you'll see Vaas. After the fire starts, run to the ladder and head out of the shack. You'll come across more than a few enemies outside so take cover and shoot. Once you reach the other end of the compound, go in and into the disco lit room where you meet Vaas.
After a short psychadelic run, Vaas asks you to shoot him but after you shoot him the scene changes and you'll see Vaas coming at your from ahead. Keep shooting at him - he keeps reappearing so keep shooting till you get to the other side of the bridge where you start a quick fight sequence again so hit the right buttons and get rid of the psychopath.
CITRA'S FAVOR
You can go about activating radio towers and capturing outposts for a while now since the second part of the game is about to begin. You ought to finish off any radios and outposts remaining on this island cos you'll go to the next one in a bit - you will be able to come back anytime though.
Go to Earnhardt's mansion and talk to your friends in the cave and come out once you are done interacting with them afterwards.
FLY SOUTH
Head to Huntley's location and from there you'll speak to him and he asks you to reach the strip within a few minutes. Grab the Quad nearby and head to the airstrip. Keep looking into your map and decide the best way to get to the strip. You are given a lot of time. Once you reach his location, you'll see the plane and some pirates who are about to attack you. Kill the pirates and after the first wave the plane starts to smoke up. Willis begins to repair it while you are left to guard the plane. Move behind a shack and wait for the enemies to come and take them out one by one - it'll be easy if you can keep your head.

After the enemies stop coming, Huntley asks you to enter the plane and then drops you off when you come on top of the island -
THREE BLIND MICE
The Wingsuit is extremely useful and will allow you to fly if you want to jump off from any location possible. Just hold the left shift whenever you want after you jump off a certain height. You can start the wingsuit if the distance between you can the ground is more than 3 meter so now you can jump off any place and get a safe landing. Learn to control the suit properly and at the end of the flight when you are near the ground you can even deploy a parachute. The suit and the shute will stay with you for the rest of the game.
Land on the island, take a truck to the town and you'll spot the Crazy Cock inn -

Talk to the barkeeper and then move to the left to the guy drinking beer near the door. After you speak to him, go downstairs and play a game. Then once Sam gets up, follow him out and talk to him. The mission ends with that conversation.
DOPPLEGANGER

Go to the shown location and talk to Sam - his house is close to the Crazy Cock. Sam asks you to become one of them and to grab the suit of a new recruit. You can activate the radio towers if the mission location is dark. Do it and head to the marker. You'll come to an enemy who is sitting and blocking the path ahead. but ignore him and move to the left of the mountain and you'll see that the path he is blocking turns into a cave - you can jump on it from the top of the rocks -

Stay crouched at all times and you can't even kill a single guy. Inside the cave, wait for the guards to move about and then walk past them or use T to throw a rock and distract them and then walk past them. After a little while, you'll come out into the open again with a guard right infront of you -

You need to throw a rock to the left ahead of him to distract him and then move ahead past him. Keep going and you'll enter another part of the cave. Stay crouched and go to the marked spot. You'll see a heaby thru the hole ahead -

Now, you need to find an alternate route. There are two guys to your left here, one should be standing and the other sits on a chair. To the left of the guy on the chair is another path you can take to the next area with the heavies. Once you get there wait and look around. Then move ahead from behind the heavy who is near the exit -

Make sure that the rocks and foliage is covering you at all times. Once you come out, jump into the water and swim from below the surface to the boat to the left. Go behind the boat and climb the ladder. Slowly, go up to the recruit and kill him. After you have his suit, head to the meeting which is taking place on the front side of the boat, so go to the front of the boat from the left side and on the way, you'll meet a guy who wants to make some dough. Anyway, soon Hoyt comes in and gives a little presentation. After that, jump into the water, grab a boat and get out of this place.
TRIPLE DECKER
If you have not been opening up area of the map then you better get onto it now. The radio towers become increasingly difficult to scale so be careful.
Now, head to the old temple area, no matter which part of the temple you come to, you need to first tag all the enemies so you can not their movements. From now on, you can move in the middle of the enemies without them knowing who you are. First, head to the lowest part of the temple and you'll find the first VIP here -

Also, there are a lot of guards in this area. Do not kill the VIP yet, move to the left and head up the temple using it's steps and you come to two soldiers on top of the steps. Move from their left and come to the top and you'll see two heavies - one of them keeps laughing like an idiot uncontrollably. Then move to the right from the heavies and on the edge you'll come to the second VIP -

Now move ahead and go into the tunnel which comes to the left and you'll spot the last VIP -

Now, you need to start killing from this guy and go downwards. First, inside the tunnel, if you have the chained takedown skill then you can wait for all the three enemies to come close to each other and kill them on by one. You will not find any info on the first two bodies irrespective of the order you are killing the VIPs. Then move out and kill the guards and the VIP. If you have the Heavy Takedown skill then you can kill the heavies which they are moving without the either of them noticing you. Then head to the lowest part and kill the last guy anyway you want to and run or kill the remaining guys. You need to get to the marked location after you killed all of them and Sam talks to you and asks if you want to help him out in a mission for Hoyt.
DEFUSING THE SITUATION
Go meet Sam and watch him go crazy. Run after him to the location of the first bomb. There are three bombs in total and at each bomb, Sam spends some time defusing the bomb - during which you need to protect him from the onslaught of pirates. Just keep kill all of the pirates and after Sam finishes, he move to the next place - follow him. Remember that Sam will not move to the next location if there are any enemies remaining so you will need to clear out the area before he can move to the next location. Also, sometimes he takes a bit of time going from place to place - look around for enemies and if there aren't any present then wait for a while and he will eventaually move. In the last area, you are to man a turret and before you go into the house with the bomb, you need to kill the guy on the turret, use a missile launcher if you have one or sniper. Just kill him and grab the turret. Then keep killing the enemies as they come, eventually, even a copter comes in -

Shoot it down and talk to Sam to end the mission.
DEEPTHROAT
Head to the mine and go up to the first platform and use the zipline to get to the next one -

Do not shoot or provoke any guard, just keep going across from platform to platform till you reach the point. Once you reach the last place, takedown the guard over here or he'll alert the others while you are trying to look at the meet. The meet is taking place on the bridge ahead so zoom in and look at what's happening -

Now, you are prompted to shoot down the truck ahead. Use the zipline to the right here to get to the lower area ahead -

Move ahead and you will find a stack of RPGs. Take one and first kill any enemies around you here and blast the bridge ahead with the launcher at the marked spot and then you'll need to get to the bridge to grab the manifest. Now, Use the zipline here to get across and go up the path here -

Use the zipline again to get across and keep going up till you reach the dead person and take the manifest. Jump off the cliff and use the wing suit to get to the marked location and get in the car.
ALL IN
Go infront of the HQ and talk to Sam -

He'll take you to Hoyt. Hoyt asks you to torture a prisoner to prove your worth so head down to Sam and continue to the prisoner. Hit the buttons specified on the screen and after you are done Hoyt invites you to a Poker game and ends the mission.
PAINT IT BLACK
NOTE: Fill up your C4 reserves and also try to buy a Sniper with a silencer and have a shotgun.
Sam has two things to do before the Poker game with Hoyt. First job is to destroy a comm center. Move to the marked location and kill the heavy outside the door with a headshot from the sniper. Go to the door and plant the C4 on it. Move back, blow the door and go in. Equip your shotgun because all the enemies are alerted and you are in small rooms so one hit from the shot will kill any of them. You need to reach the other side of the bunker while enptying it so do that and if you come across a heavy then pump your shots into him or move to a previous room and lob a few grenades so likewise. Once you reach the other end of the bunker, take the ladder up -

Slowly walk over to the sattelite dish and place the C4. Now, you'll have to wait till Sam comes. Stay close to the dish hugging the right wall -

Kill any enemy who comes by and after a while two heavies approach. Jump away and hide or if you can handle them do that and Sam comes in after a few seconds after the heavies. Run to the chopper once he lands and get away from this place and watch the hub explode.
BLACK GOLD

The second order of business is to destroy a fuel station and it's reserves. Sam asks you to drive him into the fuel depots while he mans the turret on top. There are four in total and you can look into your map and see where they are situated exactly. Go to the first one to the left and keep the car a little far from the marked location because you are going to blow it. Get out of the car and clear the who area first - kill all the enemies and enter the depot - place th C4 and come out -

Run out of range of the explosion and after it explodes, get into the car and drive to the next place. Repeat this for all four depots and then drive to the last location. Sam asks you to man the turret now. So jump on it and start killing everyone who approaches. You'll have to fight thru a ton of enemies including a few choppers to hope that your aim isn't too bad or you are chow mein...
ACED IN THE HOLE

NOTE: You cannot go back to the island exploring once this mission starts. You can only start exploration once the game ends so if you want to finish some hunts or grab equipment for the final missions then this is your time to do it.
Speak to Sam outside the compound and he will warn you that there is no going back. Start the game and keep playing no matter what the odds or the bet. You'll get into a knife fight with Hoyt soon so be prepared - this will be the fastest knife fight in the game but you can get it the first time. You need to go thru a series of left and right clicks among other buttons to defend Hoyts attacks and kill him.

BETTING AGAINST THE HOUSE
Run out and grab a vehicle - just forget about the other enemies now. Head out of the comound and open your map and get to the airport. Go to the plane and once you notice that it's empty then go to the left side shack ahead in the corner - keep killing all the enemies too. You'll find your brother in a room - open the door and go in - he also keeps shouting for help.
Once you free him, come outside and get in the chopper. You then man a machine gun on which you can go mad. You'll need to kill people, and explode cars, boats and even about half a dozen copters. Just keep firing till the madness ends - this is the most awesome mission!!!
THE DOCTOR IS OUT
Seems like our troubles have not ended. Go to the doctors place and talk to him. It seems that the Rakyat are into something, grab the copter and get to the temple for now.
HARD CHOICES

Talk to Citra inside the temple and move ahead on the fire bridge. In the end, you'll need to make a choice - whether you want to continue being a warrior or return back to who you were before....
Depending on the choice you will have two different endings.
====SPOLIERS====
If you choose to join Citra then she will have sex with you and kill you...
THE END

