Adonis Luxury Resort
An Important Note About Collectibles: Unlike in the first BioShock, in BioShock 2 you cannot return to a level once you have passed it. This means you must collect every Audio Diary, Gene Tonic, and use any weapon upgrade stations in the level before continuing on to the next, otherwise they will be forever lost to you on your current save file. To protect yourself, save your game often, preferably creating a separate save file at the start (or end) of each level.Also note that unlocking the “Rapture Historian” Xbox 360 achievement or PlayStation 3 trophy requires collecting only 100 audio diaries. There are 128 audio diaries total, so don't fret if you miss a few.
Goal: Find a Way Out of Here
After the opening cutscene, head up the stairs in front of you and make your way to the covered doorway at the other end of the walkway. Hold RT/R2 to spin your Drill. Use the Drill to remove the coral covering the doorway. Continue forward, click the Left Stick to crouch and move past the collapsed column. Move forward and into the next area.
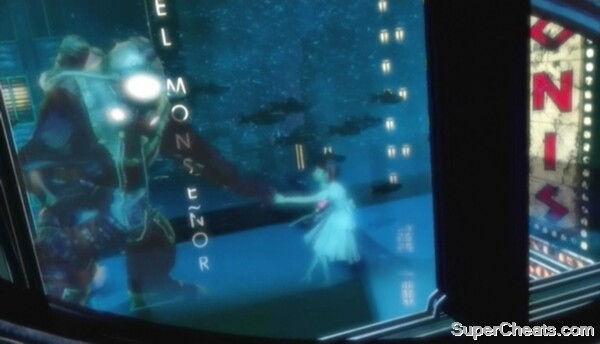 That's you on the left! |
There's an Audio Diary (Fitness) to grab before moving on. At the bottom of the steps, turn right and you'll come to a locked door. The Keypad code is written on the other side of the steamed door. The code is 1540. Enter the code into the Keypad and collect the diary, Drill Fuel, and money inside.
Once you have the audio log, exit the steam room and continue through the doorway at the other end of the corridor. Move through this next room and exit through the doorway at the other end. The Electro Bolt Tonic is attached to the Gatherer's Garden machine in the next room. Take the Plasmid to gain the Electro Bolt power. With this, you can jumpstart the sparking generator in the pool room.
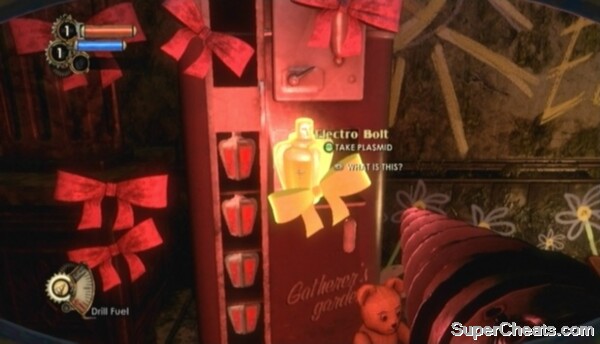 Take the Electro Bolt Plasmid from the Gatherer's Garden in Plasmid Therapy. |
There are two Splicers in the pool room. Use Electro Bolt to stun the Thuggish Splicer standing across from the doorway, then move in and finish him with your Drill. Be ready for the second Thuggish Splicer, who will come at you from the side. When both Splicers are dead, throw an Electro Bolt at the highlighted panel in front of the generator to restore power.
Goal: Find Tenenbaum
Continue through the doorway along the south end of the room. There is an Audio Diary (To My Daughter) in the Dames room. Upon entering the hallway, take a right and look for the diary by the collapsed locker and flowing water.
After collecting the diary, continue down the corridor to a Securis door. When the door opens, throw an Electro Bolt into the water to shock the two wading Splicers. There's another Audio Diary (Return) here. From the Securis door you used to enter the room, turn right and look for the diary on one of the benches there, below the poster.
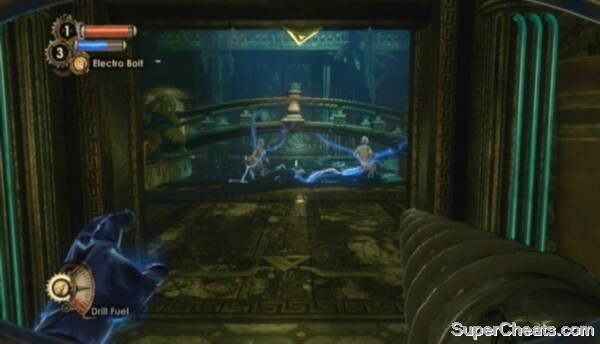 Use Electro Bolt to fry the Splicers standing in the pool of water. |
When you have the diary and ammo, return to the previous room and head up the steps to the Securis door. Approach the Little Sister in the Grand Foyer to trigger an event.
Big Sister dismounts, landing in the middle of a large puddle of water. You know what to do. Throw an Electro Bolt into the puddle to stun her, then take aim and fill her head with Rivets. She'll remain stunned for all of two seconds. When she is able to move again, she'll likely come charging. Step to the side to avoid taking damage.
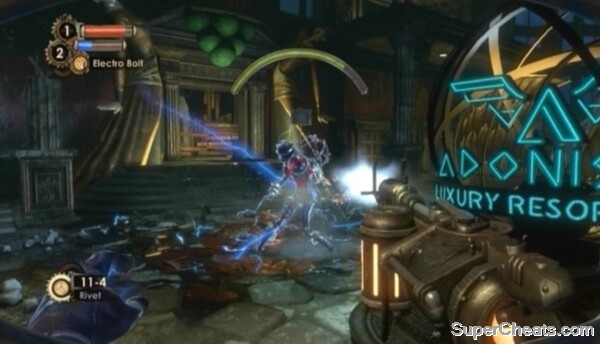 Throw an Electro Bolt at the water while Big Sister is standing in it to temporarily stun her. |
Scaring off the Big Sister doesn't require much. Shock her with an Electro Bolt while she's standing in water a couple of times and hit her with a few Rivets and she will quickly retreat.
Big Sister Fight in the Grand Foyer After facing the Big Sister, look for an Audio Diary (Generation) on the counter in front of the Vita-Chamber at the east end of the room. After collecting the diary, exit using the door the Big Sister broke through and make your way into the next room. The Big Sister appears, slicing open the window at the far end of the room, letting in the ocean and submerging you in the process.
As a Big Daddy, you are able to survive underwater indefinitely. Exit the building and begin walking along the ocean floor. There's an Audio Diary (Escape From Rapture) to collect right at the start. Look along the left side of the bath for a crashed bathysphere. It's right before the collapsed pillar you have to jump over. Search the Corpse inside the bathysphere to find the diary.
Follow the straightforward path and you'll soon come to a cliff. Drop down and continue moving along until you reach an Airlock chamber. Cycle the Airlock Control to drain the water and complete the level.
The Atlantic Express
Goal: Get to Brigid TenenbaumMove along until you come to a locked Securis door. Enter the room marked “Tool Storage” right next to the Securis door and pick up the highlighted Hack Tool on the table. Pick up the Remote Hack Dart right next to it. With the Hack Tool, take aim at the highlighted control panel visible through the broken glass and hit it with a Hack Dart.
Hacking is simple: press the A/X button while the moving needle is on a green section of the meter for each stage. Attempt to hack while the needle is on a white section of the meter and you will take damage. Soon enough, the machines you are trying to hack will have red sections as well. Land on one of these and you'll trigger an alarm, which will send a couple of pesky Security Drones after you. Quickly try again and hack the machine successfully to turn off the alarm and send back the drones.
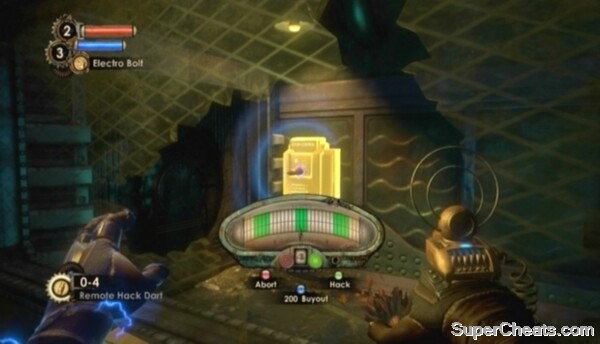 Press the A/X button while the moving needle is on a green section of the meter for each hacking stage. |
There is a deactivated Security Drone in the room beyond the Securis door. Hack the drone and it will follow you and automatically target any enemies it encounters. Land the needle on a blue section of the meter while hacking to boost the drone's damage.
Move down the corridor and you will soon reach the Repair Platform. There are a couple of Splicers here. You can make short work of them with your Rivet Gun and the Security Drone by your side. Enter Workshop 6A along the south side of the platform and look for an Audio Diary (The Great Chain Rattles) on the table inside.
Head through the door marked “Gate Control” in the northwest corner of the Repair Platform. Interact with the Control Panel there to trigger an event. Don't bother trying to fight the Splicers on the other side of the window; just crouch down and wait until the floor falls through. Use a First Aid Kit if you're about to die, though.
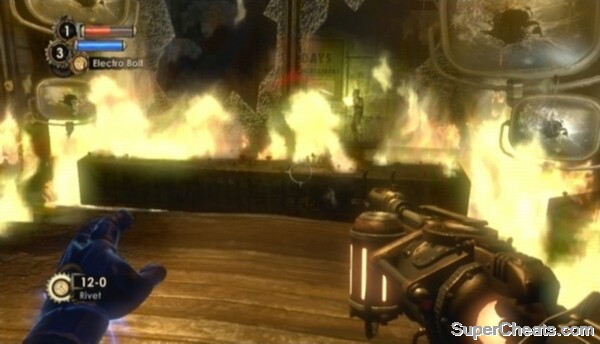 Stay alive. The floor will eventually collapse. |
The hacked Security Camera will now trigger an alarm if it spots an enemy, calling forth two friendly Security Drones. There's a Splicer in the next room, so provided you have yet to stir him, the alarm should soon go off. Let the drones take him out and then exit through the doorway in the southwest corner of the room.
Eleanor Lamb has left you the Telekinesis Plasmid in the post office. Take the Plasmid to gain the Telekinesis power. There is an Audio Diary (Mr. Tape Recorder) you can collect now that you have Telekinesis, but you'll have to backtrack. Make your way back to the end of the submerged corridor and look for the diary behind the large fan to the left of the stairs. Use Telekinesis to grab it.
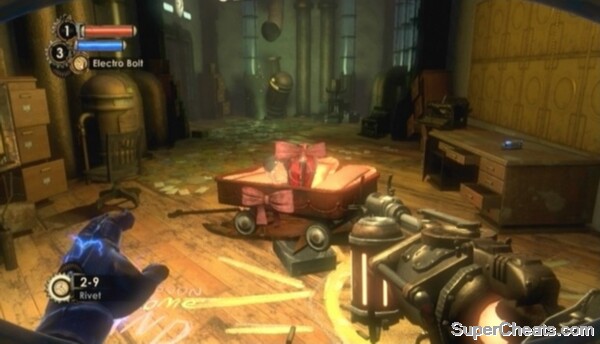 Collect Eleanor's gift in the post office. |
After collecting the diary, pick up one of the red, explosive containers with Telekinesis and launch it at the group of Splicers gathered around the flaming oil drum below. More Splicers will enter the area through the door across from the drum, so be ready with another explosive container.
When the room is clear of enemies, look for another Audio Diary (What Happened to the People?) next to the mattress in the northwest corner of the room. There's one more Audio Diary (Ryan vs. Lamb: Reality) to collect before moving on. Head through the doorway marked “Cafeteria” across from the flaming oil drum in the middle of the station. Make your way to the room at the very back of the Railway Cafe and look for the audio diary in an open suitcase next to the “Health and Happiness” poster.
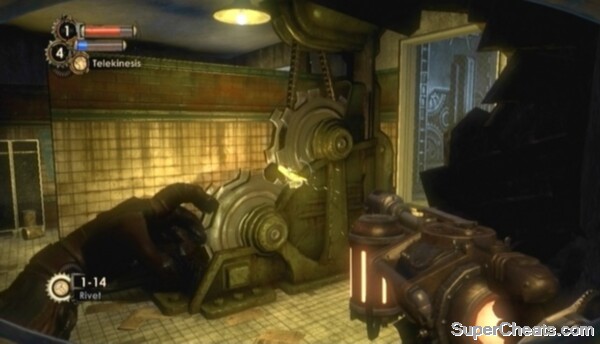 Use Telekinesis to remove the pipe jamming the gears to open the door. |
Once the door is open, proceed through to enter the Control Room. Turn right to find a Vending Machine. Hacking Vending Machines will lower the prices of the items available for purchase, and sometimes unlocks new items for purchase. If you land the needle in a blue section of the meter during the hacking process, you'll get a free item. Stock up on Rivets and First Aid Kits if you're low.
Look for an Audio Diary (Know the Beast) on the overturned filing cabinet at the bottom of the steps on the side of the room opposite the Vending Machine. After collecting the audio log, continue through the doorway next to the Vending Machine and start up the steps.
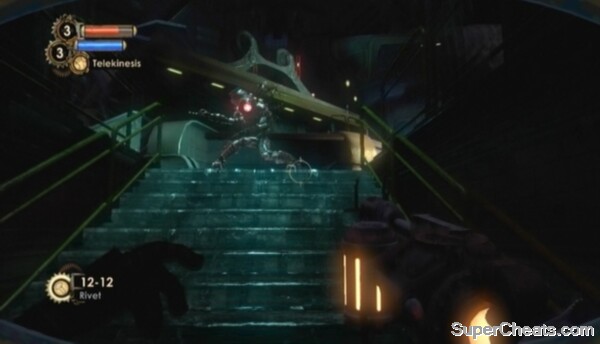 You don't have to fight her just yet. |
Use Telekinesis to pick up one of the red, explosive barrels along the wall and fallback. One of the Splicers should come forward; launch the explosive barrel to destroy him. There are several more explosive barrels which you can use to kill the remaining Splicers. The Security Drones sent by the hacked Security Camera should help you out here as well.
Killing the Splicers on the way to the elevator. When the area is clear, enter the elevator at the other end and hit the switch to start it up. When the elevator reaches its destination, step out and pick up the Trap Rivets on the filing cabinet to your right. Continue up the steps, past the set Trap Rivets, and turn left. Enter the small office here and look for an Audio Diary (Improving on Suchong's Work) inside the filing cabinet at the back.
After collecting the diary, exit through the door at the south end of the area. Stock up on First Aid Kits and Rivets using the Vending Machine here, as you'll need them for the next area. Continue through the door at the west end of this area to enter the Train Station.
Goal: Hold Off Sofia Lamb's Splicers
Activating the highlighted Intercom Switch in the Train Station will trigger an event, causing a mess of Splicers to enter the station, so make sure you're prepared before doing so. There's a Security Camera beyond the gate, which you can hit with a Hack Dart and turn friendly. With that done, equip the Rivet Gun and press down on the D-pad to select Trap Rivet ammo.
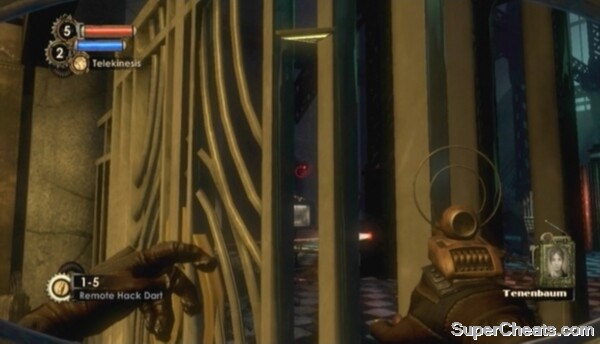 Use the Hack Tool to hack the Security Camera through the gate. |
Once you're ready for the onslaught, use the Intercom Switch to speak to Tenenbaum. Remain on this side of the gate for the entirety of this segment. Take cover behind the station map and let your Trap Rivets do the work, but be ready with your Drill for any Splicers that make it through. There are two explosive containers next to the opening in the wall beyond the south-most gate. Use Telekinesis to pick it up and then launch it and the Splicers as they come through the opening.
Surviving Lamb's Assault Goal: Board the Train
There's an Audio Diary (The Situation) to collect before leaving this level. The diary is sitting on the bench in front of the schedule board near the front end of the train. When you're ready to move on, enter the train and flip the Switch to complete the level.
Ryan Amusements
Goal: Get a TicketStep off of the train and proceed through the door at the north end of the station. Continue up the steps, past the Vita-Chamber, and head through the next door you come to. Through the door, collect the Audio Diary (Eleanor's Progress) on the altar straight ahead before continuing on. In the next area past the Vending Machine, use your Rivet Gun to kill the Splicer atop the overturned clock.
Enter the ticket stand along the west side of the area and continue through the doorway at the other end. There is a Power to the People weapon upgrade station straight down this corridor -- can't miss it. You can enhance your weapons using these upgrade stations, but each station allows for only a single enhancement.
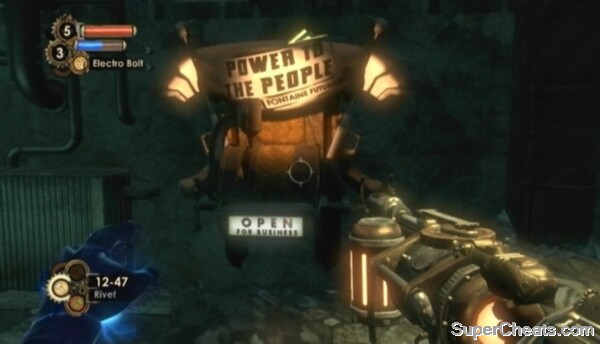 Use the Power to the People station to upgrade one of your weapons. |
Check out the “Power to the People Locations” section of this guide for a complete rundown. Each station is pointed out in the main walkthrough as well, so if you're following this, there's no need to refer to the two sections simultaneously.
After selecting an upgrade, continue past the closed weapon upgrade station, past the Vita-Chamber, and into the Manager's Office at the bottom of the steps. There will be an Audio Diary (The Old Sheepdog) on the table across from you when you reach the bottom of the steps.
Equip the Hack Tool and fire a Hack Dart at the highlighted door control panel through the broken window. Complete both stages by landing the green needle on a green section both times to open the door. The Ticket is on the table at the back of the U-shaped corridor.
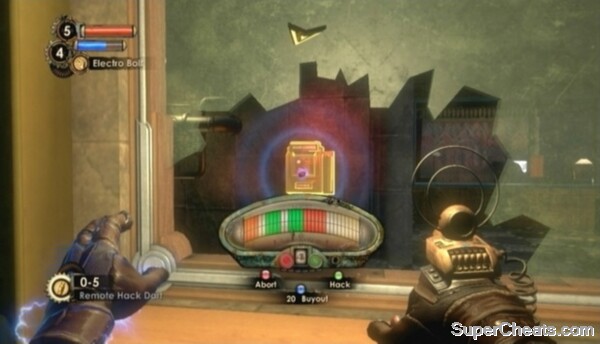 Hack open the door using the Hack Tool and Door Control panel visible through the broken glass. |
Make your way back to the Power to the People upgrade station. At the other end of the corridor is a Splicer. Hit her with a couple of Rivets, and then collect the Machine Gun from the breached security inventory. Pick up the .50 Caliber Rounds as well and continue on to the Museum Entrance.
You're up against about a half a dozen Splicers in front of the museum. Use your newly-acquired Machine Gun to make short work of them. You can also use Telekinesis to pick up the explosive barrel by the pillar across from the highlighted Ticket Verification Unit and propel it at the Splicers.
When the area is clear, insert the Ticket in the Ticket Verification Unit and enter Rapture Museum.
Goal: Find a Little Sister in the El Dorado
Pick up the Sports Boost Gene Tonic next to the ceramic statue straight ahead upon entering the museum. Once you have the Tonic, continue into the main area of the museum. Look for an Audio Diary (Volunteer) under the bench on the middle section of the upper walkway.
Make your way to the El Dorado Lounge corridor, which is accessible through the door at the north end of the main hall. Through the door you'll find another gift from Eleanor: the Drill Power Gene Tonic and an Audio Diary (Eat Dog) in a carriage. Once you have collected the tonic and diary, continue to the other end of the corridor and enter the El Dorado Lounge.
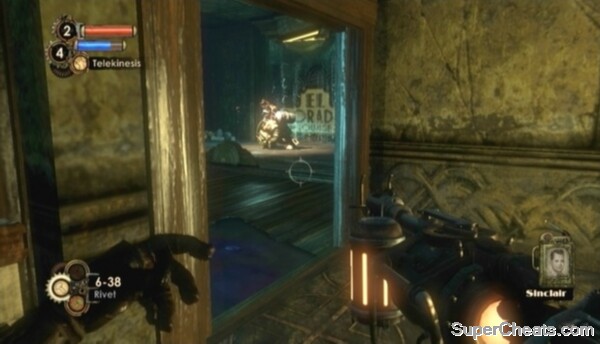 There is Little Sister is in the El Dorado Lounge -- guarded by a Big Daddy of course. |
Goal: Kill the Big Daddy
Upon entering the El Dorado Lounge, look for a deactivated Security Drone on the ground. Hack the Security Drone, landing the needle on the blue section of the meter. Look for a Trap Rivet on the bar counter to your right, and collect the .50 Caliber Rounds below the counter further up. The Big Daddy and Little Sister are at the northeast end of El Dorado, but don't provoke the Big Daddy just yet! Hack the Health Station and Vending Machine behind the bar. Then, equip your Rivet Gun with Trap Rivets selected and place as many Trap Rivets as you can in the doorway in front of the large oil spill.
With the Trap Rivets in place, equip your Machine Gun and the Telekinesis Plasmid. Look for an explosive barrel next to the oil spill, pick it up, and propel it at the Big Daddy when he nears the doorway. As soon as you've hit him, start firing your Machine Gun at him. Back up soon after, however, as the Bouncer will likely charge straight for you. With any luck, the charging Bouncer will still be on fire, igniting the oil spill as he moves through the doorway. Continue firing at the Bouncer while backing away.
After the Bouncer sets off the Trap Rivets, hit him with Electric Bolt Plasmid to stun him, then move in with your Drill and further reduce his health. Keep this up until he falls.
Loot the fallen Big Daddy's corpse and then approach the cowering Little Sister. Press the X/Square button to Adopt her when the prompt appears onscreen.
Killing the Big Daddy in El Dorado Lounge Goal: Gather Adam from 2 Bodies (1 of 2)
With the Little Sister in tow, look for an Audio Diary (“Child” and Guardian) in the open suitcase on the table across from the couch at north end of the El Dorado Lounge.
When you have the diary, hold the X/Square button and a white trail will appear. Follow the trail to reach the first gather spot. Standing on the highlighted Corpse and pressing X/Square will set the adopted Little Sister to gathering. ADAM gathering attracts Splicers, however, so preparing the area beforehand is a must.
Start by hacking the two Vending Machines across from the Corpse. Then, move around to the other side of the column and hack the Health Station there. Purchase as many Trap Rivets as you can from the Ammo Vending Machine. Spread the Trap Rivets on the ground on either side of the two Vending Machines, and place some along the walls on the two sets up steps leading up to the walkway as well. Purchase more Trap Rivets if you have cash to spare.
Once you've prepared the area, set the Little Sister down at the Corpse to begin the Gather. The bar below your own health and EVE in the top-left corner of the screen indicates the Little Sister's progress. Hold off the Splicers until the bar is completely full to complete the Gather.
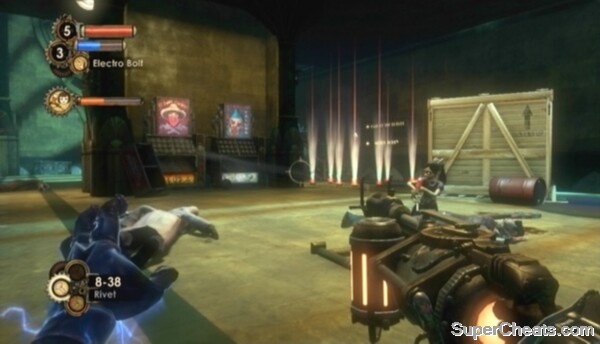 Protect the Little Sister while she gathers ADAM. |
If you want to unlock the “Master Protector” Xbox 360 achievement or PlayStation 3 trophy, worth 15 points or a Bronze trophy, you must not take any damage during a Gather and not allow a single Splicer to interrupt the Little Sister. If you're not interested in unlocking the achievement or trophy, there's no need to go overboard with the Trap Rivets. If you are interested, see the video below.
Unlocking the Master Protector achievement/trophy After the first Gather, be ready for some Splicers to break through the door behind you. Then, collect the Little Sister and proceed through the doorway.
Goal: Gather Adam from 2 Bodies (2 of 2)
There's a secret achievement/trophy to unlock here. Once through the door, look to your left to spot a robotic Andrew Ryan sitting at the desk there. To unlock the 9-Irony achievement/trophy, pick up the golf club next to the bookcase behind the robotic Ryan's desk with Telekinesis and launch it at the robot's head.
Unlocking the 9-Irony achievement/trophy Grab the Machine Gun up ahead to collect some ammo, and then continue down the steps to the tracks below. Gun down the four Thuggish Splicers when they come at you and then head to the west end of the room. While facing the “Journey to the Surface” sign, turn left and look for an Audio Diary (You, Me, and 1959) and a Heavy Rivet on the desk there.
Once you have the diary, return to the previous room. Start up the tracks, but be ready to fallback, as the bathysphere at the top of the slope will soon come rolling down. Turn right at the top of the tracks and follow the bridge there to find a Health Station. Further are some Anti-Personnel Rounds for your Machine Gun, which will surely come in handy in the areas ahead.
Hold the X/Square button to have the Little Sister guide you to the second Gather spot. There's a Splicer working on a Turret in this room. Equip your Hack Tool, hit the Turret with a Hack Dart and complete the three stages to turn it friendly. Try your best to land the needle on a blue section at the start to give the Turret a damage boost.
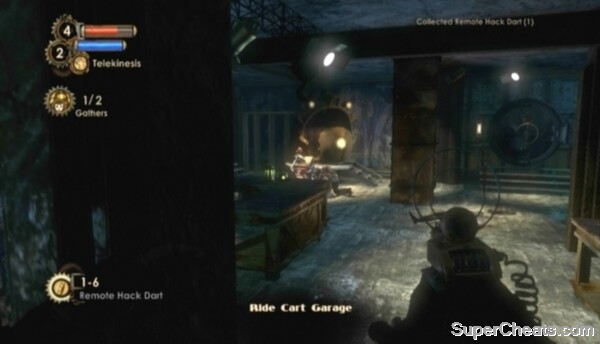 Hack the sparking Turret in the Ride Cart Garage to your side. |
Hack the Ammo Vending Machine by the Vita-Chamber in the southwest corner of the room and spend your money on Trap Rivets. Place at least five Trap Rivets along each of the windows, as Leadhead Splicers tend to take cover there to fire at you. Most of the Splicers are going to break through from the door at the northwest end of the room, so set your remaining Trap Rivets in that area leading up to the Corpse.
When you're prepared, set the Little Sister down at the Corpse and hang back by the Vita-Chamber. Equip your Rivet Gun and watch as your traps dismantle the incoming Splicers. Keep an eye on the doorway at the northwest end of the room, as some of the Sluggish Splicers may make it through the Trap Rivets. Hit them with your Rivet Gun or your Machine Gun with Anti-Personnel Ammo selected. Don't hesitate to use your Drill if they get really close.
Ride Cart Garage Gather Spot Hold off the Splicers until the Little Sister is finished gathering, then pick her up to complete the current goal. Collect the ammo in the Lockboxes strewn about the room before continuing on.
Goal: Get to the Sister VentExit the room through the doorway closest to the Health Station and turn left. Look for an Audio Diary (Lamb the Problem, Sinclair the Solution) and .50 Caliber Rounds on the table behind the falling water.
Continue following the arrow at the top of the screen down the tracks and keep an eye on your right. When you pass the white “We Will Be Reborn” graffiti, head through the opening in the wall further up. Climb the steps up to a balcony and collect the Trap Rivet and Heavy Rivet there. There is an Audio Diary (Truth is in the Body) on the table around the corner here. Continue to the very end of the walkway to find two things of Anti-Personnel ammo for your Machine Gun.
Return to the tracks and continue following the arrow at the top of the screen. The arrow will soon lead you to the Sister Vent. You're faced with a choice: Rescue the Little Sister by pressing the X/Square button at the Vent, gaining 80 ADAM, or Harvest the Little Sister by pressing the Y/Triangle button, gaining 160 ADAM.
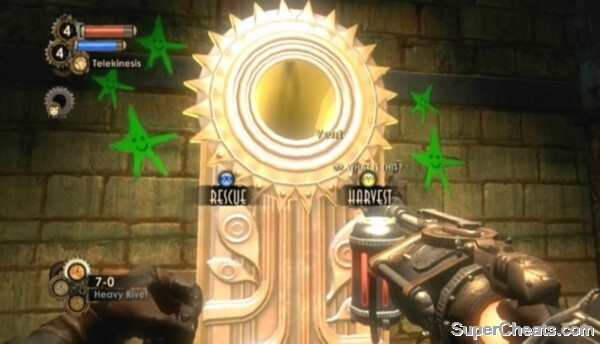 Rescue or Harvest the Little Sister at the Sister Vent. |
If this is your first time through and you're not playing on the Hard difficulty level, it's probably best to Rescue the Little Sisters to gain these perks.
Goal: Buy the Incinerate! Plasmid at the Hall of the Future
Start back toward the tracks. You'll face a group of Splicers on your way there, so be ready with your Machine Gun and Anti-Personnel Rounds.
Continue down the tracks until you reach rubble blocking your path. Move through the doorway to the right of the robotic family sitting on the couch to enter a room with two large hands. Use the Y/Triangle button to jump onto the palm of the hand to the right and walk up the arm to reach the platform above. Look for an Audio Diary (Deterioration) next to a Corpse here. Continue along the walkway to find Anti-Personnel Rounds for your Machine Gun.
When you have the first diary, drop down and enter the Ride Maintenance area through the automatic door to the left of the robotic family sitting on the couch. Use the Power to the People Station straight ahead to upgrade one of your weapons. Look for an Audio Diary (Helping Sinclair) near the Vending Machine in the alcove to the right of the weapon upgrade station. There's a Safe and some ammo in the room to the left of the Power to the People station. Use the Bot Shutdown Panel in this room if you land the needle in a section of the meter while attempting to hack the Safe.
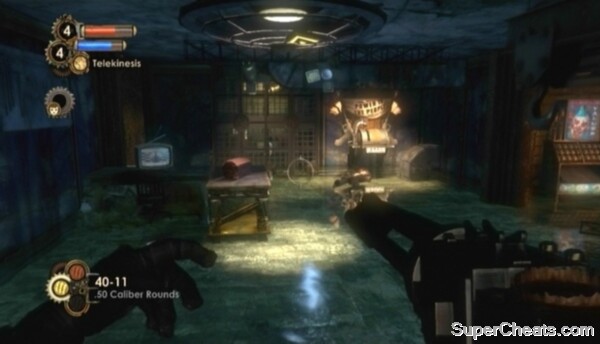 Upgrade one of your weapons using the Power to the People station in Lighting Storage. |
Continue to the end of the track where you must turn left through a doorway marked “Ride Maintenance.” Collect the Audio Diary (Efficacy) in the overturned filing cabinet through this doorway. Continue to the end of the corridor and interact with the Maintenance Door Access switch to open all doors. Move through the door that opens to return to the ride entrance. Here you will face a handful of Leadhead Splicers and a couple of Thuggish Splicers. Be ready with your Rivet Gun or Machine Gun. Duck back through the door you just came through if you're taking damage.
There's an Audio Diary (Dating Plans) and a Gene Tonic to collect before moving on, now that you've opened the doors. Head back down the ramp leading to the Journey to the Surface ride entrance. Go through the now-open doorway in the northeast corner of this room. Collect the Booze Hound Gene Tonic here and then look in the backroom to find the diary.
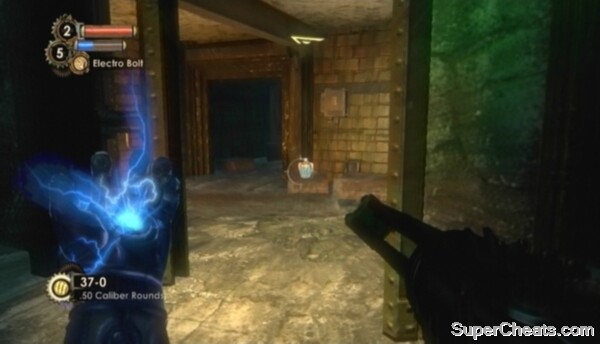 Collect the Booze Hound Tonic after opening the doors. |
Continue through the door at the other end of this room and then down the U-shaped corridor. Look for an Audio Diary (A Father's Love) by the Vita-Chamber in the next area. Past the Vita-Chamber is a Gatherer's Garden. From it, you can purchase the Incinerate Plasmid. A Health Upgrade and Eve Link Gene Tonic are also available. You should have enough ADAM to purchase them all. Consider purchasing the Health Upgrade too.
Goal: Thaw the Frozen Door
Make your way back to the start of the U-shaped corridor and use Incinerate to melt the ice covering the doorway there. There's another Gatherer's Garden here, with some additional upgrades available. Use Incinerate to melt the mound of ice in the kitchen to collect the embedded Trap and Heavy Rivets, and then start back toward the Hall of the Future entrance. You'll be facing a Big Sister in the lobby (surprise surprise), so buy a couple of First Aid Kits from the Vending Machine by the entrance before proceeding through.
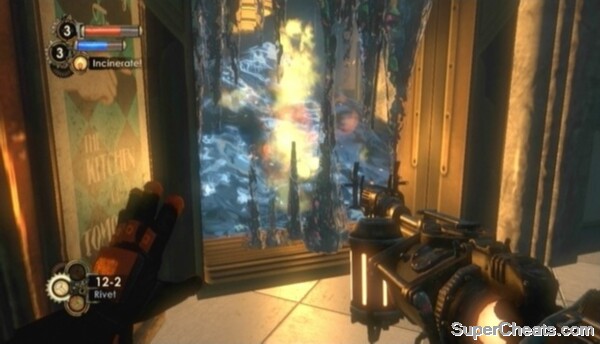 Melt ice mounds with incinerate. |
Telekinesis is your best friend here, so don't bother switching too any other Plasmid for the duration of this fight. You could use Incinerate to set fire to the Big Sister while she's standing on the oil spill, but doing so is not worth the effort.
The Rivet Gun with Trap and Heavy Rivet ammo deal a nice amount of damage. Hit her with Heavy Rivets when she's actually standing still. For the Trap Rivets, just sprinkle them around her (or attach them directly onto her) and she will most likely trip them as she jumps about.
The key to surviving this fight is to keep moving. Never stand on the spot unless the Big Sister is using Telekinesis. The large rocks Big Sister picks up with Telekinesis deal a good chunk of damage when propelled at her, so use them to your advantage. When you see Big Sister gathering nearby objects with Telekinesis, stand on the spot and wait for her to propel them your way. As soon as she releases them, use Telekinesis to grab the object that would have hit you -- most likely a large rock -- and shoot it back at her. Even while she's not using Telekinesis, rocks will be strewn about the walkway, so make use of them.
Defeating the Big Sister in the Rapture Museum When the Big Sister falls, loot her corpse to find 40 ADAM. Before making your way back to the station to thaw the frozen door, enter the Gift Shop at the east end of the bridge. There are a couple of audio diaries to collect in this area. The first Audio Diary (Cutting Corners) is in an open box behind the counter at the south end of the room. To find the second Audio Diary (Rapture in Deliverance), start by heading down the steps across from the Ammo Vending Machine. At the bottom of the steps, turn left and use Electro Bolt on the Door Control to open the gate. The diary is on a table at the back of the “Dames” room. Collect the Heavy rivets on the mattress before leaving.
After collecting the two diaries, return to the station by following the arrow at the top of the screen. When you reach the Vending Machine at the start of the Museum Entrance area, use Incinerate to melt the giant mound of ice next to it. Collect the ammo and Audio Diary (Disappeared) that were embedded in the ice, and then continue to the station.
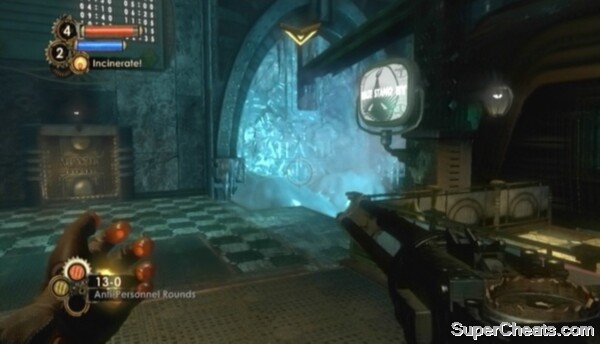 You can thaw the frozen door in the Train Station now that you have Incinerate. |
Sophia Lamb is sending more Splicers your way. Unfortunately, if you're after all the collectibles, there's one last Audio Diary (Wooden Nickels) to grab before you can hop on the train and escape. It's easy to miss. Leave the security booth and look in the room to the left of the now-unfrozen door to find the diary. With that, shoot your way to the train, get in, and flip the switch to travel to the next level.
Collecting the Wooden Nickels Audio Diary
Pauper's Drop
A note about the Research Master achievement/trophy: Research Master is unlocked by maxing out research on all nine subjects. As such, if you're after this achievement/trophy, you must research the Thuggish Splicer to level four in Pauper's Drop, as they do not appear beyond this level.Goal: Go to the Sinclair Deluxe Hotel
Step out of the train and proceed to the highlighted Door Control panel through the doorway straight ahead. Complete two stages of hacking to unlock the secured door. Through the door, pick up the Machine Gun next to the Rosie corpse to gain some ammo and then continue on into the next area. There are three Splicers through the door at the end of the L-shaped corridor. Waste them using your Machine Gun and Anti-Personnel Rounds, or headshot them with your Rivet Gun.
You'll encounter a Brute Splicer upon entering The Fishbowl. You won't be facing him just yet, so move further into the area. There's some stuff to do here before entering Sinclair Deluxe. Just beyond the door to the hotel you'll encounter a Leadhead Splicer with a hacked Security Drone. Hit the drone with a Hack Dart and hack it to your side.
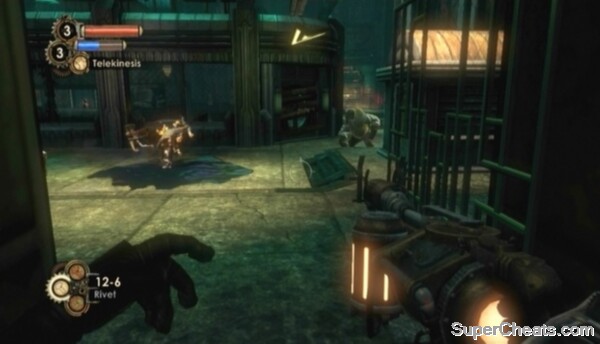 Brute Splicers can pick up and throw objects with considerable force. |
Enter Marlene's Flower Emporium and collect the Audio Diary (Ryan vs. Lamb: Religious Rights) on top of the drawers inside. There's another Audio Diary (Better Times with Lamb) on top of the flower shop, as well as the Hacker's Delight Gene Tonic. To reach these items, climb the wooden steps along the east side of the Diner and cross the bridge at the southwest end to get on top of the flower shop.
After collecting diaries and Tonic, enter the Diner through the doorway next to the wooden stairs in the southeast corner. Inside the Diner, look for a Shotgun by the bloody Corpse at the back. Take note of the code scribbled on the paper here: Clinic 0047. Make sure you're ready for a fight before picking up the Shotgun, as a group of Splicers will break into the Diner as soon as you do. All the better to test out your new weapon.
Armed with the Shotgun, now is the time to consider taking down the Rosie in the area to get at his Little Sister. Make sure he has a Little Sister with him before attacking!
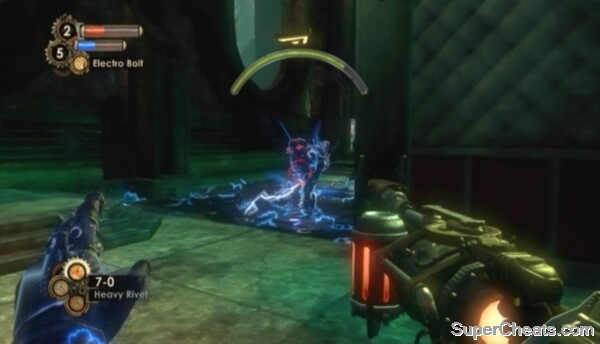 Lure the Rosie into the pool of water on the west side of the Diner and hit him with an Electro Bolt. |
When the Rosie is past the pool of water, get on top of the Diner using the ramp along the east side. If you hacked the Security Camera here, it will go off when the Big Daddy comes after you, sending two Security Drones to attack. Use Telekinesis to pick up the red, explosive container by the hacked Turret on top of the Diner (provided it's still intact). Look below for the Big Daddy and propel the explosive container at him, and then continuously hit him with gunfire until he starts firing at you. There's an explosive barrel by the oil spill at the northeast corner of the Diner, which you can pick up with Telekinesis and use to further damage the Big Daddy.
Rosie is a fierce long-ranged fighter, so try getting close to him with your Shotgun or Drill once he's really low on health. It's best to run at him while he's occupied with a Security Drone or Splicer. If you're quick enough, you can easily drain the remainder of his health up close. If you can't get close, use your Machine Gun against Rosie, ducking in and out of cover to avoid taking fire.
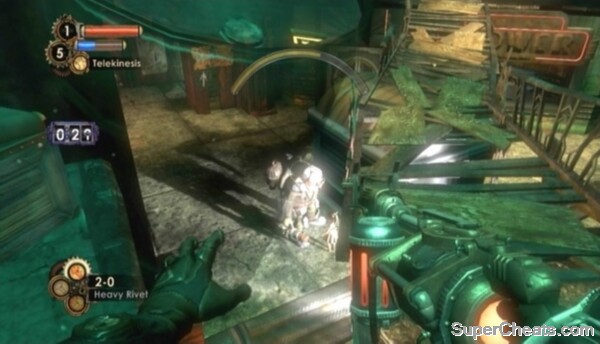 Propel explosive barrels at Rosie with Telekinesis. |
Gathering ADAM is optional, so you can just bring the Little Sister to the nearest Vent and Rescue or Harvest her if you aren't interested in earning the extra ADAM.
Killing the Rosie in The Fishbowl When you're ready to move on, enter Sinclair Deluxe through the door at the east end of The Fishbowl. Look for an Audio Diary (Wrong Side of the Tracks) in the reception office to your left upon entering. Proceed through the automatic double-door up ahead and turn through the doorway to your left to enter the office.
Goal: Search the Pawn Shop Downtown for the Research CameraReturn to The Fishbowl and exit through the passageway at the south end of the area to reach Downtown. Keep an eye out for a red, explosive barrel by an oil spill as you make your way there. Pick up the explosive barrel with Telekinesis and look for a Brute Splicer on top of the Pawn Shop (the building just beyond the Health Station). Propel the explosive barrel at the Brute Splicer to knock off some of his health. Be ready with Telekinesis and your Machine Gun with Anti-Personnel Rounds.
If the Brute picks up a slab of concrete and hurls it at you, use Telekinesis to grab it just before it hits you and propel it back at him. Hack the nearby Health Station if you have a chance, as the Brute will likely use it when he is low on health. Finish him off with your Shotgun or Machine Gun coupled with Anti-Personnel Rounds.
Killing the Brute Splicer Downtown There are a couple of audio logs to collect in this area. Look for the first Audio Diary (The End of the Line) on the Prentice Mill memorial in the northeast corner of the area. There is a second Audio Diary (Clinic Code at the Fishbowl) by the locked door to Fontaine Clinics at the south end of the area.
Goal: Use the Code 0047 to Enter the Clinic
The code to open the door to Fontaine Clinics is scrawled in blood on a newspaper at the back of The Fishbowl. Enter 0047 into the keypad to open the door. Head for the stairs beyond the reception desk and be ready for a Splicer with an explosive. Dodge the projectile and fill him with Rivets.
Around the corner at the top of the stairs is a Security Camera and a Health Station. Use a Hack Dart and hack the camera to your side. Proceed through the opening in the wall next to the Health Station and cross the walkway to another opening. Use the Power to the People weapon upgrade station here to upgrade one of your weapons before heading up the stairs.
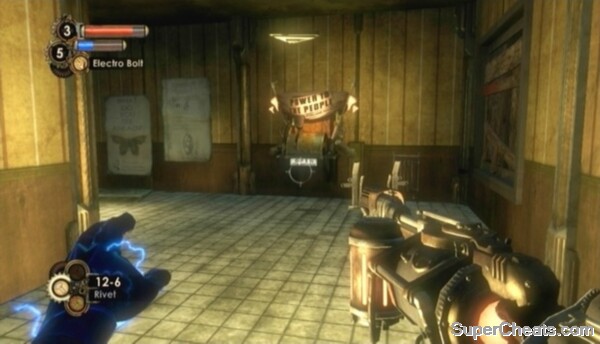 Upgrade one of your weapons using the Power to the People station in The Hamilton. |
When you have the Tonic and diary, return to the hallway and exit through the opening in the wall at the other end. Gun down the Splicers standing around the Thuggish Splicer on the covered table (she's alive, by the way). Look for an Audio Diary (Arrangements) by the bunch of candles next to the Vent.
There is a Security Camera on the wall further ahead, so be ready with your Hack Tool. Proceed through the automatic door and you'll be on top of the Pawn Shop. There's an audio log to collect nearby, so don't drop through the hole just yet. Cross the wooden bridge at the other end of the roof (the north end). Through the door here, blast the Splicer and turn right to spot the Audio Diary (Therapy with Gene 1) on the cabinet there.
After collecting the diary, drop down the hole on the Pawn Shop roof and pick up the Research Camera on the table.
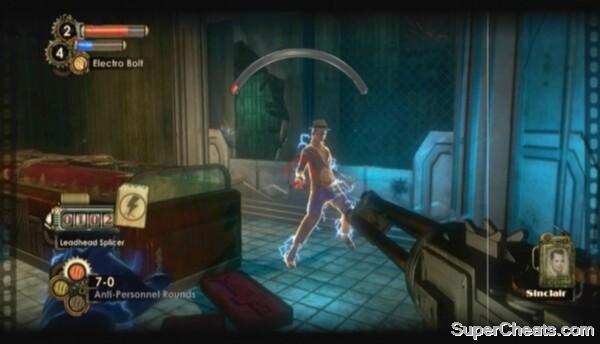 With the Research Camera equipped, start recording when an enemy is in the shot. Use a variety of attacks to rack up score. |
Using the Research Camera is simple. With the Research Camera equipped and an enemy in your sights, hit the RT/R2 button to start recording. While recording, damage the enemy in as many different ways as possible to rack up score. Achieve a certain score to unlock a Research Bonus and discover the enemy's weakness.
To complete this goal you must research any Splicer with the Research Camera. There's a Thuggish Splicer and a Leadhead Splicer through the front door. When you're ready, start recording while the Thuggish Splicer outside is in the shot. When the door opens, hit him with an Electro Bolt and then shoot him in a non-vital area, such as using the Rivet Gun to hit him in the leg. Then, switch to another weapon and finish him off. Doing this will be enough to attain the first research level.
If you're after the Research Master achievement or trophy, which is unlocked by maxing out research on all nine subjects, you must research the Thuggish Splicer to level four in Pauper's Drop, as they do not appear beyond this level.
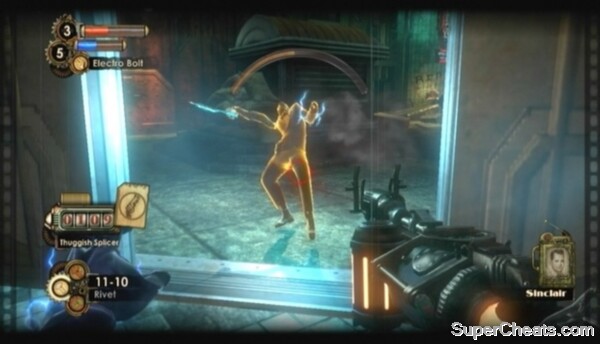 Max out research on the Thuggish Splicer while you still have the chance, as this enemy does not appear in any of the levels beyond Pauper's Drop. |
Now that you have the camera, you must use it to research a Brute Splicer to learn a new move, which will allow you to remove the rubble blocking the way in the hotel. There's a Brute Splicer in Skid Row, which can be accessed via the automatic door in the northeast corner of the Town Square area (i.e., where you are right now).
You'll encounter another Rosie in Skid Row. If he's fighting Splicers, sit back and allow them to whittle down his health. They likely won't last long, though. If the Big Daddy doesn't have a Little Sister with him, he will soon. Wait until he calls a Little Sister from the nearby Vent. You'll want to prepare the environment as well.
There's a Security Camera at the east end of the area, across the pool of water below the Vent. Hit the camera with a Hack Dart and hack it to your side. There's also a Missile Turret through the doorway to the right of the camera. This Turret won't be of much use to you against the Big Daddy, but you may as well get it on your side. If you're out of Hack Darts, you can purchase more from the Vending Machine at the start of the area, or just destroy the Turret using Telekinesis and one of the explosive containers in the area.
When the Big Daddy has a Little Sister with him, start the assault by either using Telekinesis to launch an explosive container at him if he is out of water, or by hitting him with an Electro Bolt while he is in water. The Security Camera will spot him if he is standing near the Vent, so duck behind cover while the Security Drones move in. Hit the Big Daddy with Heavy Rivets from your Rivet Gun or Armor-Piercing Rounds from your Machine Gun and throw explosives at him using Telekinesis. He should fall quickly.
Killing the Rosie in Skid Row It's best to wait to Rescue or Harvest the second Little Sister until you have the Hypnotize Plasmid and another Big Daddy has spawned in this area, as dealing with the last Little Sister in a level will spawn a Big Sister.
There's an Audio Diary (Blood Lamb) to collect in this area before moving on. Enter the Pharmacy in the middle of the area and head through the doorway behind the counter. In the backroom, climb on top of the boxes, click the Left Stick to duck and crawl through the opening in the wall to enter the bookstore. The diary is on the counter. Hack the sparking Door Control panel to exit.
After collecting the diary, enter the doorway across from the Pharmacy entrance. Look for an Audio Diary (Mole) by some fire and a Rosie corpse about halfway down.
There are two more audio diaries to collect. At the end of the corridor, rather than heading down the steps, turn right and head up the steps there. At the top of the steps, proceed through the doorway straight ahead. Upon entering this room, turn left and look for the Fire Storm Gene Tonic next to the Corpse in the corner. Then, move through the opening and cross the wooden bridge to the top of the Pharmacy. Look for an Audio Diary (Pauper's Drop) on the Storage Crate through the opening across from the hole in the roof. When you have the diary, cross the wooden bridge back to the apartments. The Audio Diary (Sunday Services) is on the ground next to the gather spot.
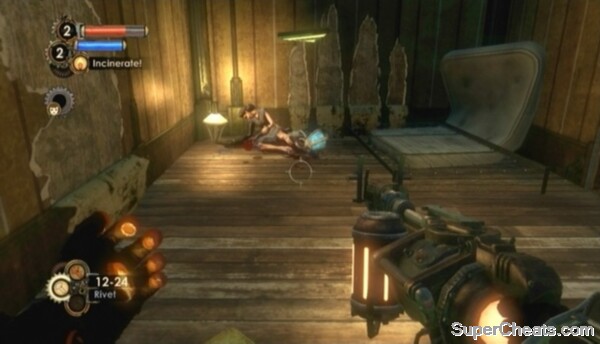 Equip the Fire Storm Gene Tonic to emit fire when hit by a melee attack. |
Get up onto the stage and head up the steps at the right end. Proceed through the door straight ahead to find another Power to the People weapon upgrade station. Upgrade one of your weapons and then exit the room. Turn right once through the door and pick up the Audio Diary (Closing the Limbo Room) on the vanity in the room you come to.
Exit back to the Limbo Room Entrance. Look for the Brute Splicer by the windows at the north end of the area. Equip the Research Camera, get the Brute in your sights and start recording. Again, you need to hit this guy with a variety of attacks to attain the first research level. Use Electro Bolt, your Rivet Gun, Shotgun, and so on until you unlock the Drill Dash move. Once you have Drill Dash, finish off the Brute with your Machine Gun and Anti-Personnel Round and Shotgun. To perform Drill Dash, hold RT/R2 and press B/Circle with the Drill equipped.
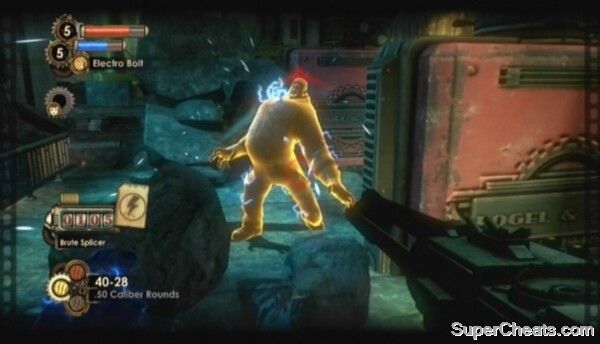 Max out the first Brute Splicer research track to gain the Drill Dash ability. |
Goal: Clear the Rubble at the Sinclair Deluxe
With the Drill Dash ability you can clear the Rubble at the hotel back at the start of the level. Now that you have the Hypnotize Plasmid, now's the time to deal with the Little Sister you have with you. A Big Sister will spawn when you do. The best place to face her is in the section of Skid Row with the Pharmacy and bookstore. There's a Vent in this area, and there should be another Rosie now, whom you can get on your side with the Hypnotize Plasmid. If you don't have Hypnotize, set in one of your Plasmid slots using the Gene Bank in the bookstore.
When the Big Sister appears, hit Rosie with the Hypnotize Plasmid, and then sit back and watch as the two duke it out. Use your Machine Gun and Armor-Piercing Rounds to finish off the Big Sister if Rosie falls. Loot the Big Sister for some ADAM, ammo, and cash.
Killing the Big Sister in Pauper's Drop In the corridor between Sinclair Deluxe and the Downtown area is an oil spill and two explosive barrels. Keep your distance, as a Splicer up ahead will ignite the oil spill and set off the two barrels. Kill the Splicer with your Rivet Gun from afar and then make your way to the other end of the corridor. Careful here, as an explosive barrel will soon roll down the stairs to your left. There's also a Brute Splicer here, so be ready for him.
Up the stairs, proceed through the door, start down the corridor, and turn right to enter Sinclair Deluxe. Move through the door beyond the counter and equip the Drill. Approach the pile of rubble blocking your path, hold RT/R2 and press B/Circle to clear the way with Drill Dash.
Goal: Go to Grace's Apartment
Kill the Splicers in the lobby and then head up the stairs. There is an Audio Diary (A Gift From Lamb) in room 106 along the south side of the second floor walkway. The diary is in the bathroom.
When you have the diary, return to the walkway and head through the doorway at the east end. Kill the Splicer on the table and then start down the hallway up ahead. Enter the apartment through the doorway by the collapsed doors at the end of the hall. Move through this area until you reach a Vent and a Security Camera. The Freezing Drill Gene Tonic is on the covered table across from the Vent.
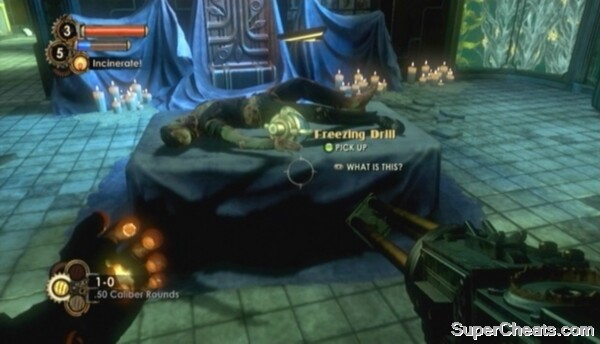 You don't want to miss the Freezing Drill Tonic. |
After collecting the diary, drop back down to the Vent and move past the hole in the wall you entered this area through. There's a Turret around the corner. Hit it with an Electro Bolt or Hack Dart and then make your way to the other end of the corridor. Enter the room here to find the Power to the People weapon upgrade station. Use the station to upgrade one of your weapons, then return to the Vent and head up the ramp across from the covered table to reach the third floor.
There's an Audio Diary (Where Has Harry Gone?) in the apartment across from the Vending Machine. Turn through the doorway to the left and look for the diary on the shelves next to the Turret. Head back into the hall once you have the diary.
You'll encounter a Brute Splicer beyond the Vending Machine. Shoot an Electro Bolt at the puddle of water while the Brute is standing there and then hit him with Anti-Personnel Rounds from your Machine Gun.
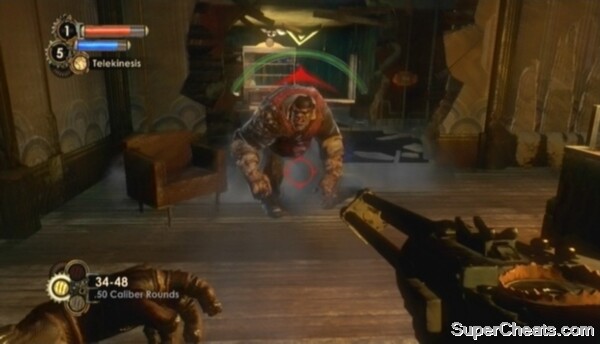 Hit the Brute Splicer with Electro Bolt while he's standing in the puddle. |
Through the bathroom, climb up the collapsed floor to reach the fourth floor. There's a Security Camera at the other end of the corridor. Hit the Security Camera with a Hack Dart and hack it to your side. There's an Audio Diary (What a Snap) by the Storage Crate at the northwest end of the fourth floor walkway.
Grace's apartment is at the southwest end of the walkway.
Goal: Find Grace's Hiding Place
There's an Audio Diary (Barbarism) under the bed in Eleanor's room in Grace's apartment, and the Keen Observer Gene Tonic on the round table across from it. Continue through the doorway across from Eleanor's room. Look for another Audio Diary (Falling Lamb) on Grace's bed.
Approach the ripped poster between the two closets at the far end of the room and remove it to reveal a Hidden Switch. Activate the switch to reveal a hidden corridor at the back of the closet to the left of the switch.
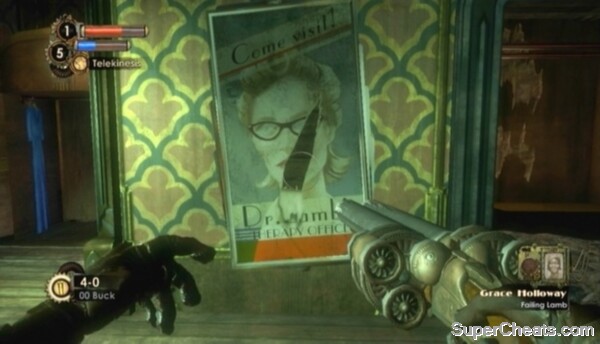 Look behind the ripped poster in Grace's apartment and press the switch behind it to reveal the way to her hiding place. |
You can kill Grace before moving on. Know that by doing so you forfeit the “Savior” achievement or trophy, which is unlocked by rescuing every Little Sister and sparing all characters when given the choice to let them live or die choice. Grace will also help by sending you ammo in the next level if you keep her alive.
Goal: Use the Override Key to End the Lockdown
Exit Grace's apartment and make your way back down to the first floor. A Splicer has set up a Turret in front of the lobby door. Hack the Turret to your side with a Hack Dart and sit back as it guns down the Splicer. Exit Sinclair Deluxe and continue to the entrance to The Fishbowl area. There's a Missile Turret behind some sandbags in front of the automatic door. Hit the Missile Turret with a Hack Dart, but back up while hacking to avoid getting hit.
To get the last Audio Diary (Field Test 1), you need to kill the Brute Splicer in The Fishbowl before leaving the level. When the Brute is dead, loot his corpse to find the diary.
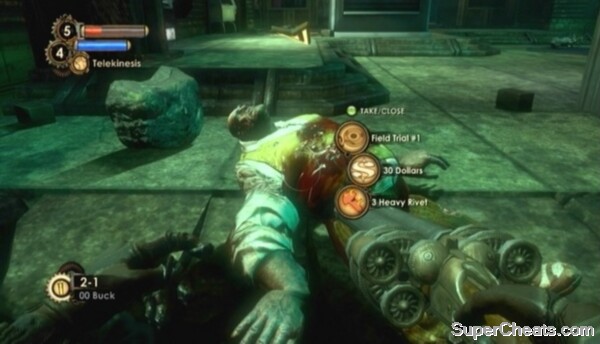 Kill the Brute that spawns in The Fishbowl and search his corpse to find an Audio Diary. |
Follow the arrow at the top of your screen back to the start of the level. Enter the Bulkhead Control room, pull the switch there, then get on the train and activate the highlighted Switch to complete the level.
Siren Alley
Goal: Find Pumping Station #5Walk the straightforward path across the ocean floor to reach the Airlock chamber at the other side. Cycle the Airlock Control to drain the water and enter Little Eden Plaza. The first Audio Diary (A Silent God) of this level is near. Turn left once through the doorway; the diary is hanging next to the painting here.
There is a Big Daddy in Little Eden Plaza. This one, called a Rumbler, is armed with a shoulder-mounted launcher. The Rumbler is the easiest of the Big Daddies to take down -- especially if you have an upgraded Drill and the Freezing Drill Gene Tonic.
At the bottom of the steps just beyond the painting of the plane crash, turn left to spot a Vending Machine. If you are low on Drill Fuel, buy as much as you can with whatever cash you have. Look for some Phosphorus Bucks for your Shotgun next to the Corpse just beyond the Vending Machine. Clear the immediate area of Splicers and then turn your attention to the Big Daddy.
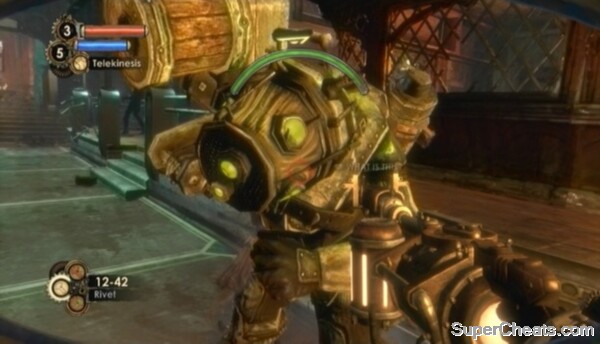 The Rumbler is the easier Big Daddy to take down, though he is equipped with a shoulder-mounted launcher. |
Circle around to keep behind the Rumbler as you continue to drain his health with your Drill. If you have the Freezing Drill Gene Tonic, the Rumbler will eventually freeze. Switch to your Shotgun and hit him with Phosphorus Bucks while he is stuck in place. He'll fall in no time.
Be sure to loot his corpse to collect the Mini-Turrets he's carrying. Mini-Turrets are dispensed using the Hack Tool, and are very handy when protecting a Little Sister during a gather.
Killing the Rumbler in Little Eden Plaza With Big Daddy out of the picture, you can adopt the Little Sister or Harvest her on the spot. As with the others, you can gather ADAM from two corpses with this Little Sister. These Gatherings are optional, each one yielding an additional 60 ADAM on top of whatever ADAM you get from harvesting or rescuing the Little Sister once you are done with her. Hold the X/Square button to have the Little Sister lead you to the first gather spot.
If you have rescued every Little Sister thus far, rescue this one and the sisters will leave you a gift at the Gatherer's Garden. This gift contains the Proud Parent Gene Tonic (Little Sisters gather slightly more ADAM from every corpse), 80 ADAM, and some money.
There's ammo, the Handyman Gene Tonic, and an Audio Diary (Misbehaving) in the restaurant in the middle of the plaza. There's a hole on the second floor you can drop through to get in. Use Incinerate to melt the ice mounds so you can collect the embedded ammo. The diary and tonic are on the counter in the middle room. Hack the Door Control in the room next to the kitchen to get out.
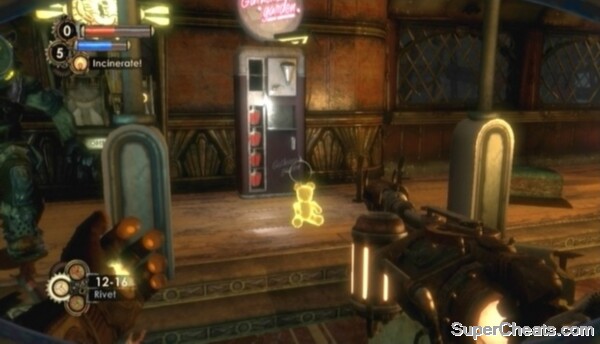 If you've rescued every Little Sister thus far, look for your reward at the Gatherer's Garden. |
To get to the Power to the People station in the Mermaid Lounge, shoot a Hack Dart at the Door Control panel visible in the kitchen through the window at the top of the stairs. Complete the hacking stages to open the gate. Drop through the hole in the kitchen storage room to reach the weapon upgrade station on the first floor. The third Audio Diary (Father to Fall) is on the ground next to it. The gate will close before you can exit this room. A Splicer in the next room will set fire to the oil spill here, so sit back in the corner and wait for the flames to dissipate. Another Splicer will jump down from above, so be ready with a weapon.
If you hang around Little Eden Plaza long enough, another Rumbler will spawn. Wait until he has a Little Sister with him and then go ahead and use the strategy outlined above to kill him. There are three Little Sisters total in this level.
 Hang around Little Eden Plaza long enough and another Rumbler will spawn. |
There is Security Camera on the wall to the left through the doorway, so be ready with a Hack Dart, or simply run up and hack while the camera is turned away. Head up the stairs to the locked security door to Plaza Hedone.
Goal: Find the Keycode to Access Plaza HedonePick up the highlighted Audio Diary (Lamb's Salvation) and then return to Little Eden Plaza. The code to unlock the door into Plaza Hedone is in Daniel Wales' office in the Pink Pearl. The Pink Pearl is accessible through the double-door at the northeast end of Little Eden Plaza. There's a Brute Splicer there, so be ready with Telekinesis or the Hypnotize Plasmid, which you can use to set the Brute against the Rumbler if there is one in the area.
If you spared Grace in Pauper's Drop, you can find some ammo in the Mail Tube by the Pink Pearl entrance.
In the Pink Pearl, pick up the Speargun next to the Rumbler corpse across from the doorway and then continue on into the next room. There's an Audio Diary (Father Simon Wales) on the desk in the first-floor office, which is accessible through the automatic double-door in the northeast corner of the lobby.
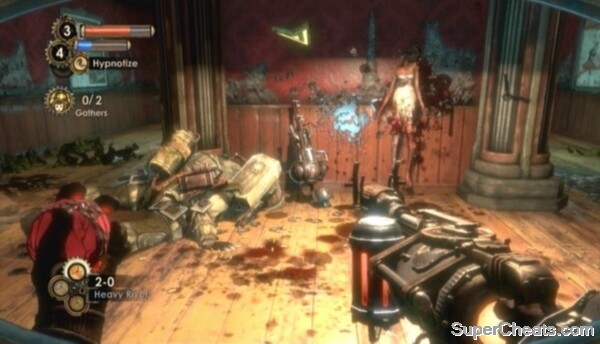 Look for the Speargun when first entering the Pink Pearl. |
The stairs to the third floor are at the north end of the second-floor walkway. Hit the two Trap Spears with a Rivet to clear the doorway. There are a few Splicers on the third floor, including two Spider Splicers. The door into Daniel Wales' room is in the southeast corner of the third-floor walkway. There is an Audio Diary (Wales an' Wales) on the desk in the office at the back of the hall. Be careful not to drop through the hole before collecting the diary.
Goal: Defeat Daniel Wales
Drop through the hole at the end of the hall when you're ready to face Daniel Wales. There are two Turrets and a Spider Splicer in the next room. You can hack both of Turrets with Hack Darts, or just destroy them. Pick up the Hacker's Delight 2 Gene Tonic on the ground to your right.
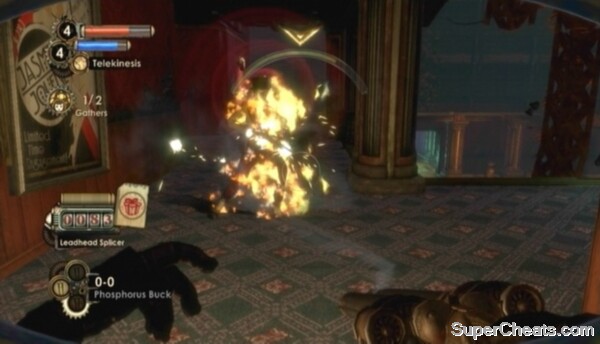 Daniel Wales is a runner, so take him out quickly. |
Daniel will be to your left as soon as you're through the double-door. Turn left and immediately propel the explosive barrel at him. Daniel should fall if you hit him. Equip your Drill and hit him with Drill Dash when he stands up. Continue using your Drill to drain his health while he is on the ground. Daniel has a Security Drone with him, so either destroy it or hack it to your side. You won't need a Hack Dart if the drone gets close enough. Use your Shotgun and Phosphorus Bucks to finish Daniel off, then loot his corpse for the Audio Diary (The Date is the Code) containing the keypad code.
Killing Daniel Wales Goal: Use the Keycode to Access the Plaza Hedone
Return to the locked Securis door at the top of the stairs in the Maintenance Area. Enter 1919 into the Keypad to open the door.
Goal: Defeat Simon's Followers
The power has been cut. You must hold out until it comes back on. Sinclair will send you a couple of Mini-Turrets, Trap Rivets, and a First Aid Kit in the Mail Tube next to the door. The best place to set up your defence is on the ground floor, where you should have a hacked Security Camera. Place the Mini-Turrets using your Hack Tool and then sit in a corner.
You'll be attacked by Spider Splicers, and a Brute Splicer at the end. You can purchase First Aid Kits from the Vending Machine here if you're low on health.
Defeating Simon's Followers Goal: Enter Pumping Station #5In Plaza Hedone, there is an Audio Diary (Buy Her Memory) in the room through the automatic double-door along the northwest end of the upper walkway. On the ground floor, look for a second Audio Diary (The Pair Bond Mechanism) on a stack of blocks in front of the Gene Bank, Gatherer's Garden, and Vending Machine at the south end of the area.
There is a Rumbler in this area. If you have yet to rescue the three Little Sisters in this level, purchase some Drill Fuel from the Vending Machine and kill the Rumbler with a Drill Dash followed by more drilling and some blasts from your Shotgun. Just make sure he has a Little Sister with him before attacking! Be sure to loot the Rumbler's corpse for Mini-Turrets when he is dead.
Remember that rescuing or harvesting the final Little Sister of the level spawns a Big Sister. Make sure you're ready to face her before making your choice. You should be more than capable of handling a Big Sister at this point.
A good place to face her is in Plaza Hedone, especially if you hacked the Security Camera above the double-door at the south end. If another Rumbler has spawned, you can use the Hypnotize Plasmid to turn him against her. Other than that, use your Drill and Drill Dash, the Machine Gun and Armor-Piercing Bullets, and your Shotgun and .00 Bucks or Phosphorus Shells to make short work of her.
Killing the Big Sister in Siren Alley A tunnel below Plaza Hedone contains the Vending Expert Gene Tonic and an Audio Diary (The Requirements of Utopia). The tunnel is accessible near the stairs in the southwest corner of the plaza. Start down the corridor next to the stairs leading up to the second-floor walkway. Walk along the corridor to reach the stairs down to the tunnel. The Tonic is hanging from a rope partway down, and the diary is on a stack of blocks at the end.
There are a few more audio diaries to collect before moving on. The first is in a secret area in Joe's Green Groceries, along with a Gene Tonic. Enter Joe's Green Groceries at the south end of the ground floor. Press the Conspicuous Switch behind the counter to open the door on the other side of the wall. Proceed through the door to enter the Illegal Plasmid Lab. Look for an Audio Diary (An Empty Niche) on the table in the room through the Securis door next to the Ammo Vending Machine on the flooded ground floor. The Cure All Gene Tonic (restore EVE when visiting a Health Station) is on a mattress through the adjacent doorway.
A second Audio Diary (Lamb's Operation) can be found in the Smuggler's Hideout on the Rooftops above Joe's Green Groceries. Take the stairs up to the second-floor walkway and cross the wooden bridge to the top of the grocery store. In the alley here is a Turret; hack or destroy it, and then proceed through the Securis door. The diary is on top of the Smuggler's Crate in this room.
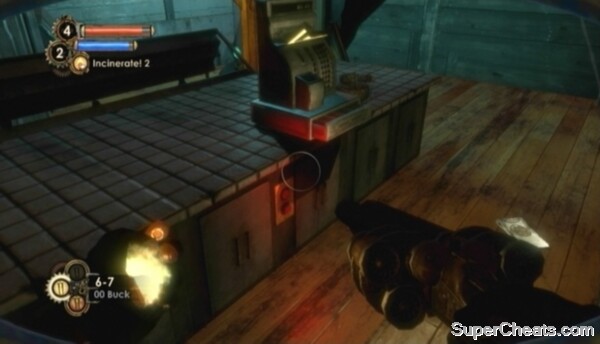 Press the Conspicuous Switch on the counter in Joe's Green Groceries to open the way to the secret Illegal Plasmid Lab. |
Once you have everything in Plaza Hedone, continue through the Securis door marked “Temple of the Lamb” next to the vending machines at the south end of the plaza. Continue through the door along the west side of this area to enter Pump Station Access. There is another Audio Diary (Shackled to the Great Chain) to collect here. Head up the stairs through the doorway past the Vending Machine and go to the west end of the upper walkway. The diary is in the room behind the gate. Hit the Door Control panel on the wall to the right and complete each hacking stage to open the gate.
Before heading through the door at the east end of Pump Station Access, pick up the Audio Diary (Guidance of the Lamb) on the ground below the two paintings to the right. Through the door, head down the steps and turn into the room to your left. Use the Power to the People station here to upgrade one of your weapons. Look for an Audio Diary (Therapy with Gene 2) in the filing cabinet across from it.
 Don't miss this Power to the People station on your way to Simon Wales' church. |
Goal: Defeat Simon Wales
Simon Wales is a Spider Splicer, and he has a similar amount of health as his brother did. Two Spider Splicers, a Brute Splicer, and a handful of Leadhead Splicers accompany Wales. Make sure you've killed the two Spider Splicers and the Brute before dropping down from the walkway
Throw down any Mini-Turrets you have and then use your Shotgun to kill the two Spider Splicers, who will come at you right at the start. The Brute will show up eventually and jump up onto the walkway soon after. If you have the Cyclone Trap Plasmid, place some traps on either side of you and wait for the Brute to show up. When he does, he will hit one of the traps when he charges for you, sending him flying. When he hits the ground, switch to your Shotgun and fire at him until he gets back up. When he gets back up, equip your Drill and hit him with a Drill Dash to finish him off.
With the Spider Splicers and the Brute dead, Wales will appear. He has a Security Drone with him. Try to hack it to your side when it flies up to you, or simply destroy it. Drop down to the area below and kill the Leadhead Splicers in the area. Hit Wales with your Shotgun, Drill Dash, and whatever else you have. Throw down Cyclone Traps in front of him to send him flying, and then blast him while he's down. Keep an eye out for Leadhead Splicers all the while.
Defeating Simon Wales When Wales is dead, loot his corpse to find the Pump Control Key.
Goal: Divert the Emergency Pumps
Before doing anything else, pick up the final Audio Diary (The Creed of the Faithful) on the pulpit at the front. Continue to the control room and activate the Pump Control to complete the goal.
Goal: Get to Dionysus ParkFollow the arrow at the top of the screen to the beginning of the level. When Little Eden Plaza is flooded, make your way to the ocean floor and walk across to the Dionysus Park airlock. Cycle the Airlock Control to complete the level.
Dionysus Park
Goal: Locate the Train StationMake your way through the Cohen's Collections corridor and to Dionysus Park. You will face a Houdini Splicer here. Houdini Splicers throw fire and can cloak themselves momentarily. As with any other Splicers, these guys are vulnerable to Anti-Personnel Rounds. The Cyclone Trap Plasmid also works quite well, because you can set one under a Houdini Splicer from afar and then move in and fill them with lead when they hit the ground.
When the Houdini Splicer is dead, exit via the doorway at the east end of the area. Look for an Audio Diary (Patronage) on the shelf next to the puddle of water straight across from the doorway.
With that, proceed up the stairs and through the doorway. Move straight through the falling water and down the stairs there to find another Audio Diary (A Gift from Billy). This diary contains the code to open the locked door in the previous area. There is a Power to the People weapon upgrade station and another Audio Diary (Lamb's Time is Over) behind this door. Backtrack to the area where you faced the first Houdini Splicer and input the code 1080. The door is next to the Vending Machine at the east end of the Cohen's Collection corridor.
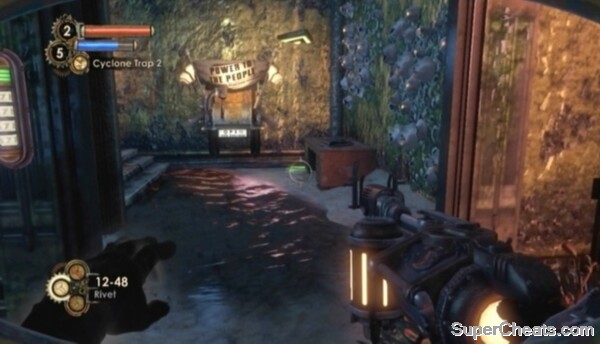 Input 1080 into the Keypad to open the way to a Power to the People station and Audio Diary. |
Once you have the diary, exit through the automatic double-door at the other end of the room. There is another Audio Diary (Lost and Found) at the centre of the carousel here.
Goal: Meet Stanley in the Train StationProceed through the Securis door at the east end of the room after collecting the audio diary to enter the Maintenance Access area. Kill the three Leadhead Splicers beyond the Vita-Chamber and then continue into the next area. Collect the Solid Slugs and Shotgun at the other end of this corridor. Kill the two Leadhead Splicers in the next room. There is another Power to the People station here; use it to upgrade one of your weapons, and then continue through the adjacent door.
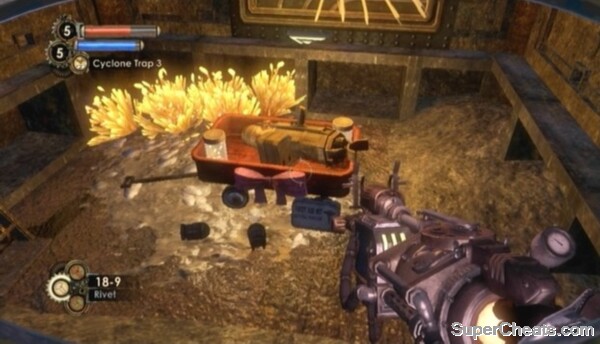 Eleanor's next gift to you is a Launcher. |
Goal: Rescue or Harvest Three Little Sisters (Triton Theater)Exit through the automatic door at the east end of the station after speaking to Stanley. Up the stairs and through the second automatic door, look for an Audio Diary (Lamb Flouts the System) next to the overturned trashcan behind the statue at the centre of the area.
One of the three Little Sisters is in the Triton Theater, accessible via the corridor at the south end of the Gallery Entrance, the area you are currently. Past the falling water and up the steps to your right is a Missile Turret. Hit it with a Hack Dart and make it friendly before entering the theatre.
Enter the Lounge through the doorway at the west end of the lobby. Kill the two dancing Houdini Splicers, and then approach the locked door at the bottom of the steps at the north end of the lobby. Hack the Door Control panel to open the door. Pick up the Audio Diary (Learning Poker) on the Filing Cabinet in the corner straight across from the door. Return to the theatre lobby once you have the diary.
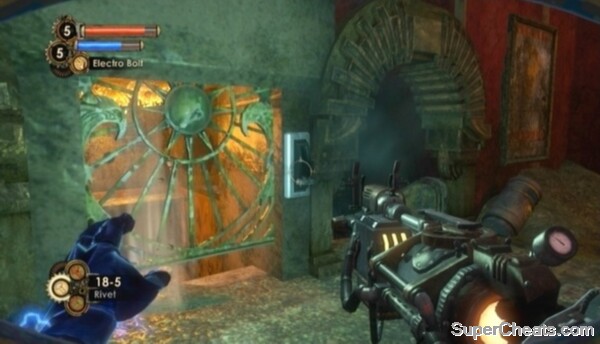 Hit the sparking Door Control lever in the Triton Theater lobby to uncover some Proximity Mines for your Launcher. |
The Little Sisters in this level are guarded by Elite Bouncers, a stronger variant of the Bouncer you faced in a previous level. You can make short-work of an Elite Bouncer with Proximity Mines. Sticking Proximity Mines to an object and then propelling that object with Telekinesis deals massive damage.
Start by finding a Splicer corpse. Use Telekinesis to pick it up. Press the X/Square button to place the corpse down somewhere away from the Big Daddy, equip your Launcher, switch to Proximity Mines and stick three onto the corpse. Propel the corpse at the Elite Bouncer using Telekinesis -- this should just about kill him. Switch to your Drill and hit him with Drill Dash, then just keep drilling until he falls.
Killing the Elite Bouncer in Triton Theater When the Big Daddy is dead, Adopt the Little Sister or Harvest her on the spot. There is a gather spot in front of the stage, and another up in the booths. Again, ADAM gathering is completely optional.
When you're ready, proceed through the automatic double-door to the left of the stage. Look for an Audio Diary (The Secular Saint) on a bottom shelf in the far corner of this room.
After collecting the diary, head back to the corridor just outside the theatre and head up the stairs at the west end. Collect the Audio Diary (A Spy) on the railing of the booth here. There is another Audio Diary (Growing Up) in the hall leading to the Projection Booth, which is accessible through the automatic double-door at the east end of the corridor just outside the theatre. There is a Security Camera at the top of the stairs, so destroy or hack it before entering the hall. Look for the diary in front of the collapsed section of wall partway down. Continue to the end of the hallway and collect the Extended Reel Gene Tonic in the Projection Booth.
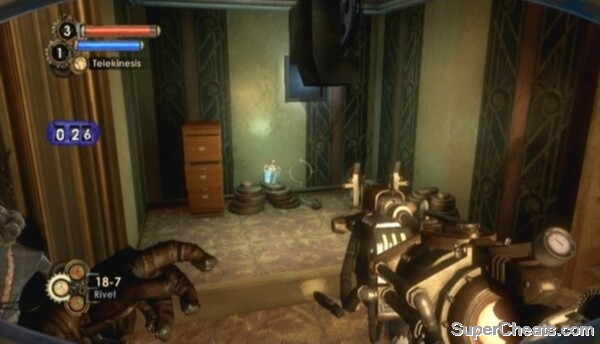 Look for the Extended Reel Tonic in the Projection Booth. |
There is Security everywhere in the Imago Gallery. Hack as many of the Security Cameras and Turrets as you can. A bunch of Splicers will eventually show up, and there is a Little Sister gather spot here, so they having some friendly machines here will come in handy
There is an Audio Diary (Falling into Place) embedded in an ice mound next to the doorway across from the Vent at the southwest end of Imago Gallery. Use Incinerate to melt the ice mound so you can collect the diary. Continue through the double-door next to the Vent to find the Hardy Machines Gene Tonic.
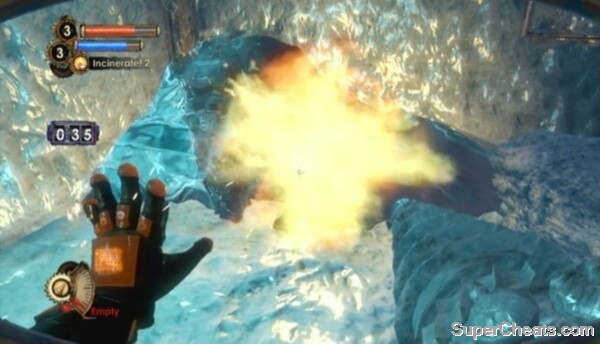 Use Incinerate to melt the ice mounds in Imago Fine Arts. |
You first must find a corpse to attach the Proximity Mines to. Kill the Houdini Splicer here and pick up his corpse with Telekinesis. Move away from the Elite Bouncer and drop the corpse by pressing the X/Square button. Then, equip your Launcher, set it to Proximity Mines and attach three mines to the Splicer corpse. With that, use Telekinesis to pick up the corpse and then propel it at the Big Daddy. Hit him with a couple of Frag Grenades or use Drill Dash and a couple of Shotgun blasts up close to finish him.
Killing the Elite Bouncer in J. Fischer Gallery With the Big Daddy out of the picture, Adopt or Harvest the Little Sister and then head up the steps at the southwest end of the room. Collect the Drill Specialist Gene Tonic and the Audio Diary (Gotta Keep it Together) in the backroom up here.
If you've rescued every Little Sister thus far, rescuing this one will yield a reward. Look for a gift from the Little Sisters at the Gatherer's Garden. The gift contains 120 ADAM, 100 Dollars, and the Demanding Father Gene Tonic (Little Sisters continue to gather when interrupted by Splicers).
Goal: Rescue or Harvest Three Little Sisters (Basement Storage)
The Basement Storage area is accessible through the door at the north end of the room -- the one with the carousel at its centre. Head up the stairs to the left of the door to Lamb's Garden and look for an Audio Diary (Dionysus Park's Weakness) at the base of the partially open door. The EVE Expert Gene Tonic is behind the diary.
You can kill the Elite Bouncer here easily with Proximity Mines, just as you did with the others. Hack the Ammo Vending Machine across from the double-door into Lamb's Garden and purchase at least three Proximity Grenades. Then, look for a red, explosive container across from the double-door and pick it up with Telekinesis. Drop the container by pressing X/Square and then equip your Launcher and set it to Proximity Mines. Attach three Proximity Mines to the container, then pick it up with Telekinesis and carry it into Lamb's Garden. If the Elite Bouncer is partially damage, hitting him with this should do him in.
Killing the Big Daddy in Basement Storage Adopt or Harvest the Little Sister once the Elite Bouncer has been taken care of. If you've adopted her, you can go for the last two gather spots, one of which is in Lamb's Garden. There is a second gathering spot in the carousel room.
Remember that a Big Sister will spawn when you deal with the last Little Sister of the level. She's easy enough to take care of with the Launcher. Just hit her with Frag Grenades and Proximity Mines and she'll fall in no time. Consider backtracking to the Imago Gallery and rescuing or harvesting the Little Sister there, especially if you hacked all of the Turrets and Security Cameras.
Goal: Board the Train to Fontaine Futuristics
Deliver the Little Sister once you're ready to face the Big Sister. Throw down any Mini-Turrets you have and wait for her to come to you. When the Big Sister is dead, fight your way back to the train station to see Stanley.
The final Audio Diary (A Plan) is in the security booth with Stanley. You're faced with another choice here: kill Stanley Poole, or let him live. The choice is easy if you're after the “Savior” achievement or trophy, which is unlocked by rescuing all Little Sisters in the game and sparing all characters when given the choice to let them live or die. Unlike Grace, you won't hear from Stanley again if you let him live.
Once you've made your choice, board the train and flip the switch to complete the level.
Fontaine Futuristics
Proceed through the gate, past the Vita-Chamber and into the next area. Upon stepping through the automatic door, turn left to spot the first Audio Diary (Alone at Last) of the level. Take out the Leadhead Splicers in the area below. Shoot an Electro Bolt at the pool of water they're standing in. Through the automatic double-door you'll find another gift from Eleanor -- this time the Damage Research Gene Tonic.Down the stairs, listen to Gil Alexander's message and then enter the Airlock chamber.
Goal: Find Gil Alexander's Next RecordingCycle the Airlock Control to fill the chamber with water. Step onto the ocean floor and walk the short route to the Fontaine Futuristics Airlock. Once there, cycle the Airlock Control to drain the water.
In the next area, after witnessing a Security Drone zap a Splicer, you will be attacked by a group of Houdini and Leadhead Splicers. There's a Vending Machine at the east end of the room, and a Healing Station behind the wall across from it. Use either of these if your health is low.
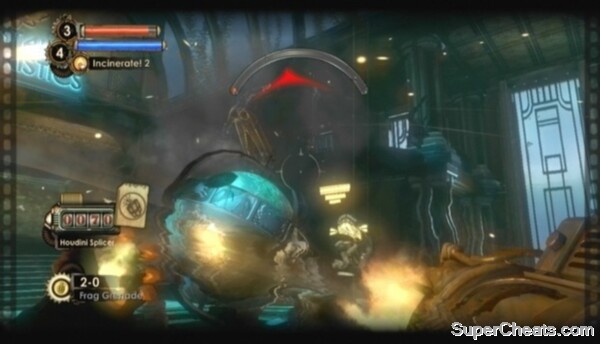 Kill the Splicers in Fontaine Futuristics. |
After dealing with the Splicers, proceed up the steps and to the gate. Interact with the highlighted Bio-Scan security panel next to the gate.
Goal: Defeat Gil's Security Guard
You must defeat the Alpha Series Gil sends after you to open the gate. He's not nearly as tough as he looks. Have Telekinesis selected so you can throw back the Frag Grenades he sends your way. When he appears, hit him with whatever you've got. When he shoots a Frag Grenade at you, catch it with Telekinesis and shoot it back. Hit him with a couple of these to kill him. Be sure to pick up the Launcher he drops and loot his corpse for ammo.
Killing Alpha Series Goal: Enter Fontaine Futuristics
Continue through the gate at the top of the stairs once the Alpha is dead. Listen to Gil's recording and then collect the highlighted Audio Diary (Agnus Dei) to the left of the desk. Interact with the Voice Activated Switch on the other side of the wall to open the gate. Attempt to gain access to the Security Office using the Voice Activated Switch around the other side, only to be thwarted by Gil.
Goal: Break Gil's Control Over Security
When the way is open, look for an Audio Diary (Means of Control) on the couch to the right of the hanging corpse. There is a Big Daddy in this area -- a Rumbler. You've faced this guy before. He's armed with a shoulder-mounted launcher, making him a fierce long-range fighter.
If you have Drill Fuel, hit him with a Drill Dash to get close and then just keep drilling until he falls. This strategy is most effective with the Freezing Drill Gene Tonic. If you're out of Drill Fuel, equip Telekinesis and any weapon; use Telekinesis to catch and throw the Rumbler's projectiles and Mini-Turrets, and continuously fire at him until he falls. Be sure to loot his corpse for Mini-Turrets.
Killing the Rumbler in Fontaine Futuristics With the Big Daddy out of the picture, either Adopt or Harvest the Little Sister and be on your way. As with every other Little Sister, you can gather from two corpses to earn an additional 120 ADAM before rescuing or harvesting her. The gather spots here are a lot more challenging than those in previous levels, so be ready.
There is an Audio Diary (Life After Sisterhood) on the ground next to the Vent in the southeast corner of the second-floor walkway. Once you have that diary, head to the southwest end of the walkway and move through the opening in the wall here. There's a Turret beyond the pillar at the bottom of the steps; there's no need to hack it since there aren't any Splicers here, so just destroy it. Drop through the hole at the other end of the corridor to enter the Plasmid Laboratory Facade. Look for an Audio Diary (A New Cognitive Model) on the chair here, as well as the Drill Power 2 Gene Tonic.
Goal: Destroy the Signal Relays (1/4)
Proceed through one of the doorways at the south end of this room. Destroy the highlighted Signal Relay attached to the Bot Shutdown Panel on the other side of the wall. Deactivate the alarm using the Bot Shutdown Panel when it goes.
Goal: Destroy the Signal Relays (2/4)
There is another Signal Relay in the Plasmid Showroom, which is accessible through the door at the west end of this area. Before entering the theatre, look to your left to spot a hole in the wall next to a sparking Turret. Take note of the blood-scrawled code on the wall behind the woman tied to the chair: 5254. With that, continue into the theatre.
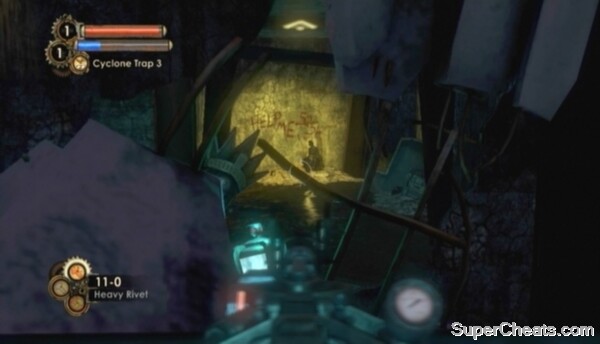 Take note of the code written here: 5254. |
Wade through the pool of water, then head up the steps and proceed through the double-door at the top. Wait until the Splicer here is killed by an explosion and then collect the ammo from the vandalized Vending Machine.
Stand in the spotlight when told. A Houdini Splicer will soon appear on the platform to your right. Place a Proximity Mine in the middle of the platform to kill her immediately. Another Houdini Splicer will soon appear on the platform to the left. Place another Proximity Mine there to kill him as well. Kill the remaining Houdini Splicers and an Alpha will appear. Be ready with your Launcher and Frag Grenades and hit him as he approaches. Equip your Drill when his health is low and hit him with Drill Dash to finish him.
The Plasmid Showroom After that ordeal, walk off the stage and destroy the highlighted Signal Relay on the Bot Shutdown Panel on the pillar straight ahead.
Goal: Destroy the Signal Relays (3/4)
The third Signal Relay is in the Marketing Department. The Marketing Department is through the automatic double-door off the east end of the second-floor walkway. Kill the two Houdini Splicers sitting at the table here, then exit through the door at the north end of the room.
Look to your left once through the door to spot an Audio Diary (Source of Volunteers) on the desk there. Move in and collect the diary while there is no electricity running through the water to avoid taking damage. The third Signal Relay is attached to the Bot Shutdown Panel on the other side of the wall. There is a Security Camera there as well, so destroy it before it triggers the alarm.
Gil has set up a Missile Turret in the previous room. Hit it with a Hack Dirt and hack it to your side, or simply destroy it. To destroy the Turret, catch one of its missiles with Telekinesis and throw it back.
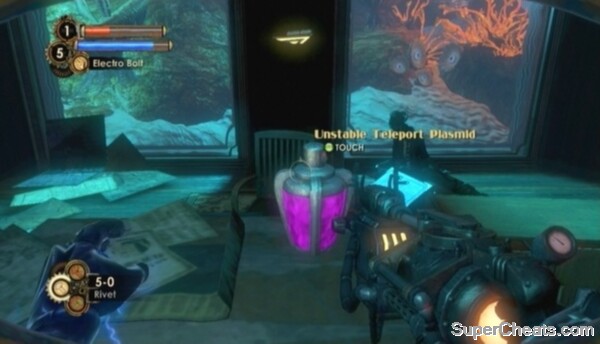 The Unstable Teleport Plasmid will eventually lead you to the Vending Expert 2 Gene Tonic. |
Goal: Destroy the Signal Relays (4/4)
The fourth and final Signal Relay is in Frank Fontaine's office, which is through the double-door at the north end of the second-floor walkway. There is a Turret in front of the door, so be careful. Inside the office is an Alpha. Hit him with a couple of Frag Grenades and whatever else you have. The Signal Relay is attached to the Bot Shutdown Panel in the southeast corner of the office.
Examine the Conspicuous Boar Mount in the southwest corner of the office to uncover a secret storage space. There are three locked safes and an Audio Diary (Goodbye to Fontaine) here.
Goal: Enter the Security Office
Downstairs, look for the Unstable Teleport Plasmid on the counter next to the Vending Machine and touch it. Look for it again on one the couches across from the Security Office. Touch it this time and you will eventually be teleported to a secret area. Collect the Vending Expert 2 Gene Tonic to be teleported back to the Lobby.
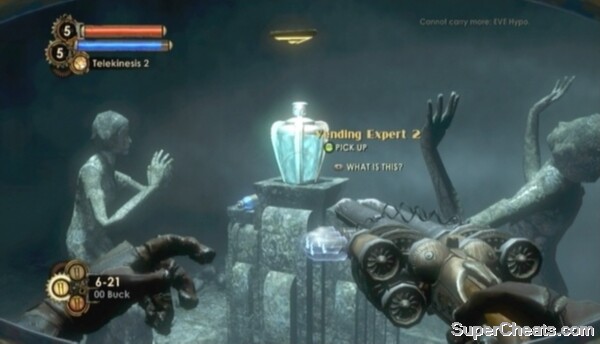 Touch the Unstable Teleport Plasmid one last time to reach a secret area. |
Goal: Get to Gil AlexanderThe way to the Plasmid Laboratory is through the automatic double-door next to the Ammo Vending Machine at the west end of the ground floor of Fontaine Futuristics. Upon entering the Lab Airlock, turn left to spot an Audio Diary (About the Experiment) on a table with some Big Daddy gear.
Goal: Find the Entrance to the Hidden Plasmid LaboratoryCycle the Airlock Control to fill the chamber with water. Drop through the hole in the ocean floor and continue down the path to another airlock. Inside, cycle the Airlock Control and enter the Plasmid Laboratory.
Goal: Find and Activate the Circuit BreakersThe two Circuit Breakers are on either side of the giant tank in the middle of the room. Look for an Audio Diary (Solving for X) below the north-most breaker.
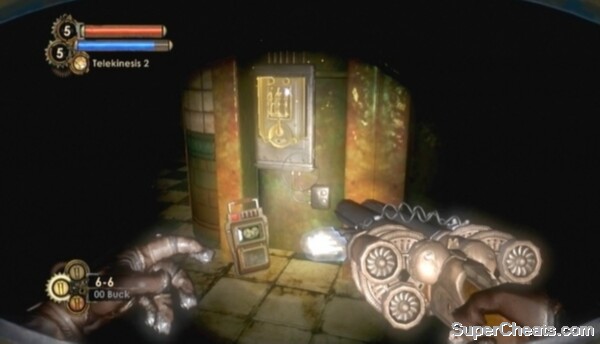 Activate the two circuit breakers to turn on the lights. |
There is an Audio Diary (Gil's Plan in Place) next to the Gatherer's Garden between the two sets of steps that lead up to the switch.
Activate the Power Mains Switch to complete the goal. Be ready for a fight though.
Goal: Collect 4 ADAM-Infused Plants
Collect the first ADAM-Infused Plant next to the Power Mains Switch. Two Alphas will then spawn. Use Telekinesis to pick up the Hypnotic Polyp by the base of the tank and propel it at one of the Alphas, or you could just use the Hypnotize Plasmid. Kill the surviving Alpha and then exit to the Showers through the door at the northeast end of the room.
There is an Audio Diary (Outlived Usefulness) in the Subject Observation room across from the steps into this area. Collect the diary and then enter the Test Pacification Chambers through the door at the other end of the room. Turn left to spot the second ADAM-Infused Plant. Collect the plant and attempt to leave the room. Kill the Alpha and Leadheads that appear, and then make your way back to the main room.
Goal: Collect 4 ADAM-Infused Plants (3/4)
A Little Sister and Rumbler Big Daddy have spawned in the lab. You know what to do. Equip Telekinesis and any other weapon, provoke the Rumbler and then simply catch his projectiles and throw them back with Telekinesis. That, or you can attach some Proximity Mines to one of the Alpha corpses in this room, pick the corpse up with Telekinesis and throw it at the Rumbler to greatly diminish his health.
Killing the Rumbler in the ADAM Research Laboratory When the Rumbler falls, loot his corpse for Mini-Turrets and then Adopt or Harvest the Little Sister.
Exit through the doorway at the south end of the room to enter the Live Test Facility. There's a Missile Turret under the stairs in the first room. Hack this turret to your side and it should take care of the Splicers here.
Proceed through the door at the far end of the room to enter the Test Subject Surgery area. The Rumbler here is special. He carries an Audio Diary (Meltzer's Choice). Kill him as you did the other two -- either by flinging a Proximity Mine-covered corpse at him or by throwing his projectiles back with Telekinesis. Search his corpse to find the diary.
Killing the Rumbler in Test Subject Surgery Adopt or Harvest the Little Sister once the Rumbler is dead and then collect the third ADAM-Infused Plant next to the surgery chair.
Goal: Collect 4 ADAM-Infused Plants (4/4)
Before leaving Test Subject Surgery, look for an Audio Diary (Goodbye, Dr. Alexander) by the Vent in the northeast corner of the area. To the right of this diary, hit the Door Control panel visible through the broken window here with a Hack Dart and hack the door open. Return to the previous room and head through the now-open door to find a Power to the People weapon upgrade station and an Audio Diary (Big Sister) next to it.
You have with you the final Little Sister of the game. If you've rescued every other Little Sister, a gift will be delivered to the Gatherer's Garden upon rescuing this one. This gift contains 250 ADAM, 100 Dollars, and a Creme-Filled Cake. Sweet.
Remember that delivering the last Little Sister of the level will spawn a Big Sister, so be ready for a fight before proceeding. The best place to face her is the room just outside the Test Subject Surgery area, especially if you've hacked the Missile Turret to your side. Throw some Mini-Turrets down and then hit her with Frag Grenades and whatever else you've got. Set fire to the oil spill with Incinerate if she's standing there.
Killing the Big Sister in Fontaine Futuristics When the Big Sister is dead, loot her corpse for ADAM and cash and then return to Test Subject Surgery. Make your way back to the Vent at the northeast end of the area and drop through the opening in the barred floor nearby to enter the Test Subject Holding Cells. The last ADAM-Infused Plant you need is in the southwest-most cell.
There is an Audio Diary (Betrayal) in the northwest-most cell. To get to it, enter the cell at the northeast end of the block (mind the turret) and move through the opening in the bars at the back of the cell. Walk to back of the northwest cell and use Incinerate through the bars to melt the ice that has the door frozen shut. Collect the diary and ammo in the northwest-most cell and then be on your way.
Goal: Lure Gil out of HidingStart back to the central room. You'll encounter some Leadhead Splicers, Houdini Splicers and a couple of Alphas, so be ready.
Make sure you're ready for a fight before activating the Sample Injection Controls in the main room. There is a Vending Machine at either end of the control deck if you need anything.
Goal: Extract Gil's Genetic Key
Approach the controls and interact with the highlighted panel to complete the goal. Pick up Gil's Genetic Key when it appears.
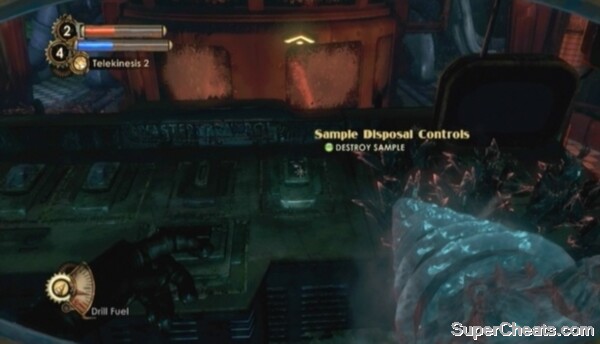 Leave Gil alive if you're after the Savior achievement/trophy. |
Goal: Unlock the Hidden Elevator
Head back to the airlock and cycle the Airlock Controls. Interact with the highlighted Airlock Access Panel on the ocean floor to unlock the way to the elevator.
Goal: Take the Elevator Down
Cycle the Airlock Controls to access the hidden elevator. Look to the right for the last Audio Diary (The People's Daughter) of the level. Don't miss it on your way out!
Step into the elevator and press the button to complete the level.
Persephone
Goal: Find Eleanor LambStart down the path to Persephone. When you come to the entrance, look to the left to spot a Power to the People weapon upgrade station. Upgrade one of your weapons and then continue into Persephone.
Down the hall past the Vending Machines, turn into the room to the right of the falling water and look on the ground next to the Vent here for an Audio Diary (Selling Ryan Short). Continue down the hall and into the Atrium after collecting the diary.
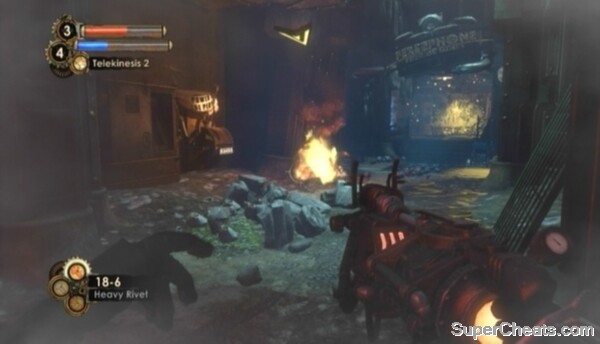 Don't miss this Power to the People station on your way into Persephone. |
Goal: Defeat the Big SistersYou're up against two Big Sisters here. This is an easy fight if you have the Hypnotize Plasmid. Even if you don't, the tools you do have should be more than adequate to get the job done. When the Big Sisters appear, equip Hypnotize and hit both of them. Hypnotize wears off in about 30 seconds, so keep an eye on the Sisters. While hypnotized they are a reddish tint; they will return to their normal colour when the effect wears off.
Other than using Hypnotize, there's a pool of water in the middle of the area, which you can charge with an Electro Bolt to momentarily stun the Big Sisters if they're standing in it. There is an explosive container next to the Health Station, which you can pick up with Telekinesis and propel at them. Your Drill is a good choice when only one Big Sister is left standing, especially if you have the Freezing Drill Tonic set. Hit a Big Sister with Drill Dash and then keep drilling. With any luck the Big Sister will freeze, allowing you to effortlessly finish her.
Defeating the two Big Sisters After defeating the Big Sisters, enter the Quarantine Room to trigger an event.
Goal: Escape the Holding Room
Approach the highlighted Vent and press the A/X button to climb through
Goal: Use the Security Release Lever
Continue to the second highlighted Vent at the other end of this room and crawl through to gain access to Sofia Lamb's office. Use the Cell Block Door Controls in Lamb's Office to complete the goal.
Up the steps across from the controls, look for an Audio Diary (Withholding Visitation) on the chair in front of the desk.
Goal: Find the Big Sister Suit Pieces
After collecting the diary, head up the steps across from the desk and chair to enter the Common Hall. There is another Audio Diary (Blessing in Disguise) on the toy submarine next to the statue here.
Proceed through the door to the left of the diary. You can gather 40 ADAM from the “Angel” here. Follow the arrow at the top of the screen to find the Big Sister Armor. Continue through the next double-door. There is another automatic double-door to your right that doesn't open correctly. Use the Vent next to it to enter the room. You can gather another 40 ADAM from the corpse here. Activate the Circuit Breaker to open the door.
 Gather from Angels to earn 40 ADAM. |
Up the stairs, approach the group of Splicers and turn left to spot another corpse. Gather from the corpse to gain 40 ADAM, and then continue down the hall. The Big Sister Weapon is in the room at the end of the hall.
Goal: Bring the Big Sister Suit to EleanorOnce you have all three pieces of the Big Sister Suit, follow the arrow at the top of the screen to Eleanor's room. Before giving her the suit, look under the bed to find an Audio Diary (Freeing Father).
Give Eleanor the Big Sister Suit to complete the goal.
Goal: Pick up the Summon Eleanor Plasmid
Take the Summon Eleanor Plasmid from Eleanor. With this Plasmid you can summon Eleanor to fight by your side. Very handy.
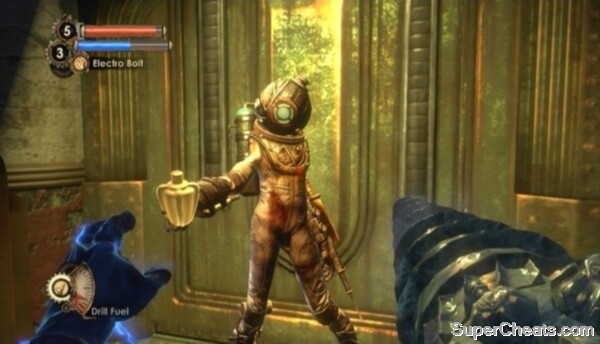 The Summon Eleanor Plasmid will make the last stages of the game a cakewalk. |
Follow the arrow at the top of the screen back to the Atrium. There are two Leadhead Splicers and two Brutes here. Now's a good time to use that new plasmid. Kill the Splicers and then make your way to the level exit.
Inner Persephone
Approach Sinclair's lifeboat on the docking platform. A couple of Splicers will soon enter the area, so use the Summon Eleanor Plasmid and take them out.Goal: Get to the Holding Wing
Get onto the second-floor walkway. Kill the Brute and Leadhead Splicers that appear and then enter the Holding Wing via the doorway at the south end of the walkway. The door into the next area is locked, but you can hack it open by shooting a Hack Dart at the highlighted Door Control panel visible through the broken window.
Goal: Override the Security Curfew
Proceed through the door and head to the other end of the corridor. In the room you come to, go through the door marked “Security Checkpoint A” in the northeast corner of the room. Make your way to the end of this corridor and enter the room there. There is an Audio Diary (Out With the Old…) on the desk here.
Return to the previous room after collecting the diary and press the highlighted Prisoner Admittance Button.
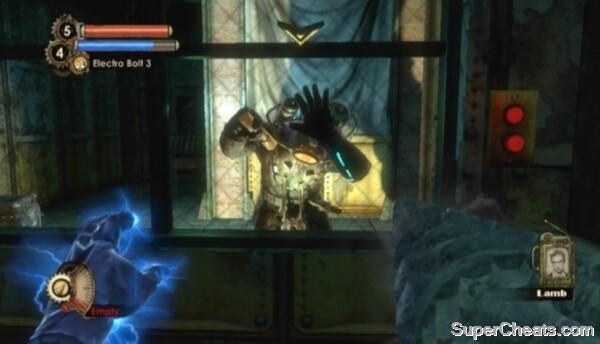 You need that key he's holding. |
Look for an Audio Diary (The Definition of Despair) next to the corpse on the table in the northwest corner of the Cafeteria. Continue through the doorway at the south end of the Cafeteria, then through the double-door and down the stairs you come to. There is another Elite Brute Splicer here. Once he has been dealt with, melt the ice mound with Incinerate and collect the Proximity Mines.
Exit through the opening in the wall. Shoot the Trap Spears blocking the way. Kill the two Leadheads in the next room and head up the stairs.
Sinclair is locked in the watchtower in the middle of the Holding Wing. There are two ways to get Sinclair out. One way is to enter the correct code in the Keypad to unlock the door. You'll need to piece together the code by listening to audio diaries found in the prisoner cells. The quicker way to get him out is by using the tunnel in the bathroom directly across from the watchtower door. Pay the 5 Dollars to open the gate and turn right upon entering. Melt the ice blocking the tunnel entrance with Incinerate and crawl through. Follow the tunnel and you'll come to a window. Use Incinerate to set fire to the oil visible through the window to draw Sinclair out. Then just crawl back through the tunnel, kill Sinclair and pluck the key from his corpse.
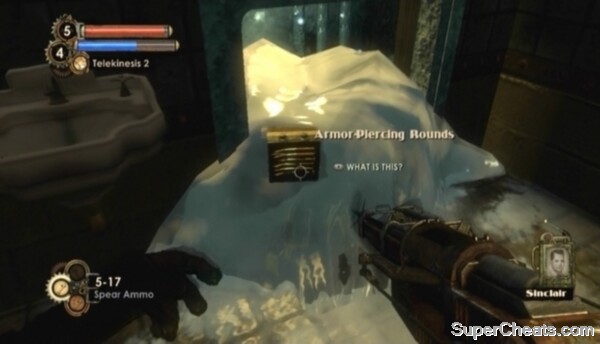 Melt the ice mound in the bathroom and follow the tunnel to a window into the watchtower. |
Enter the Cell Block South Quad via the doorway at north end of the room. Enter the northwest cell and crawl through the opening in the wall to find the first Audio Diary (Last Two Digits).
Return to the main room and enter Block D via the door at the south end of the second-floor walkway. There's a Turret in here, so be ready with a Hack Dart. Enter the cell to the left and look for an Audio Diary (First Two Digits) in the toilet. Enter the cell to the right and look for an Audio Diary (A Trade) on the bed.
There are two more audio diaries and two gene tonics still to collect in the Holding Wing. Move through the opening in the wall of the northern cell in Block C to enter to Block B. Search the hanging corpse in Block B to find an Audio Diary (No More Hope Left). Look for the Elemental Sponge Tonic in the sink in the north cell of Block B. Enter Block A through the door at the north end of the second-floor walkway. Look for an Audio Diary (A Generous Offer) on the ground in the southwest cell of Block A.
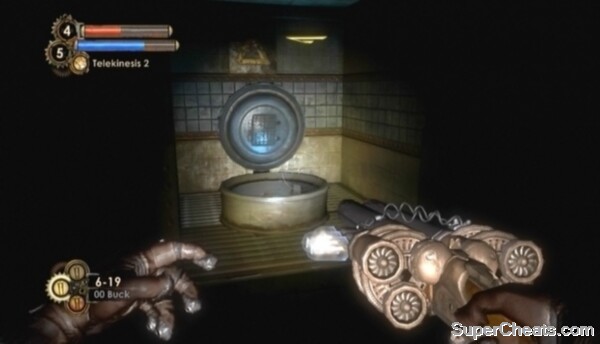 The Elemental Vampire Tonic is in one of the holes in Solitary Confinement. |
Goal: Use the Key Code to Break InWhen you have the audio diaries and two tonics, return to the watchtower door and enter 2673 into the Keypad to get at Sinclair. Note that even if you went after the code because you wanted to collect the audio diaries, it's still best to draw Sinclair out through the tunnel in the bathroom, as he is likely take a lot of damage from the fire and exploding barrels.
Killing Sinclair Goal: use Sinclair's Key in the TowerThere is an Audio Diary (Magic Sauce) in the watchtower Sinclair was holed up in, as well as a Power to the People weapon upgrade station. Activate the Security Override when ready. Two Alphas will appear, but you're more than capable of handling them this far in.
Goal: Return to the Docking PlatformFight your way back to the Docking Platform. You'll encounter Alphas on the way there. Just make sure you have Eleanor summoned.
Goal: Find the Pediatric Ward in the Therapy Wing
Back at the Docking Platform, enter the Therapy Wing through the door at the north end of the second-floor walkway. Move down the corridors until you come to a large, water-filled pipe. Enter the Recreational Therapy area through the door to the left of the pipe. Kill the two Splicers here and then search the corpse sitting on the couch by the window at the far end of the room to find an Audio Diary (Legs, Mouth, Arms, and Eyes).
With that, enter Intensive Therapy across from the Recreational Therapy entrance. Look for an Audio Diary (A Simple Question) next to the red chair at the north end of the room.
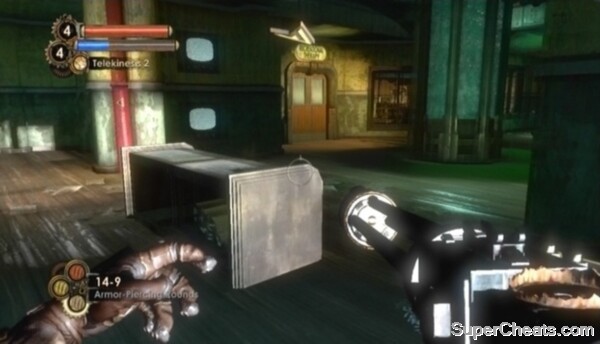 Look for the Pediatric Ward in the Therapy Wing of Persephone. |
There are two more diaries in the Administration Offices, which are accessible through the door at the west end of the hall. Upon entering the offices, head through the first door to your right and look for an Audio Diary (Sacrifices) on the shelf in the southeast corner of this room. Leave this room and go down the stairs straight ahead. There is a Leadhead Splicer and an Alpha down here, so be ready. Look for an Audio Diary (A Stratagem for Sinclair) on the desk in the northeast corner of the room.
Enter the Pediatric Ward when you have the three diaries. You must hold out in the Pediatric Ward as you are attacked by Alphas and Splicers. Summon Eleanor and this is easy.
Goal: Signal Eleanor in the Therapy Pediatric WardPress the highlighted Call Button when the ward is clear. With that, return to the Docking Platform. More enemies have spawned here.
Goal: Find the Pediatric Ward in the Infirmary WingWhen the Docking Platform is clear, enter the Infirmary Wing through the door at the west end of the second-floor walkway. Hack the Security Camera in the central room of the Infirmary Wing and then enter Ward A via the door in the southeast corner. Walk to the end of this hall and enter the door to your left to spot an Audio Diary (Such Freedom) on the bed there.
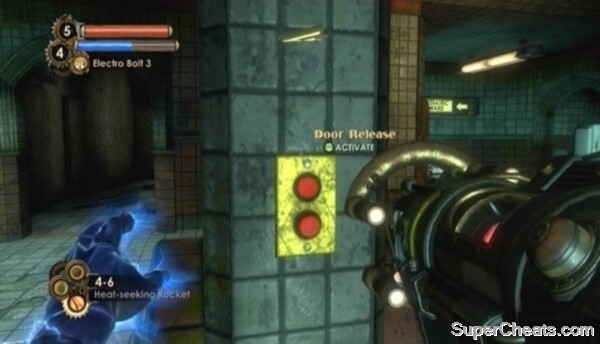 Press the Door Release button on the pillar in the Quarantine Area to access the Power to the People station. |
Two more audio diaries to collect. Head up the stairs just outside the Quarantine Area and enter Surgery through the double-door to the left. Look for an Audio Diary (They Feel Pain) on the counter by the Mail Tube in the second part of this area. Exit through the double-door at the other end of Surgery. Before entering the Pediatric Ward, enter the Autopsy Room through the door at the north end of the walkway. Look for the final Audio Diary (Alleviating Pain) on the sinks behind the pillar with the hanging corpse.
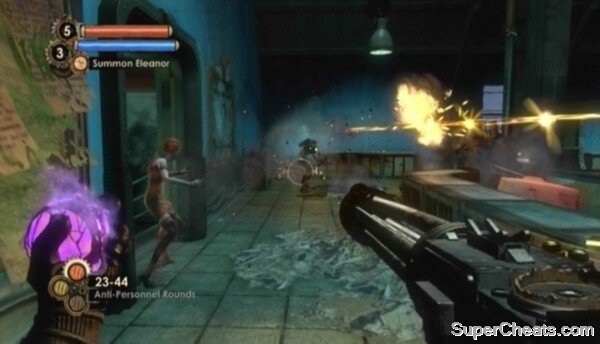 Summon Eleanor to your side for an easy fight. |
Goal: Signal Eleanor in the Infirmary Pediatric WardPress the highlighted Call Button at the south end of the ward when the area is clear.
Goal: Return to the Docking Platform
Make your way back the Docking Platform for the final push. Approach Sinclair's lifeboat to get started.
Goal: Survive Lamb's Final Assault
The Summon Eleanor Plasmid is disabled for the first part of this fight. You must hold off the Splicers until the water in the lifeboat is boiling. You'll be attacked by Leadhead Splicers and Alphas. Take out the Alphas with your Launcher, and the Leadheads with your Shotgun, Machine Gun, or Rivet Gun. There's a Vending Machine next to the Vita-Chamber at the back of the area if you need First Aid Kits.
Summon Eleanor with the Plasmid as soon as she gives word that she's available. Now many Elite Brute Splicers and more Alphas will spawn, so you definitely want Eleanor's help. Keep fighting until the water in the lifeboat is completely evaporated.
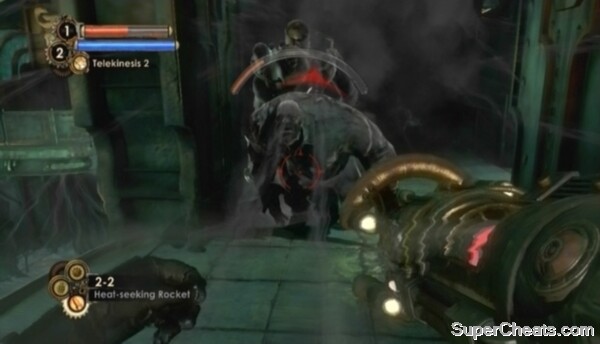 Hold of the enemies until you can summon Eleanor. |
Goal: Flood the Docking Platform
You must destroy the two highlighted pipes to flood the Docking Platform. The enemies are pushing really hard at this point, so you'll want to break the pipes quickly. Use Heat-Seeking Rockets if you have them, because Frag Grenades will just bounce off.
Shatter both tubes to flood the platform.
cannot load player config
The Final Battle Goal: Get to the Elevator
Follow the arrow at the top of the screen and enter the Escape Vessel to win the game.
Now sit back and enjoy the ending -- you've earned it! There are few different endings, but the actual ending video is determined by how you dealt with the Little Sisters. You'll see the good ending if you rescued all Little Sisters, the evil ending if you harvested all Little Sisters, or the neutral ending if you rescued some and harvested some.


