Assassin's Creed 4: Black Flag
Assassin's Creed 4: Black Flag

Assassin's Creed IV: Black Flag is the sixth installment of the world-renowned and critically-acclaimed stealth action video game series Assassin's Creed. Acting as the official canon prequel to Assassin's Creed III, this time you take the helm of pirate and assassin Edward Kenway, the grandfather of Connor Kenway, and one of the most feared and respected name in the world of pirates during his time.
This entry keeps the same tried and tested open-world stealth oriented gameplay, incuding classic missions like assassinations and chases. New to the series however, is the open-sea pirate gameplay, which lets you play as Captain Edward manning his own ship, exploring the vast oceans finding valuable loot, fighting other pirates and royal patrol ships, capturing enemies and strongholds, recruiting new crew members, hunting marine fauna and so much more. The open-sea part takes 50% of the whole gameplay, while the other 50% is the same assassin gameplay we all know and love. This means the game has twice more content than the previous games, offering players hours and hours of quality and fun gaming experiences.
Our Unofficial Guide will cover everything including the main story, side missions, collectibles, extras, Achievements and more. Enjoy your browsing and please use the menu on the right to navigate the guide.
Sequence 1 - Edward Kenway
Bullseye
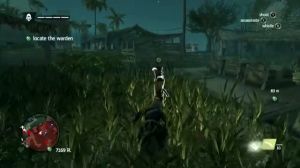
Upon taking control of Edward, swim to the beach and rendezvous with the Assassin. Chase after the assassin and once you find the viewpoint, climb it and synchronize with it. Viewpoints will reveal the immediate area and will allow you to fast-travel to them. You'll also see the collectibles and activities in the area revealed by the viewpoint. To do this, climb atop the first viewpoint, then press B to synchronize. You can go ahead and collect all collectibles in the area and once you're done wandering around chase after the target again.

Shortly after reaching the second viewpoint, you'll find the assassin who will still run away. Pursue him by running on and over obstacles until you reach an open area where he'll make his stand and fight you. Don't be too aggressive; keep your stance and use basic counterattacks to overpower and kill him.
The First Victim
You can return to the area revealed by the second viewpoint and start collecting the items there. Aside from the treasure chests, you can find a floating Shanty (song to be sung by your crew when sailing) and a Mayan Stelae (easy puzzles which will allow you to collect Mayan Stones - requirements for unlocking the Mayan Armor). Shanties need to be chased since they'll float away when you get near. The trick however is to know their fixed patterns and paths. Once you do, you can just take shortcuts and wait ahead of them. This is pretty useful especially when collecting shanties in cities.
The third viewpoint is on the tall waterfall. Synchronize with it to follow reveal the are and the last batch of collectibles. When ready, head down and enter the restricted area. Keep hiding under foliage and slowly make your way to the target, disposing off some guards along the way. Always use the stealth skill when you get near them or equip your bare fists first so you can knock the guards out if you don't want to kill them.
Approach the merchant after taking out all the enemies, grab any items around you, (including the treasure map and the buried treasure in the same area) then swim out to the ship located at the sea. Go to the bridge and take the wheel. Sail away avoiding any obstacles that may damage your ship and finally arrive at Havana.
Abstergo Scene 1
This first Abstergo intermission scene is very straightforward. First
up, respond to Melanie by looking up first, then look down to calibrate
your sensory areas. After that , follow herinto down to the lobby take
your new tablet.
Keep following her again and ride the elevator, then go to the Subject 17 floor. After the meet-up with your boss, you can go ahead to your workstation and log-in to the Animus system to continue with the story. There are computers that you can hack and Sticky Notes that you can collect in this "real world" part of the game. You'll be introduced to hacking later on. Don't worry about the sticky notes and computers at this point; all of them can be collected even if you finish the game. These collectibles don't count towards the 100% synchronization of Edward Kenway's memory sequences.
Keep following her again and ride the elevator, then go to the Subject 17 floor. After the meet-up with your boss, you can go ahead to your workstation and log-in to the Animus system to continue with the story. There are computers that you can hack and Sticky Notes that you can collect in this "real world" part of the game. You'll be introduced to hacking later on. Don't worry about the sticky notes and computers at this point; all of them can be collected even if you finish the game. These collectibles don't count towards the 100% synchronization of Edward Kenway's memory sequences.
Sequence 2-1: Lively Havana
Optional Missions:
- Tackle the Pickpocket
- Use smoke bombs to escape combat
Follow Stede as he walks towards town and just enjoy the chat with him. Once you've reached the general store, stop by and purchase a sword. The best choice at this point is the pair of British Cutlasses since they're cheaper than their Spanish counterpart but still has the same stats.
Next, you'll have to climb the nearby church tower which happens to be a viewpoint as well. Climb up and synchronize to reveal the immediate area. Shortly after synching, Stede will be robbed so move to the edge of the beam of the church tower and do an Eagle Dive to the haystack below. Get out of it and chase after the thief. When you are almost near him, tackle him by pressing the B, and recover his loot. Tackling the thief will complete the first of the two optional objectives in this sequence.
Return to Stede and follow him to the tavern. After a short scene, you'll be in a fistfight against some thugs. Just obey the onscreen tutorials during the fight since this also servers as the game's combat tutorial. This will teach you how to block and counter. Follow the video below:
When the bar brawl ends and the guards arrive, equip the Smoke Bombs by pressing left on the d-pad. Use a smoke bomb to start your escape. Run away outside the tavern and look for a good hiding area. Just drop more smokes if they spot you again. You must become anonymous to end the mission.
- Tackle the Pickpocket
- Use smoke bombs to escape combat
Follow Stede as he walks towards town and just enjoy the chat with him. Once you've reached the general store, stop by and purchase a sword. The best choice at this point is the pair of British Cutlasses since they're cheaper than their Spanish counterpart but still has the same stats.
Next, you'll have to climb the nearby church tower which happens to be a viewpoint as well. Climb up and synchronize to reveal the immediate area. Shortly after synching, Stede will be robbed so move to the edge of the beam of the church tower and do an Eagle Dive to the haystack below. Get out of it and chase after the thief. When you are almost near him, tackle him by pressing the B, and recover his loot. Tackling the thief will complete the first of the two optional objectives in this sequence.
Return to Stede and follow him to the tavern. After a short scene, you'll be in a fistfight against some thugs. Just obey the onscreen tutorials during the fight since this also servers as the game's combat tutorial. This will teach you how to block and counter. Follow the video below:
Beat 'Em Up
When the bar brawl ends and the guards arrive, equip the Smoke Bombs by pressing left on the d-pad. Use a smoke bomb to start your escape. Run away outside the tavern and look for a good hiding area. Just drop more smokes if they spot you again. You must become anonymous to end the mission.
Sequence 2-2 ...And My Sugar
Optional Missions:- Hire dancers to distract guards
- Stay out of combat
Use the Eagle Vision to find the two guards you need to track. Stay quiet while tailing them, utilizing stealth through the crowd-blending. You will know that you have already blended if Edward turns to gray when he is close to any civilians. Keep following them while maintaining proper distance. It will be a good idea to hire dancers so you can blend in their midst while walking. The targets may walk through restricted areas so it will be a good idea to distract the guards using your hired dancers.
Another alternative way of tailing them is through the rooftops. Just take out any guards on the rooftops or avoid them completely to avoid blowing your cover. After the targets stopped running, hire another dancer group to blend in and walk beside them so you can eavesdrop their conversation.
Soundtrip
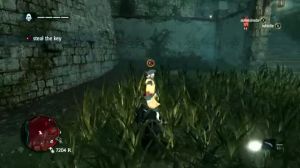
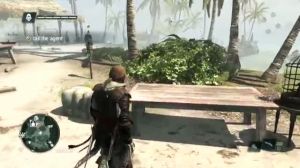
Upon reaching the gallows, use Eagle Vision again and wait until you have tagged Mendoza. When Mendoza reaches the next building, hire the nearby dancers. Slowly go the building where Mendoza enters and use the dancers to distract the guards. Head inside and wait at the corner, when he looks away from you, get near him and hold B to loot him. You can also assassinate him and steal his key if you feel like it.
Next, you have sneak inside the fort. The best approach to sneak in is through the western corner of the fort where you can find wooden beams and poles on the wall. Take out the nearby guard and hop on the branches and poles. Go up the first wall and take out the guards above the ledge. Head up again and sprint to the stockroom when the guards are looking away. Get your items and head out the fort. Finally, return to Stede to complete the mission.
Sequence 2-3: Mister Walpole, I Presume
- Complete Rogers' shooting challenge
- Pickpocket all 3 Templars
Head to the governor's home villa. Reach the terrace and join the guests doing target practice. Just follow the screen tutorials about pistol shooting. Shortly after, Rogers will challenge you. IN this challenge, you have to need to hit all the targets under 20 seconds. Use manual aim for accurate shots on these stationary targets. Remember to reload after every 4 shots, then quickly hit the other targets.
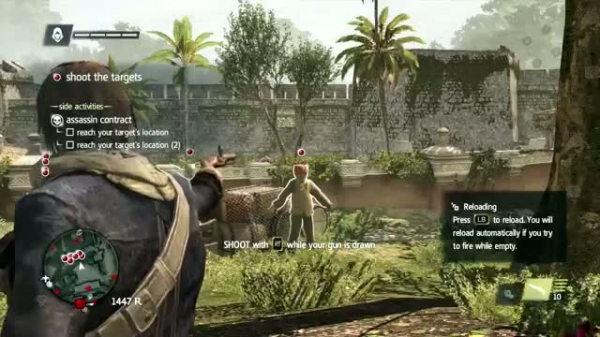
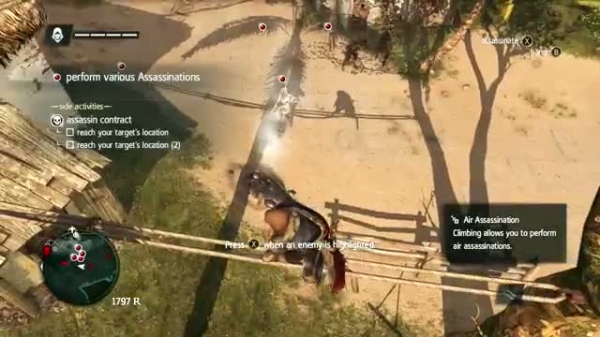
After the challenge, talk to Du Casse next to receive a pair of hidden blades. The next challenge is to perform various types of assassinations. Just complete all of these assassination techniques:
- Haystack Kill
- Front Stealth Kill
- Behind Stealth Kill
- Running Assassination
- Air Assassination
After completing the challenges,talk to Du Casse again and you will meet Governor Torres afterwards. When the cutscene ends, you'll have the optional objective to pickpocket all of them. Approach them silently and pickpocket all of them from behind carefully. Listen in again to finish this segment.
Sequence 2-4: A Man They Call The Sage
Optional Missions:- Tackle the Sage from above
- Use the pistol in combat
Once the mission starts, follow the group until you are ambushed by assassins. Equip your pistol by pressing left on the d-pad and use it to shoot down the gunners on the rooftops. Prioritize them since they can critically wound or kill Torres very quickly. While protecting Torres, don't waste too much time fighting in the same area. Kill a few of the assailants, then go to the next areas while staying within the group.
Continue moving forth with the group until you reach the church. The Sage escapes and you'll have to chase him down. The sage will follow a fixed path so it is possible to stay on the ground while pursuing him, take shortcuts and just wait ahead of him. Once you have the chance, tap B while running and you will successfully tackle the Sage. This should complete the second optional mission and the main mission itself.
Sequence 2-5: Claiming What's Due
Optional Missions:
- Stay out of combat
- Kill guards from stalking zones
Upon the start of the mission, jump above the fence of the Governor's plantation and move through using the crop fields for cover. Use Eagle Vision to tag the guards. It will make your job easier if you'll take care of the oblivious guards stealthily. There's a lot of ways of doing this so do what you prefer to eliminate them without raising an alarm.
Continue further the fields until you find some stairs leading to the villa. Activate Eagle Vision again to see the captain holding the key. Take him out then loot the key away from him.
Go up the stairs and go in the bushes at the back wall. Move through the bushes on the western side until you reach a watchtower. Feel free to take out the guards patrolling nearby that may compromise your position. You have to take out the guard on the watchtower since he can spot you from afar and can even shoot you. Once he's taken care of, go over the wall near the watchtower and hide immediately on the foliage.
Keep moving to the left and climb the shed. Silently jump up by the branches heading to the prison, then open the doors of the prison for a cutscene. Mission complete.
Sequence 2-6: The Treasure Fleet
Optional Missions:- Free 23 pirates
- Kill 3 guards from behind corners
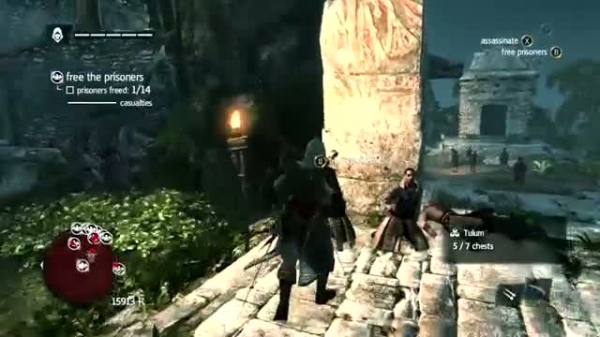
Follow the onscreen prompts to free yourself from the shackles. Once free, stand by the door and whistle to get the guard's attention. Grab the guard and kill him when he gets near. Go to the next cabin and check the left area. Whistle again then perform a stealth kill on the guard that you lured. Continue to the last room and and kill the the last guard stealthily to complete the optional mission. Recover your gear then climb the nearby ladder to reach the ship's deck.
Once outside this ship, engage all enemies and free the 9 prisoners here. You only need to free 18 pirates for the main mission but you have to release 23 to complete the other optional mission. (And get the 100% mission synch) Once done, swim towards the next ship to the east. Like before, do not use stealth on the ship; go under the deck and clear the guards so you can release all prisoners inside.
This next one is the final Man O' War ship for this mission. Board it and take out all enemies on the deck. Once done, enter the hatch door in the middle of the ship and climb down. Take out the remaining guards inside and free the last batch of pirates. Go back to the deck and to the large brig in the sea beside the man o' war. Take out the brig's captain then eliminate his remaining crew.
Capping the Cap
After commandeering the brig, you'll have to control it and escape. Sail to the objective point and keep your speed to go out of the enemy ships' firing range. Faster gunships will pursue you but you don't have to engage them; just sink them if ever they're getting in your way. When the rogue wave is about to hit your ship, face it head on or brace yourself. You should also do the latter in case your ship is along the path of a watersprout.
Sequence 3-2: This Tyro Captain
Optional Missions:
- Shoot an iguana
- Air assassinate an ocelot
Head to Abaco Island, just ignore the enemy ships for now since you are not yet upgraded you ship for effective naval combat. Once docked, swim in the waters then head ashore. Find the island's only viewpoint first on the map, then synchronize to fully reveal what the island has to offer.
For the first optional mission, equip your pistol and shoot at least one iguana located in the island, then skin it afterwards. Follow the video below for the location:
Use Eagle Vision to look for and tag the ocelots, they are very easy to find running around the island. For the optional objective, you have to climb up a tree or branch then wait for the wild feline to get near, within air assassination range. Skin the animal and repeat the process until you get the necessary materials to craft the items you need to complete the mission.
Enter to the Crafting menu via the Start button. Create a Pistol Holster II and Health Upgrade 1. When done, When done, collect all collectibles in the island then return to your ship and talk to Ade.
- Shoot an iguana
- Air assassinate an ocelot
Head to Abaco Island, just ignore the enemy ships for now since you are not yet upgraded you ship for effective naval combat. Once docked, swim in the waters then head ashore. Find the island's only viewpoint first on the map, then synchronize to fully reveal what the island has to offer.
Synching
-- Video coming soon --
-- Video coming soon --
For the first optional mission, equip your pistol and shoot at least one iguana located in the island, then skin it afterwards. Follow the video below for the location:
Cold Blooded
-- Video coming soon --
-- Video coming soon --
Use Eagle Vision to look for and tag the ocelots, they are very easy to find running around the island. For the optional objective, you have to climb up a tree or branch then wait for the wild feline to get near, within air assassination range. Skin the animal and repeat the process until you get the necessary materials to craft the items you need to complete the mission.
Here Kitty
-- Video coming soon --
-- Video coming soon --
Enter to the Crafting menu via the Start button. Create a Pistol Holster II and Health Upgrade 1. When done, When done, collect all collectibles in the island then return to your ship and talk to Ade.
Sequence 3-2: Now Hiring
Optional objectives:
- Disarm and kill 3 guards
- Shoot the rope to save the pirate
This mission will introduce you to some of the ways to recruit crew members for your ship. Go to the nearest group of pirates and defeat all enemies to rescue them. For the first optional objective, you have to unequip your weapon and just use your bare fists to counter enemy attacks. This will disarm the attacker and will enable you to get his weapon. Use the same weapon to kill the disarmed guard; repeat this three times to complete the optional objective.
Head to the pirate markers and just eliminate guards. Keep doing this until you get the required amount of recruits.
Head to the pirate marker near the fort. Another optional objective will be available here. Get near the gallows, aim for the rope above the captive's head and shoot it to save him from execution. Engage the guards and take them all out. Be careful of the snipers on the fort walls as well. Use your enemies on the ground as human shields when the prompt to do so appears.
Once done, return to the tavern to complete the mission after the cutscene.
- Disarm and kill 3 guards
- Shoot the rope to save the pirate
This mission will introduce you to some of the ways to recruit crew members for your ship. Go to the nearest group of pirates and defeat all enemies to rescue them. For the first optional objective, you have to unequip your weapon and just use your bare fists to counter enemy attacks. This will disarm the attacker and will enable you to get his weapon. Use the same weapon to kill the disarmed guard; repeat this three times to complete the optional objective.
Head to the pirate markers and just eliminate guards. Keep doing this until you get the required amount of recruits.
Ahoy Mateys
-- Video coming soon --
-- Video coming soon --
Head to the pirate marker near the fort. Another optional objective will be available here. Get near the gallows, aim for the rope above the captive's head and shoot it to save him from execution. Engage the guards and take them all out. Be careful of the snipers on the fort walls as well. Use your enemies on the ground as human shields when the prompt to do so appears.
Once done, return to the tavern to complete the mission after the cutscene.
Sequence 3-3: Prizes and Plunder
- Use a swivel to kill 3 sailors
- Plunder 20 rum
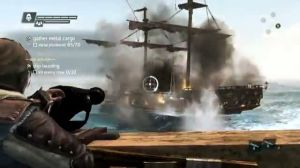
Talk to your mates by the beach to start this mission. When you're sailing out in the ocean, use the spyglass by pressing RB to look at any enemy ships. This will reveal the ship's type, nationality and cargo. You can also tag a target ship so you can easily locate it.
When locked to the target ship, speed up and get into attacking range. Your ship has different types of weapons, each with their own strengths and uses. Keep attacking the target ship until it becomes critically damaged and paralyzed. Position your ship beside it, then hold B to board. During the boarding process, you can release steering wheel and use the swivel gun.
For the optional objective, you have to hit and kill 3 enemies using it before hopping aboard the enemy ship. Take out the required number of opponents to successfully complete the raid. Just keep doing this until you reach the required amount of cargo. The second optional mission requires you to collect 20 rum which should be an easy task as long as you plunder ships repeatedly.
Free Shipping
-- Video coming soon --
-- Video coming soon --
Once done, head back to Salt Key and grab an intermediate hull upgrade from the harbourmaster shop to complete the mission. You can also take your time to collect all collectibles and complete all activities while you're still in Salt Key Bank.
Sequence 3-4: Raise the Black Flag
Optional Missions:
- Plunder a hunter ship
- Plunder 30 sugar
Before sailing out, I suggest completing all activities and collecting all collectibles while you're still in Salt Key Bank to get more money that you can use to buy the available upgrades at this point. Sail out of the village when ready then press RB to use the spyglass and find target ships.
Find the schooners that carry sugar, they will be your main targets for the optional mission in case you haven't collected enough sugar from your previous plundering. For the other optional mission, you have to increase your wanted level to get the attention of a hunter ship. They are easily distinguishable because of their trademark bright-red sails; besides, the game will show their icon on the map and on your screen. Hunter ships are more powerful and armored compared to their ordinary counterparts. As you increase your wanted level, more powerful hunter ships will appear to hunt you down.
Since your Jackdaw isn't that upgraded yet, combating LV1 hunter ships should suffice. To increase your wanted level, keep plundering ships or destroying them. Once a hunter ship appears, approach it to get into firing range then use your broadside cannons and swivel guns to weaken it. Once weakened, you can proceed with the boarding process similar to ordinary ships. For future battles, it help having upgrades such as tougher hull armor, mortars, and more powerful cannons for the Jackdaw.

When you have enough metal and sugar, go back to Salt Key, talk to the local officer by the beach and pay 200 reales to bribe him and clear your wanted level. You're basically able to free roam now using your ship. When you're ready to continue with the main story, sail to Andreas Island next.
- Plunder a hunter ship
- Plunder 30 sugar
Before sailing out, I suggest completing all activities and collecting all collectibles while you're still in Salt Key Bank to get more money that you can use to buy the available upgrades at this point. Sail out of the village when ready then press RB to use the spyglass and find target ships.
Find the schooners that carry sugar, they will be your main targets for the optional mission in case you haven't collected enough sugar from your previous plundering. For the other optional mission, you have to increase your wanted level to get the attention of a hunter ship. They are easily distinguishable because of their trademark bright-red sails; besides, the game will show their icon on the map and on your screen. Hunter ships are more powerful and armored compared to their ordinary counterparts. As you increase your wanted level, more powerful hunter ships will appear to hunt you down.
Since your Jackdaw isn't that upgraded yet, combating LV1 hunter ships should suffice. To increase your wanted level, keep plundering ships or destroying them. Once a hunter ship appears, approach it to get into firing range then use your broadside cannons and swivel guns to weaken it. Once weakened, you can proceed with the boarding process similar to ordinary ships. For future battles, it help having upgrades such as tougher hull armor, mortars, and more powerful cannons for the Jackdaw.
When you have enough metal and sugar, go back to Salt Key, talk to the local officer by the beach and pay 200 reales to bribe him and clear your wanted level. You're basically able to free roam now using your ship. When you're ready to continue with the main story, sail to Andreas Island next.
Sequence 3-5: Sugarcane and Its Yields
- Sabotage 2 alarm bells
- Stay out of combat
This mission will require you to follow a ship so if you've been plundering ships prior to this mission, it will be a good idea to reset your wanted level so no hunter ships will disturb you in getting a 100% mission synchronization.
Walk with Kidd as he explains the situation a bit. Head to the top of the rock nearby and use your Eagle Vision to see the target engaged in a conversation. You have to observe the target and keep hiding from sight to prevent alarming him. Once he reaches his docked ship, you'll be given a few seconds to race back to the Jackdaw. Quickly run towards your ship and hop on the obstacles to reach your ship's steering wheel in time.
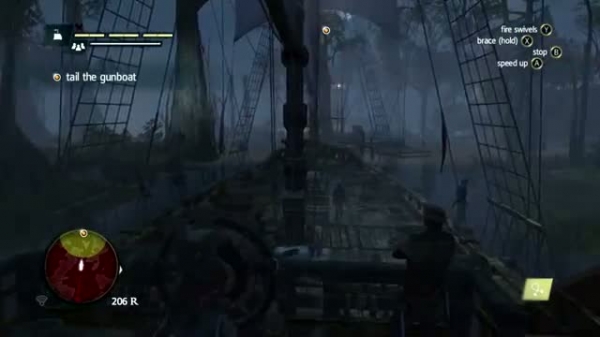
When following the ship, you'll enter the restricted area. The optional objective to avoid combat will be activated during this phase. Make use of the map at all times since visibility is limited due to the fog. Your Avoid the yellow-colored line of sights of your enemies by making hard turns left and right. To do a quick turn, slow down by pressing B, then speed up by pressing A, while holding left or right. It is much faster if you tap B 3x, then tap A 3x while turning. Keep following the target schooner while avoiding enemy patrol boats and you'll be cleared of the optional objective. Continue until the schooner reaches the plantation. Dock from a distance and continue on foot. Sprint to the marker to start the eavesdropping.

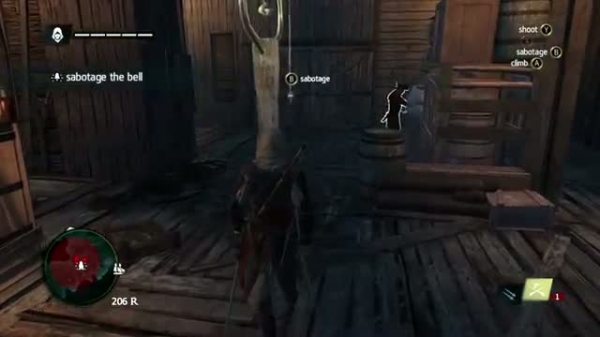
Stay close to the target as you follow him across the area. Move along the crops to remain hidden. Eventually, your target will reach the warehouse and look for the guard holding the warehouse key. After this, you can take your time in making moves to sabotage two alarm bells. One is guarded by a drunk soldier and another one is located to the north beside the warehouse. Be careful of the guard on the guard tower as well; take him out if he's giving you a hard time.
To find the guard holding the key, use your eagle vision to identify and tag him. He'll be walking with a buddy so it will be a good idea to take them out using double-assassination. Their patrol route is fixed so it's easy to plan your next course of action. There's a narrow space between two houses near the warehouse where you can hide in the grass, wait for them to pass a bit then quickly sneak behind them to stab them safely out of sight.
Once you have the key and both alarm bells disabled, you can proceed to the warehouse and use the key to open it. What you did right now is the same process you'll do when looting the other Warehouses in the region.
Sequence 3-6: Proper Defenses
Optional Missions:
- Use one broadside to sink 2 boats
- Use heavy shot to sink 2 ships
To start this mission, you'll have to sail to Salt Lagoon. Upon arriving in the island, take your time to synchronize with the viewpoint and collect all collectibles. You can also hunt some deers and skin them so you can craft a Health Upgrade II. You also need to have purchased the Heavy Shot upgrade for your ship to complete one of the optional missions. Once ready, talk to your pirate buddies to activate the mission.
Hop on the Jackdaw and sail to the green-colored area. Your target will be a huge ship called The Arca so search the objective point and use your spyglass to tag it once you've found it. Maintain enough distance while tailing it. Stay away from the detection range of your target and other ships; utilize hard turns to avoid them or just simply stay out of their path. Once the Arca stops and get attacked by another pirate ship, the crew will become aware of your position and will start aiming mortar fire at you in the form of yellow circles on the water. Maneuver your ship away from these circles or if you can't make it in time, brace for impact to minimize the damage.
You will face 8 enemy ships after the target ship escapes. The two optional objectives will become available at this point. For the first objective, you have to line up two ships and destroy them using your broadside cannons. For the second optional objective, you have to get up-close-and-personal with a ship and fire your Heavy Shot. Take note that Heavy Shots don't require aiming; just get close to another ship and "look" at your heavy cannons on deck to "highlight" them and fire them. Destroy two ships at close range to complete this objective.
Sequence 3-7: A Single Madman
- Stay out of combat
- Air assassinate Du Casse
Grab the rope and swing out to the sea. Head to the shore and climb the ruins. You can collect the collectibles along the way. Make your way to the top of the ruins and you'll reach a jungle path. There are guards patrolling the path so you have to take them out stealthily as part of the first optional objective.
Hide in the foliage and take out the guards silently. Continue ahead and you'll find two guards. You can double-assassinate them from above using a tree branch behind them. Continue forth and you'll encounter a split in the path. Both passages will lead to some walls with a lone guard patrolling.
Take him out and instead of following the objective marker, turn to the left to find a small waterfall and a stone wall. Go past that and there's another lone guard walking around. Take him out to loot the chest nearby. There's also a shanty here and a white jaguar that spawns here as well. The jaguar is dangerous so you have to kill it quickly; otherwise it will keep doing hit-and-run attacks until you succumb. Don't forget to get its skin once you kill it. Return to the main path and follow the objective marker. Take out the guards along the way.
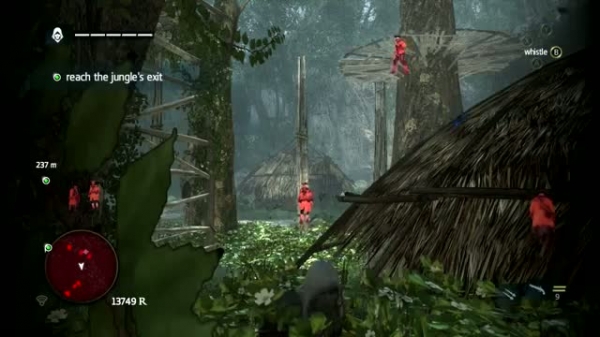
You'll eventually find several stationary guards along the trail. Avoid any confrontation to make sure your optional objective is still intact. You just have to be careful of the only patrolling guard. There's an off-trail to the right which will allow you to bypass them completely. You can just pass them and run towards the path to the right directly then open the chest along the way.
Hop on the branches and trees until you reach an abandoned native settlement with several more guards – including a gunner. Hide in the foliage then tag the targets with your eagle vision to keep track of their movements. The gunner and the two guards on the ground are just walking around in circles. Move around the hut and take cover in the bushes nearest to their path. From there, you can let them pass a bit then double-assassinate them. If you want to go loud though, you can just get close enough and use your pistol to take out the gunner. Make sure to leave the area immediately and hide far away since the shot will attract the other guards. Once you've patiently and stealthily dealt with the guards, you can collect the animus fragment on top of the wooden platform nearby without any worries of being discovered.
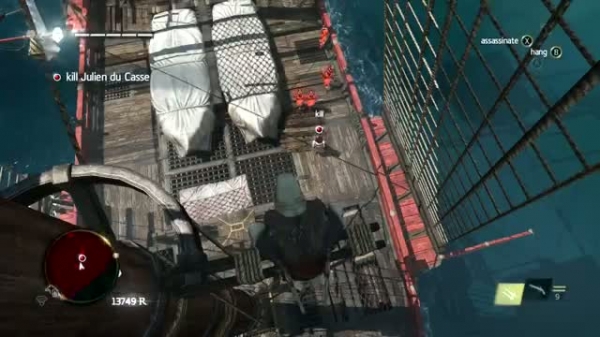
Follow the path and you'll discover a small village where the target ship is docked. If you haven't been discovered, the first optional objective will be complete at this point and the second will be revealed. Since you can only do this when your target is unaware of your presence, you'll have to remain discreet and silent.
Employ stealth and take out the enemies without alerting nearby guards. You have to make your way to the bow of the ship since that is where you can get into the perfect position to attempt the second optional objective. Upon reaching the bow of the ship, climb up and be careful not to be seen by the roaming patrols. You have to use the ropes connecting to the masts.
Once you're there, make your way to the main mast in the middle and climb down slowly to the grid of ropes on either side. Climb down enough for you to highlight a target below and for your assassination button to be enabled. Wait for the target to pass and assassinate him from above to complete the optional objective and the mission.
Abstergo Scene 2
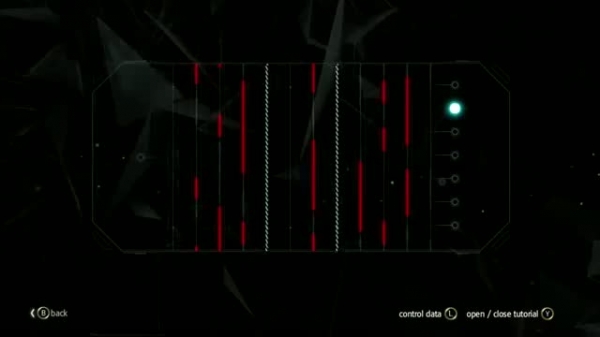
Go the elevator and pick the 15th floor. Head to the CCO's office. After the cutscene, ride the elevator back to the 2nd floor, then enter the office on the right using a Level 1 clearance. Head inside, go to the computer, then start hacking. On the first hacking sequence, you have to guide the data bit until it reaches the green line in the sphere. For hacking solutions, you can refer to this page.


Head to the elevator and go to the lobby. Talk to the courier by the coffee stall, then return to your workstation at the 2nd floor log back in to the Animus when you're ready.
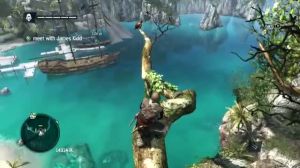
Sequence 4-1: This Old Cove
Once the mission starts, follow Kidd back to the jungle until you reach
some ancient Mayan structures. This is a tutorial about Mayan Stelaes.
The first one of these puzzles that you have encountered is found in
Cape Bonavista, during the first game's first chapter. You should know
how to solve these puzzles from hereon. Get on top of the stelae and
activate it. Align the shapes that will appear using your Eagle Vision
then dig on the spot where the lines interconnect to receive a mayan
stone. These stones are needed to open an ancient door containing the
Mayan Armor. Also, all the other mayan stelae locations will be
displayed in the map. Refer to the this page for the individual Mayan Stelae locations.
Follow Kidd until you reach a storage cellar. Go upstairs and you'll be inside a mansion which will serve as your new headquarters. After the cutscene, all Templar Hunt mission locations will be displayed on the map. Completing this missions will award you with a Templar Key, which you can use to unlock the cage in the mansion containing the Templar Armor. Refer to the Extras section of this guide for the individual walkthroughs of Templar Hunt missions.
Once done, leave the mansion and synchronize with the viewpoint by the edge of the cliff to the north to reveal the island and the remaining collectibles. Return to the docks and talk to Kidd to trigger a cutscene. The mission will be complete afterwards.
From hereon, you can now buy upgrades for your new hideout by talking to your crewmates on the dock. You can also upgrade your mansion by interacting with the plans inside the building itself.
Sequence 4-2: Nothing is True...
Optional Missions:- Knock out 3 assassins
- Loot 4 treasure chests
Two optional objectives will become available. This is an infiltration mission; you have to remain undetected and avoid killing anyone. You have to knock out the assassins in the area by attacking them stealthily while unarmed. Knock out guards whenever you have the chance and hide their bodies if there are patrols that will be traversing the path; this lowers your chance of being discovered and will make your job a lot easier as you progress.
The first chest should be behind the rock and bushes from your starting point. Swim towards the dirt road nearest to the viewpoint. Hide behind the bushes and knock out the nearest assassin once the patrolling woman assassin walks by. Get her attention by whistling then pull her to the bushes to knock her out. Next, sneak behind the guy standing beside the pile of leaves and knock him cold as well. Make your way to the viewpoint next.
Before heading to the objective, I recommend synchronizing with the nearby viewpoint to help you locate the important items and clear up the map as well. To do this, hide in the bushes beside the viewpoint then wait for the other assassin to walk by. Knock him out then flank the other guy and knock him cold. Synchronize with the viewpoint then do a Leap of Faith to the water to get the first animus fragment.
Follow the objective marker to the southwest while moving through the bushes for cover. Make your way to the beach and knock out the lone female assassin patrolling there. Circle around the next patrolling guard and take him out to reach the chest beside the rocks.
After looting the chest, head to the north. You'll encounter another patrol there; you can just run past or knock him out. You'll find some ruins to the north. There will be three asssassins here; as you get near them, the other two will start patrolling the area. Go through the bushes until you find a fallen tree trunk that you can climb. This will allow you to move above ground using the branches. Get past the patrols by hopping from branch to branch. You'll also get an animus fragment along the way.
You'll have to jump back to the ground at the end of the tree line then climb up on the nearby rock pillar. Hope on the branches of the trees again until you reach the wooden platform. From there, you can hop on another set of branches to reach the next portion of the path. Just make sure you don't get discovered by the nearby patrol. Continue forth until you reach the next area.
You'll find some temple ruins and a lot more guards in the area. There are two chests and a Mayan Stelae nearby. You have to go to the left and get past the assassins. To do this, wait for the patrol to move away then slip through the guard standing by the stairs. Quickly climb up the wall before the patrol turns around and sees you.
Move through the bushes to find more guards along the way. There's a chest is nearby and you have to deal with the guards first before you can loot it. Wait for the patrols to turn their backs and knock out the nearest assassin. Move to the next bush, wait for the patrol to turn his back then knock out cold as well. Finally, time your attack and knock out the remaining patrol away from plain view. After taking care of these three, you should be able to open the chest nearby.
Continue going north then knock out the patrol near the edge of the cliff. Carefully move to the north, towards the Mayan Stelae. Shimmy to the next cliff where there are two assassins. You can lure the roving guard by revealing yourself briefly then hiding immediately in the bush which will prompt him to investigate. Once you separate him away from his partner, you can easily knock him out without alarming the other guard.
The next objective should be very near now. Be careful of the gunner near the objective point since she can see you easily from a distance. Hop on the branches quickly when she's not looking to get close enough for you to knock her out.
You can either lure the nearby patrol towards your position or just sneak past her when she's occupied. If you left the gunner you took down earlier writhing on the ground, the patrol should put her guard down and check her comrade. Use this chance to sneak behind her and knock her out as well. Use the alternate path away from the guards and move along to see James Kidd who's waiting at the entrance of the temple.
You can solve the Mayan Stelae to the west first before talking to him if you want. When ready, go see him to complete the mission.
Sequence 4-3: The Sage's Buried Secret
This path is very straightforward; all you need to do is follow Kidd and
overcome obstacles along the way. Tail him until the path ahead gets
destroyed. Climb the left wall and make continue to the statue head.
Swing on top of it to open the next door ahead.
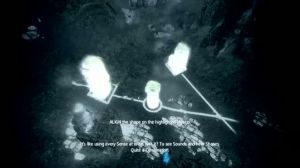
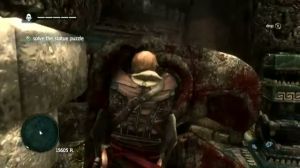
Resume following Kidd then dive to the hole you'll encounter next. Swim through the short underwater tunnel until you reach the temple entrance. Climb up and you'll encounter a peculiar statue puzzle.
To solve this puzzle, stand on the top of the block with a face carved on it to raise the blue block. (Clinging on it should be fine too) Next, use the lever in the middle and rotate the blue arc so it stops under the statue head of the same color. Leave the lever and use your weight to pull down the blue block. This should open the first door in the multi-layered entrance ahead.
Next, rotate the lever until the red block stops to the left. Do the same thing you did earlier; stand on or cling to the face block to lift the red block, use the lever to rotate the circle again so the red arc stops under the red block, then set the face block down. This should open another door layer.
Finally, rotate the plate again and place the green arc under the green block. Step on/cling on it to set it down and open the last door. Watch the last scene and this mission will be complete.
 This is an entirely stealth mission and a perfect mission for you to
practice your blowpipe handling. The blowpipe allows you to use Sleep or
Berserk Darts silently. The number of darts and the duration of the
effects can be upgraded by crafting. Sleep Darts will temporarily put
your target to sleep, giving you enough time to pass by him undetected
or get close enough to kill him. You can also use these to get the
attention of nearby guards as they'll check out the target. Be warned
though that the target may wake up faster because his comrades will be
waking him up.
This is an entirely stealth mission and a perfect mission for you to
practice your blowpipe handling. The blowpipe allows you to use Sleep or
Berserk Darts silently. The number of darts and the duration of the
effects can be upgraded by crafting. Sleep Darts will temporarily put
your target to sleep, giving you enough time to pass by him undetected
or get close enough to kill him. You can also use these to get the
attention of nearby guards as they'll check out the target. Be warned
though that the target may wake up faster because his comrades will be
waking him up.
Berserk darts are perfect for diversion and best used on those huge, bulkier enemies and elite officers. The target will attack ANYONE nearby while the dart is active. Fortunately, the target will also die from exhaustion once the dart's effect expires. Take note that an actively berserk target will notice you immediately and ruin any stealth-related optional tasks you're trying to accomplish so stay out of sight of those you set to berserk.

Start off by putting the first guard to sleep. Once he's down, Kidd will go down and finish him off. Loot the bodies of the enemies you targeted with your darts to recover your darts sometimes. The prisoners you'll rescue have guns pointed at them. These trigger-happy guards that will shoot the prisoners instantly in the first sign of danger. Climb the nearby wall and take out the gunner first. Next, kill the lone guard on the ground to the southwest to free the first prisoner and find a chest as well.
Climb back up to the wall then go to the prisoner to the west, inside a temple ruin. There you'll find another chest and the prisoner as well. Take out the guard the way you prefer to. Next, use make the gunner on the ground go berserk and let him to kill at least one of his comrades. Once done, you can now go and use a sleep dart to divert their attention or perform a double-assassination. Release the nearby prisoners as well.
Circle around to the ruins to the north to find another lone guard with a prisoner. Eliminate him away from the view of his comrades and free the prisoner.
Now you'll find two prisoners with gunner holding them. Quietly eliminate the standing guard behind the gunner while the two patrols are away then hide the body in one of the nearby bushes. You can then use a berserk dart on the gunner to make him engage the patrols or take your time taking him out covertly.
Free the two prisoners and synchronize with the nearby viewpoint to fully reveal the island. The temple entrance under the viewpoint leads to a closed door holding the Mayan Outfit that is also marked in your map. You can't access it yet at this point so leave it for now.
Head to the north then kill another single patrol then free the prisoner. Scale the nearby walls to reach an upper path where there's another patrol you can eliminate. Tread the downhill path and turn left to find the last chest behind the foliage.
Continue heading downhill and you'll spot two more guards. Get rid of them then proceed to the nearby prisoners. Move to a good vantage point then use a berserk dart on the gunner again when the patrol is nearby so they can go ahead and kill each other. Once done, assassinate the survivor(s) and free up the prisoners immediately. Be careful when doing this since the gunner in the nearby tower can still spot you.
Move to the northeast and hide behind the bush beside the tower so you can pull the lone patrol there as soon as he passes by. There's also another prisoner on top of the nearby guard tower as well so climb the nearby tower then quickly take out the gunner. Release the prisoner afterward.
Move around again to the northeast using the concealed path to the north. Carefully get near the next set of prisoners. Use a berserk dart on one of the guards, let them kill each other then take out the last one. Rescuing the next set of prisoners to complete your target number. A cutscene will trigger shortly.
During this scene and after speaking with Kidd, the assassin contracts around the region will be briefly revealed. The next story-related mission is in Nassau. Before going there, get the last collectibles you haven't collected in the area.
Resume following Kidd then dive to the hole you'll encounter next. Swim through the short underwater tunnel until you reach the temple entrance. Climb up and you'll encounter a peculiar statue puzzle.
To solve this puzzle, stand on the top of the block with a face carved on it to raise the blue block. (Clinging on it should be fine too) Next, use the lever in the middle and rotate the blue arc so it stops under the statue head of the same color. Leave the lever and use your weight to pull down the blue block. This should open the first door in the multi-layered entrance ahead.
Next, rotate the lever until the red block stops to the left. Do the same thing you did earlier; stand on or cling to the face block to lift the red block, use the lever to rotate the circle again so the red arc stops under the red block, then set the face block down. This should open another door layer.
Finally, rotate the plate again and place the green arc under the green block. Step on/cling on it to set it down and open the last door. Watch the last scene and this mission will be complete.
Sequence 4-4: Overrun And Outnumbered
Berserk darts are perfect for diversion and best used on those huge, bulkier enemies and elite officers. The target will attack ANYONE nearby while the dart is active. Fortunately, the target will also die from exhaustion once the dart's effect expires. Take note that an actively berserk target will notice you immediately and ruin any stealth-related optional tasks you're trying to accomplish so stay out of sight of those you set to berserk.
Start off by putting the first guard to sleep. Once he's down, Kidd will go down and finish him off. Loot the bodies of the enemies you targeted with your darts to recover your darts sometimes. The prisoners you'll rescue have guns pointed at them. These trigger-happy guards that will shoot the prisoners instantly in the first sign of danger. Climb the nearby wall and take out the gunner first. Next, kill the lone guard on the ground to the southwest to free the first prisoner and find a chest as well.
Climb back up to the wall then go to the prisoner to the west, inside a temple ruin. There you'll find another chest and the prisoner as well. Take out the guard the way you prefer to. Next, use make the gunner on the ground go berserk and let him to kill at least one of his comrades. Once done, you can now go and use a sleep dart to divert their attention or perform a double-assassination. Release the nearby prisoners as well.
Circle around to the ruins to the north to find another lone guard with a prisoner. Eliminate him away from the view of his comrades and free the prisoner.
Now you'll find two prisoners with gunner holding them. Quietly eliminate the standing guard behind the gunner while the two patrols are away then hide the body in one of the nearby bushes. You can then use a berserk dart on the gunner to make him engage the patrols or take your time taking him out covertly.
Free the two prisoners and synchronize with the nearby viewpoint to fully reveal the island. The temple entrance under the viewpoint leads to a closed door holding the Mayan Outfit that is also marked in your map. You can't access it yet at this point so leave it for now.
Head to the north then kill another single patrol then free the prisoner. Scale the nearby walls to reach an upper path where there's another patrol you can eliminate. Tread the downhill path and turn left to find the last chest behind the foliage.
Continue heading downhill and you'll spot two more guards. Get rid of them then proceed to the nearby prisoners. Move to a good vantage point then use a berserk dart on the gunner again when the patrol is nearby so they can go ahead and kill each other. Once done, assassinate the survivor(s) and free up the prisoners immediately. Be careful when doing this since the gunner in the nearby tower can still spot you.
Move to the northeast and hide behind the bush beside the tower so you can pull the lone patrol there as soon as he passes by. There's also another prisoner on top of the nearby guard tower as well so climb the nearby tower then quickly take out the gunner. Release the prisoner afterward.
Move around again to the northeast using the concealed path to the north. Carefully get near the next set of prisoners. Use a berserk dart on one of the guards, let them kill each other then take out the last one. Rescuing the next set of prisoners to complete your target number. A cutscene will trigger shortly.
During this scene and after speaking with Kidd, the assassin contracts around the region will be briefly revealed. The next story-related mission is in Nassau. Before going there, get the last collectibles you haven't collected in the area.
Sequence 5-1: The Forts
Optional Missions:
- Use the mortar to damage the fort
- Use a running assassinate to kill the officer
Head to Nassau's tavern for a scene. Travel to the Punta Guarico to the east next. Approach the fort and you can start the mission as soon as you can. Use your ship's mortar to damage the fort defenses to complete an optional objective. After completing that optional objective, you can proceed destroying the fort defenses using your ship's cannons.
After destroying the fort defenses, dock then enter the fort. Don't bother with the normal enemies and just find the officer. Ensure that you have your hidden blades equipped then perform a running assassination to complete the optional objective. It is effectively done by taking the target by surprise.
Next, head to the war room and open it to find Torres inside. After the scene, the fort will be captured and the region will become unrestricted. All the collectibles and locations in the area will be revealed as well. Before heading to the next mission, you can collect all collectibles in the fort and complete a Naval Contract as well.
Sequence 5-2: Traveling Salesman
Optional Missions:
- Kill 4 gunners
- Kill 5 guards stunned by smoke bombs
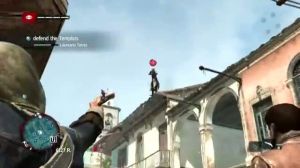
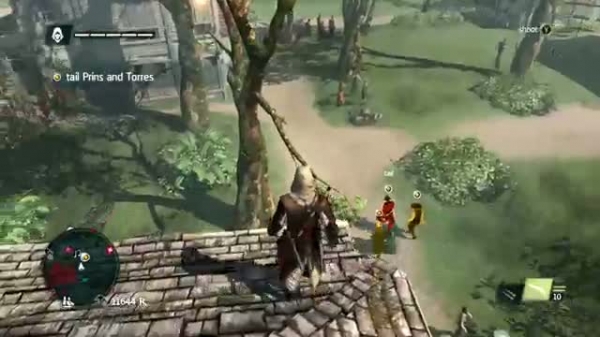
Start the mission by talking to Ade. The optional objectives will become available as soon as the mission starts. Follow Prins and Torres while avoiding being detected. You don't have to be too close; you can follow them on the rooftops while keeping your eyes on them. Be wary of the gunners though; make sure to covertly take out anyone that notices you.
For your convenience, concentrate in taking out the gunners first since you'll have the chance to rake some smoke bomb kills later on. However if you want to make sure, you can score a couple smoke bomb kills on isolated guards or patrols. Just make sure you can catch up with the targets before the timer runs out.
You have to eavesdrop the targets. You don't have to be on the ground or too close to them; as long as you're in range, you'll still be able to hear them and remain in the mission. The pair will eventually reach the manor. Wait for them to go inside then sneak in the manor grounds via the bushes. Wait for them to stop and a cutscene will trigger.

After the cutscene, you have to defeat all five heavy guards. This is the last chance to use your smoke bomb to stun and kill them to count towards the second optional objective. After that, Kidd will run away. Chase him and tackle him to complete the mission.
Optional Missions:
- Use berserk darts on 2 brutes
- Use sleep darts on 2 gunners
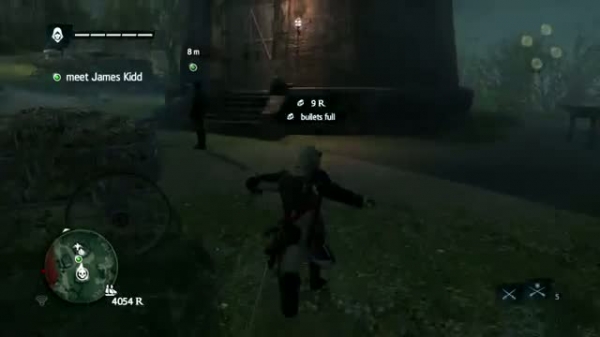
First up, locate James atop the windmill of Kingston. Getting up there is a little tricky though. Just set your sights on the marker, jump up and catch one of the moving wheels of the windmill, then land on the rooftop. After the scene, your optional objectives will become available as well.
Go down to the ground and go straight ahead until you reach the mansion's plantation. You can use the berserk darts to exploit nearby brutes' toughness and strength to create the diversion you need. Brutes are the large, axe-wielding guys that can throw bombs. You can even cause additional guys to go on berserk until you create a riot and get the attention of the nearby patrols. While they're at it and when the nearby gunner on the watchtower is not looking (you can also put him to sleep using a sleep dart if you feel like it), sabotage the first bell.
After sabotaging the first bell, it will be to your advantage to climb up the watchtower and finish the gunner off. Go back to the ground and proceed to the next bells. Remember to move under cover and pause whenever you encounter a group of guards to mark them and study their movements. After sabotaging the two bells and taking out isolated guards, proceed to meet up with Kidd who is hiding in a bush near the mansion's gate. Wait for her to make her move.
After the scene, enter through the gate. Eliminate one of the guards in the balcony then climb to the roof to reach the viewpoint there. Synchronize with it and get the animus fragment over the chimney to the west while you're at it. There's also a chest in the study room in the third floor and another chest in the corridor to the east.
Your target is located in the small garden at the back of the mansion. Put him to sleep so he won't notice you as you get near and finish him off. After Laurens' dying scene, all the manor's guards will discover you and will be after your neck. It will be tricky to escape on foot so you have to find the nearest tree you can climb. Escape the villa by using the trees to avoid the ground troops and exit the plantation. Once you're clear, meet up with Kidd in the windmill to complete the mission.
- Kill 4 gunners
- Kill 5 guards stunned by smoke bombs
Start the mission by talking to Ade. The optional objectives will become available as soon as the mission starts. Follow Prins and Torres while avoiding being detected. You don't have to be too close; you can follow them on the rooftops while keeping your eyes on them. Be wary of the gunners though; make sure to covertly take out anyone that notices you.
For your convenience, concentrate in taking out the gunners first since you'll have the chance to rake some smoke bomb kills later on. However if you want to make sure, you can score a couple smoke bomb kills on isolated guards or patrols. Just make sure you can catch up with the targets before the timer runs out.
You have to eavesdrop the targets. You don't have to be on the ground or too close to them; as long as you're in range, you'll still be able to hear them and remain in the mission. The pair will eventually reach the manor. Wait for them to go inside then sneak in the manor grounds via the bushes. Wait for them to stop and a cutscene will trigger.
After the cutscene, you have to defeat all five heavy guards. This is the last chance to use your smoke bomb to stun and kill them to count towards the second optional objective. After that, Kidd will run away. Chase him and tackle him to complete the mission.
Sequence 5-3: Unmanned
- Use berserk darts on 2 brutes
- Use sleep darts on 2 gunners
First up, locate James atop the windmill of Kingston. Getting up there is a little tricky though. Just set your sights on the marker, jump up and catch one of the moving wheels of the windmill, then land on the rooftop. After the scene, your optional objectives will become available as well.
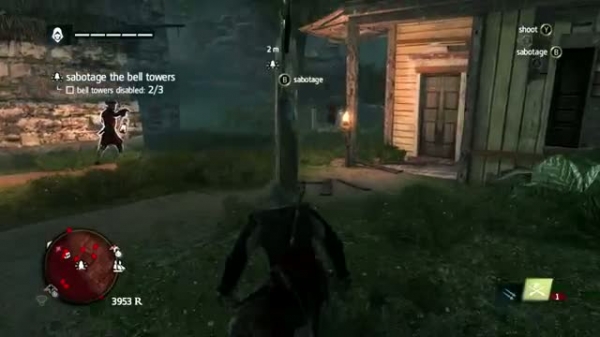
Go down to the ground and go straight ahead until you reach the mansion's plantation. You can use the berserk darts to exploit nearby brutes' toughness and strength to create the diversion you need. Brutes are the large, axe-wielding guys that can throw bombs. You can even cause additional guys to go on berserk until you create a riot and get the attention of the nearby patrols. While they're at it and when the nearby gunner on the watchtower is not looking (you can also put him to sleep using a sleep dart if you feel like it), sabotage the first bell.
After sabotaging the first bell, it will be to your advantage to climb up the watchtower and finish the gunner off. Go back to the ground and proceed to the next bells. Remember to move under cover and pause whenever you encounter a group of guards to mark them and study their movements. After sabotaging the two bells and taking out isolated guards, proceed to meet up with Kidd who is hiding in a bush near the mansion's gate. Wait for her to make her move.
After the scene, enter through the gate. Eliminate one of the guards in the balcony then climb to the roof to reach the viewpoint there. Synchronize with it and get the animus fragment over the chimney to the west while you're at it. There's also a chest in the study room in the third floor and another chest in the corridor to the east.
Your target is located in the small garden at the back of the mansion. Put him to sleep so he won't notice you as you get near and finish him off. After Laurens' dying scene, all the manor's guards will discover you and will be after your neck. It will be tricky to escape on foot so you have to find the nearest tree you can climb. Escape the villa by using the trees to avoid the ground troops and exit the plantation. Once you're clear, meet up with Kidd in the windmill to complete the mission.
Sequence 6-1: Diving For Medicines
Optional Missions:
- Loot 3 treasure chests
- Avoid being attacked by a shark
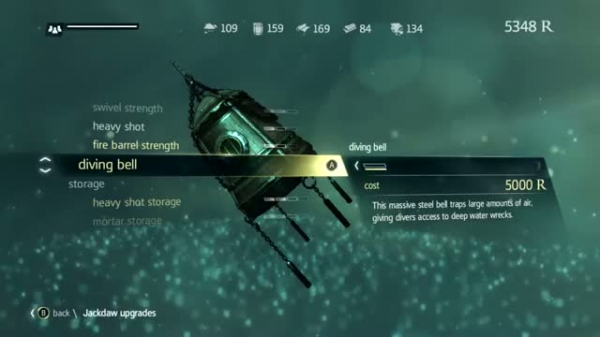
Head to Nassau to begin this particular mission. After that, join Ben and Blackbeard on a walk. After the conversation, you'll have to buy a diving bell for your ship next. You should have enough funds at this point so find the nearest harbourmaster and purchase a diving bell for 5000 reales. Return to your ship and sail to the sea. Head to the wreck of San Ignacio to the west and meet up with Blackbeard.
Head to the wreckage, then dive down. The Diving Bell will allow you to replenish your air supply as many times as you need. There are also scattered air barrels dropped by your crew where you can enter to replenish your air and to escape from sharks. These are used once only. In caverns, there are natural air pockets where you can replenish your air supply as many times as you need.
The map of the underwater wreck / area is already complete and all important items are already listed there. You just need to locate all chests and find all Animus Fragments. For the first area, make sure you collect all chests and a single animus fragment before opening the hatch of the wrecked ship and getting the medicine since the wreckage where the medicine is located will collapse, preventing you from going back where you came from.
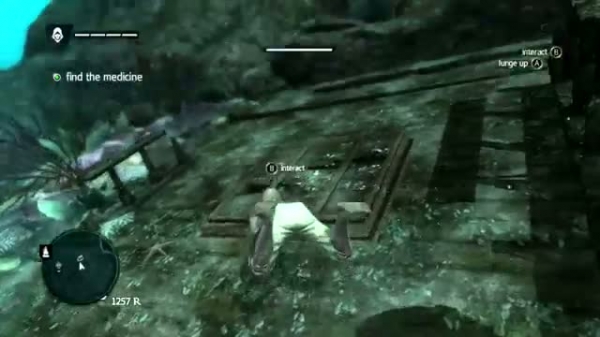
After getting the medicine, the wreck will collapse. You have no choice but to swim through the underwater tunnel. Use the air pocket there to replenish your air as you go through the tunnel. As you move on, you'll caught up in a violent water current. Wave your arms to control your body and prevent yourself from hitting the rock pillars. Keep at it until you reach the next part of the tunnel.
As soon as you exit the tunnel, you'll encounter the dreadful predators of the sea; great whites. You have to hide in the seaweed or Shipwrecks to avoid getting attacked. Take note that unless you're near them, they won't attack immediately; you'll hear an audio cue indicating that you've been spotted by a shark (or sharks). Use that time to immediately find seaweeds, wreckage or air barrels where you can hide. Moving on, use the air barrel nearby if you need to replenish your air and continue collecting the remaining collectibles in the area. There are three sharks roaming around and you'll have close encounters with them often since the area isn't that large either. Once you've explored the area completely, carefully return to the diving bell and resurface to complete the mission.
Optional Missions:
- Rescue 5 survivors
- Kill 5 guards stunned by smoke bombs
Go to Salt Lagoon to begin the mission. Follow the marker, the area will then turn to a large green search area on the map. Follow the icon to find the Queen Anne's Revenge. You'll find some pieces of wreckage along the way. Rescue at least 5 survivors stranded on the sea to count towards your first optional mission. Head to Mariguana Island to find Blackbeard's ship. There are also a few Royal Navy frigates in the area which you can loot or capture to add to your online fleet.
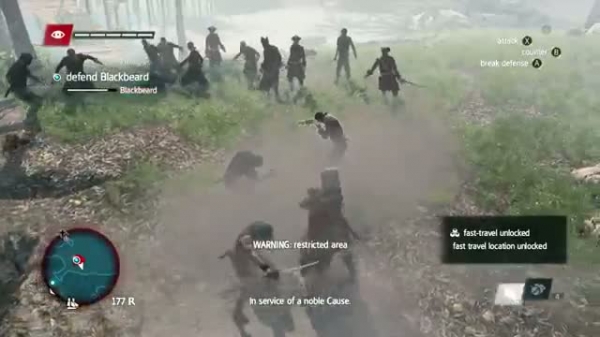
Head to the shore and help Blackbeard defend himself against some Royal Navy men. Completing the second optional objective should be easy at this point; use smoke bombs to stun your enemies and take them out while they're stunned by the smoke cloud. Talk to Blackbeard again after defeating all enemies then head out to sea again to go to the marked area.
You'll be controlling Queen Anne's Revenge. It has more guns and more powerful than the Jackdaw but it is slower so you'll have to compensate for that when controlling it. Face the target Man o' War head-on and incapacitate it so you can board it. Unlike other boardings, you don't need to kill any of the ship's crew members; just locate the captain and kill him to complete the mission.
- Loot 3 treasure chests
- Avoid being attacked by a shark
Head to Nassau to begin this particular mission. After that, join Ben and Blackbeard on a walk. After the conversation, you'll have to buy a diving bell for your ship next. You should have enough funds at this point so find the nearest harbourmaster and purchase a diving bell for 5000 reales. Return to your ship and sail to the sea. Head to the wreck of San Ignacio to the west and meet up with Blackbeard.
Head to the wreckage, then dive down. The Diving Bell will allow you to replenish your air supply as many times as you need. There are also scattered air barrels dropped by your crew where you can enter to replenish your air and to escape from sharks. These are used once only. In caverns, there are natural air pockets where you can replenish your air supply as many times as you need.
The map of the underwater wreck / area is already complete and all important items are already listed there. You just need to locate all chests and find all Animus Fragments. For the first area, make sure you collect all chests and a single animus fragment before opening the hatch of the wrecked ship and getting the medicine since the wreckage where the medicine is located will collapse, preventing you from going back where you came from.
After getting the medicine, the wreck will collapse. You have no choice but to swim through the underwater tunnel. Use the air pocket there to replenish your air as you go through the tunnel. As you move on, you'll caught up in a violent water current. Wave your arms to control your body and prevent yourself from hitting the rock pillars. Keep at it until you reach the next part of the tunnel.
As soon as you exit the tunnel, you'll encounter the dreadful predators of the sea; great whites. You have to hide in the seaweed or Shipwrecks to avoid getting attacked. Take note that unless you're near them, they won't attack immediately; you'll hear an audio cue indicating that you've been spotted by a shark (or sharks). Use that time to immediately find seaweeds, wreckage or air barrels where you can hide. Moving on, use the air barrel nearby if you need to replenish your air and continue collecting the remaining collectibles in the area. There are three sharks roaming around and you'll have close encounters with them often since the area isn't that large either. Once you've explored the area completely, carefully return to the diving bell and resurface to complete the mission.
Sequence 6-2: Devil's Advocate
- Rescue 5 survivors
- Kill 5 guards stunned by smoke bombs
Go to Salt Lagoon to begin the mission. Follow the marker, the area will then turn to a large green search area on the map. Follow the icon to find the Queen Anne's Revenge. You'll find some pieces of wreckage along the way. Rescue at least 5 survivors stranded on the sea to count towards your first optional mission. Head to Mariguana Island to find Blackbeard's ship. There are also a few Royal Navy frigates in the area which you can loot or capture to add to your online fleet.
Head to the shore and help Blackbeard defend himself against some Royal Navy men. Completing the second optional objective should be easy at this point; use smoke bombs to stun your enemies and take them out while they're stunned by the smoke cloud. Talk to Blackbeard again after defeating all enemies then head out to sea again to go to the marked area.
You'll be controlling Queen Anne's Revenge. It has more guns and more powerful than the Jackdaw but it is slower so you'll have to compensate for that when controlling it. Face the target Man o' War head-on and incapacitate it so you can board it. Unlike other boardings, you don't need to kill any of the ship's crew members; just locate the captain and kill him to complete the mission.
Sequence 6-3: The Siege of Charles-Towne
Optional Missions:
- Use sleep darts on 3 crocodiles
- Skin a crocodile
Keep following the enemy gunboat while maintaining safe distance. Stay cautious across the swamp. Watchtowers will meet you here. Eventually you'll reach a narrow part of the river with an outpost. Completely stop and leave the ship. Swim to the watchtower outpost and covertly take out the enemies as you make your way towards the bell. Sabotage it and return to the ship to resume following your target.
You'll come to a point where you need to resume trailing targets on foot. A couple of optional objectives will become available as well. For the first objective, it will be better to do it now since there aren't that many crocodiles here. Put a croc to sleep as near as you can get it to dry land. That way you can skin it without staying in the water too long.
The river is swarming with crocodiles so activate your eagle vision regularly to tag them in the darkness and know their locations. Stay out of the water unless it is really necessary. Use your sleep darts on three crocodiles to complete the other optional objective.
It is not required to kill any guards along the way. However, if it will make you move quickly and keep on track with your target, then covertly take them out as you progress. Continue tailing the rowboat via the ruins. You'll find an abandoned chapel along the way. Kill the guards there the go through opening on the wall and swing to the other side. The rowboat will stop briefly for a short greeting with the guards stationed there but one of them will be pulled to the water by a stalking crocodile. This will cause panic and will make the rowboat go faster.
Move behind cover and climb the wall so you can make it to the cemetery. There's a patrol consisting of four soldiers here. There's no need to engage them; just stay put and let them walk away. Continue forth and attempt to eavesdrop at the target. However, your presence will be discovered shortly which will prompt the captain to run away. Chase him and ignore all enemies along the way until you close the distance and land the finishing blow.
Abstergo Scene 3
Go to Melanie through the elevator first, then head up to the CCO's
office. After the cutscene, turn to the corner and receive level 2
security access. Melanie will speak with Olivier alone. During that
time, John will put a new waypoint in your map. Head to the corridor
next to the receptionist then continue downstairs. John will now give
you LV2 access which will allow you to open the door.
Find the LV2 door along the corridor to reach the security room. Operate the console and you'll have to hack it using a new method at this point. Open the tutorial again if you need assistance. Select 2-5-7 to get the target number in this sequence and hack the console successfully.

After the scene, leave the security room and make your way to the open window. Wait for the gondola to arrive then use it to reach the CCO's office terrace. Head inside the office and hack his computer to get the shareholders meeting schedule. This will also count towards the number of computers hacked. Wait for the receptionist to leave then head to lobby via elevator.
Deliver the file to the courier in the lobby you can now return to the animus and resume your simulation. However, with your new access, you can explore the previously inaccessible rooms for more Sticky Notes and hackable PCs. Do this at your own pace as you see fit.
Optional Missions:
- Sabotage the alarm bell
- Kill 3 guards while hanging from a ledge
Locate the woman on Nassau beach to begin the mission. Covertly tail the pirates and British reps as they move around the city. You can follow them in the open, just stay away from their restricted space. If you decide to follow them on the rooftop, make sure you take out any gunners as well.
Once they reached the fort, wwait outside while hiding in the bushes as
they converse. Your main objective will then tell you to infiltrate the
fort. There's a wooden platform in the southeastern corner of the fort
where you can climb and scale the damaged portion of the wall. There's
also a couple of gunners in the two buildings beside the fort which you
can kill by pulling them over the ledge while you're hanging. (Counted
towards the optional objective). Make sure you're unarmed and they must
die upon hitting the ground for the kills to count. As soon as you enter
the fort, your main objective will be updated.
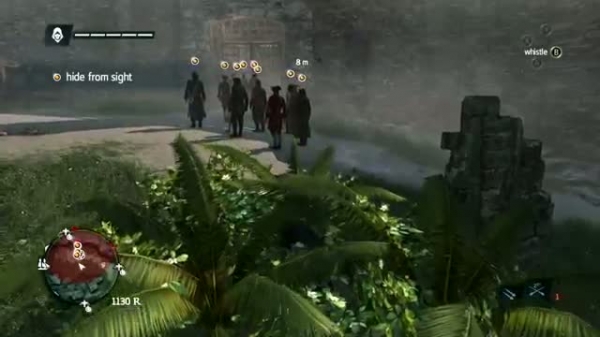
For your second optional objective, you'll find the bell in the northeast part of the fort. For your convenience, theres are some ample cover that will help you get near it. It will help taking out the guards on the walls to make your job easier. After sabotaging the alarm bell, head towards the marked building and steal Chamberlain's plans on top of a barrel near the door. The mission will be complete afterward.

Find the LV2 door along the corridor to reach the security room. Operate the console and you'll have to hack it using a new method at this point. Open the tutorial again if you need assistance. Select 2-5-7 to get the target number in this sequence and hack the console successfully.
After the scene, leave the security room and make your way to the open window. Wait for the gondola to arrive then use it to reach the CCO's office terrace. Head inside the office and hack his computer to get the shareholders meeting schedule. This will also count towards the number of computers hacked. Wait for the receptionist to leave then head to lobby via elevator.
Deliver the file to the courier in the lobby you can now return to the animus and resume your simulation. However, with your new access, you can explore the previously inaccessible rooms for more Sticky Notes and hackable PCs. Do this at your own pace as you see fit.
Sequence 7-1: We Demand a Parlay
- Sabotage the alarm bell
- Kill 3 guards while hanging from a ledge
Locate the woman on Nassau beach to begin the mission. Covertly tail the pirates and British reps as they move around the city. You can follow them in the open, just stay away from their restricted space. If you decide to follow them on the rooftop, make sure you take out any gunners as well.
For your second optional objective, you'll find the bell in the northeast part of the fort. For your convenience, theres are some ample cover that will help you get near it. It will help taking out the guards on the walls to make your job easier. After sabotaging the alarm bell, head towards the marked building and steal Chamberlain's plans on top of a barrel near the door. The mission will be complete afterward.
Sequence 7–2: The Gunpowder Plot
Optional Missions:
- Kill four guards in one streak
- Use blowpipe on 10 guards
Head to the tavern at Nassau to begin. Now you have to steal some gunpowder. Four areas are marked as your mission points. Each of them has a lot of guards protecting the item. It sounds challenging but it is actually an easy and straightforward mission.
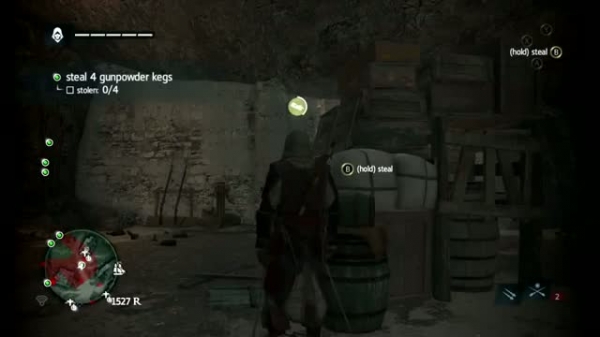
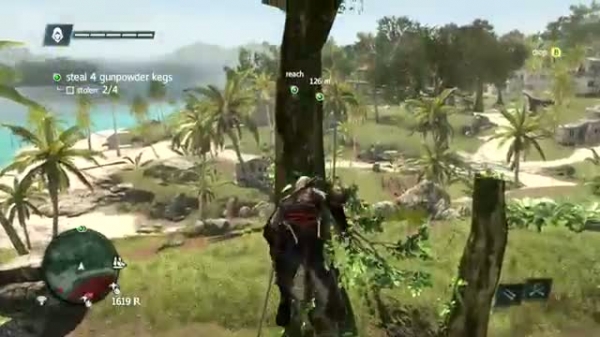
Use blow darts while in cover as you inch your way to the gunpowder. After hitting 10 guards with the blowpipe, you can simply run to the gunpowder, draw all the attention, throw a smoke bomb, the kill 4 guards in succession for the requirement. You can use your pistols and hidden blades for quick kills.
Just repeat whatever strategy suits you retrieve the remaining gunpowders. The mission will be complete after stealing all four gunpowder kegs.
- Kill four guards in one streak
- Use blowpipe on 10 guards
Head to the tavern at Nassau to begin. Now you have to steal some gunpowder. Four areas are marked as your mission points. Each of them has a lot of guards protecting the item. It sounds challenging but it is actually an easy and straightforward mission.
Use blow darts while in cover as you inch your way to the gunpowder. After hitting 10 guards with the blowpipe, you can simply run to the gunpowder, draw all the attention, throw a smoke bomb, the kill 4 guards in succession for the requirement. You can use your pistols and hidden blades for quick kills.
Just repeat whatever strategy suits you retrieve the remaining gunpowders. The mission will be complete after stealing all four gunpowder kegs.
Sequence 7-3: Commodore Eighty-Sixed
Optional Missions:
- Kill 3 guards from stalking zones
- Air assassinate Chamberlaine
Follow the guards across the town while keeping distance and avoiding causing any unnecessary commotion. Keep tailing them until they reach their camp by the shore. The camp has several stalking points where you can execute unknowing guards. These kills count towards the first optional objective. Once done, swim to the ship in the ocean afterwards.
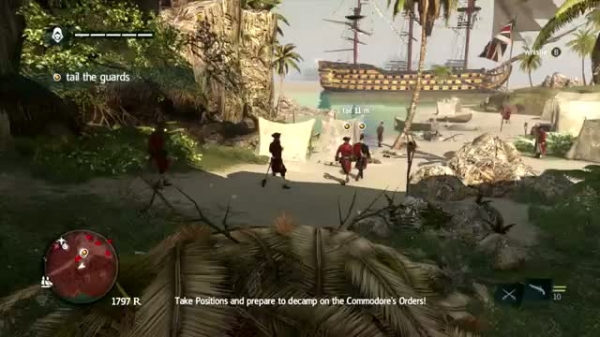
Climb up to the mast in the middle and climb the net halfway to get in range. To reach it without alarming the guards, climb on the bow of the ship then use the ratlines to reach the main mast. There's a gunner in the masts who can spot you and ruin your assassination attempt so put him to sleep then knock him out permanently. Once Chamberlaine when he is aligned right under you, jump and air assassinate him.
- Kill 3 guards from stalking zones
- Air assassinate Chamberlaine
Follow the guards across the town while keeping distance and avoiding causing any unnecessary commotion. Keep tailing them until they reach their camp by the shore. The camp has several stalking points where you can execute unknowing guards. These kills count towards the first optional objective. Once done, swim to the ship in the ocean afterwards.
Climb up to the mast in the middle and climb the net halfway to get in range. To reach it without alarming the guards, climb on the bow of the ship then use the ratlines to reach the main mast. There's a gunner in the masts who can spot you and ruin your assassination attempt so put him to sleep then knock him out permanently. Once Chamberlaine when he is aligned right under you, jump and air assassinate him.
Sequence 7-4:The Fireship
Optional Missions:
- Use the mortar to sink 3 ships
- Use barrels to sink a ship
Before starting this mission, you have to purchase all available upgrades for Jackdaw at this point. Make sure you're fully stocked with mortars and fire barrels as well. Once the mission starts, you have to escort the fireship, The Royal Phoenix. Your self-explanatory optional objectives are indicated immediately at the start of the mission. Use your mortars to destroy the small gunboats. A well-placed and adjusted mortar fire can even take 2-3 boats at once.
For the second optional objective, you have to finish off an enemy ship using fire barrels. The best way to do this is to critically damage a ship - but not enough to incapacitate it. Get close while maneuvering your ship then steer the ship around so that the Jackdaw's rear gets pointed towards the enemy ship. Release your fire barrels at once which should be enough to sink the enemy ship.
Keep destroying enemy ships and protect the fire ship until it hits the blockade. After the blockade has been destroyed, all the enemy ships will come after you. If your ship is fully upgraded, you can accept the challenge and sink them all. Otherwise, turn away from them and make a hasty escape the zone to complete the mission.
Optional Missions:
- Kill 4 guards
- Use heavy shot to incapacitate the Man O' War
Before attempting this mission, make sure you have an ample supply of Heavy Shots.
To head to the next mission, sail north of Abaco Island and head to the
mission marker. After the cutscene, follow the stranger and until you
enter a restricted area full of royal navy guards. Turn on Eagle Vision
to tag him. Start listening to the conversation while being hidden when
you are prompted to do so. Utilize Eagle Vision again to tag more
enemies. Kill four guards from stalking zones along the way to complete
your optional objective. Keep eavesdropping until the cutscene is
triggered.
After the bombardment, sprint to the Jackdaw before the timer runs out, then immediately sail out. You'll have to engage the Man O' War. This should be a pretty easy encounter especially if the Jackdaw is equipped with the best parts you can purchase at this point. For the secondary optional mission, attack the Man O' War until its armor gets critically low - enough for it to be taken down by a single Heavy Shot fire. Get close to it and once you're beside it, fire a heavy shot round to incapacitate it.
Board the man o' war and shoot the gunpowders, kill the officer and eliminate the required number of enemy crew members. Keep fighting until a cutscene is triggered. After that, board the Jackdaw and escape the zone. Don't bother fighting off the remaining ships since the Jackdaw will be critically damaged at this point and there are invulnerable ships in the opposing navy preventing you from getting your revenge.
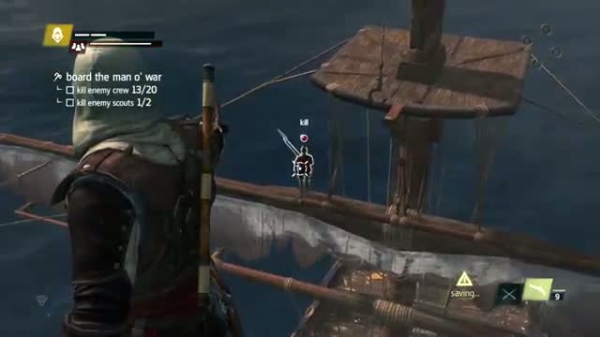 Optional Missions:
- Damage the Royal African Pearl with an upgraded ram
- Use the fort's defenses to sink a ship
I highly advise liberating the Cabo de Cruz fort before starting the mission since it will make this mission a lot more bearable. Also, make sure your have the battering ram upgrade purchased and equipped. Restock your ammo and repair your ship then set out to the mission area.
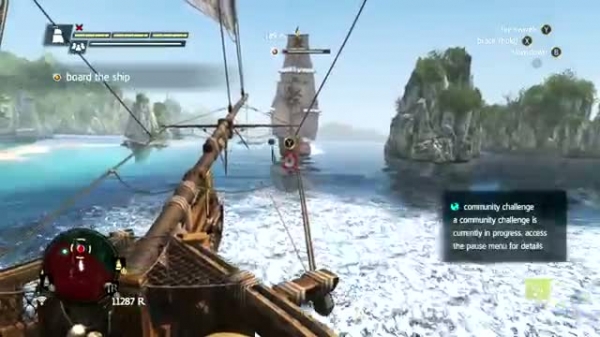
For the mission, follow the allied pirate ship The Ranger to the southeast of the search area. You'll find the Pearl docked in the nearby islands. Attack it and it will release its sail and escape. Continue chasing the Pearl and shoot the fire barrels it leaves behind. Eventually, you'll rescue Vane and his men while in the middle of a fight against more enemy ships.
The captured fort will prove its use since it will fire upon the hostile ships. At this point, the optional objectives will be given as well. First, approach the Pearl at full speed and ram it head on. The best way to do this is when the Pearl is turning or slowing down. Next, lure the other ships within the fort's firing range. You can also attack them and damage them so that the fort cannons can finish them off. Once you're done with the optional objectives, board the ship and watch the following cutscenes.
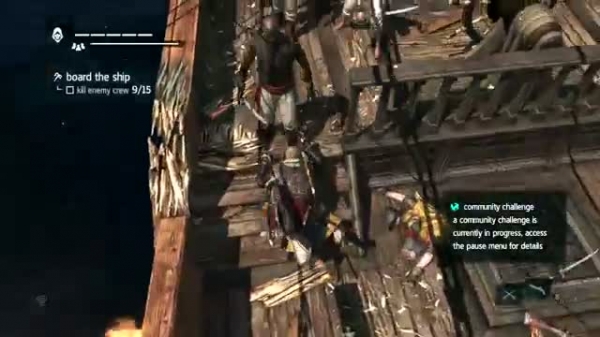
- Use the mortar to sink 3 ships
- Use barrels to sink a ship
Before starting this mission, you have to purchase all available upgrades for Jackdaw at this point. Make sure you're fully stocked with mortars and fire barrels as well. Once the mission starts, you have to escort the fireship, The Royal Phoenix. Your self-explanatory optional objectives are indicated immediately at the start of the mission. Use your mortars to destroy the small gunboats. A well-placed and adjusted mortar fire can even take 2-3 boats at once.
For the second optional objective, you have to finish off an enemy ship using fire barrels. The best way to do this is to critically damage a ship - but not enough to incapacitate it. Get close while maneuvering your ship then steer the ship around so that the Jackdaw's rear gets pointed towards the enemy ship. Release your fire barrels at once which should be enough to sink the enemy ship.
Keep destroying enemy ships and protect the fire ship until it hits the blockade. After the blockade has been destroyed, all the enemy ships will come after you. If your ship is fully upgraded, you can accept the challenge and sink them all. Otherwise, turn away from them and make a hasty escape the zone to complete the mission.
Sequence 8-1: Do Not Go Gently...
- Kill 4 guards
- Use heavy shot to incapacitate the Man O' War
Before attempting this mission, make sure you have an ample supply of Heavy Shots.
After the bombardment, sprint to the Jackdaw before the timer runs out, then immediately sail out. You'll have to engage the Man O' War. This should be a pretty easy encounter especially if the Jackdaw is equipped with the best parts you can purchase at this point. For the secondary optional mission, attack the Man O' War until its armor gets critically low - enough for it to be taken down by a single Heavy Shot fire. Get close to it and once you're beside it, fire a heavy shot round to incapacitate it.
Board the man o' war and shoot the gunpowders, kill the officer and eliminate the required number of enemy crew members. Keep fighting until a cutscene is triggered. After that, board the Jackdaw and escape the zone. Don't bother fighting off the remaining ships since the Jackdaw will be critically damaged at this point and there are invulnerable ships in the opposing navy preventing you from getting your revenge.
Sequence 8–2: Vainglorious Bastards
- Damage the Royal African Pearl with an upgraded ram
- Use the fort's defenses to sink a ship
I highly advise liberating the Cabo de Cruz fort before starting the mission since it will make this mission a lot more bearable. Also, make sure your have the battering ram upgrade purchased and equipped. Restock your ammo and repair your ship then set out to the mission area.
For the mission, follow the allied pirate ship The Ranger to the southeast of the search area. You'll find the Pearl docked in the nearby islands. Attack it and it will release its sail and escape. Continue chasing the Pearl and shoot the fire barrels it leaves behind. Eventually, you'll rescue Vane and his men while in the middle of a fight against more enemy ships.
The captured fort will prove its use since it will fire upon the hostile ships. At this point, the optional objectives will be given as well. First, approach the Pearl at full speed and ram it head on. The best way to do this is when the Pearl is turning or slowing down. Next, lure the other ships within the fort's firing range. You can also attack them and damage them so that the fort cannons can finish them off. Once you're done with the optional objectives, board the ship and watch the following cutscenes.
Sequence 8–3: Marooned
Optional Missions:
- Skin 3 animals
- Air assassinate Vane
After the scene, you'll have to find Vane. First things first; climb the nearby viewpoint and synchronize to clear up your map. You can collect the collectibles in this area as you see fit. Follow the path to the forest and hop on the fallen tree trunk along the way. Cross using the other tree trunk and turn left to find a chest. Climb up the trees nearby to get an animus fragment and loot another chest in the ruins after the fragment. This is the hunting spot for the red howler monkey. Since you can't do anything to it right now, you have to return later once you got your old equipment back.
Follow the main path and you'll spot another animus fragment floating over the branches. Get it while you're at it. Also, be careful since there's a black jaguar that spawns along the path. It will be better to take it by surprise by hiding in the nearby foliage or ambush it from the trees. Unfortunately, you have to wait for it to respawn after killing and skinning it to meet the optional objectives. Out of the native fauna in this area, the jaguar is the only animal you can kill and skin using your current equipment.
Follow the main path and you'll eventually reach an ancient temple-like ruin. Vane is in the area as well. Climb the second viewpoint but Vane will run away. Synchronize the viewpoint to clear the map and reveal the collectibles. Collect all the items in the area before following Vane.
Continue your pursuit of Vane. Just follow the river and you'll reach a small swamp. There's a crocodile here so use the trees to reach the other side since you have no way of killing it for now. Vane is already losing his sanity as you encounter him along the way. He'll start shooting and throwing grenades at you. Move from cover to cover since one pistol shot can instantly take out your whole life bar.
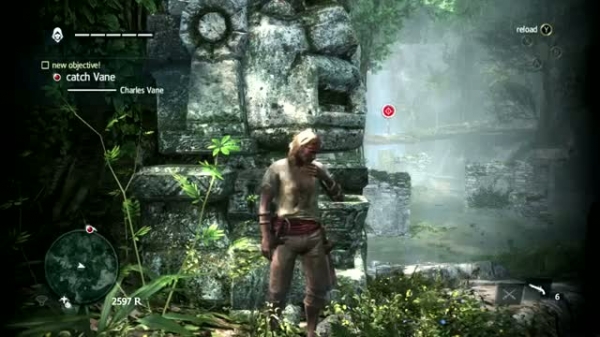
Once you're near him, he'll blow up the tree trunk he's standing on and will escape again. Chase after him until you reach another ruins. This time, your main objective is to kill him. For your secondary optional objective, you have to air assassinate him. You can do this by climbing the top of the tower behind him. Make your move from cover to cover when he's lobbing the grenades. He's good with the pistol so expect to take damage he catches you in the open and while he's aiming with his gun.
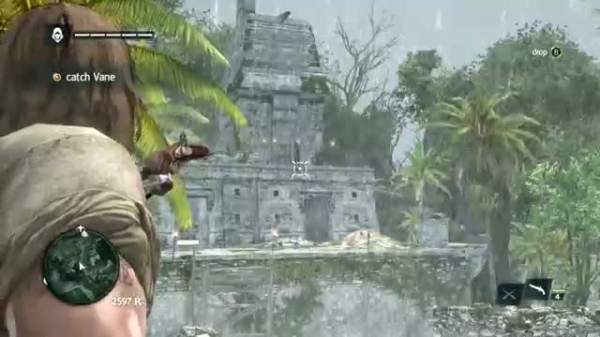
Once you've reached the tower, climb on the part where there's a torch and make your way to the top. Wait for him to load his grenade then leap on him to complete the second optional mission. This will complete the mission.
Optional Missions:
- Kill 4 brutes
- Sabotage 2 alarm bells
Head to Kingston and look for the Royal African Company representative. Head up to the plantation and locate the men you are searching for using your Eagle Vision. There are three alarm bells in the plantation. Fortunately, two of those are easily accessible. Just use your darts and always stay in cover. Make sure to either take out the guards from stalking zones or hide the bodies.
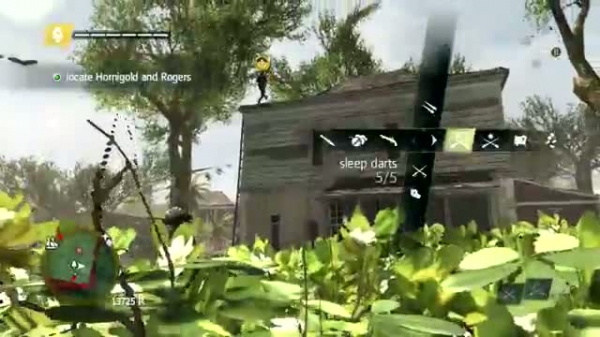
You have to kill four brutes but there's only a few of them in the area. One thing you can do is to sabotage the two alarms first, then deliberately stir up trouble or even letting them discover a dead body so that they'll raise an alarm to call in reinforcements. Abuse using your berserk darts to create diversions and kill the other targets easily. Remember, this is the only chance in the mission where you'll get to defeat four brutes.
After locating the targets, follow them at a safe distance. Stay close as you can until they reach the last warehouse. where a cutscene will take place. After this, you have to defend yourself against an ambush. Use a smoke bomb to distract your enemies and escape the area. Become anonymous and the mission will be complete.
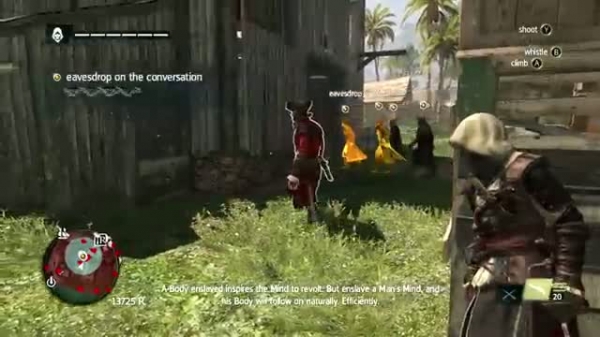 Optional Missions:
- Double assassinate Cockram and Burgess
- Free 2 pirates
First up, sail to Principe. Engage and destroy the enemy ships by the beach. After sinking all of them, dock at the nearby bay then swim to the viewpoint by the beach. Synchronize with it to reveal the immediate area and for you to find to nearby collectibles.
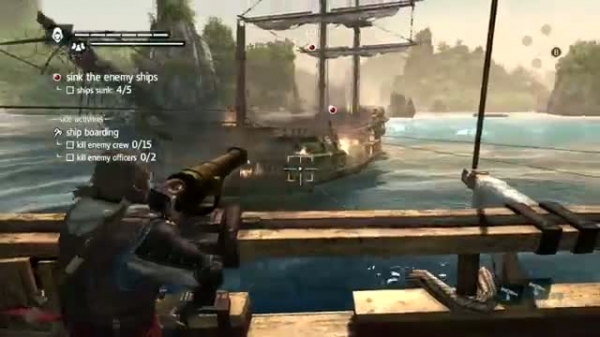
You can also go through the ledges north of the main entrance go around the the cliff where the encampment's cannons are located. This is a good route since it will be easier for you to move around and avoid most of the enemies and patrols. Move in to the location of the first pair of captive pirates. You have to kill the gunners and guards quietly. It will be best to use a berserk dart on the officer since he can take out anyone with one shot. There's also a gunner on the nearby rooftop so using darts on the the officer and the gunner will make it easier for you to route the other guards in the nearby stalking areas.
Make your way to the next set of prisoners and covertly take out the guards along the way. There's also a viewpoint on top of the guard tower near the walls to the southeast. If you can take out the gunner there. it will make your job easier. Once the patrols and other guards are taken care of, sneak behind the two gunners at the edge of the cliff and kill them to free the pirate captives.
Upon reaching the campsite, a cutscene will occur. Your next targets are located in the fort. Just keep using the shrubs and bushes to hide and eliminate guards along the way. After reaching Burgess and Cockram in the village below the fort, head down the road. Looking at the middle of the village, the alarm bell is quite visible. Ignore that and go up the rooftop of the house from the alarm bell and traverse the tree branches. Keep moving up above the high branches and turn on Eagle Vision. Once you have located Cockram and Burgess stay on the branch and wait until they pass under. Kill them both when you get the chance.
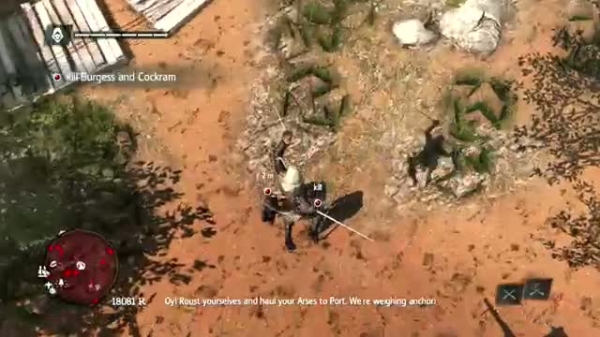 Optional Missions:
- Stay out of combat
- Use a rope swing to kill the captain
Sail to the marked area, then follow the canal until you find the Portuguese fleet. Jump off ship and slowly swim to the target ship. Once there, climb up the ropes to and get to the top of the mast. To be safe, you can put the gunner on the main mast to sleep then grab the flag, then dive in the water. Swim back to the Jackdaw and continue ahead with the stolen flag waving on top of the Jackdaw as a disguise.
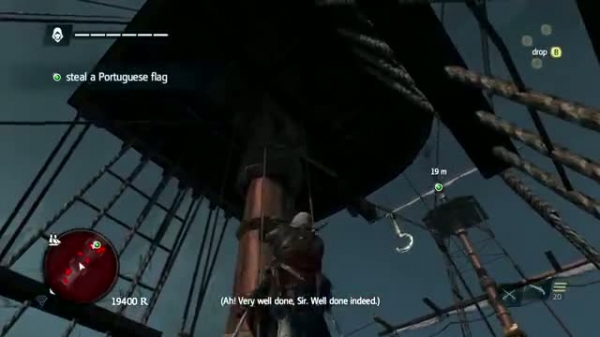
Carefully navigate the canal to avoid raising suspicions. After reaching another ship, you'll have to swim to the shore and find the unloaded cargo. Infiltrating the area won't be a walk in the park. The are several methods you can use to take out the patrols. The most effective ones will be abusing the use of sleep and berserk darts as well as assassinations from stalking areas. Use the berserk darts to create a riot. Just remember to stay in cover just in case a survivor running amok from the berserk darts' effect is looking around. Being spotted by them will instantly trigger combat, thus ruining your attempt to get the first optional objective.
Continue moving until you find two guards in the first chokepoint. It will be better to use a berserk dart on the brute and let him run towards the group of guards around the campfire. Use this chance to pass by and hide in the nearby bushes past the bottleneck. Once you're in the next area, you have to watch out of the patrol and the two brutes. Making these two brutes go berserk can create a diversion long enough for you to go around and reach the marked treasure chest. After successfully looting the chest, head to the shore carefully and the Jackdaw will arrive to pick you up. Board it and reach the wheel to pursue the ship.
While sailing in the canal, stay on the right side because there is a couple of ships blocking the path on the left side. After cartching up with the galleon, you have to swim to the shore again and take out the guards in the watchtowers. You need to do this again covertly so start killing the guards in the outside perimeter. Stay in the stalking areas and learn movement patterns of the patrols. The watchtower guards won't look around so you climb the tower behind them and take them out from behind. Just be careful of the ground patrols nearby; it is still a good move to carefully take out the ground troops before trying to clear the watchtowers.
After taking care of the first watchtower, continue moving along the bushes to encounter two patrol units. Use berserk darts on them while hiding and wait for them to thin out their ranks. Always make the officers go berserk first since they can kill instantly. Continue ahead and clean up the remaining guards before moving on.
Once you've reached the second watchtower, kill the guard there and the second optional mission will be added. You have to use a rope swing to kill the captain of the docked ship nearby – all while maintaining complete stealth. There's a rope in the tower that you can use to swing but make sure that you've cleared the guards below to ensure no one's going to blow your cover. The captain aboard the ship will just walk in a fixed pattern so wait for him to come back, run towards the rope to swing to the ship. Keep mashing the attack button while in mid-air so your attack connects when the prompt appears. Mission complete.
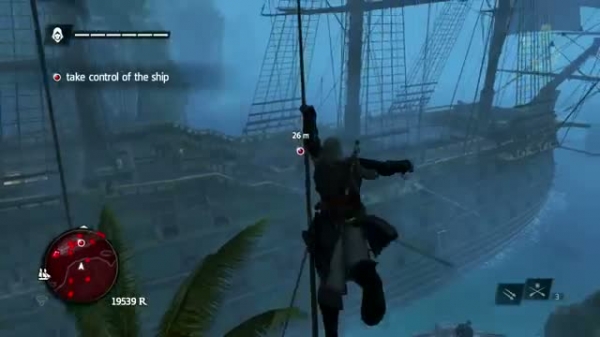 Optional Missions:
- Stay out of combat while finding Hornigold
- Air assassinate Hornigold
Sail to the marked restricted territory first. Keep moving at reasonable speed as other enemy ships will be on the lookout. Avoid the enemy's line of sights as you continue ahead. You have to go through the narrow seaway while evading the patrol boats' detection. Upon reaching the open sea, use the spyglass and concentrate on the schooner docked beside a frigate. Once you've located the Benjamin, tag it and engage it combat. Incapacitate it and sink any other hostile ships that's coming your way. Once Hornigold's ship gets beached, leave your ship and find him on the island.
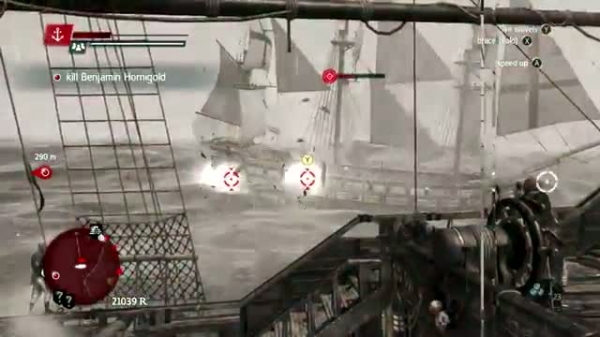
Hornigold is located in the Mayan ruins. You have to reach him without alerting the guards so move on along the left side. Use your eagle vision to find and tag hostile targets. Use stealth and take out snipers and soldiers across your path. You have to reach the adjacent hill where a fallen coconut tree connects to hill where Hornigold is located. Approach the ruins at the back where there's a lot of cover to move about. Just don't act carelessly. Take out any guards that may spot you then climb the ruins until he's within your attack range. Take note that the officer near him is moving about so wait for that officer to turn his back and pounce on Hornigold to air assassinate him.
Optional Missions:
- Incapacitate all guards while unarmed
- Incapacitate 5 guardians from stalking zones
Head to the marked location east of Charlotte. This is the last discoverable location which will contain more collectibles. Un-arm yourself and head inside the jungle. The guardians are natives hiding in the bushes who will ambush you when you're near. Use your eagle vision to find them in the bushes. The gauge in the upper left corner of the screen shows the number of guardians present in the area. Also, take note that you must knock them out using your bare hands for those to be counted towards the optional missions. It won't be counted if you use sleep darts to go around them. You can sneak behind them within the stalking area so do that to knock them them out.
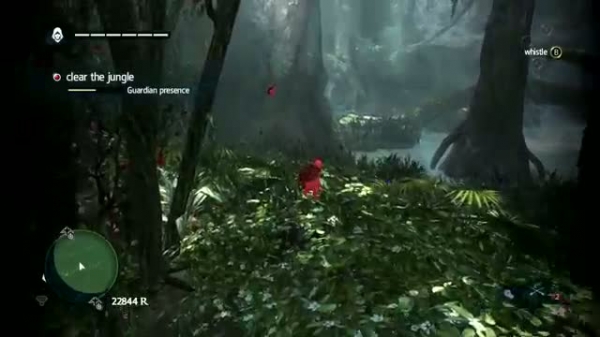
Head to the first jungle area and move along the stalking areas to the right side since there are three guardians along the path. There's another guardian hiding in the bushes along the stream so don't miss him.
Head to the next area where there's guardian activity and stay on the right again. Tag the guardians using your Eagle Vision then move along the stalking areas. If ever you get detected, guardians will chase after you. Lose them and hide then attempt to subdue them. As long as you don't use your weapons against them and you knock them out from stalking zones, it will be counted towards the optional objectives. After knocking out five guardians from stalking zones, you can now climb the branches and wooden platforms to incapacitate them from the air. Find all the guardians in this area then clear them before moving to the next zone.
Head to the next part of the jungle where guardians are hiding. Climb up the wooden platform and take out the guardian patrolling there. Be careful of the swamp as well since there's a crocodile roaming the waters. There will be four guardians in this zone; one is on the wooden platform, two hiding in the bushes near the central tree platform and another one along the path to the cave.
Climb the viewpoint near the cave entrance to clear up the map. Enter the cave and knock out the guardians one by one. You're not required to take them out while hiding but you have to defeat them in battle without using weapons. There will be several chests and collectibles along the way too so don't forget to loot them.
Exit the cave and head to the last jungle area. Jump on the platforms then search the path along the waterfall to find two more guardians. Knock them out then follow the straightforward path leading to the out-of-this-world ruins. There are only three guardians left in the area so find them and incapacitate them all. Two should be patrolling the area and one is hiding in the bush near the Mayan Stelae. After clearing the area, climb the black monolith and synchronize with the waypoint.
Once done, Roberts will eliminate the witnesses and you'll have to follow him inside. Pick up the wooden tray containing some blood samples until you reach the altar. Place the blood samples there and watch the following scenes.
After getting trapped inside the area, climb the ledge to the north and you should be able to climb on the wall using the spaces. As you make your way around, you can also get an animus fragment along the way. Jump to the last ledge that will take you to a short tunnel leading outside. Slide down the slope only to get injured terribly. Approach Roberts and attempt to deflect any attacks from his men. You'll eventually succumb to your wounds and black out. Mission will be complete.
- Skin 3 animals
- Air assassinate Vane
After the scene, you'll have to find Vane. First things first; climb the nearby viewpoint and synchronize to clear up your map. You can collect the collectibles in this area as you see fit. Follow the path to the forest and hop on the fallen tree trunk along the way. Cross using the other tree trunk and turn left to find a chest. Climb up the trees nearby to get an animus fragment and loot another chest in the ruins after the fragment. This is the hunting spot for the red howler monkey. Since you can't do anything to it right now, you have to return later once you got your old equipment back.
Follow the main path and you'll spot another animus fragment floating over the branches. Get it while you're at it. Also, be careful since there's a black jaguar that spawns along the path. It will be better to take it by surprise by hiding in the nearby foliage or ambush it from the trees. Unfortunately, you have to wait for it to respawn after killing and skinning it to meet the optional objectives. Out of the native fauna in this area, the jaguar is the only animal you can kill and skin using your current equipment.
Follow the main path and you'll eventually reach an ancient temple-like ruin. Vane is in the area as well. Climb the second viewpoint but Vane will run away. Synchronize the viewpoint to clear the map and reveal the collectibles. Collect all the items in the area before following Vane.
Continue your pursuit of Vane. Just follow the river and you'll reach a small swamp. There's a crocodile here so use the trees to reach the other side since you have no way of killing it for now. Vane is already losing his sanity as you encounter him along the way. He'll start shooting and throwing grenades at you. Move from cover to cover since one pistol shot can instantly take out your whole life bar.
Once you're near him, he'll blow up the tree trunk he's standing on and will escape again. Chase after him until you reach another ruins. This time, your main objective is to kill him. For your secondary optional objective, you have to air assassinate him. You can do this by climbing the top of the tower behind him. Make your move from cover to cover when he's lobbing the grenades. He's good with the pistol so expect to take damage he catches you in the open and while he's aiming with his gun.
Once you've reached the tower, climb on the part where there's a torch and make your way to the top. Wait for him to load his grenade then leap on him to complete the second optional mission. This will complete the mission.
Sequence 9–1: Imagine my Surprise
- Kill 4 brutes
- Sabotage 2 alarm bells
Head to Kingston and look for the Royal African Company representative. Head up to the plantation and locate the men you are searching for using your Eagle Vision. There are three alarm bells in the plantation. Fortunately, two of those are easily accessible. Just use your darts and always stay in cover. Make sure to either take out the guards from stalking zones or hide the bodies.
You have to kill four brutes but there's only a few of them in the area. One thing you can do is to sabotage the two alarms first, then deliberately stir up trouble or even letting them discover a dead body so that they'll raise an alarm to call in reinforcements. Abuse using your berserk darts to create diversions and kill the other targets easily. Remember, this is the only chance in the mission where you'll get to defeat four brutes.
After locating the targets, follow them at a safe distance. Stay close as you can until they reach the last warehouse. where a cutscene will take place. After this, you have to defend yourself against an ambush. Use a smoke bomb to distract your enemies and escape the area. Become anonymous and the mission will be complete.
Sequence 9–2: Trust is Earned
- Double assassinate Cockram and Burgess
- Free 2 pirates
First up, sail to Principe. Engage and destroy the enemy ships by the beach. After sinking all of them, dock at the nearby bay then swim to the viewpoint by the beach. Synchronize with it to reveal the immediate area and for you to find to nearby collectibles.
You can also go through the ledges north of the main entrance go around the the cliff where the encampment's cannons are located. This is a good route since it will be easier for you to move around and avoid most of the enemies and patrols. Move in to the location of the first pair of captive pirates. You have to kill the gunners and guards quietly. It will be best to use a berserk dart on the officer since he can take out anyone with one shot. There's also a gunner on the nearby rooftop so using darts on the the officer and the gunner will make it easier for you to route the other guards in the nearby stalking areas.
Make your way to the next set of prisoners and covertly take out the guards along the way. There's also a viewpoint on top of the guard tower near the walls to the southeast. If you can take out the gunner there. it will make your job easier. Once the patrols and other guards are taken care of, sneak behind the two gunners at the edge of the cliff and kill them to free the pirate captives.
Upon reaching the campsite, a cutscene will occur. Your next targets are located in the fort. Just keep using the shrubs and bushes to hide and eliminate guards along the way. After reaching Burgess and Cockram in the village below the fort, head down the road. Looking at the middle of the village, the alarm bell is quite visible. Ignore that and go up the rooftop of the house from the alarm bell and traverse the tree branches. Keep moving up above the high branches and turn on Eagle Vision. Once you have located Cockram and Burgess stay on the branch and wait until they pass under. Kill them both when you get the chance.
Sequence 10–1: Black Bart's Gambit
- Stay out of combat
- Use a rope swing to kill the captain
Sail to the marked area, then follow the canal until you find the Portuguese fleet. Jump off ship and slowly swim to the target ship. Once there, climb up the ropes to and get to the top of the mast. To be safe, you can put the gunner on the main mast to sleep then grab the flag, then dive in the water. Swim back to the Jackdaw and continue ahead with the stolen flag waving on top of the Jackdaw as a disguise.
Carefully navigate the canal to avoid raising suspicions. After reaching another ship, you'll have to swim to the shore and find the unloaded cargo. Infiltrating the area won't be a walk in the park. The are several methods you can use to take out the patrols. The most effective ones will be abusing the use of sleep and berserk darts as well as assassinations from stalking areas. Use the berserk darts to create a riot. Just remember to stay in cover just in case a survivor running amok from the berserk darts' effect is looking around. Being spotted by them will instantly trigger combat, thus ruining your attempt to get the first optional objective.
Continue moving until you find two guards in the first chokepoint. It will be better to use a berserk dart on the brute and let him run towards the group of guards around the campfire. Use this chance to pass by and hide in the nearby bushes past the bottleneck. Once you're in the next area, you have to watch out of the patrol and the two brutes. Making these two brutes go berserk can create a diversion long enough for you to go around and reach the marked treasure chest. After successfully looting the chest, head to the shore carefully and the Jackdaw will arrive to pick you up. Board it and reach the wheel to pursue the ship.
While sailing in the canal, stay on the right side because there is a couple of ships blocking the path on the left side. After cartching up with the galleon, you have to swim to the shore again and take out the guards in the watchtowers. You need to do this again covertly so start killing the guards in the outside perimeter. Stay in the stalking areas and learn movement patterns of the patrols. The watchtower guards won't look around so you climb the tower behind them and take them out from behind. Just be careful of the ground patrols nearby; it is still a good move to carefully take out the ground troops before trying to clear the watchtowers.
After taking care of the first watchtower, continue moving along the bushes to encounter two patrol units. Use berserk darts on them while hiding and wait for them to thin out their ranks. Always make the officers go berserk first since they can kill instantly. Continue ahead and clean up the remaining guards before moving on.
Once you've reached the second watchtower, kill the guard there and the second optional mission will be added. You have to use a rope swing to kill the captain of the docked ship nearby – all while maintaining complete stealth. There's a rope in the tower that you can use to swing but make sure that you've cleared the guards below to ensure no one's going to blow your cover. The captain aboard the ship will just walk in a fixed pattern so wait for him to come back, run towards the rope to swing to the ship. Keep mashing the attack button while in mid-air so your attack connects when the prompt appears. Mission complete.
Sequence 10–2: Murder and Mayhem
- Stay out of combat while finding Hornigold
- Air assassinate Hornigold
Sail to the marked restricted territory first. Keep moving at reasonable speed as other enemy ships will be on the lookout. Avoid the enemy's line of sights as you continue ahead. You have to go through the narrow seaway while evading the patrol boats' detection. Upon reaching the open sea, use the spyglass and concentrate on the schooner docked beside a frigate. Once you've located the Benjamin, tag it and engage it combat. Incapacitate it and sink any other hostile ships that's coming your way. Once Hornigold's ship gets beached, leave your ship and find him on the island.
Hornigold is located in the Mayan ruins. You have to reach him without alerting the guards so move on along the left side. Use your eagle vision to find and tag hostile targets. Use stealth and take out snipers and soldiers across your path. You have to reach the adjacent hill where a fallen coconut tree connects to hill where Hornigold is located. Approach the ruins at the back where there's a lot of cover to move about. Just don't act carelessly. Take out any guards that may spot you then climb the ruins until he's within your attack range. Take note that the officer near him is moving about so wait for that officer to turn his back and pounce on Hornigold to air assassinate him.
Sequence 10–3: The Observatory
- Incapacitate all guards while unarmed
- Incapacitate 5 guardians from stalking zones
Head to the marked location east of Charlotte. This is the last discoverable location which will contain more collectibles. Un-arm yourself and head inside the jungle. The guardians are natives hiding in the bushes who will ambush you when you're near. Use your eagle vision to find them in the bushes. The gauge in the upper left corner of the screen shows the number of guardians present in the area. Also, take note that you must knock them out using your bare hands for those to be counted towards the optional missions. It won't be counted if you use sleep darts to go around them. You can sneak behind them within the stalking area so do that to knock them them out.
Head to the first jungle area and move along the stalking areas to the right side since there are three guardians along the path. There's another guardian hiding in the bushes along the stream so don't miss him.
Head to the next area where there's guardian activity and stay on the right again. Tag the guardians using your Eagle Vision then move along the stalking areas. If ever you get detected, guardians will chase after you. Lose them and hide then attempt to subdue them. As long as you don't use your weapons against them and you knock them out from stalking zones, it will be counted towards the optional objectives. After knocking out five guardians from stalking zones, you can now climb the branches and wooden platforms to incapacitate them from the air. Find all the guardians in this area then clear them before moving to the next zone.
Head to the next part of the jungle where guardians are hiding. Climb up the wooden platform and take out the guardian patrolling there. Be careful of the swamp as well since there's a crocodile roaming the waters. There will be four guardians in this zone; one is on the wooden platform, two hiding in the bushes near the central tree platform and another one along the path to the cave.
Climb the viewpoint near the cave entrance to clear up the map. Enter the cave and knock out the guardians one by one. You're not required to take them out while hiding but you have to defeat them in battle without using weapons. There will be several chests and collectibles along the way too so don't forget to loot them.
Exit the cave and head to the last jungle area. Jump on the platforms then search the path along the waterfall to find two more guardians. Knock them out then follow the straightforward path leading to the out-of-this-world ruins. There are only three guardians left in the area so find them and incapacitate them all. Two should be patrolling the area and one is hiding in the bush near the Mayan Stelae. After clearing the area, climb the black monolith and synchronize with the waypoint.
Once done, Roberts will eliminate the witnesses and you'll have to follow him inside. Pick up the wooden tray containing some blood samples until you reach the altar. Place the blood samples there and watch the following scenes.
After getting trapped inside the area, climb the ledge to the north and you should be able to climb on the wall using the spaces. As you make your way around, you can also get an animus fragment along the way. Jump to the last ledge that will take you to a short tunnel leading outside. Slide down the slope only to get injured terribly. Approach Roberts and attempt to deflect any attacks from his men. You'll eventually succumb to your wounds and black out. Mission will be complete.
Abstergo Scene 4
You'll receive LV3 security clearance at this point which will allow you
to explore more areas even more. That means you should have access to
all the Sticky Notes
and hackable computers/ terminals. I'll leave the exploring to you
since there are no missable Sticky Notes and Computers. You can always
go and find the ones you missed even after you finish the game.
Make your way to the marked security room. You should find another sticky note along the way. (Sticky Note 18) Now enter the room and hack the security computer. The code is 3757.

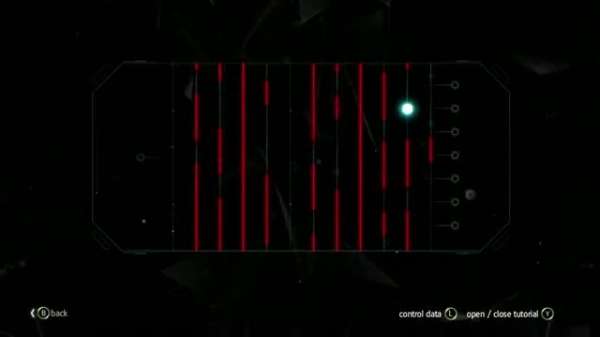
After watching the security feed, access the cloud server and hack it as well. The code is 3777. After completing the hacking sequence, you'll have to manually hack the remote computer. A new database entry will be added (Abstergo Entertainment: Aget of Cutthroats) and a cutscene will trigger.
After the scene, head back to your room and log in back to your animus.
Make your way to the marked security room. You should find another sticky note along the way. (Sticky Note 18) Now enter the room and hack the security computer. The code is 3757.
After watching the security feed, access the cloud server and hack it as well. The code is 3777. After completing the hacking sequence, you'll have to manually hack the remote computer. A new database entry will be added (Abstergo Entertainment: Aget of Cutthroats) and a cutscene will trigger.
After the scene, head back to your room and log in back to your animus.
Sequence 11-1: To Suffer Without Dying
Optional Missions:
- Sabotage 3 alarm bells
- Visit 2 old friends
Shake the cage by pressing any button, do this until an assassin releases you. You'll get your hidden blade and blowpipe back which will allow you to sneak in the fortress and utilize stealth. For your first optional objective, you have to sabotage three alarm bells before reaching the prison building. The alarm bells are close to stalking areas so you'll have a good position eliminating the guards silently and cleanly.
One alarm is located a few steps away from the gibbet where you were held, along the main path. The next one is located on the right side of the fort, beside some stalking areas near the wall. The last one is located in a guarded area right before the prison door. Don't forget to check the gibbets near the beach to the southwest. Examine the skeleton there to find Rackham's remains; this will update your secondary optional objective.
You can pretty much choose what approach you want to do. If you haven't cleared this area before, it will help synchronizing with the viewpoint to clear the map. Make your way to the prison gate to find the last alarm bell. You can use your darts to clear the area easily and allow you to sabotage the alarm bell.
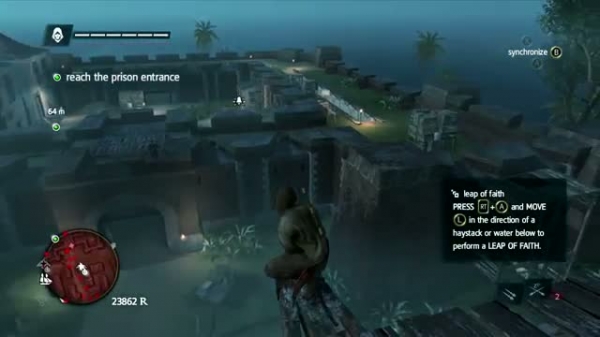
Enter the prison and continue until you reach the first set of cells. You will find Vane in one of the cells here so talk to him to complete your second optional objective. Continue along the corridors and take out the guards along the way. When you reach the second large room with the prison cells, you'll find Mary and Anne being harassed by the guards. Eliminate the two guards outside her cell by jumping up the bars above and performing a double air assassination or simply pick up a weapon and engage them in battle.

Get her and make your way to the exit. Assist Mary on your way to the waypoint outside, putting down Mary every time there are enemies so you can engage them. Continue until you've reached the boat and mission marker. Mission complete.
- Sabotage 3 alarm bells
- Visit 2 old friends
Shake the cage by pressing any button, do this until an assassin releases you. You'll get your hidden blade and blowpipe back which will allow you to sneak in the fortress and utilize stealth. For your first optional objective, you have to sabotage three alarm bells before reaching the prison building. The alarm bells are close to stalking areas so you'll have a good position eliminating the guards silently and cleanly.
One alarm is located a few steps away from the gibbet where you were held, along the main path. The next one is located on the right side of the fort, beside some stalking areas near the wall. The last one is located in a guarded area right before the prison door. Don't forget to check the gibbets near the beach to the southwest. Examine the skeleton there to find Rackham's remains; this will update your secondary optional objective.
You can pretty much choose what approach you want to do. If you haven't cleared this area before, it will help synchronizing with the viewpoint to clear the map. Make your way to the prison gate to find the last alarm bell. You can use your darts to clear the area easily and allow you to sabotage the alarm bell.
Enter the prison and continue until you reach the first set of cells. You will find Vane in one of the cells here so talk to him to complete your second optional objective. Continue along the corridors and take out the guards along the way. When you reach the second large room with the prison cells, you'll find Mary and Anne being harassed by the guards. Eliminate the two guards outside her cell by jumping up the bars above and performing a double air assassination or simply pick up a weapon and engage them in battle.
Get her and make your way to the exit. Assist Mary on your way to the waypoint outside, putting down Mary every time there are enemies so you can engage them. Continue until you've reached the boat and mission marker. Mission complete.
Sequence 11–2: Delirium
Next Page
Sequence 11–3: ...Everything is PermittedPrevious Page
Sequence 11-1: To Suffer Without Dying
Sequence 11–3: ...Everything is PermittedPrevious Page
Sequence 11-1: To Suffer Without Dying
This mission is more of an interactive set of cutscenes, there are no
real objectives here but just sequences. Start crawling forward on the
first event. Do this until you go underwater. Next up, swim up to the
surface. Head past the sharks until you reach a building. Assassinate
all of Roberts' multiple doppelgangers scattered around the area.

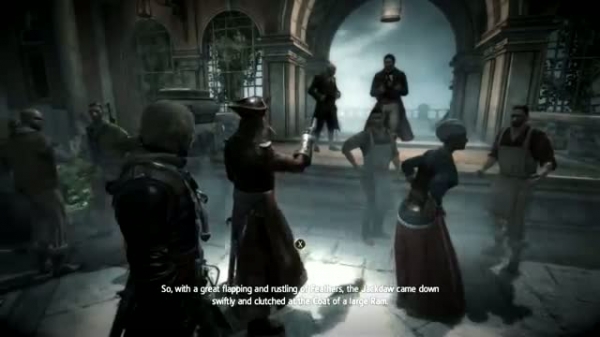
Once you get to the ship, start sailing forward until you get crashed. Wake up on the real world afterwards.
Optional Missions:
- Use the rope dart to hang 2 guards
- Use the rope dart to pull 3 guards
Head to the Assassin's camp first. Look for Adewale and speak with him to begin the mission. Follow Ah Tabai to receive a new weapon - the Rope Dart. Follow him to the forest and help him repel the invaders.
As part of your optional objectives, you have to use the rope dart to
hang 2 enemies and to pull 3 three. To hang, equip the rope dart and go
to an elevated position like tree branches. Look down on your target and
make sure you're close enough for them to be highlighted. When the
prompt showing Hang appears, press Y to execute.

For the second optional objective, you simply have to target an enemy, use the Rope Dart and pull him towards you so you can finish him off.
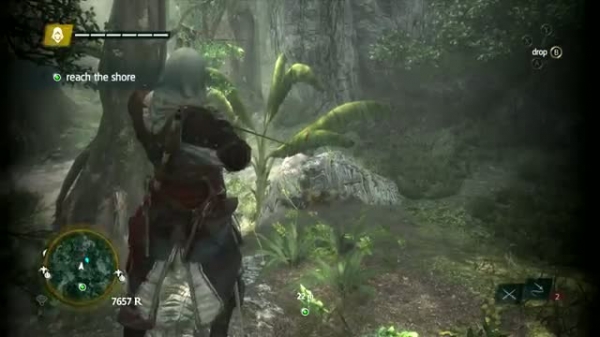
After killing enough guards for the optional mission requirement, sprint fast to the beach. For your new main objective, you have to kill 20 soldiers. Once this is done, swim to the ship and locate the Captain. You don't have to sneak at this point; just force your way through, throw out a smoke bomb near the captain, then kill him fast while he's choking from the smoke.

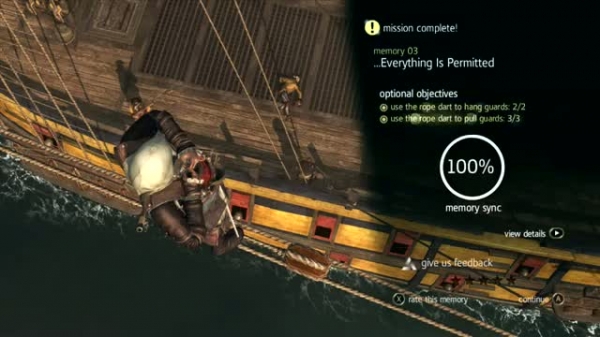 Optional Missions:
- Kill the diplomat from a haystack
- Kill Rogers from a bench
Head to Kingston and go to the Assassins Bureau. Talk to Anto to start this mission. Go to the marked location, use Eagle Vision and find the Italian diplomat by the beach. Tail the diplomat. You don't need to be too close to him; just maintain enough distance and keep him in your sight to avoid de-synchronization.
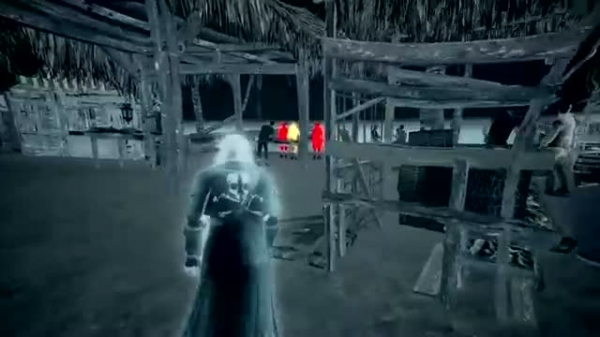
The diplomat's first stop has a haystack where you can hide and where you can take him out, as part of your first optional mission. You can go to that location ahead of him but you still need to wait for him to walk and maintain enough distance. There are guards near the haystack; you can take out the one beside the haystack near the bushes. This will give you clearance to hide in the nearby haystack without alarming the nearby guards. The target will stand beside the haystack and his escorts will leave him. Use this chance to kill him.
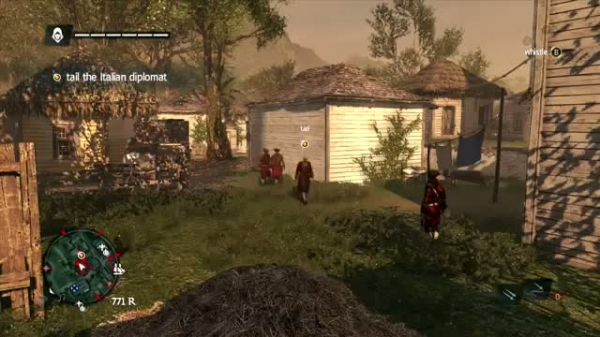
Wearing the diplomat's clothes as disguise, go to the fancy ball to find your target. Rogers will be able to recognize you immediately, so stay out of his sight. For your second optional objective, you need to assassinate him from a bench. There's one to your left. You can see some people sitting down on this particular aisle as well so it's fairly recognizable. This bench branches off from the walkway on the left side entrance guarded by security. You don't need to do anything after sitting but to wait. When Rogers walks in front of you, kill him. After the assassination, quickly flee away from the scene and lose your heat then talk to the Assassins to complete the mission.

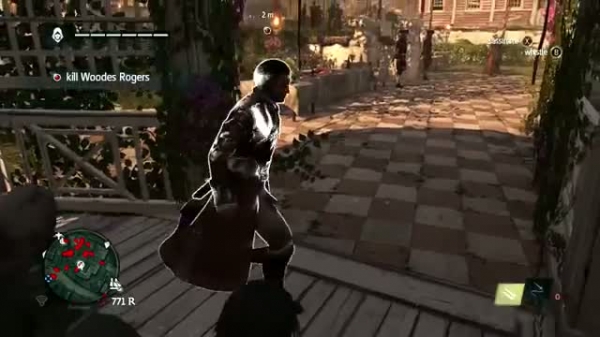 Optional Missions:
- Use the rope darts to kill Roberts
- Kill 8 guards by destroying powder barrels
Track down Roberts' location in Africa by following the story marker, use the closest fast travel icon that you currently have to arrive there quicker. Head ashore and continue ahead. For your first optional mission, you have to use the gunpowder barrels along to kill multiple enemies. To do this, lure a bunch of enemies then detonate the barrel. Don't worry about taking damage with the explosion; you should be sturdy enough to survive the blast at this point.
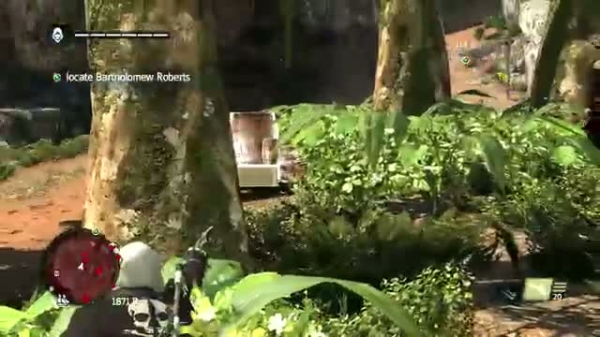
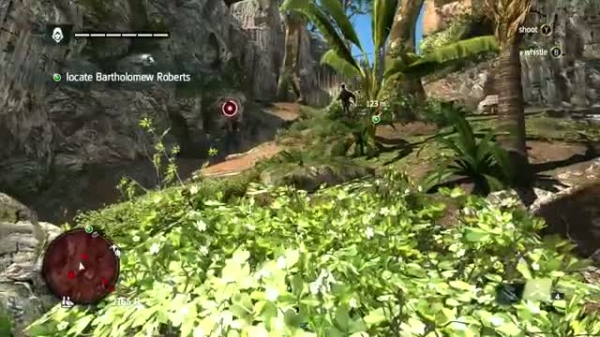
Head to the marker and use your Eagle Vision to locate Roberts. He will begin to escape once you spot him, so chase him down fast until he returns to his own ship. Follow the Royal Fortune but don't stick too close since the nearby cliff will be blown and your path will be blocked. Go around and keep attacking Robert's ship continuously. Use your swivel guns to take out any fire barrels left along your path.

Once you've reached the open sea, the Spanish Navy will be waiting and engage Roberts as well. You have to destroy the other ships and incapacitate the Royal Fortune so you can move in and board it. Go up to one of the lower masts, find Roberts and keep hitting the Tool button with the Rope Dart equipped when he's below. When you're in range, you should be able to fire the Rope Dart and hang Roberts to complete the second optional mission.
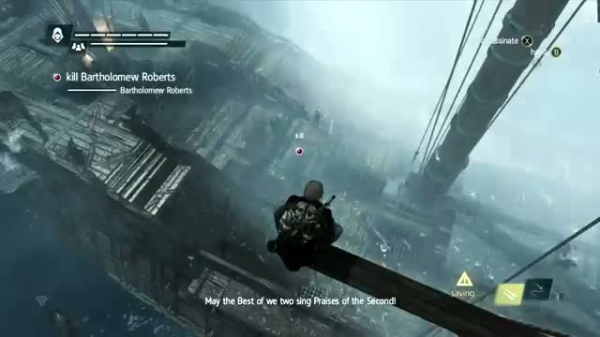
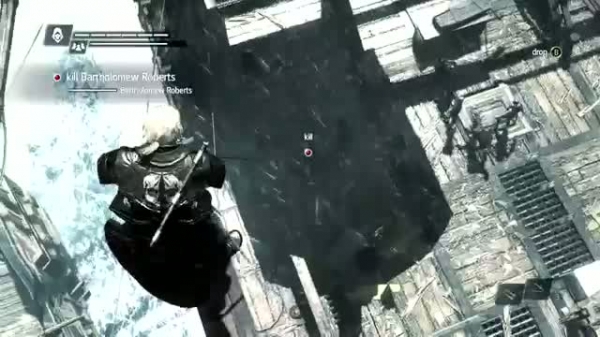
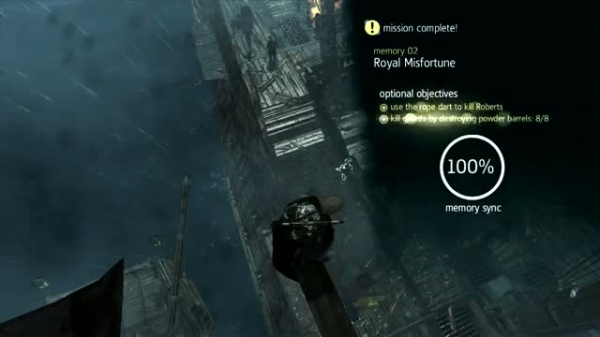 Optional Missions:
- Stay out of combat
- Use 2 guards as a human shield
Fast Travel to Havana first, then locate the starting point atop a building. Curfew is being imposed now so expect the guards to be immediately hostile. Slowly head to the church and find El Tiburon, Torres' right-hand man exiting the rear door of the church. Carefully tail them through the city through the rooftops. Just beware of the gunners along the way. You'll finally see the target enter the fort. You need to infiltrate the fort next.
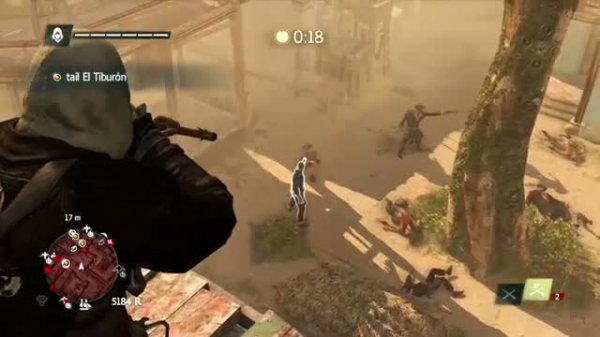
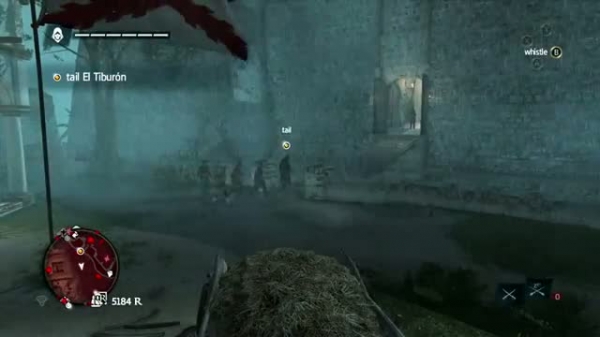
You have to enter the fort stealthily. The best way to infiltrate the fort is in the same corner where the viewpoint is located. There are guards nearby so use some Berserk Darts to get rid of them then use the wooden beams on the fort walls and make your way to the broken part of the wall. Once there, take your time quietly taking out the guards; it is time-saving than reloading your checkpoint and doing things all over again. Take out the gunners first since they have longer sight range and will most likely blow your cover. The more guards you subdue, the easier your job will be.
Once you're clear, cross the rope in the middle of the fort and wait for Torres to walk underneath. Finish him off with a rope dart but you'll discover that you only killed a double.
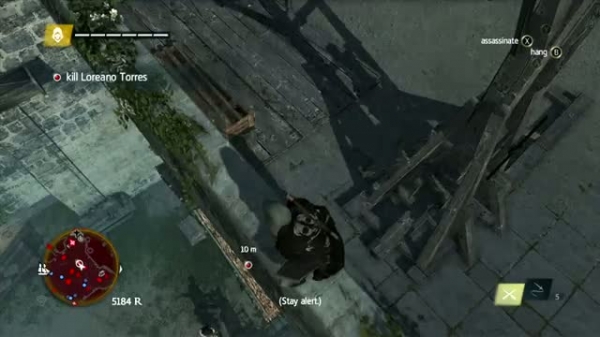
You will begin to face El Tiburon next. You can only damage him using your pistols, so make sure all of your shots count as much as possible. His minions will respawn indefinitely, so don't bother killing them; just counter their attacks as necessary.
For the second optional objective, you have to use one of the enemy soldiers as human shield. Keep a few of El Tiburon's men alive then wait for him to load his pistol. Press the correct button to use a nearby soldier as shield when prompted. Do this twice to complete the secondary mission. Keep shooting at El Tiburon. In case you run out of bullets, throw a smoke bomb for cover or just run around the fort while reloading your weapon.
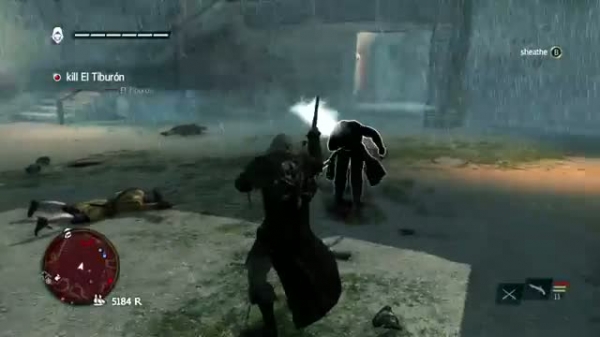
When he's dead, run away and keep lose your heat until you are anonymous. Then return to the Assassin's Bureau afterwards to complete the mission.
 Optional Missions:
- Free the 7 guardian hostages
- Use the Observatory's defenses to kill 4 guards
There will be two level 36 Man o War's blocking the way before you can reach the shore where the mission starts. If you're having problems overpowering them, make sure to upgrade your ship with the best parts you can afford. Since this is the last mission, you should have at least taken time to explore various wrecks and found treasures that may contain blueprints for unlocking the elite parts. Take out both ships then swim to the shore.
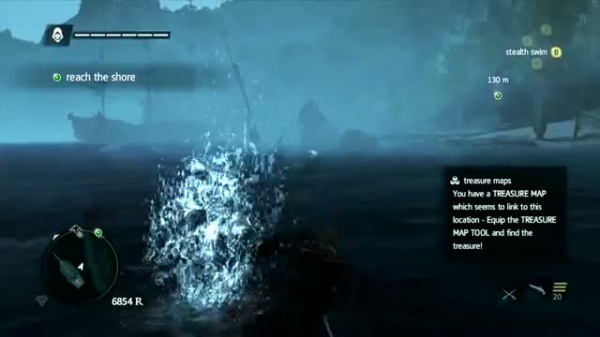
Make your way to the forest and you'll find soldiers here. For your first optional mission, you have to free captive guardians by killing their captors covertly. Continue along the forest until you reach the viewpoint. You'll find the first set of hostages there. Continue inside the cave and you'll find two more hostages under the first bridge. Go down the ramp nearby to circle around and take out the guards to free them.
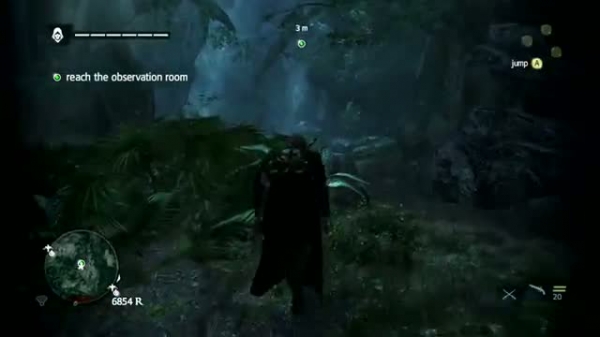
Go to the upper level of the cave until you find a patrol. There will be three more hostages in the deadend to the left. Be careful since there will be two patrols behind the gunners. Prioritize getting rid of the patrols first before eliminating the gunners. After releasing them successfully, the optional objective should be complete. Leave the cave and continue to the Observatory.
In the Observatory, sprint forward, head past the guards, and hop on a large, bright structure on the right. Make your way up these pillars while they are moving, until you reach the platforms at the top. Wait for the pillars to bring you to a beam you can hop over to. Jump through the beams here, until you reach a ledge that gets destroyed under you. Sprint forward to the door to reach the observation room where Torres and his men are waiting.
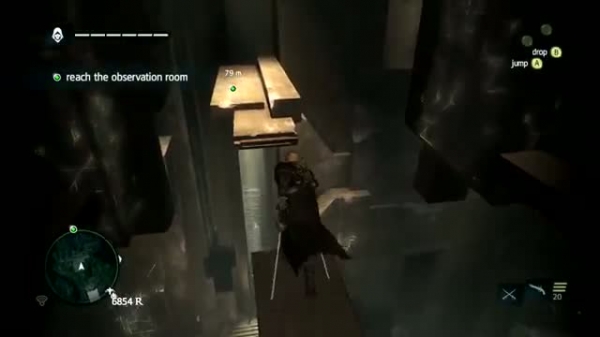
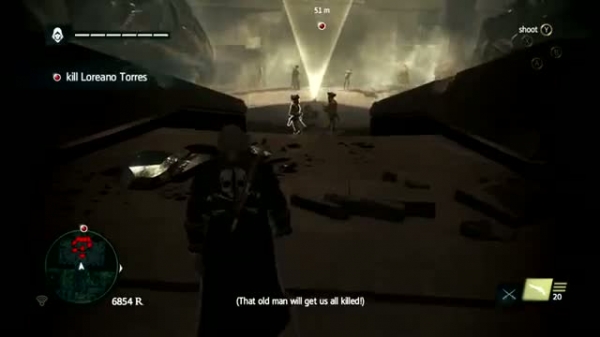
Avoid getting hit by the beam of light on the floor otherwise you'll get incinerated. Head to the open area to face the guards. For your second optional mission, you have to kill 4 guards using the heat rays on the floor. Keep your weapon ready and counter their attacks. Make sure to throw them towards the wall of light for the kills to count. You have to move quick since if they get killed when they're walking above the heat ray, it won't get counted.

Swing across the metal beams under the platform where Torres is standing then jump to the next wall. These walls will fire heat rays at regular intervals and through fixed lines. Time your movement and make your way to the right then jump on the floating monoliths. Reach the moving blocks on the ceiling and wait on the horizontal bar to get near you. Jump on it and you'll be in range for an air assassination. Don't jump immediately; wait for the heat ray to stop firing and perform an air assassination to complete the mission.
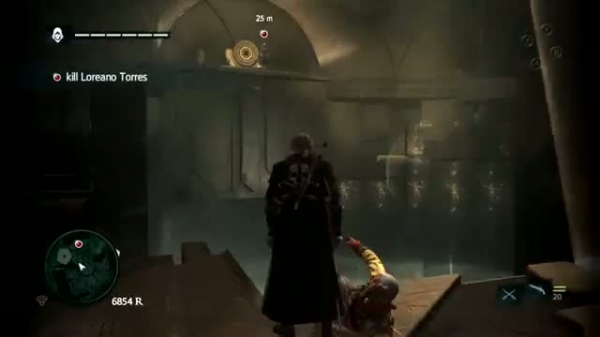
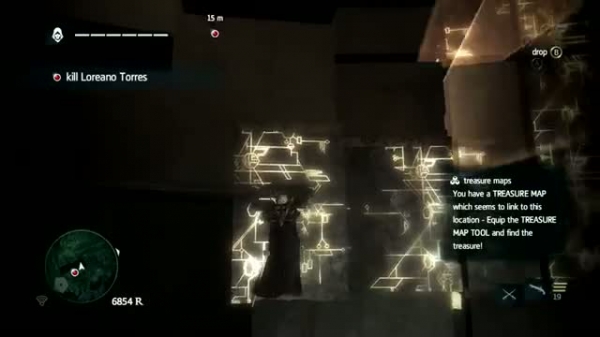
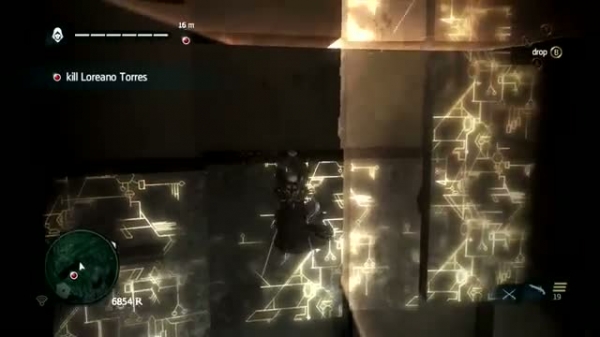
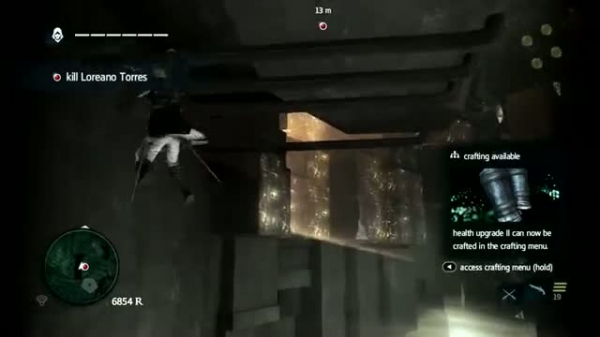
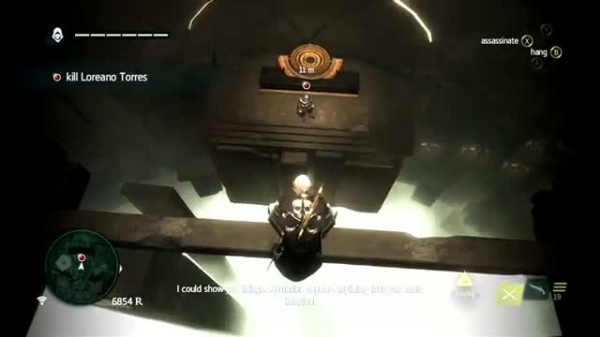
Once you get to the ship, start sailing forward until you get crashed. Wake up on the real world afterwards.
Sequence 11–3: ...Everything is Permitted
- Use the rope dart to hang 2 guards
- Use the rope dart to pull 3 guards
Head to the Assassin's camp first. Look for Adewale and speak with him to begin the mission. Follow Ah Tabai to receive a new weapon - the Rope Dart. Follow him to the forest and help him repel the invaders.
For the second optional objective, you simply have to target an enemy, use the Rope Dart and pull him towards you so you can finish him off.
After killing enough guards for the optional mission requirement, sprint fast to the beach. For your new main objective, you have to kill 20 soldiers. Once this is done, swim to the ship and locate the Captain. You don't have to sneak at this point; just force your way through, throw out a smoke bomb near the captain, then kill him fast while he's choking from the smoke.
Sequence 12–1: A Governor No Longer
- Kill the diplomat from a haystack
- Kill Rogers from a bench
Head to Kingston and go to the Assassins Bureau. Talk to Anto to start this mission. Go to the marked location, use Eagle Vision and find the Italian diplomat by the beach. Tail the diplomat. You don't need to be too close to him; just maintain enough distance and keep him in your sight to avoid de-synchronization.
The diplomat's first stop has a haystack where you can hide and where you can take him out, as part of your first optional mission. You can go to that location ahead of him but you still need to wait for him to walk and maintain enough distance. There are guards near the haystack; you can take out the one beside the haystack near the bushes. This will give you clearance to hide in the nearby haystack without alarming the nearby guards. The target will stand beside the haystack and his escorts will leave him. Use this chance to kill him.
Wearing the diplomat's clothes as disguise, go to the fancy ball to find your target. Rogers will be able to recognize you immediately, so stay out of his sight. For your second optional objective, you need to assassinate him from a bench. There's one to your left. You can see some people sitting down on this particular aisle as well so it's fairly recognizable. This bench branches off from the walkway on the left side entrance guarded by security. You don't need to do anything after sitting but to wait. When Rogers walks in front of you, kill him. After the assassination, quickly flee away from the scene and lose your heat then talk to the Assassins to complete the mission.
Sequence 12–2: Royal Misfortune
- Use the rope darts to kill Roberts
- Kill 8 guards by destroying powder barrels
Track down Roberts' location in Africa by following the story marker, use the closest fast travel icon that you currently have to arrive there quicker. Head ashore and continue ahead. For your first optional mission, you have to use the gunpowder barrels along to kill multiple enemies. To do this, lure a bunch of enemies then detonate the barrel. Don't worry about taking damage with the explosion; you should be sturdy enough to survive the blast at this point.
Head to the marker and use your Eagle Vision to locate Roberts. He will begin to escape once you spot him, so chase him down fast until he returns to his own ship. Follow the Royal Fortune but don't stick too close since the nearby cliff will be blown and your path will be blocked. Go around and keep attacking Robert's ship continuously. Use your swivel guns to take out any fire barrels left along your path.
Once you've reached the open sea, the Spanish Navy will be waiting and engage Roberts as well. You have to destroy the other ships and incapacitate the Royal Fortune so you can move in and board it. Go up to one of the lower masts, find Roberts and keep hitting the Tool button with the Rope Dart equipped when he's below. When you're in range, you should be able to fire the Rope Dart and hang Roberts to complete the second optional mission.
Sequence 12–3: Tainted Blood
- Stay out of combat
- Use 2 guards as a human shield
Fast Travel to Havana first, then locate the starting point atop a building. Curfew is being imposed now so expect the guards to be immediately hostile. Slowly head to the church and find El Tiburon, Torres' right-hand man exiting the rear door of the church. Carefully tail them through the city through the rooftops. Just beware of the gunners along the way. You'll finally see the target enter the fort. You need to infiltrate the fort next.
You have to enter the fort stealthily. The best way to infiltrate the fort is in the same corner where the viewpoint is located. There are guards nearby so use some Berserk Darts to get rid of them then use the wooden beams on the fort walls and make your way to the broken part of the wall. Once there, take your time quietly taking out the guards; it is time-saving than reloading your checkpoint and doing things all over again. Take out the gunners first since they have longer sight range and will most likely blow your cover. The more guards you subdue, the easier your job will be.
Once you're clear, cross the rope in the middle of the fort and wait for Torres to walk underneath. Finish him off with a rope dart but you'll discover that you only killed a double.
You will begin to face El Tiburon next. You can only damage him using your pistols, so make sure all of your shots count as much as possible. His minions will respawn indefinitely, so don't bother killing them; just counter their attacks as necessary.
For the second optional objective, you have to use one of the enemy soldiers as human shield. Keep a few of El Tiburon's men alive then wait for him to load his pistol. Press the correct button to use a nearby soldier as shield when prompted. Do this twice to complete the secondary mission. Keep shooting at El Tiburon. In case you run out of bullets, throw a smoke bomb for cover or just run around the fort while reloading your weapon.
When he's dead, run away and keep lose your heat until you are anonymous. Then return to the Assassin's Bureau afterwards to complete the mission.
Sequence 12–4: Ever a Splinter
- Free the 7 guardian hostages
- Use the Observatory's defenses to kill 4 guards
There will be two level 36 Man o War's blocking the way before you can reach the shore where the mission starts. If you're having problems overpowering them, make sure to upgrade your ship with the best parts you can afford. Since this is the last mission, you should have at least taken time to explore various wrecks and found treasures that may contain blueprints for unlocking the elite parts. Take out both ships then swim to the shore.
Make your way to the forest and you'll find soldiers here. For your first optional mission, you have to free captive guardians by killing their captors covertly. Continue along the forest until you reach the viewpoint. You'll find the first set of hostages there. Continue inside the cave and you'll find two more hostages under the first bridge. Go down the ramp nearby to circle around and take out the guards to free them.
Go to the upper level of the cave until you find a patrol. There will be three more hostages in the deadend to the left. Be careful since there will be two patrols behind the gunners. Prioritize getting rid of the patrols first before eliminating the gunners. After releasing them successfully, the optional objective should be complete. Leave the cave and continue to the Observatory.
In the Observatory, sprint forward, head past the guards, and hop on a large, bright structure on the right. Make your way up these pillars while they are moving, until you reach the platforms at the top. Wait for the pillars to bring you to a beam you can hop over to. Jump through the beams here, until you reach a ledge that gets destroyed under you. Sprint forward to the door to reach the observation room where Torres and his men are waiting.
Avoid getting hit by the beam of light on the floor otherwise you'll get incinerated. Head to the open area to face the guards. For your second optional mission, you have to kill 4 guards using the heat rays on the floor. Keep your weapon ready and counter their attacks. Make sure to throw them towards the wall of light for the kills to count. You have to move quick since if they get killed when they're walking above the heat ray, it won't get counted.
Swing across the metal beams under the platform where Torres is standing then jump to the next wall. These walls will fire heat rays at regular intervals and through fixed lines. Time your movement and make your way to the right then jump on the floating monoliths. Reach the moving blocks on the ceiling and wait on the horizontal bar to get near you. Jump on it and you'll be in range for an air assassination. Don't jump immediately; wait for the heat ray to stop firing and perform an air assassination to complete the mission.


Post a Comment