Devil May Cry 4 - Mission 04: Cold Blooded
Approach the Gyro Blade at the west end of the Library and hit it with Buster to bring it to life. Afterwards, use Buster to push the Gyro Blade across the room and into the closed door. Gyro Blades can break doors that are marked with these symbols; smashing this one allows you to exit the Library.

Gyro Blade | 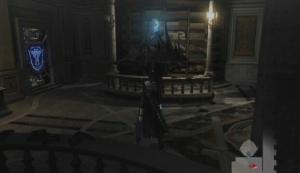
Closed Door |
Return to the Gallery; a red mesh immediately covers the exit, and a group of Frosts and Scarecrows spawns. You can activate the Gyro Blade in this room and use it to damage the enemies here if you are so inclined; doing so is in no way necessary, however. Slashing the Gyro Blade in quick succession while it's active sets it spinning, razor-sharp blades protruding from its sides. Once the enemies have been dealt with, break the destructible objects in the Gallery to get some Red Orbs before returning to the Grand Hall.
Grand Hall
Drop down to the first floor of the hall and approach the coffin. There's a dormant Gyro Blade north of the coffin; locate the Gyro Blade and punch it into the coffin to destroy it, uncovering a seal.You cannot use this now, but it will prove useful later. For now, enter the Large Hall using the door at the east end of the hall.
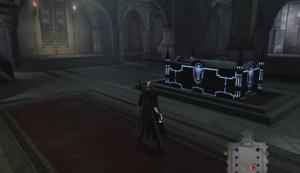
Coffin | 
Gyro Blade |
Large Hall -- Gyro Blade Puzzle
Move down the hall until you reach a blocked doorway. Two Gyro Blades must be set onto the remaining pedastles here. Use Buster to activate either of the two Gyro Blades here now, and then punch it down to the west end of the hall. When you reach the end of the hall, punch it into the gate there to free another Gyro Blade. Leave the Gyro Blade you used to smash the gate behind and punch this new one back to the blocked doorway. Some demons spawn down the hall; simply slash the Gyro Blade a couple of times to set it spinning and punch it down the hall to easily to clear them out. When you reach the blocked doorway, place the blade on one of the empty pedestals. Afterwards, use the door midway down the east end of the hallway to enter the Dining Room.

Blocked Doorway | 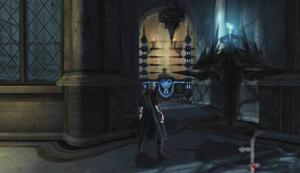
Gyro Blade Gate |
A pair of white knights occupy this area. Eliminate them, then move north and enter the corridor at the end of the room. Turn into the dead end to find another Gyro Blade. Use Buster to activate the blade, and then punch it towards the fireball corridor. Punch the Gyro Blade in front of you to move down the corridor without taking damage from the unceasing fireballs. You won't take any damage as long as the Gyro Blade is ahead of you. At the end of the corridor, punch the blade into the machine to destroy it.
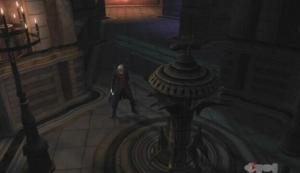
Gyro Blades | 
Fireball Hallway |
You can attempt Secret Mission 02 if you wish; check out the 'Secret Missions' section for more info. When you're ready to proceed, head through the door across from the Secret Mission parchment. A group of Scarecrows spawns in the fenced off area here; the Gyro Blade in this room can be used to quickly take them out if you wish. Once the Scarecrows have been dealt with, locate the wheel and start pummeling it with attacks. The wheel will open the cage's gate, allowing you to enter the hall and move the Gyro Blade onto the final pedestal.

Secret Mission 02 | 
Wheel |
Central Courtyard -- Boss Battle: Bael
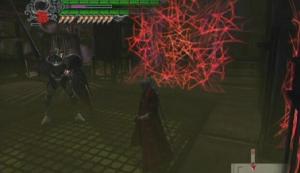
The two Rusalkas will effortlessly dodge any attempt you make to use Snatch or Buster on them, so hit them with standard melee attacks instead. The seemingly harmless Rusalkas are actually attached to a hideous toad demon named Bael. He'll reveal himself once you've dealt enough damage to the Rusalkas. While far from agile, Bael can move around the courtyard by leaping up into the air and then landing on the ground with a devastating thud. As soon as Bael leaps up into the air, start running in any direction and then Side Roll in an attempt to avoid the subsequent body slam.
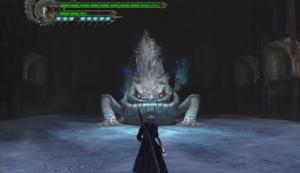
Bael |
Bael has a variety of attacks in his arsenal; a couple of ice based ones that can freeze Nero, and a few brutal melee attacks. One attack in particular to watch out for is Bael's lunge attack in which he attempts to catch Nero in his open mouth and then chew on him. This attack deals a large amount of damage, so be ready to Side Roll out of the way when Bael lunges forth. It's quite hard to dodge Bael while you're attacking him, but side rolling can save you in most cases.
Most of his melee attacks are tough to dodge if you are too far away from him, but by keeping close to him you should be able avoid the majority of his melee attacks with the Side Roll ability. You might even be able to get behind Bael after successfully dodging one of his attacks, allowing you to chip away at his health bar while he turns around or before he leaps up into the air. Bael has a couple of long-range ice attacks, too; side rolling or jumping should be enough to get you out of the way, but if you do get caught by one of his ice attacks and Nero becomes frozen, rotate the Left Thumbstick (or Analog Stick) until the ice shatters.
Bael will occasionally hide himself away and leave you to deal with the Rusalkas. Henceforth, they aren't nearly as passive as they were during your first encounter with them. You'll want to be careful when facing the Rusalkas again, as their attacks can deal a fair amount of damage. While they are out, focus all of your attacks on a single one, because if you deal enough damage, she will become stunned and you can then use Buster on her to pull Bael back into the battle. If you don't manage to stun one of the Rusalkas and bring Bael back in this fashion, however, he will eventually reenter the battle and attempt to catch Nero in his open mouth, so start running to one side and Side Roll to avoid him.
If Bael sustains enough damage, he'll fall over stunned; this is your chance to knock off a sizeable chunk of his health with Buster. Bael will likely become stunned at least twice during this fight, so don't stray too far from him to avoid missing an opportunity to hit him with a the special Buster combo.
When Bael is close to death, his skin shifts to a reddish tint and he'll begin to attack more aggressively. If at any point he freezes while in this state, immediately get away from his face, as the ice quickly shatters and Bael will lunge forward. If you're low on health and willing to risk it, jump up and slash the Rusalkas while Bael is frozen to squeeze some Green Orbs out of them.
Once you've managed to bring Bael down, you'll obtain a Rusalka Corpse. With this item, Nero's Devil Arm will glow while near a secret (i.e., Red Orb stashes, Blue Orb Fragments, and Secret Mission parchments). Collect the mass of Red Orbs that the demon leaves behind, then head through the door on the west side of the courtyard to clear the mission.
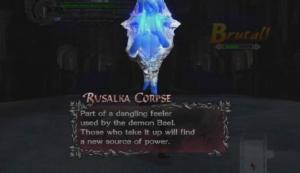
Rusalka Corpse
Devil May Cry 4 - Mission 05: Trisagion
Right off the bat, a pair of Mephisto manifest and attack. These guys look scary, but their ethereal cloaks can be snatched away, leaving behind a pathetic, writhing, insect-like creature. The Mephisto can be hard to grab while they're cloaked, so wait until one is readying an attack and then use Snatch several times to remove its cloak.
Your enemy is snatchable once uncloaked, so pull the pathetic thing towards you and dish out some damage with a combo. If you aren't quick enough, the exposed Mephisto will don its cloak again; just snatch it away once more and finish it off. Since you're facing two of them, try using Streak to push the uncloaked Mephisto away from the other to avoid attacks from the cloaked Mephisto.
Rusalka corpse you acquired after defeating the boss at the end of the previous mission, Nero's Devil Arm will glow when you reach the stairs at the south end of the area. If you hop off of the stairs and walk underneath the archway you'll find the Secret Mission 03 parchment attached to the base of the stairs. You can't complete this one without the Hold ability, so you'll have to return to this area sometime after completing Mission 08 when it's acquired. Check out the 'Secret Missions' section for more info.
Secret Mission 03 |
Tip -- A Gold Orb sits on one of the stone ledges along the eastern side of the graveyard. To get to this orb, first smash the statue in the middle of the area, hop onto the pedestal, and face east. Next, jump towards the ledge, use Roulette Spin and then Air Hike. If you did this correctly, you should have landed on the middle ledge. From here, use Streak 2 to collect the large Red Orb and Gold Orb on the two other ledges.
Stone Ledge |
Master's Bedroom
Use the door at the top of the stairs at the south end of the graveyard to enter the Master's Chamber. Kill off the Bianco Angelo in this room and then stand before the fireplace. Jump up and slash away at the mirror until it shatters, revealing the Secret Mission 10 parchment. Attempt this one if you wish; it's one of the easier ones and can be completed with a minimal amount of skills. Check out the 'Secret Missions' section for more info.
Secret Mission 10 |
When you're ready to move on, head through the door at the south end of the room to reach the Torture Chamber. Pummel the wheel to the right to raise the gate before the Gyro Blade. Activate the Gyro Blade and punch it across the catwalk. When you reach the next area, punch the Gyro Blade into the tower to trigger a cutscene.
Wheel | 
Gyro Blade |
Fortuna Castle -- B1
You'll face two Mephisto down here. Use snatch to remove their cloaks and attack while they're vulnerable. Afterwards, approach the pillar and examine it to obtain the Wing Talisman key item. With this item in your possession, you can jump onto the seals and use them to reach the top of the well. A Red Orb cluster can be found in a cell about midway up the well.
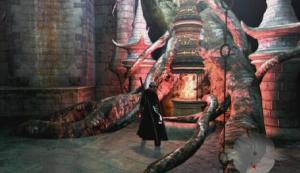
Pillar | 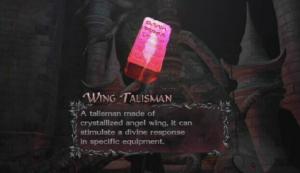
Wing Talisman |
Once back in the Torture Chamber, a group of Scarecrows appears and the way out is sealed. Begin fighting the Scarecrows and eventually a pair of Mephistos join the fray. Switch your focus from the lesser demons to the two Mephisto. Focus on one of them at a time; first snatch away its cloak, then use Streak to push it away from the crowd. Repeat this to take out the other Mephisto and then finish off the Scarecrows and leave the chamber.
Grand Hall
Kill off the two Frosts in the Large Hall and then use the western-most door to enter the Grand Hall. Use the Gyro Blade in this area to bust the coffin in the middle of the room if you haven't already. With the Winged Talisman in hand, the seal underneath the coffin is active; hop onto it to reach the chandelier above, then hack away at its stem to drive it into the portrait of Sanctus, revealing a secret doorway. Proceed through the doorway and down the stairs to reach the Underground Laboratory entrance.
Tip -- Use Snatch to grab the Vital Star S in one of the cells on the left side of this room.
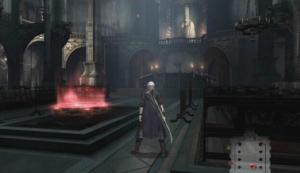
Active Seal | 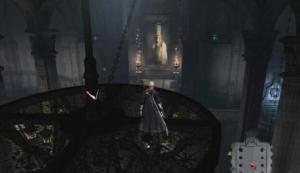
Chandelier |
Move to the end of this area to clear the mission.
Mission 06: Resurrection
Blue Orb Fragment -- You likely spotted this one during the opening cutscene. Grab the fragment on your way down and then drop down.
Once you've reached the bottom, head through the door to trigger yet another cutscene. The enemies you encounter here -- called Cutlasses -- can be a real pain to deal with. If you have the right skills, however, you should have an easy enough time taking them out. First, target one of the Cutlasses, use Charged Shot to stun it and then immediately use Streak or Split to knock the Cutlass up out of the floor. There are three of them here, so use Streak to push the flopping Cutlass away so you can attack it without taking damage from the others. When the three Cutlasses have been dealt with, the red mesh blocking the door at the other end of the tunnel will disappear.
Game Room
Proceed through the door at the end of the Cutlass tunnel to reach the Game Room. To remove the blue mesh blocking the door at the other end of the room, the Nero statue must reach the space at the end. Yellow circles move the Nero piece to a nearby space of the same color, red spaces spawn a group of enemies or a couple of energy beams, blue spaces spawn Red and Green Orbs, and white spaces have no effect.
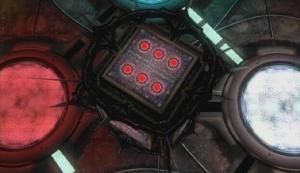
Dice | 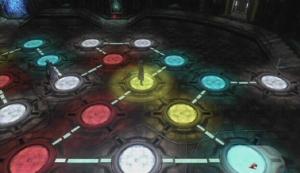
Game Board |
The dice will land on the number that was on top when you hit it. With this knowledge you can roll a six every time and get out of this one quickly, or use the first yellow space to jump ahead. Use Buster on the dice shortly after the two appears; if you hit it correctly, the dice will land on six. When the Nero piece reaches the end, head through the door to reach the Containment Chamber
Containment Room -- Boss Battle: Agnus
This one is simple, really; jump up into the air, use Snatch to pull one of the flying swords to you, then use Buster to launch that sword at the window Agnus is hiding behind. Several swords are in the air at once, so make sure that you'll have enough time to execute Buster without being interrupted by a sword slash. The only threat Agnus poses is that he will sometimes charge the room with electricity. To avoid this, hop onto the circular platform in the middle of the room when the window glows red, as you won't take any damage here. Some of the broken swords may drop Green Orbs, so collect those if your health is low.
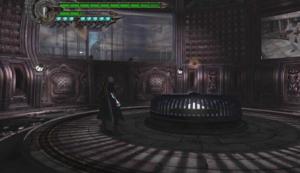
Agnus | 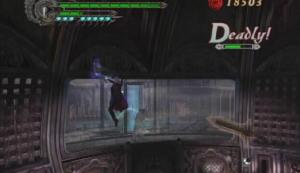
Buster |
Continue throwing swords into the window until it shatters. Jump up to the cowering Agnus to confront him and receive a powerful key item, Yamato. With the Yamato you can toggle Nero's Devil Trigger, which will boost up his attack power and speed significantly, and will also restore small amounts of health while it's active. The effects won't last long at first, but Purple Orbs can be purchased from the Item screen to lengthen the D.T. Gauge. The gauge refills when Nero takes damage, deals damage, or when a Devil Star item is used. It can only be toggled when at least three units are full.
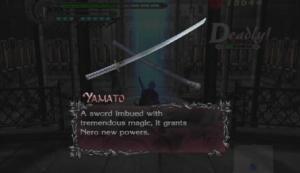
Yamato |
Foris Falls
Pummel the wheel to extend the bridge across Foris Falls and remove the blue mesh blocking entrance to the stairs. Climb these stairs to the top.
Blue Orb Fragment -- At the top of the stairs, notice the fragment hovering in mid-air. You'll need Streak to grab this one. Stand at the end of the platform directly in front of the hovering orb and use Streak to launch Nero into it. Streak 2 might be necessary to make it out far enough, but you can just use Snatch to grab it in mid-air if that's the case.
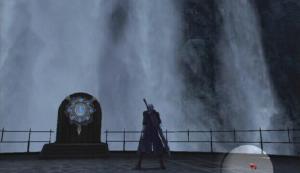
Wheel | 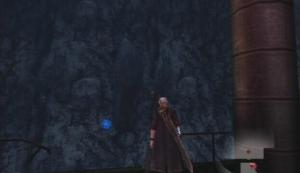
Blue Orb Fragment |
Head through the door at the top of the stairs once you're ready to move on.
Angel Creation
Fight off the knights in the first part of the room. The High Roller into mid-air Buster combo works quite well, and if you can manage to get behind one, use Devil Trigger and slash away to make short work of him. The Secret Mission 04 parchment can be found on the wall in the northwest corner of this area. Attempt the mission if you wish; check out the 'Secret Missions' section for more details. There are more knights at the other end of the area, so make your way there and fight them. Proceed through the door once they've been dealt with
Secret Mission 04 |
To Mitis Forest
Interact with the console in the Underground Laboratory to seal off the bottom floor. Afterwards, use the floating seals to reach the door at the top of this area. Use the door there to return to the Grand Hall. Head up the stairs, through the smashed Sanctus portrait and exit through one of the doors on either side of it. Move to the end of the courtyard walkway and use the door there. Cross the Bridge in Foris Falls and go through the door to reach the Forest Entrance. Move forward to trigger a cutscene and clear the mission.
Devil May Cry 4 - Mission 07: The She-Viper
The Secret Mission 08 parchment is attached to the stone gazebo up ahead, but don't activate it because Nero does not have the Royal Guard fighting style needed to clear it. You'll have the opportunity to complete this one in a later mission, though, so just ignore it for now. Pummel the Red Orb cluster near the structure to collect a large number of Red Orbs and then make your way to the next area.
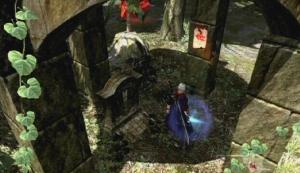
Secret Mission 08 | 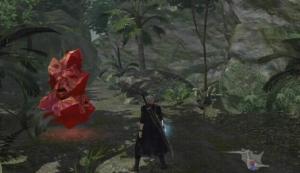
Red Orb Cluster |
Before dropping down, follow the path to the left to find a Holy Water and then drop down to the area below to encounter a group of Chimera Seeds. Nero can take one of these guys out with a single Buster, so tear through them one by one, then head to the east end of the area and enter the building there.
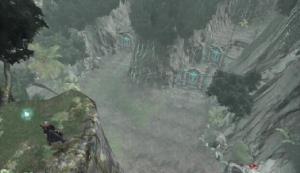
Holy Water |
Ruined Church
Inside the Ruined Church, Chimera Seeds attach themselves to Scarecrows to form Chimeras. These enemies don't appear to have any more health than the normal Scarecrows you're used to facing by now, but they are a bit more dangerous in that the plant attachment can use its blades to damage you even while its host is on the ground or in mid-air. The blades don't deal a whole lot of damage, but they can kick your style rank down a notch or two if you aren't careful.
When the Chimeras have been dealt with, break the glass enclosing the area at the west end of the church and smash the pods there to collect a large amount of Red Orbs. Afterwards, head up the stairs in the southeastern corner of the church and follow the walkway to its end to reach a wheel. Pummel the wheel to spawn tiles which you can then follow to reach the walkway at the opposite end of the church. Don't loiter though; as another tile manifests, the one behind it disappears, so keep moving to avoid falling to the floor below. Once you've made it onto the walkway, use the door at its end to reach the Ruined Valley.
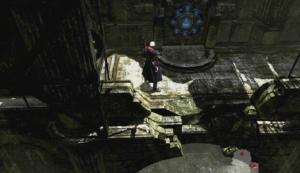
Wheel | 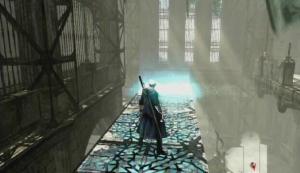
Tiles |
Ruined Valley
Head up the stairs and stand on the seal to spawn a couple of Grim Grips. Use the two Grim Grips to reach a wheel. Attack the wheel until tiles start appearing beyond the nearby cliffside. These tiles act similarly to those you used to cross the Ruined Church, though they are a great deal more hazardous as there is no real pattern to their appearance and disappearance. To make matters worse, two Mephistos will loom over you while you cross the valley.
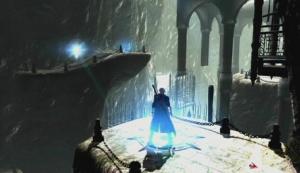
Grim Grip | 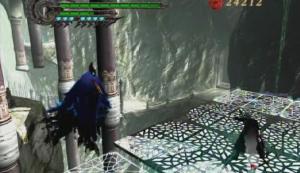
Mephisto |
Try your best to avoid the specters (or, try to kill them), but concentrate on the tiles around you. If the tiles beneath Nero turn red, quickly move onto a stable set of tiles, in other words, not another red one! In the event that you do fall, you'll find yourself in the Ruined Lowlands where you then must defeat the enemies there before an exit seal will appear. Air Hike can be a real lifesaver (well, a timesaver, at least) here, because it can be used to reach a stable tile as a tile beneath you disappears.
Blue Orb Fragment -- This fragment is at the south end of the valley; wait until there are some tiles beneath it, then jump up into the air and take it into your inventory.
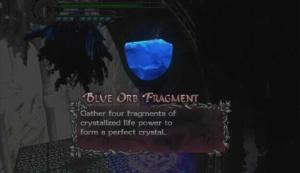
Blue Orb Fragment |
Once you've safely made it to the end of the line, head through the door there to reach the Lapis River.
Lapis River/Ancient Plaza
There isn't much to see in this area, other than some Red Orb-holding pods and the Secret Mission 05 parchment. The parchment is attached to a tree in the southwest corner of the area. Attempt it if you'd like; check out the 'Secret Missions' section for more info.
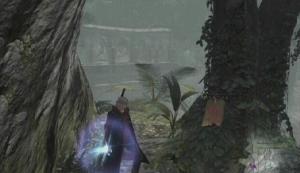
Secret Mission 05 |
When you're ready to proceed, follow the northwest trail to the Ancient Plaza. A group of Scarecrows and Chimera Seeds quickly spawns and the exit is sealed. Clear the area of enemies to remove the red mesh blocking the exit, then follow the trail to reach the Windswept Valley.
Windswept Valley/Ruined Valley
Activate the Gyro Blade, slash it to set it spinning, and then punch it towards the two doors to destroy them. Set the blade spinning again and launch it at the Scarecrows and/or Chimeras in the area. Afterwards, send the Gyro Blade through the adjacent door to destroy it. Use the door on the other side to reenter the Ruined Valley.
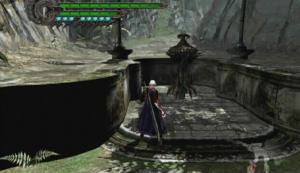
Gyro Blade | 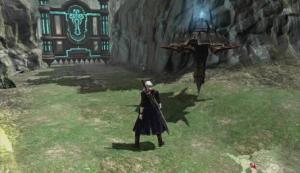
Gyro Blade Door |
The humongous viper in this area is intent on having Nero for a midday snack. Dash across the walkway -- trying your best to avoid taking hits from the viper -- to reach the opposite side of the valley. Once you have safely made it across, head through the door to reach the Forgotten Ruins.
Forgotten Ruins
Blue Orb Fragment -- Attack the Combat Adjudicator and attain a style rank of A to receive some Red Orbs and a Blue Orb Fragment.
Head through the arched doorway and kill the Scarcrows and Chimera Seeds on the other side. Afterwards, move to the end of the walkway. You'll find a Divinity Statue there; you are just before a boss battle, so it would be a good idea to at least purchase some healing items just incase. The Air Hike ability will be of great use against this boss, so use Proud Souls to purchase it if you lack it. It is a bit pricey, but you can select the 'Cancel All' option from the menu to refund the Proud Souls you've spent thus far. Get Air Hike for now; you can always refund again after the battle and get your old skills back if you wish.
| | 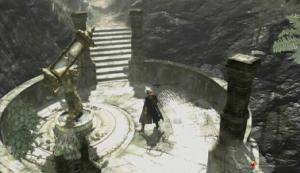
Divinity Statue |
When you're ready to go, enter the She-Viper's Den to face Echidna.
Den of the She-Viper -- Boss Battle: Echidna
The She-Viper has quite a bit of health, but her attacks, while quick, are easy enough to dodge and do not deal very much damage. During the first half of the battle, Echidna's primary attack consists of her shooting up into the air, circling the arena and then lunging through the trees in an attempt to knock you aside. Hold down the Lock-on button to keep track off her movements while she's up in the air. When she thrusts out towards you, Side Roll out of the way just before impact to avoid the attack.
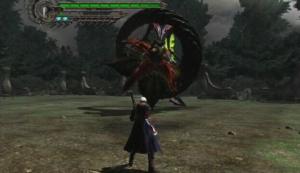
Echidna |
When Echinda is not up in the air, she'll be hovering somewhere in the arena. When Echidna begins to twist her torso to the side, jump up into the air to avoid the tail swipe that follows. You can use Hell Bound to pull yourself towards her torso and then hack away while in mid-air. A good combo to use against her while she's hovering: slide towards her with Streak, use High Roller and then Split while up in the air. To add some punch to this combo, while standing a safe distance away, charge up Nero's Blade to Exceed level 3, then use Streak and follow through; both High Roller and Streak are significantly more powerful while Red Queen is powered up. If she becomes stunned (she'll slump down and put one of her hands to her head), use Buster on her to perform a powerful combo.
Echidna will also root herself into the ground and release a Chimera Seed or two from the bulb beneath her. Jump up towards the bulb and use Buster to inflict a fair amount of damage. If you have the Air Hike ability, you can leap up onto Echidna's base when she spits out a Chimera Seed to reach her torso. Activate Nero's Devil Trigger while up there and slash away until she bumps you off. If at any point during the battle you are low on health, seek out and destroy one of the pod clusters in the area, as the pods may hold Green Orbs.
Once about half of Echidna's health bar has been chipped away, the sky darkens and it begins to rain. At this point, the She-Viper begins to glow yellow and her attack pattern shifts. She has a couple of new moves in her arsenal, including one where she plunges into the ground and raises a number of tentacles in the immediate vicinity. While Echidna is embedded into the ground, approach her and activate the Devil Trigger if you are able to, otherwise slash away until at least three of the bars on the D.T. Gauge are full. If you can deal enough damage to Echidna while she's in this state, she will become stunned; use Buster at this point to deal heavy damage to her. sStay far away from Echinda while she's using her other attacks and wait until she embeds herself in the ground again, as that's the best opportunity to inflict some serious damage.
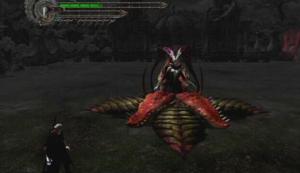
Devil Trigger |
You'll obtain the Sephirothic Fruit key item once you've manage to best Echinda, but unfortunately she manages to get away. Darn! Nevertheless, approach the gnarled roots in the southwest corner of the den and examine them. They react with the Sephirothic Fruit and wither away, allowing you move on to the next mission.
Devil May Cry 4 - Mission 08: Profession Of Faith
Make your way to the west end of the initial area and fight off the Scarecrows and Chimera Seeds there.
Blue Orb Fragment -- The pod hanging from the ceiling of the tunnel in the middle of the Ancient Training Ground holds the fragment. Stand below it, jump up into the air and use a normal attack to break it open and claim the fragment.
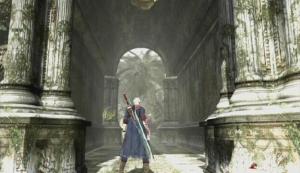
Pod |
Examine the gnarled roots in the next area; with the Sephirothic Fruit in your possession, they'll shrivel up and clear the way. There's nothing of particular interest here, so head straight for the exit in the southwest corner of the area.
Ancient Plaza
The Assaults, the reptilian humanoids first encountered here, are much like the Frost enemy that you are already familiar with. They're a bit quicker, though, but that's easy enough to compensate for. As with Frosts, Buster is quite effective when you're crowded, as Nero will grab the Assault and swing it around, damaging the surrounding enemies. These guys are also snatchable, so use this to your advantage and lock one into a combo. Get ready to Side Roll while an Assault burrows underground or jumps up into the air, as it soon thrusts towards you in both cases.
Watch out for their projectile attack as well; just jump out of the line of fire to avoid taking damage. These guys also carry shields, but you can simply jump over them to get by this, or use Charged Shot to knock them down, then move in and pummel them. Once the Assaults have been dealt with, make your way to the Windswept Valley using the northeast exit.
Windswept Valley/Ruined Church
There aren't ant enemies here, so ignore the Gyro Blade and head for the Ruined Church entrance in the eastern corner of the valley. Kill off the Scarecrows and Assaults in the room, then smash all of the pods in the church for a large amount of Red Orbs. Afterwards, pass underneath the stairwell archway and use the Sephirothic Fruit to remove the roots there. Proceed through the door to reach the Lost Woods.
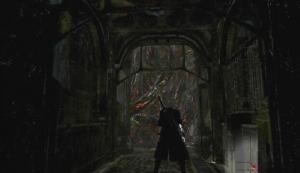
Roots |
Lost Woods
The inscription on the tablet in the middle of the woods reads: 'This is a gentle forest, yet those who treat her unkindly will fall into darkness. Those who do not wish for darkness should seek the light. For if not, all efforts will be in vain.' Just that bit of information should give you a good idea what the Lost Woods is all about; if you don't follow the light, you'll be aimlessly wandering through the woods. If you head the wrong way, you'll end up in the Hidden Pit area where you then must fight off a group of enemies to make an exit seal appear. Stepping on this seal will bring you back to the initial area of the Lost Woods.
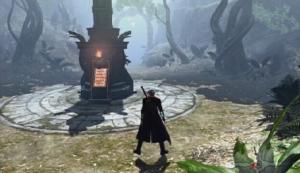
Lost Woods | 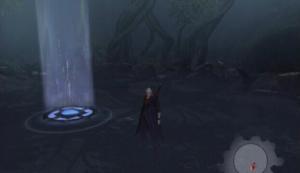
Hidden Pit |
Blue Orb Fragment -- To get this fragment, you'll have give the Hidden Pit a visit. After killing the enemies in the area, stand in front of the seal and spin the camera around to look north. You should be able to spot a Blue Orb Fragment in the trees; stand underneath the fragment and use Air Hike to take it into your inventory.
To get out of the Lost Woods you have take the path where the archway shadows are pointing towards the statue in the middle of the woods (see image below). Think how the shadow of something would appear in real life if the sun were shining behind it. If you chose the correct path, you'll find yourself in an area identical to the first. In each instance, take the path that the sun is shining on and you'll soon make it out of the woods.
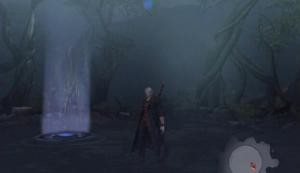
Blue Orb Fragment | 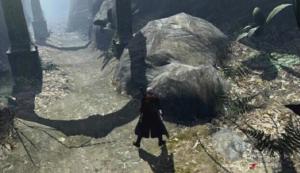
Shadows |
Forgotten Ruins/Ancient Training Ground
Once you have made it out of the woods, head to the other end of the walkway (do not drop down to the area below!) and go through the door there. Defeat the Scarecrows and Assaults near the beginning of the area, then move to the end of the walkway and proceed through the door. You'll be facing a boss in the next area, so use the Divinity Statue to purchase healing items and new skills if you have Proud Souls on hand; Streak, Split, and Air Hike are all good ones to have for the upcoming battle.
Grand Album Bridge -- Boss Battle: Angelo Credo
Credo is a fierce and masterful swordsman while in his demon form. The hulking Aegis Shield that he holds can block any kind of attack, making it especially difficult to break through his guard. As well as being a solid defender, he's also a heavy hitter. To make matters worse, Green Orbs are scarce during this battle, so you're essentially limited to whatever healing items you might have stored away in your inventory.
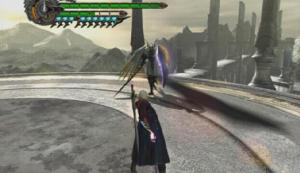
Angelo Credo |
Most of Angelo Credo's attacks are quickly executed, but if you dodge the strike using Side Roll or Jump, you can usually get a few hits in while his attack animation finishes. Credo's move pool mainly consists of various sword swings and a couple of powerful combos that can be dodged fairly easily, but there are a couple of moves in particular to look out for. If Credo teleports away from you, it is likely that he will then follow up with a sword throw. The thrown sword travels very fast, but you can get a small Green Orb if you manage to bat it down with a slash.
The thrown sword can also be caught using Buster, but Credo has to be just the right distance from you and your timing must be bang on. With too little distance between yourself and Credo, the sword is impossible to catch, so it would be best to simply dodge this attack with a Side Roll than to risk taking damage. If Credo is far away enough from you (i.e., at the opposite end of the platform), use Buster as soon as the sword leaves his hand.
When Credo slashes his sword downwards, Side Roll to avoid this attack, move behind him and use Buster while he recovers. Sometimes when Credo is knocked into while his shield is raised, he'll lift his shield up and stand on one leg; get out of the way when you see this animation, because a downward sword swing will follow. If you can get in there with a quick Streak, though, you can interrupt the attack and hopefully start a combo. Once you've broken through his guard, don't let up! Pummel him with normal strikes, Streak, Split, High Roller and normal slashes until he recovers. Activate Devil Trigger if you have Credo locked into a combo and get in as many hits as you can.
The Devil Bringer is the key to success here; use Buster on Credo whenever he stumbles backwards or his guard falters. If you deal enough damage to Credo with a single combo, he will stagger on the spot; use Buster at this moment to perform a special variant that'll deal a significant blow to Credo's health. There is a very small window of opportunity to hit Credo while he's staggering, so your best bet is to use Buster as often as possible so you don't miss a chance to deal heavy damage.
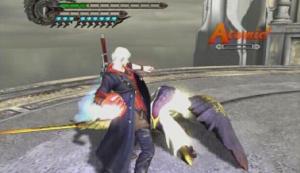
Buster |
Once Credo is close to death, he'll kneel, evidently wounded, and become significantly more powerful when he stands back up. He's more difficult to manage during this powered up stage, so activate Devil Trigger and wail on him while he's kneeling; hopefully you can kill him and avoid having to face a stronger, faster, more reckless Angelo Credo. He'll also fly during this stage, and has a new attack in which he summons a number of swords around himself and proceeds to launch them towards you. Credo does not seem to be nearly as defense-oriented during this stage, and should be close to death, so slash away at him to quickly hack off the remainder of his health.
You obtain the Aegis Shield once you've bested Credo. The Hold ability is available with this attack. To use Hold, first grab a snatchable enemy with Snatch and then hold down the Devil Bringer button to use that enemy as a meat shield.
Devil May Cry 4 - Mission 09: For You
Move south towards the HQ until you encounter a group of enemies. You're up against a couple of Bianco Angelos and a new, more powerful variant, the Alto Angelo. Together, these guys can be tough, as they have a number of group-based attacks. You can actually wipe them all out at once with a simple tactic, but the Charged Shot skill is required to do so. Wait until the knights gather together in the distance and begin to form a mass of energy. Charge Blue Rose and as soon as the ball of energy comes hurtling towards you, blast it to send it back to them. This should destroy each of them and possibly earn you an SSS grade. This is a great way to earn a large amount of Proud Souls, and also to unlock the 'Smokin' Sick Style!!!' achievement on the Xbox 360 version.
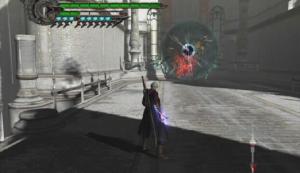
Angelo Attack | 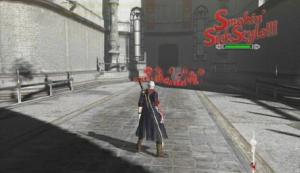
SSS Grade |
Once the knights have been dealt with, enter the Grand Hall at the end of the bridge.
Grand Hall
Blue Orb Fragment -- Attain an S grade on the Combat Adjudicator in the northeast corner of the Grand Hall to receive a large amount of Red Orbs and the fragment.
Tip -- A Devil Star S can be found in the northwestern corner of the hall.
Exit through the doorway at the south end of the hall and hit the switch there to trigger a cutscene. Hitting this switch opens up a new path, but also triggers lasers in the Grand Hall. These lasers can take out a bar of health if touched, so coming into contact with them is something you want to avoid. Turn right at the top of the stairs, drop down to a safe spot between the laser there, and then jump up onto the east walkway. Head through the doorway and up the stairs to enter the Key Chamber.
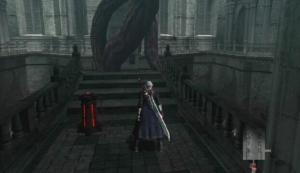
Switch | 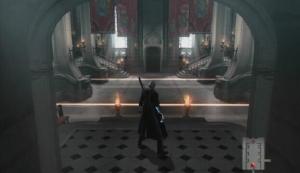
Lasers |
Key Chamber
Another trio of knights occupies this chamber. A red mesh covers the key item tower, and two rapidly moving lasers effectively block off exit through the doorway at the opposite end of the room. If you are now familiar with the tactic outlined in this mission's opening paragraph, use it to wipe the group out if the opportunity arises. When the knights have been dealt with, approach the tower and examine it to obtain the Key of Cronus key item.
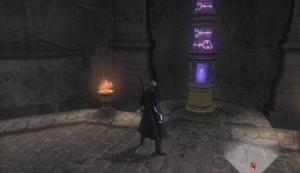
Tower | 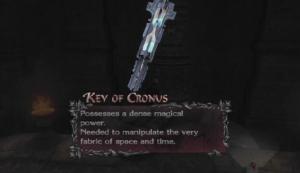
Key of Cronus |
Approach the machine in the middle of the chamber and hit it with a Buster to slow time for a short while. The rapid moving lasers blocking thr western doorway are slowed to a dull pace, allowing you to slip through..
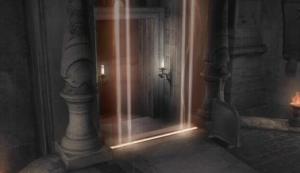
Blocked Doorway | 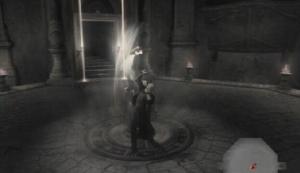
Time-slow Machine |
The Gauntlet
Slash the wheel in the southeastern corner of the room until an elevator is lowered. All you must do is kill the enemies that spawn in the elevator to ascend to the next level. When the first batch has been dealt with, step out of the elevator and into the small area. Activate the machine with a Buster to slow time, then move past the lasers and to the elevator at the other end. Kill the Frosts within to reach the third level.
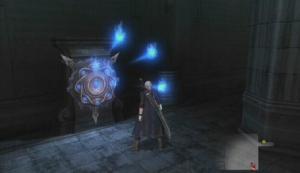
Wheel | 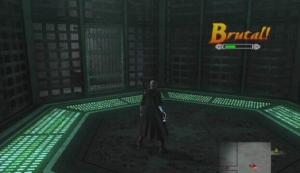
Elevator |
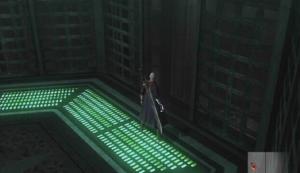
Blue Orb Fragment -- While in the elevator at the third level, turn away from the laser room and drop down from the open doorway to reach an area below. A Blue Orb Fragment can be found here. You'll have to jump to get it, and doing so sets you back to the first level. Activate the wheel again to call the elevator and make your way back up to the third level.
Dropdown | 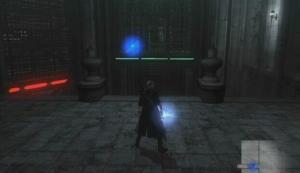
Blue Orb Fragment |
Defeat the Assaults to ascend to the exit.. Use the Divinity Statue just before the next area if need be, otherwise head up the stairs to proceed.
Agnus' Room -- Boss Battle: Angelo Agnus
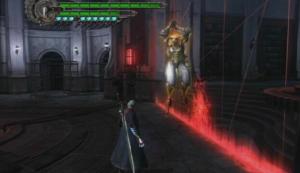
After facing the Angelo version of Credo, Agnus comes off as a real pushover. While a couple of his attacks can be problematic, they are easy enough to detect and then dodge. Angelo Agnus is not nearly as nimble as Credo, and mainly relies on his demonic powers rather than a sword and shield. While he does carry a hulking blade, his sword swipes are brutish and easily avoided.
Angelo Agnus |
Agnus hovers in mid-air for the duration of the battle, which allows him to move around the room quickly. He'll use his sword when close to you; the only attack you really need to watch out for is the downward swing, but there is ample warning for that one; when he raises his sword up over his head, get ready to Side Roll out of the way. Agnus will frequently summon Gladius to aid him in battle, however these creatures can actually be used against him.
In their reptile forms, the Gladius glide around the room and will occasionally change to sword form and dart towards you. Use Snatch to knock a Gladius out of the air and embed it into the ground below, then use Buster to pluck it out of the ground and automatically hurl it towards Agnus. The throw will take a second or two to execute, so make sure that none of the other enemies are about to hit you to avoid having your attack interrupted. Using Agnus' own creatures is the easiest way to deal damage to him.
One move in particular to watch out for is Agnus' health sapping ability. When you hear him shout 'Your strength is mine!' get ready to jump or Side Roll out of the way, as Agnus will soon charge towards you and attempt to grab hold of you. If he manages to get you, he then proceeds to sap your health to restore a portion of his own health bar. The sapping can be cut short by toggling Devil Trigger.
If at any point during this battle you require health, the few cages in the room release Green Orbs when broken. The Gladius creatures sometimes leave behind White Orbs when killed which are used to charge the D.T. Gauge. Another one of Agnus' abilities appears similar to the Gladius summon in its casting, but the disc of energy will instead launch a number of fireballs towards you. A rather lengthy casting, but most of the fireballs can be dodged rather easily if you're a good distance away from the casting.
For Agnus' most devastating attack, he summons two Cutlasses, fastens them to his arms and starts to spin towards you. Get as far away from him as you can while this is going on and get ready to Side Roll, as Agnus will throw them towards you once he's done with them.
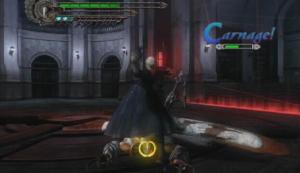
Once Agnus has sustained a certain amount of damage, he will slump over and remain still for a short while. Use Buster while he is in this state to perform a powerful combo, dealing a significant blow to Agnus' health bar. Keep an eye on him to avoid missing the opportunity to use this.
Buster
Devil May Cry 4 - Mission 10: Wrapped In Glory
Exit Agnus' room to the Gauntlet and step into the elevator to trigger a cutscene. The new enemy that the cutscene introduces is a more powerful variant of the Mephisto enemy you have dealt with previously. The Faust's attacks differ from his lesser counterpart's; his claw swipes cover a wide-range as opposed to the pinpoint precision that the Mephisto usually use, which make his attacks much harder to dodge.
The Faust is sided by two Mephisto, so things could get ugly. The Faust's cloak is a bit tougher to remove than a Mephisto's, too. First, jump up into the air and use Buster on the enemy, then immediately start charging Blue Rose; as soon as you touch the ground, lock-on and hit the Mephisto/Faust with Charged Shot. If the cloak isn't removed entirely, use Snatch until the remainder is removed. Wail away on the vulnerable Faust/Mephisto once it's exposed.
When the enemies have been dealt with, step out of the elevator and onto the platform. Hit the time-slow machine with Buster, then make your way past the lasers and onto the elevator at the other end of the platform. Attack the wheel on the elevator until the blue mesh blocking the dropdown is removed. Step out of the elevator, hit the machine, move to the first set of lasers and use the dropdown to reach the floor below.
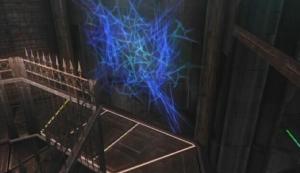
Blocked Dropdown | 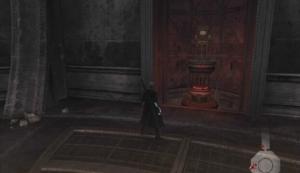
Time-slow Machine |
Key Chamber/Grand Hall
A group of four knights, headed by an Alto Angelo, occupy the Key Chamber. This could be a tough fight, as facing five enemies in this cramped chamber leaves very little room to move around. Luckily the machine in here can be activated to slow time, making facing the knights much easier.
The entire group can be wiped out at once with a simple tactic, but the Charged Shot skill is required to do so. Wait until the knights gather together and begin to form a mass of energy. Charge Blue Rose and as soon as the ball of energy comes hurtling towards you, blast it to send it back to them. This should destroy each of them and possibly earn you an SSS grade.
Afterwards, hit the time-slow machine, then slip past the lasers to reach the Grand Hall. Head up the steps at the northern end of the room and cross the bridge to the second HQ building.
Security Corridor
You must make it safely to the opposite end of this laser-ridden corridor. Having the Air Hike ability will aid you greatly here, but it is not entirely necessary. Use Buster on the machine to slow time, then start down the corridor. Some of the lasers must be hopped over, while others are high enough to be walked under. With Air Hike, you can simply jump over everything; just be careful not to touch one of the lasers on the way down.
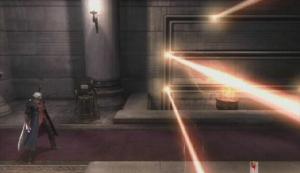
Corridor | 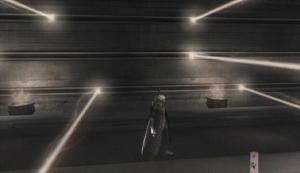
Lasers |
The parchment for Secret Mission 06 can be found at the other end of the corridor. Attempt it if you wish, otherwise proceed through the doorway up ahead. In the next room, drop down from the ledge to the floor below. Defeat the two Mephisto and the Faust that then spawns. Afterwards, approach the machine and examine it to part with the Key of Cronus to slow time. Scale the slowed blades until you are on the second one from the top. Jump onto the ledge on the south side of the room and proceed through the door there.
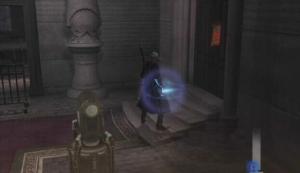
Secret Mission 06 | 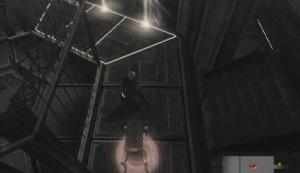
Time-slow Machine |
Experiment Disposal
Destroy the knights that spawn here and then hack away at the Red Orb cluster in the northeastern corner of the room until it shatters. Afterwards, approach the lift at the other end of the room
Blue Orb Fragment -- The Roulette Spin and Air Hike skills are needed to get to this one. Before (!) taking the elevator up to the Meeting Room, stand about halfway between the wall and the elevator. Next, normal jump and use Roulette Spin, then immediately Air Hike to reach the elevator's lowest frame. From here, normal jump inwards and, while in mid-air, turn around, use Air Hike and try to land on the frame above. The fragment is up here; use Air Hike to grab it.
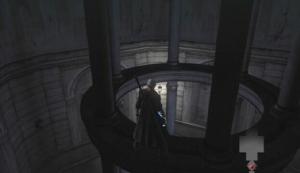
Elevator Frame | 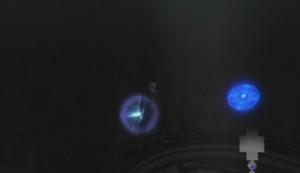
Blue Orb Fragment |
Examine the machine to set the Wing Talisman there. Take the lift up to the Meeting Room.
Meeting Room
Defeat the pair of Alto Angelos that appear and then head through the doorway at the south end of the room. There's a Divinity Statue just before the next room, as well as the Secret Mission 07 parchment. Attempt the secret mission if you wish; check out the 'Secret Missions' section for more info.
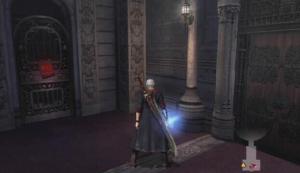
Secret Mission 07 |
A boss battle takes place in the proceeding room, so use the Divinity Statue to purchase healing items and new skills. Smash the candelabras for Green Orbs to completely fill your health bar before heading through the door.
Ascension Chamber -- Boss Battle: Dante
You've faced Dante before, but this won't be anything like the fight that took place after the introductory tutorial; this is strictly a fast-paced, no holds barred affair. Dante's abilities are similar to Nero's, and on Devil Hunter difficulty at least, he won't use any weapons other than his blade and dual handguns. Blue Rose is nigh useless during this bout because Dante will almost always manages to use Ebony & Ivory to negate any gunfire you send his way.
Trying to inflict damage with Red Queen can be an issue too, as your strikes are usually met by Dante's Rebellion blade with a clash of steel. As if having the majority of your attempts to attack blocked with a similar attack wasn't bad enough, Dante is also faster, stronger and more nimble than Nero. However Nero does have one weapon that Dante does not, the Devil Bringer…
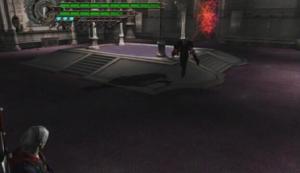
Dante | 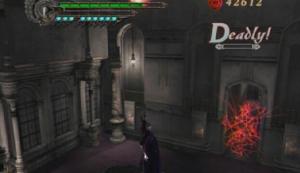
Dante |
As Dante does not have a Demon Arm of his own, Nero's will be the main tool used to best him. Dante is strikingly agile, but if you can manage to hit him with Snatch, he may slip up, allowing you to get a few hits in, which is at least something. If you do throw him off balance, immediately activate Devil Trigger and slash away until he recovers. Buster is among one of the most effective skills in your arsenal here, so hit Dante with it whenever the opportunity arises.
If you're low on health, the candelabras in the room may hold Green Orbs, so seek one out and destroy it to (hopefully) restore some health. That, or use any healing items you may have stored away in your inventory.
There is one simple and surefire way to defeat Dante, though it completely zaps any challenge from this battle. First, jump up onto the dais in the middle of the room, stand near the ledge, overlooking Dante, and wait until he jumps up to join you. Grab him with Buster while he's in mid-air to throw him back to the ground below. Dante can't block your attack while in mid-air, and it's very effective, taking out almost an entire bar. Use this tactic repeatedly for an easy win.
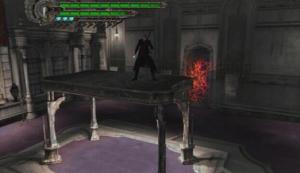
Dais
Devil May Cry 4 - Mission 11: The Ninth Circle
Blue Orb Fragment -- There's a Combat Adjudicator at the south end of the Advent Chamber. Attack the Combat Adjudicator and attain a combo grade of SSS to receive a bunch of Red Orbs and a Blue Orb Fragment. You'll have to use a large variety of moves to earn the grade.
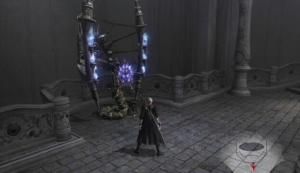
Combat Adjudicator | 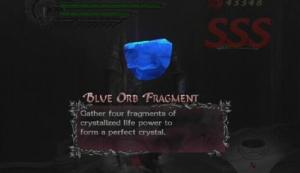
Blue Orb Fragment |
Slash the wheel on the eastern side of the chamber to trigger a set of Grim Grips. Use Hell Bound on the grips to scale up to the walkway above. Move forward to trigger a Mephisto and Faust spawn. Defeat the specters, hit the switch at the far end of the walkway and use the lift that appears to reach the second floor.
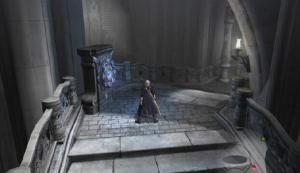
Wheel | 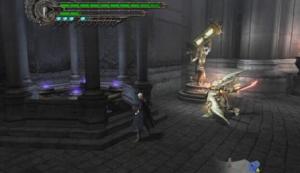
Lift |
Advent Chamber -- 2F
Approach the gate at the end of the walkway and read the inscription on the tablet to the left. The inscription reads 'Proceeding alone is strictly prohibited.' To open the gate, stand on the pressure pad, then target one of the Scarecrows on the other side and use Snatch to pull it onto the second pressure pad. When the gate is open, kill the two Scarecrows and continue down the walkway.
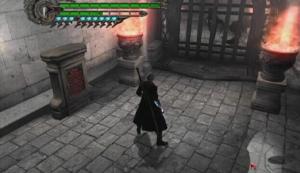
Gate | 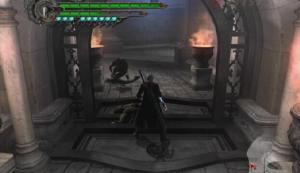
Scarecrows |
You have to hit the two Grim Grips here a certain way to scale the wall at the other end of the pit. Snatch 3 may or may not be required, but use the Divinity Statue to purchase the skill if you lack it to ensure success. Jump towards the first Grim Grip and use Hell Bound to propel yourself towards the second. Latch onto the second grip as soon as you are able to; you won't reach the wall if you wait too long. If you hit the second grip correctly, Kick Jump up the wall to scale the rest of it.
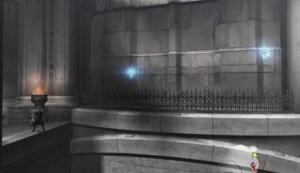
Grim Grips |
The second set of Grim Grips is easier to cross, but you will have to defeat a group of Bianco Angelos if you miss one and fall to the area below.
Tip -- A Devil Star S can be found in the pit, just below the high wall. You'll have to defeat the knights that spawn there if you wish to retrieve it, though.
Once you've made it over the wall, kill the Alto Angelo there and then slash the wheel until a third set of Grim Grips appears. Use the grips to reach the third floor, then hit the switch and kill the group of knights that spawns. Drop down from the left end of the platform and make your way back to the Divinity Statue on the second floor. Ignore the enemies here and step onto the lift.
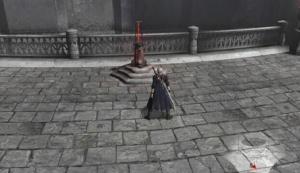
Switch | 
Lift |
Advent Chamber 3F -- Boss Battle: Sanctus
While at first glance Sanctus appears to be nothing more than a frail old man, he is, in fact, no pushover. What he lacks in physical strength he more than makes up for with his demonic powers. The battle begins with Sanctus hovering in the air, enclosed in a protective sphere. The shield must first be shattered before you can inflict any damage. Sanctus can glide around the arena fairly quickly, so breaking the sphere is easier said than done.
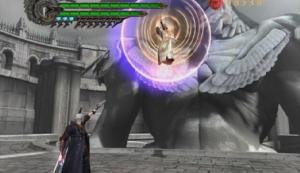
Sanctus |
Hell Bound can be used on the two orbs that hover near Sanctus to pull yourself towards him, putting you in prime position to get a few slashes in on the sphere. The sphere will shatter when it sustains a certain amount of damage. Once it's down, do not let up, as Sanctus will eventually restore it, forcing you to bring it down all over again. Hit him a few more times while the sphere is down and he'll fall to the ground, stunned. Slash away while he's vulnerable and then use Buster to perform a special combo that will deal a significant blow to his health.
Vulnerable | 
Buster |
Sanctus is completely helpless while on the ground, but while floating in the air he uses a few different attacks, but the majority of those are easy enough to avoid. One attack you will want to watch out for, though, is when Sanctus launches a bevy of fireballs towards you. If you're on the ground and a fair distance from him, simply Side Roll to one side to dodge them all or slash them as they come at you. The fireballs can be tough to dodge while in the process of attacking him, so if you see this attack coming, cease the assault and try your best to avoid getting hit. Sanctus will also summon pillars of energy around him which is almost impossible to avoid when you're near him.
If you fail to quickly drop Sanctus to the ground after shattering the sphere, he'll summon a new one, a process which will inflict damage if you're nearby when it happens. When Sanctus covers the ground below him with an energy beam, jump up into the air and execute a slash combo to remain there until the attack ceases. Since this attack is easy to dodge, it's actually a good time to gets some hits in. If you see a good opportunity to damage his shield, activate Devil Trigger to up the damage you'll deal.
Continue breaking Sanctus' protective sphere, dropping him to the ground and then using Buster until he is left with about a quarter of his health bar. At this point, a short cutscene is triggered in which Sanctus seeks refuge within the towering Savior. Prepare yourself, as the Savior will then attempt to crush Nero with its fist; Side Roll out of the way just before impact to avoid taking damage. When Sanctus returns to the field, he does so with a couple of new moves in his arsenal. The hovering orbs that surround him can now hurt you; they'll occasionally shoot towards you and inflict damage if they hit. Use Blue Rose to shoot the flaming orbs out of the air and return them to their default nature.
Buster | 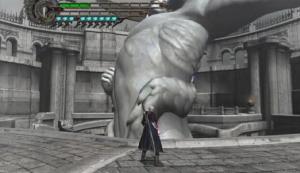
Savior |
Sanctus is especially deadly at this point, because the fireballs he launches, when coupled with the flaming orbs can be difficult to dodge. While Sanctus acts much the same way he did during the first part of the fight, his use of the Savior can make getting the last few hits in difficult because he'll come back out with a fully recharged shield. Whatever you do, don't let up! Get Sanctus out of his shield and attack him while he's vulnerable until his health bar is spent to clear the mission.
Devil May Cry 4 - Mission 12: A New Beginning
Character control now shifts from Nero to Dante. Luckily you retain all of the Proud Souls and Red Orbs acquired while playing as Nero, as well as your health bar and D.T. gauge. Dante is much different than Nero in terms of gameplay; his move list is a lot larger for one thing, and he lacks the Devil Bringer, but his combat style is much more diverse. This transition might be tough to adapt to at first, but you'll likely find that the sheer amount of skills available to Dante makes him both powerful and quite fun to use. In other words, if you were getting by fine with Nero, you should have no problem slaying demons as Dante.

Dante |
Before starting the mission, select 'Power Up' from the menu and enter the 'Skill Up' menu. Purchase all of the sword skills to start, Charged Shot for Ebony & Ivory or Coyote-A, and definitely the Speed and Air Hike abilities. You'll also want to upgrade a couple of styles, but it's difficult to know which ones you prefer without first playing as Dante. If you're looking for an authorial suggestion; the Trickster and Swordmaster styles are enough to get you through most any situation.
Ascension Chamber
Test out each of Dante's combat styles on the Scarecrows in this room. You'll find that Dante has several moves that are similar to Nero's (Stinger/Streak, Helm Breaker/Split, High Time/High Roller), so he isn't entirely different when it comes to swordplay. Pause the game and open up the Skill List for a complete rundown of the moves currently available to you. Once the Scarecrows have been dealt with, head through the door at the north end of the room.
Meeting Room
A new type of enemy is encountered here; a larger, more powerful Scarecrow. The Mega Scarecrows can take more of a beating than the standard Scarecrow, deal more damage, and have a projectile attack added to the mix. They're still one of the lesser enemies, though, so they aren't too difficult to defeat this far into the game. Once the enemies have been dealt with, proceed through the door at the north end of the room.
Experiment Disposal
Approach the lift and examine it to retrieve the Wing Talisman key item that Nero left behind. When the lift reaches the first floor, an ominous message appears on screen; the HQ is about to collapse! You have less than 10 minutes to escape.
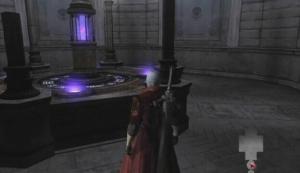
Lift | 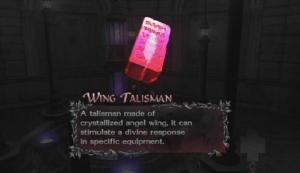
Wing Talisman |
Drop down into the pit up ahead and pick up the Gold Orb there. Locate the wheel at the west end of the room and slash away until an elevator drops down into the pit. Step into the elevator and kill the Frosts that spawn within to rise back to the floor above. Shatter the Red Orb cluster in the northwest corner of the room before moving on to the next area.
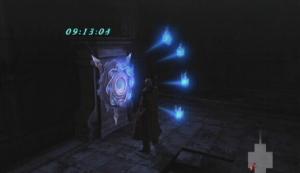
Wheel | 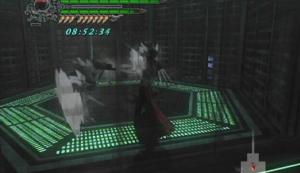
Frosts |
Security Corridor
As soon as you step into the corridor, the ledge collapses and Dante falls to the floor below. You'll face three Mephisto on the lower level. While Dante lacks Nero's Devil Bringer (and thus the Snatch and Buster skills), a few rapid shots from the Coyote-A does a nice job of removing a Mephisto's cloak. Follow up with a barrage of attacks to quickly eliminate the weakened Mephisto.
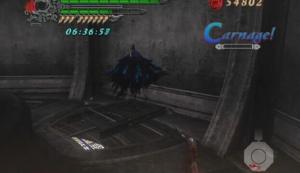
Mephisto |
Afterwards, examine the time-slow machine to retrieve the Key of Cronus and halt the spinning blades. Hop up the stationary blades and head through the doorway at the north end of the area. Don't waste your time with the secret mission if you missed it the first time around, as it will just waste time and can't be completed as Dante anyway. Hit the time-slow machine and hop over the lasers to reach the other end of the corridor. Exit through the door and cross the bridge to reach the Grand Hall.
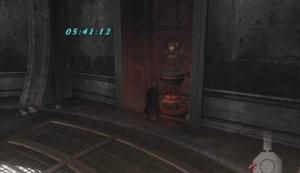
Time-slow Machine | 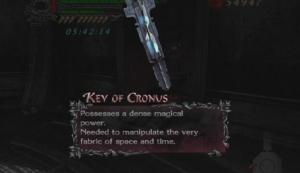
Key of Cronus |
Grand Hall
Eliminate the Angelos that spawn in the hall to remove the red mesh blocking the door. Afterwards, either exit to the Gran Album Bridge using the door at the north end of the hall to safety, or, if you have time to spare, head through the door on the east side of the room to the Key Chamber.
Blue Orb Fragment -- Hit the time-slow machine in the Key Chamber, ignore the Gladius creatures, and slip through the lasers at the far end of the room to reach the Gauntlet. Search for the Combat Adjudicator here and attain a style grade of B by attacking it to receive some Red Orbs and the fragment. Now quickly make your way back to the Grand Hall!
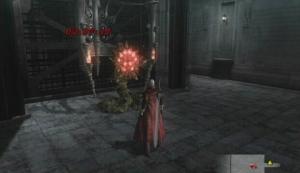
Combat Adjudicator | 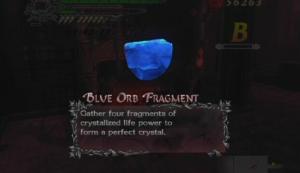
Blue Orb Fragment |
You're home free once on the Gran Album Bridge. Make your way to the end of the bridge to clear the mission.
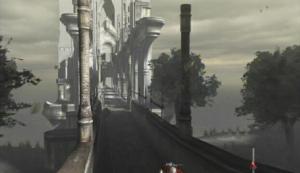
Gran Album Bridge
Devil May Cry 4 - Mission 13: The Devil Returns
You've been through here before as Nero, but several things differ this time around. For one thing, any path shrouded by black fog will not bring you to the area it should because of Echinda's influence on the forest. To start, move south along the walkway and hop down to the area below. Take the eastern exit, as the other will lead you right back to the Ancient Training Grounds.
Forgotten Ruins/Windswept Valley
Jump down from the balcony in the middle of the walkway and eliminate the Scarecrows and Chimera that spawn below. Afterwards, move through the black fog at the start of the eastern trail to enter the Windswept Valley.
Balcony | 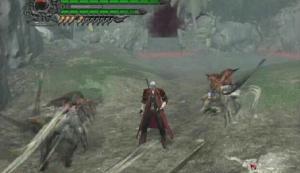
Chimera Assaults |
The area is immediately sealed off and a group of Assaults spawns. The trouble with these guys is that they've been taken over by the Chimera in a fashion similar to the Chimera brand of Scarecrow you previously had to deal with. The Assaults are much faster than the Scarecrows, and that quickness, coupled with the almost unavoidable swipes from the Chimeras make this a decidedly deadly pairing. Activate Devil Trigger to take care of them quickly if you must, otherwise pound a way and try to avoid taking too much damage.
When the way is clear, head up the stairs to the east and through the black fog to reach the next area.
Ancient Plaza/Lapis River
More Assaults to deal with here, but luckily these ones aren't infected by the Chimera. Defeat the enemies, then make your way to the north exit and head through to reach the Lapis River. The exit here is actually underneath the bridge in the middle of the area. Eliminate the two Mephisto first if you wish, otherwise move through the black fog below the bridge to proceed.
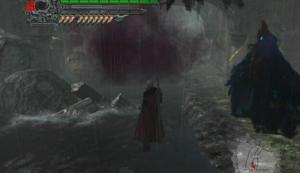
Exit |
Windswept Valley/Ruined Church
Use the door up ahead to enter the Ruined Church.
Blue Orb Fragment -- Attain a style grade of A on the Combat Adjudicator in the church's western room to receive the fragment and a large amount of Red Orbs.
Move underneath the stairs and through the door at the end of the way.
Lost Woods/Forgotten Ruins
There are a couple more of those annoying Chimera Assaults to deal with here. Take them out (with Devil Trigger active, if you must), or simply avoid them and run to the statue in the center. You've been through the Lost Woods once before, but here's the explanation again, just incase you made it through the first time based on sheer luck.
To get out of the Lost Woods, you must take the path where the archway shadows are pointing towards the statue in the middle of the woods (see image below). Think how the shadow of something would appear in real life if the sun were shining behind it. If you chose the correct path, you'll find yourself in an area identical to the first. In each instance, take the path that the sun is shining on -- even if it appears to be the path you used to enter the area -- and you'll soon make it out of the woods.
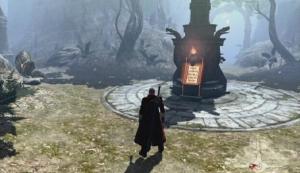
Lost Woods | 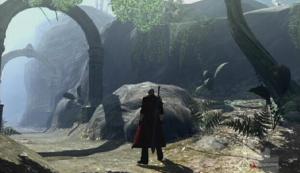
Shadows |
The way out this time around is east, west, south and south again. In the Forgotten Ruins, use the Divinity Statue if you wish, otherwise exit into the next area to trigger a boss battle.
Den of the She-Viper -- Boss Battle: Echidna
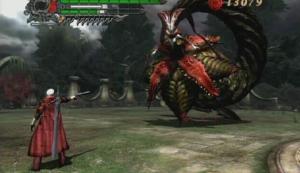
Echidna's move pool is identical to your first encounter of her as Nero. Dante's combat styles and differing skills mean a slightly different approach this time around. This strategy focuses on the Trickster and Swordmaster combat styles, so remember which buttons are used to toggle them so you can switch between them on the fly.
| 
Echidna |
The Trickster style can be used to avoid the majority of Echidna's attacks. Toggle this style while Echidna is flying around the arena. Hold down the Lock-on button to track her movement and use Dash just before impact. While Echidna is floating in the air, if you've upgraded the Trickster style, use Sky Star to propel yourself towards her torso, then switch to the Swordmaster style and use Aerial Rave to deal some damage.
Preserve your D.T. Gauge until Echidna roots herself into the ground to spawn Chimera Seeds. Though you can't Hell Bound your way up to her, wait until the bulb below her spits out a Chimera Seed, then Air Hike up onto her mid-section, toggle the Swordmaster style, activate Devil Trigger and use Shredder repeatedly. With a lengthy D.T. Gauge, you can chip away a large portion of Echidna's health here. Throw in a Rebellion Combo B and maybe a Stinger (careful not to fall!) and you can knock her health down quite a bit. Though you can't perform a super Buster as Nero could, you are at least be able to stay in place when Echidna becomes stunned and continue the assault.
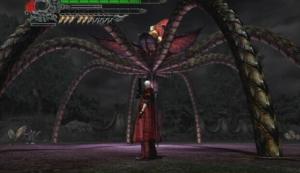
Rooted | 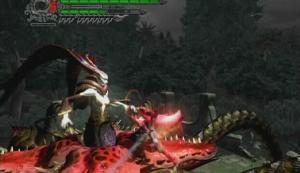
Devil Trigger |
When her health bar has been halved, Echidna powers herself up. She now moves faster and will inflict more damage with each hit. Instead of rooting herself into the ground to spawn Chimera Seeds, she will instead plunge herself into the ground and raise roots around her and attempt to smack you around with them. Avoid the roots and get up to her torso; toggle Devil Trigger if it's available, and hit her with Shredder, Rebellion Combo B and other quick attacks.
Avoid her other attacks with Dash and wait until she embeds herself into the ground again before moving in to deal damage. There's also a projectile attack that you'll want to watch out for; keep your distance from her when she is not in the ground and use Dash to avoid taking damage.
Once Echidna has fallen, you'll receive the Gilgamesh weapon. Feel free to try it out whenever. Head through the exit in the southwest corner of the den to clear the mission.
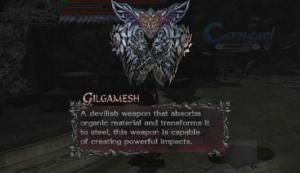
Gilgamesh
Devil May Cry 4 - Mission 14: Forest of Ruin
You'll encounter a new enemy a short ways down the path known as Fault. These guys are more of an annoyance than anything because all they'll is try to trap you in their mouths, which doesn't do any damage. If they do succeed, however, you're in for a bit of an annoyance because you are then brought to the Ruined Lowlands where you must defeat the enemies there to spawn an exit seal. The enemies encountered in the lowlands could very well be those annoying Chimera-infected Assaults, so try your best to avoid being sent there. When you use the seal to exit the lowlands, you'll end up back at the start of the area, which can be quite irritating.
Fault | 
Ruined Lowlands |
With that said, the Faults are easy enough to avoid; keep an eye out for the shape that appears just before they are about to emerge and jump up into the air or move to the side to avoid getting sucked in. Destroy the Scarecrows at the far end of the area -- watching out for Faults all the while -- and use the exit to proceed to the next area.
Lapis River
This area is occupied by Mephisto, so switch to the shotgun and start removing their cloaks. The Faults will follow you around for the rest of this mission, so remain vigilant. Defeat the Mephisto and the Faust that then spawns and leave the area using the exit at in the northwest corner.

Mephisto |
Ancient Plaza/Windswept Valley
Clear out the Assaults here to remove the red mesh covering the entrance and the exit, then head through the exit at the other end of the area.
Move forward until a group of Chimera-infected, or soon-to-be-infected, Scarecrows and Assaults spawns. The Faults are much more aggressive here, so you'll likely have to spend the majority of this skirmish airborne. Shower the enemies below with shotgun fire on your way down and then commence the slashing until you're forced up into the air again by an emerging Fault.
After the fight, hop up the ledges at the northwest end of the valley and use the exit at the top to leave the area.
Forest Entrance
Attack the Red Orb cluster (Shredder seems to work quite well) until it shatters to receive a large amount of Red Orbs. The Royal Blocker secret mission parchment is attached to the ruins here; you had to pass it by while playing as Nero due to lack of the Royal Guard style. Attempt it if you wish, otherwise head through the tunnel to reach Foris Falls and clear the mission.
Devil May Cry 4 - Mission 15: Fortuna Castle
Blue Orb Fragment -- Head up the stairs on the right to find a Combat Adjudicator. Attain a style grade of SS to receive the fragment and some Red Orbs.
Combat Adjudicator |
Go through the door in the southeast corner of Foris Falls to reach the Central Courtyard.
Central Courtyard -- Blitz
About midway down the walkway, a cutscene introduces a brand new type of enemy called Blitz. Blitz are without a doubt the toughest of the ‘lesser' demons that you will encounter in Devil May Cry 4. They are agile and pack quite a punch. Not only that, but they're protected by an electric shield, so any attempt to melee one results in a sharp jolt. The Blitz's electric shield can be removed, however; it's best done using the shotgun with Charged Shot (without locking-on), as well as the Round Trip Rebellion ability.
Blitz | 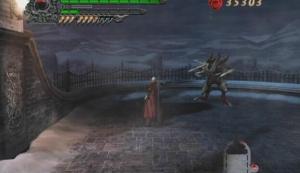
Shield Down |
Of course, the Blitz won't stand idly by while you bring down its shield. All of its attacks are quick and effective, so have the Trickster style toggled and Dash to avoid taking damage. You'll have to jump and Air Hike to avoid its electric beams sweeps, though. Once its shield is down, switch to Swordmaster, flip on Devil Trigger and go to town. Most of its melee attacks here can be interrupted by your own attacks, so don't let up until you see sign Blitz's shield returning.
When you've dealt enough damage, the energy surrounding the Blitz will turn red. It's close to death at this point, but also a lot quicker and even more deadly. Keep your distance when it reaches this stage, as it will attempt to grab hold of you, deal a ton of damage, and then self-destruct. Hit the Blitz with a few more Charged Shots and then stand back as it explodes.
Following that endeavor, continue down the walkway and proceed through the door at its end.
Grand Hall
The first floor of the castle is completely covered in ice, so you'll have to find some way to remove it before you can leave. Start along the eastern walkway and use the only accessible door there to enter the Gallery.
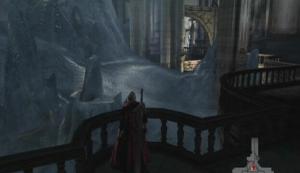
Ice |
Gallery/Library
Make your way to the opposite end of the Gallery and go through the door there. Enter the Library at the south end of this area and kill off the Angelos within. Proceed through the passage at the south end of the Library. Hit the Red Orb cluster here with quick attacks until it shatters to gain a large amount of Red Orbs.
Afterwards, drop down to the bottom of the stairwell. The parchment for Secret Mission 09 can be found down here; it's attached to the stairs, just left of the door. Attempt it if you wish, otherwise head through the door down here.
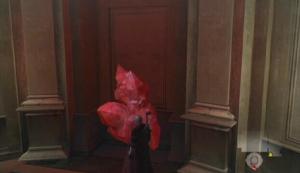
Red Orb Cluster | 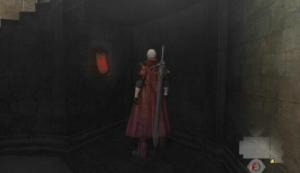
Secret Mission 09 |
Large Hall/Dining Room
Start down the hall and enter the Dining Room using the door in the eastern area. Make your way to the room at the end of the corridor to face some Scarecrows, including a couple of the Mega variety. Once the Scarecrows have been dealt with, use the door to return to the Large Hall. Move to the west end of the hall and use the only accessible door there to enter the Torture Chamber.
Torture Chamber
A large number of Frosts spawn in the chamber; you've dealt with these guys plenty of times before, so taking them out shouldn't be a problem. Kill the Frosts, then head through the doorway at the south end of the chamber and drop down to the pit below. Slash away at the wheel to activate a special blue seal. Hop onto the blue seal to ascend to the second floor.
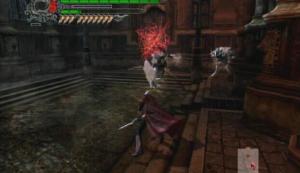
Frosts | 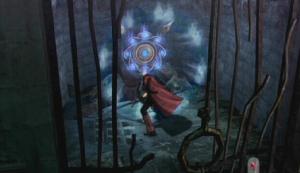
Wheel |
Head through the door at the other end of the walkway.
Master's Chamber
You'll face another one of those Blitz creatures in the Master's Chamber, which is just wonderful. Take care of the Scarecrows in the room first, as you won't want them in your way while you're trying to handle the Blitz. Blast away the Blitz's shield with the shotgun, then flip on Devil Trigger and slash away. Repeat this process as many times as necessary. Remember to keep your distance when the energy surrounding it turns red.
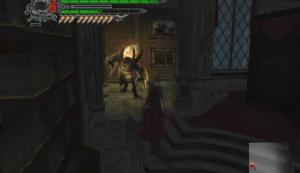
Blitz | 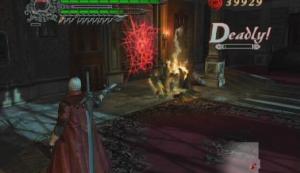
Blitz |
Once that's over and done with, exit through the door to the next area.
Soldier's Graveyard
Tip -- A Gold Orb sits on one of the stone ledges along the eastern side of the graveyard. To get to this orb, first smash the statue in the middle of the area, hop onto the pedestal, and east. Toggle the Trickster style, jump towards the ledge, use Air Hike and then Sky Star to land on the middle ledge. From here you can use Sky Star and then Air Hike to grab the Gold Orb to the left and the large Red Orb to the right.
Orbs |
Smash the graves and statues here to gain some Red Orbs before heading through the door in the northeastern corner of the area.
Central Courtyard -- Boss Battle: Dagon
Don't be fooled by the new name and color change; in terms of abilities and attack pattern, Dagon is Bael through and through. There really isn't much that can be said here because you've already faced and beaten this guy once before. This fight is made even easier with Dante's weapons and abilities at your disposal.
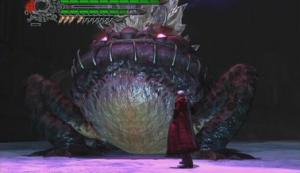
Dagon | 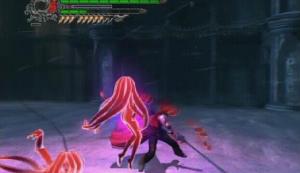
Rusalkas |
Jump, Side Roll, or Dash to avoid Dagon's attacks. When he disappears and leaves you to face the Rusalkas, slash away at them with your sword to bring him back. If Dagon catches you in his mouth, toggle Devil Trigger and he'll spit you right out. While Dante lacks Buster, a Devil Trigger Shredder will absolutely wreck this guy. Stay away from his mouth, attack from the side and you'll bring him down in no time. You receive the devastatingly powerful Pandora gun after defeating him.
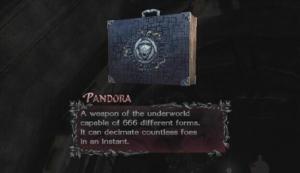
Pandora
Devil May Cry 4 - Mission 16: Inferno
A poisonous gas hangs in the air, so you'll be taking constant damage here.
Blue Orb Fragment -- A Combat Adjudicator can be found in the initial area. A style grade of S is needed to acquire the fragment, but you have to be quick about it, as the poisonous gas will be zapping your health all the while. Once you've managed an S grade, pick up the Green Orbs to the right of the statue to refill your health bar.
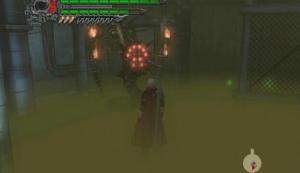
Combat Adjudicator | 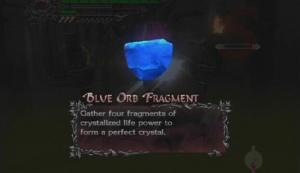
Blue Orb Fragment |
R&D Access
An encounter with Cutlasses ensues as you step into the corridor. These guys can be a real pain without Nero's Buster ability, but you'll just have to make due. Equip Dante's dual handguns, lock-on to one of the buggers and fire away to slow its movement. With Rebellion selected, hit that Cutlass with a Stinger to stun it, then slash away to bring it up above ground. Pummel the flopping Cutlass with attacks; these guys lack in the health department, so it'll die quickly. Take out the remaining Cutlasses to dissolve the red mesh blocking the way out. Move to the opposite end of the corridor -- collecting the Green Orbs along the way -- and head through the door there.
Game Room
Well, no games for Dante, but you do have to fight off a group of Agnus' Gladius creatures before you can move on. Jump and use Helm Splitter, or the shotgun, to knock the swords out of the air and then hit the grounded Gladius with Stinger to destroy it. Once every creature has been dealt with, head through the door at the northeast end of the room.
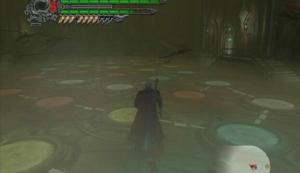
Gladius |
Containment Room/Foris Falls
The window in the Containment Room is quickly sealed off, and a group of Gladius and Angelos spawn. Clear the room of enemies to lower the force field, then jump through the window and use the door on the other side to reach Foris Falls. Climb to the top of the stairs at the far end of the area and head through the door there.
Window |
Angel Creation
There are three knights to face before you can move on. Pandora's standard fire can prevent the majority of the Angelos' attacks, so hit them with it if they're up in the air or charging towards you to send them staggering back. Step onto the catwalk and make your way to the other end to face a large group of knights, this time headed by an Alto Angelo. If you start to get overwhelmed, flip on Devil Trigger and spam Stinger, as this ability will break through their shield while D.T. is active, allowing you to wipe them out quite quickly. When the knights have been defeated, proceed through the door to reach the next area.
Bianco Angelo | 
Alto Angelo |
Underground Laboratory/Grand Hall
Use the red seals to ascend to the upper ledge and then head through the door to return to the Grand Hall. Make your way up the stairs, leap down from the second floor walkway, and exit through the castle's front door.

Seals | 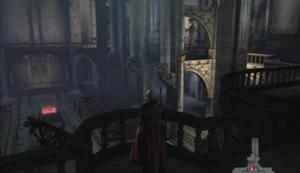
Grandhall |
Fortuna Castle Gate
Move south from the castle gate and you will soon come across some new enemies called Basilisks. These guys aren't very hard to take down; they can be juggled with most attacks, and their own attacks are easy enough to dodge with Dash or the Side Roll ability. Use Stinger and the shotgun to keep the hounds at bay, then move in and slash away. Simply spamming the Stinger ability is an easy way to kill the Basilisks, but it won't net you a whole lot of style points.
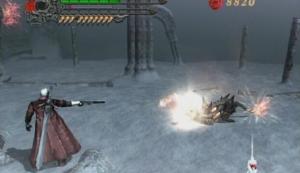
Basilisk |
Once the Basilisks have been dealt with, jump up to the archway in the southwestern corner of the area and make your way up the ledges. There's actually a secret mission parchment along the way, but you'll need the weapon received after defeating this mission's boss to reach it. It's for Secret Mission 11; check out the 'Secret Missions' section for more info.
Second Mining Area
There aren't any enemies to face here, so make your way through this area to reach Ferrum Hills. If you're low on health, purchase healings items using the Divinity Statue, as you won't come across any Green Orbs in the next area. Don't forget about the Red Orb cluster near the Divinity Statue on your way out!
Ferrum Hills -- Boss Battle: Berial
As with the last two repeat boss encounters, Berial doesn't seem to have changed at all since you first encountered him as Nero. His attacks are the same, and he seems to have retained the same amount of health. If you defeated Berial without issue the first time around, then you'll have an even easier time here. The only significant difference is the lack of houses in the arena, meaning that there is no way to restore health once you've taken damage.
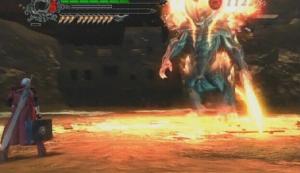
Berial |
Equip Pandora and hit Berial with Epidemic as he approaches to chip away at his health bar. A good way to go about attacking Berial is to use Sky Star (Trickster) to propel Dante towards him, then immediately switch to Swords Master and mash the Style Action button to slash away at the beast's face. Berial's flame shroud will disappear when he's sustained enough damage. Flip on Devil Trigger at this point and hit him with everything you've got.
If you continuously attack Berial while he is not covered in flames he will soon fall over. At this point, spam Shredder with Devil Trigger toggled to deal some impressive damage. Start running as he starts to get up so you can avoid the hellfire attack he unleashes afterwards. You'll receive the Lucifer weapon once Berial has fallen. Collect the mass of Red Orbs Berial leaves behind upon his death, then exit the area to clear the mission.
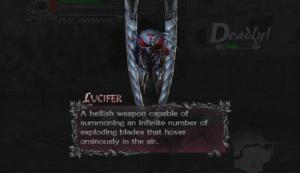
Lucifer
Devil May Cry 4 - Mission 17: Adagio For Strings
Make your way through the mining area to reach Port Caerula. Defeat the Scarecrows and Altos that spawn at the center of the dock and then exit to the Residential District. Another enemy encounter here, this time composed of Mephistos and Assaults. Clear out the demons, pummel the Red Orb cluster until it shatters, then step into the alleyway and through the door at its end.
Business District/Terrace
More demons; you just can't get a break can you? It's sheer pandemonium; a large number of Scarecrows of both the standard and Mega variety, as well as a pack of Basilisks, occupy the district.
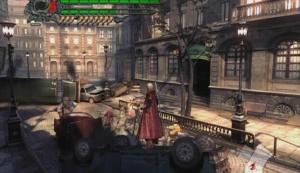
Scarecrows |
Blue Orb Fragment -- Once the district is clear of demons, locate the Restaurant-Café on the west side of the street; about midway down. Air Hike or use Kick Jump to get up onto the awning. Kick Jump up the wall and use Sky Star (Trickster) as soon as Dante reaches the top of the railing.
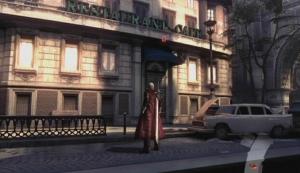
Restaurant | 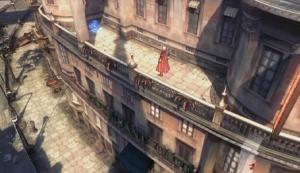
Blue Orb Fragment |
Afterwards, make your way to the south end of the district and use the door there.
Opera House Plaza
Secret Mission 12 can be found by destroying the trashcan at the western end of the initial area. Attempt it if you wish, otherwise head south to reach the fountain and defeat the Mephistos, Altos and Faust that spawn there. Once the enemies have been dealt with, head up the stairs at the southern end of the area and turn right. Use the Divinity Statue at the end of the way here if you wish, otherwise proceed through the door to enter the Opera House.
Secret Mission 12 | 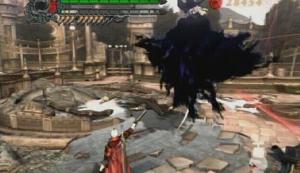
Faust |
Opera House -- Boss Battle: Angelo Agnus
You'll find another repeat boss fight in Agnus here, albeit in a different location than the first time you faced him. Agnus has retained the majority of the attacks he had when you first faced him, but this time around he'll summon Basilisks instead of Gladius. The Basilisks are easy to kill and drop White Orbs to restore your D.T. Gauge, so they can actually turn the tide of battle in your favor.
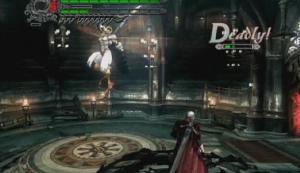
Angelo Agnus |
Angelo Agnus' health sapping ability returns; remember, get ready to dodge when you hear him say 'Your strength will be mine!' If Agnus does manage to grab hold of you, toggle Devil Trigger and he will promptly drop you. You can easily bring down Agnus without deviating from the Swordmaster style, as the majority of his attacks are sluggish and easy to detect. Flip on Devil Trigger, pummel Agnus with attacks and he'll go down in no time. There isn't much more that can be said; bottom-line, considering you've made it this far, winning this fight will be a cakewalk.
Devil May Cry 4 - Mission 18: The Destroyer
This mission is just one big boss fight. Your objective; take down the colossal Savior! Now, this is no simple task, even for one as well-versed in combat as Dante. You obtain the Yamato at the start of this mission. With this artifact in your possession, the Dark Slayer combat style can be toggled by attempting to switch to the talent you currently have selected. This weapon won't be of much use during this battle, but it may come in handy during subsequent playthroughs.
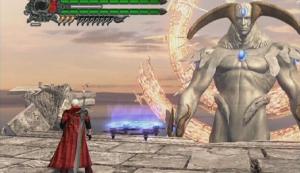
Savior | 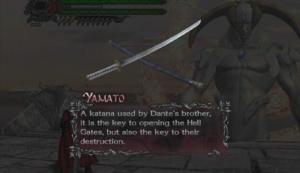
Yamato |
Sky Above Fortuna -- Boss Battle: Savior
The key to bringing this guy down lies in destroying the crystals on its forehead, wrists, shoulders, shins and back. This battle can be somewhat confusing, as you'll have to use the blue seals to reach the different platforms around the Savior, so it's easy to lose your place. Of course, the Savior won't just stand idly by while you work to destroy the weak points; it'll throw plenty of attacks your way, most of which are quite damaging.
The Savior will likely send three dark orbs your way at the start of the battle. Destroying one of these orbs yields White Orbs that, when collected, will restore some of your D.T. Gauge, so blast just one of them with the shotgun, then Side Roll, jump, or Dash out of the way to avoid taking damage.
Left Wrist/Left Shoulder
First things first, getting off of the starting platform. Hop onto the blue seal to reach a lower platform. Two knights spawn down here; you don't want to waste too much time with these guys, so flip on Devil Trigger and take them out with a few quick Stingers, or sit back and hope the Savior kills them for you. Putting yourself on the lower platform poses significant danger, though, as the Savior can now reach you with its fists.
You're in prime position to take out two of the Savior's weak spots, though. Wait until it's about to hit you with its left hand (dodge fist slams from its right hand) and avoid the slap, then jump onto the back of its hand. Don't jump at all once you're on its hand and it should pull you inwards. Be careful while you're on its hand, though, as the Savior will occasionally conjure dark orbs and launch them towards you once in awhile. Jump just before an orb is about to hit, or use Jealousy Pandora to stop it. You'll have jump to avoid the swipes from its right hand, too; get ready to jump when you see it raising its right arm.
Left Hand | 
Left Wrist and Shoulder |
Lock-on to the Savior's weak spot, whip out Pandora and use its PF262: Jealousy ability until the crystal breaks completely (you'll see a little shockwave). You can reach the crystal on its shoulder from here, too; move on to that one after shattering the crystal on its wrist. Dante will be thrown down to another platform once both the wrist and shoulder crystals have been destroyed.
Forehead
From here on out, it's impossible to know exactly where the blue seals are going to take you. Basically what you want to do here is get yourself onto a platform that is close enough to the Savior's weak spot or onto a platform where it can perform certain attacks. To take out the forehead crystal, you'll need to get onto its left hand again. Once on a platform where the Savior fist slams and slaps its left hand down, jump onto its hand, wait to be pulled closer, then lock-on and use Jealousy Pandora to shatter the crystal.
Right Shoulder/Right Wrist/Back
In order to destroy the crystals on its back, right shoulder and right wrist, you must land on a platform with a stun gun on it. When you land on one of these, immediately start pummeling the wheel with attacks and activate it before the Savior can knock you down from the platform. The gun shoots out a couple of orbs that will temporarily incapacitate the colossus.
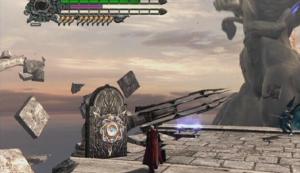
Stun Gun | 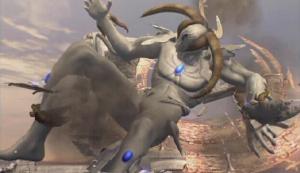
Stunned |
While the Savior is stunned, you can shatter the crystals on its right arm while it rests it on one of the double level platforms. The blue seal from that platform will put you on the path to another that runs alongside the statues back. Since it's so close, you can hit its back crystal with melee attacks.
Shins
It can be hard to know if you're on a platform that is suitable for hitting the shin crystals. Likely the Savior will do nothing but launch dark orbs and occasionally round-up, gather energy and throw a single giant orb towards you. Try to lock-on with Pandora and use Jealousy; if the style meter indicates that you're dealing damage, it's a good platform. So all you really need to do then, is jump up and Air Hike into the air and hit the shin crystals with Jealousy Pandora until they're both shattered.
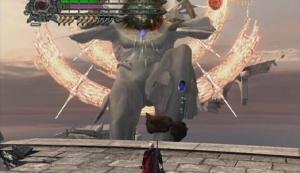
Shin Crystals |
Since there are no Green Orbs in the field, you'll have to make due with whatever you might have stored away in your inventory if your health is low. However if you purchased enough Purple Orbs to acquire a lengthy D.T. Gauge, you can flip on Devil Trigger to gain small amounts of health while it's active. Additionally, you can obtain White Orbs to restore the gauge by shooting down the four dark orbs that the Savior throws at you. You can pretty much avoid death if you can keep Devil Trigger active indefinitely while targeting the Savior's shin crystals. Dodge the single orbs, though, those just hurt.
Final Strike
Once all but the Savior's chest crystal remains, it will begin to charge and eventually fire a gigantic laser beam at your platform. To avoid taking a large amount of damage, simply use the blue seals to leap from platform to platform. You're toast if you get caught in the beam, so keep an eye out for the Savior's charging phase (it's hard to miss). Use the blue seals to leap to other platforms until the Savior's health bar appears at the bottom of the screen.
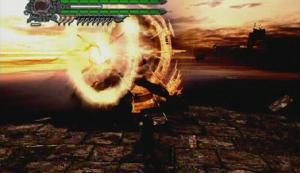
Charging |
The chest crystal is your target now. Basically you need to jump from platform to platform and use Jealousy Pandora to whittle down the Savior's health bar. At first it seems that bringing this guy down will take a very, very long time, however the Savior will become stunned once you've dealt enough damage, and you can then use a blue seal to reach the center platform right next to its chest crystal. With a full Devil Trigger its health can be knocked down a great deal. Spam Stinger like there's no tomorrow, and throw in a Shredder or two for good measure. If you're on one of the upper platforms, the Savior may hug up very close to it and slowly begin to rise; get ready to toggle Devil Trigger when this happens, and bust out the best combo you can within the brief timeframe that the chest crystal is exposed.

Stunned | 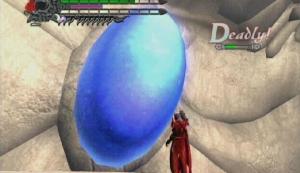
Chest Crystal |
Continue hitting the Savior's chest crystal with gunfire, get to the central platform when it's stunned again and deal as much damage as possible. Remember, you can restore some of your health while Devil Trigger is active, so toggle it if you're close to death and lack healing items.
Devil May Cry 4 - Mission 19: The Successor
You're playing as Nero once again, which is bad news if it took you awhile to get used to Dante. This entire mission consists of a dice game, similar to the one you partook in within the Underground Laboratory's Game Room. There are several levels to this one, though, but the rules are similar. The Nero statue must reach the circle at the end to progress to the next level. Yellow spaces warp the piece to the exit, red spaces spawn a group of enemies or a couple of energy beams, blue spaces spawn Red and Green Orbs, and the white spaces have no effect.
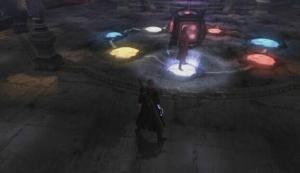
Game Board | 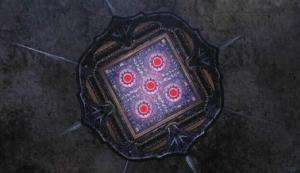
Dice |
You thought you were finished with recycled boss battles, eh? Well, unfortunately you thought wrong. At the end of the final four levels, you're treated to a repeat boss battle; Berial, Dagon, Echidna and finally Angelo Agnus. Since you've faced all of these bosses before, and bested them to boot, there isn't much more that can be said about this mission. So, here's the dice trick -- which allows you to roll any number you wish -- and a couple of tips.
The dice will land on the number that was on top when you hit it. With this knowledge you can roll the number needed to immediately reach the boss battle and to quickly progress the next level. First, observe the dice to find out what number comes before the one needed, then use Buster on the dice as soon as that prior number switches over to the number you want. If you hit it correctly, the dice will land on that number.
Tip -- When facing the Angelos at the end of the first level, there's a trick you can pull off to wipe them all out at once. Wait until the knights gather together in the distance and begin to form a mass of energy. Charge Blue Rose and as soon as the ball of energy comes hurtling towards you, blast it to send it back to them.
You need a four to progress to the second level, a five for the third, a four to move on to the fourth, another four to move on to the fifth, and a five to move on to the sixth.
Tip -- At least one Green Orb can be found in one of the corners of each level, so be sure to pick these up to replenish some health before triggering that level's boss battle.
When you reach the top level, smash the stones and hop through the opening to clear the mission.
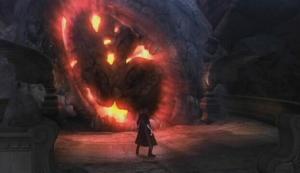
Mission Clear
Devil May Cry 4 - Mission 20: La Vita Nuova
This is it, the final battle! There's no turning back now!
Sacred Heart -- Boss Battle: Sanctus Diabolica
This battle bears some similarity to your first encounter with Sanctus, as he uses several of the same moves and floats around the area in a protective sphere. However Sanctus is significantly more dangerous this time around (which makes sense, what with this being the final battle and all) and sports a brand new, decidedly evil look. Well, this is it, time to silence this demon once and for all.
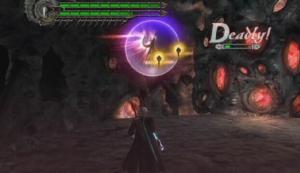
Sanctus Diabolica |
Yet again, Nero's Demon Arm will serve as the main tool in besting your enemy. First and foremost, Sanctus' protective sphere needs to be shattered, then it's just a matter of knocking him to the ground and hitting him with Buster to perform a powerful combo. Same deal as last time; use Hell Bound on the orbs that float near Sanctus to get close to the sphere and start dealing some damage to it. Activating Devil Trigger will certainly help bring down the sphere faster, so toggle if the gauge permits it..
This guy can be a real pain to knock out of the air once the sphere is broken. He'll either dodge to the side, or throw fireballs to keep you at bay. The fireballs can be easily avoided by dropping to the ground and circling beneath Sanctus. The opportune moment to knock Sanctus out of the air is while he remains still and uses his blade to shield himself from your attacks. At this point, jump up and hit the raised sword with Buster to stagger him, then jump back up to him and slash away to strike him down. Be quick about hitting him once his guard is down, as he recovers quite quickly. When he falls to the ground, use Buster to deal a substantial blow to his health.
Stunned | 
Buster |
Sanctus will create a new protective sphere once you've hit him with Buster, or if you can't manage to knock him out of the air in time. You'll take some damage if you're nearby when he creates the shield. Light will appear around him and he yells 'The Savior is coming.' When you've witnessed it once, it's easy to see it coming thereafter. If you are in mid-air and Sanctus starts to glow, drop down to the ground and move a short distance away to avoid taking damage.
There are a few attacks that Sanctus will use while he's floating around. When he raises his sword and says 'I sentence you to death,' he surrounds the area around him with pillars of electricity. He'll summon the pillars mid-sentence, so the lifting of his sword is the best indicator here. If you're in the process of hitting the sphere, either continue to madly hack away in hopes of shattering it before he can summon the pillars, or drop to the ground and move as far from him as you can to avoid taking damage. The fireballs Sanctus throws your way are probably his most annoying (and frequent) attack, but the fireballs can be easily avoided with a couple of Side Rolls, or by jumping up into the air.
Try to preserve your health, as there are no Green Orbs to be found in this area, so you'll have to use whatever healing items you have stored away in your inventory, or activate Devil Trigger to restore health.
When you've reduced Sanctus' health bar to about three or four bars, he'll start using a deadly new attack in which he charges at you with his sword several times. From this point on, he uses this attack each time you knock him strike him down, so you'll have dodge it before you can knock off that last bit of health. Getting hit by Sanctus' blade hurts a lot here, so work especially hard to avoid him. Use Side Roll shortly after Sanctus starts the initial charge to dodge it. Be ready to Side Roll again right after his first attempt, as he'll try to hit you with a couple of quick strikes. His final strike takes the longest to charge, and he'll attempt to throw up another sphere immediately afterwards.
You're going to have to be quick to knock Sanctus out of the air while he's in his psycho state. First, stand far away from Sanctus as he readies the final strike of his attack; Side Roll to avoid getting hit, then immediately hit him with some attacks to drop him to the ground. If you were standing far enough away, Sanctus' charge should have ended right behind you, allowing you to then turn around and quickly attack. If he managed to create another sphere, then you need to shatter it, dodge his charges and try again.
The False Savior
Once you've managed to defeat Sanctus Diabolica, you'll then have to take on the False Savior to finish this. This is a short sequence, but it will require good timing on your part. First, avoid getting hit by the Savior's right fist when he slams it down, then hit that fist with Buster. Then (this is the part that requires good timing), get ready to use Buster on his left fist as he swings it towards you. If you fail to hit his left hand, you'll have to start over again with his right fist. When you've hit both of his hands, use Buster again on his face to trigger the endgame cutscene.
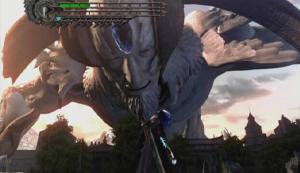
The False Savior | 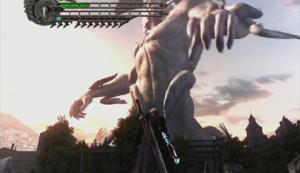
Fist Slam |
Congratulations! You've just completed Devil May Cry 4! It's not entirely over; be sure to sit through the credits and protect Kyrie from the Scarecrows for ninety seconds to view an additional cutscene with Dante, Trish and Lady after the credits. Use Snatch to pull any Scarecrow that gets too close to Kyrie and keep her from getting hit for the whole ninety seconds to unlock the second epilogue. |
|
|
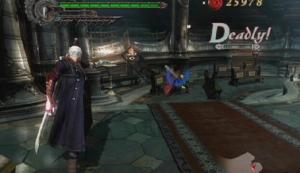
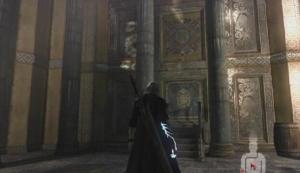
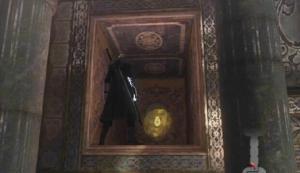
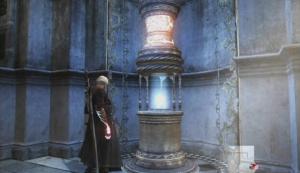
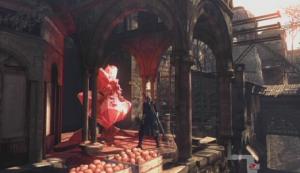
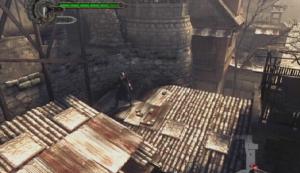
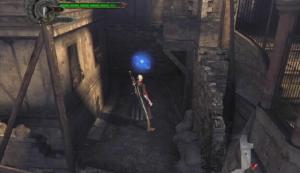
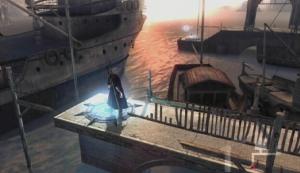
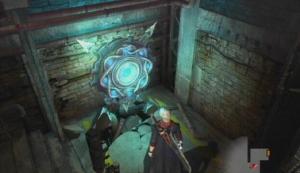
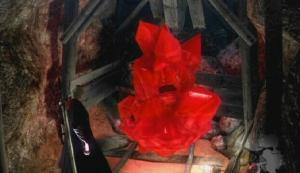
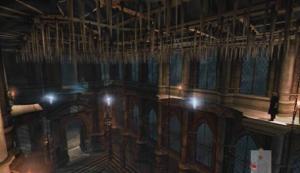
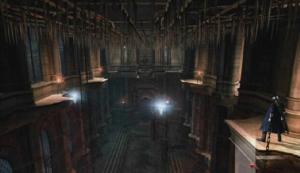
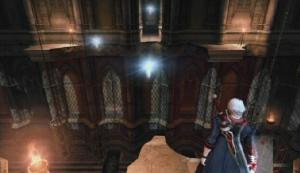
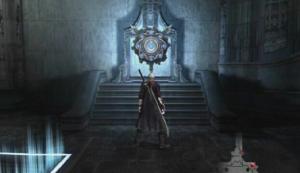
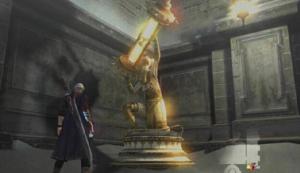




Post a Comment