Resident Evil: Revelations

Episode 1: Into the Depths
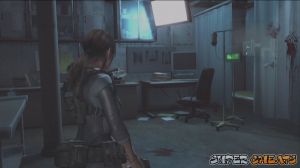
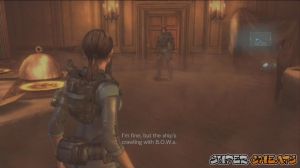
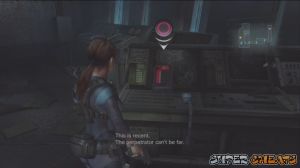
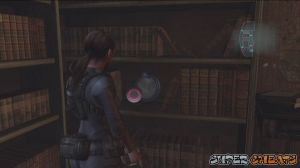
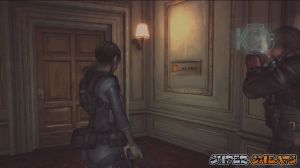
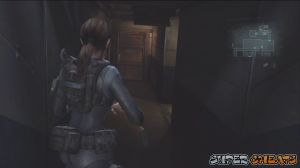
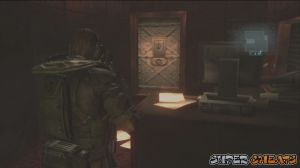
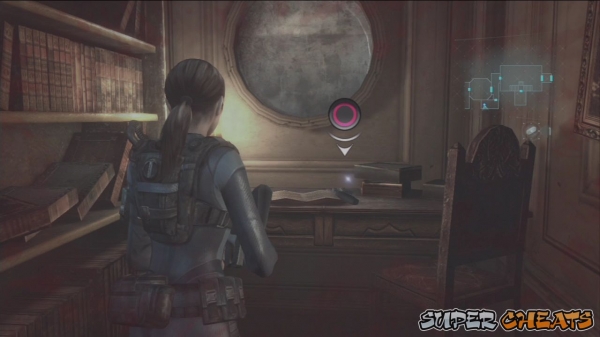
Enter the dining room and go around the counter to reach the door to the southeast of the room. Examine the locker in the corner to find some handgun ammo as well. Enter the kitchen and examine the sparkling object under the grate on the floor.
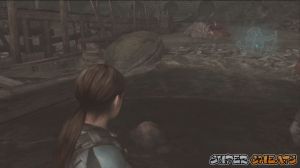
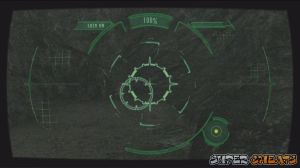
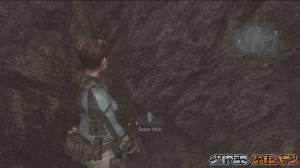
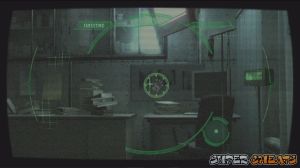
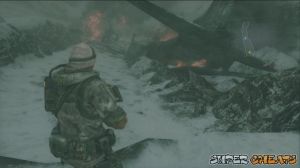
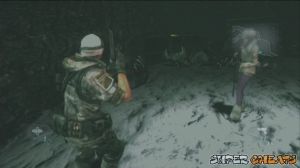
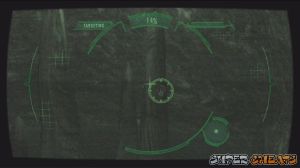
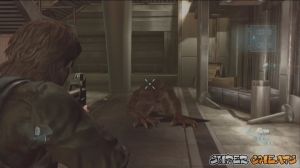
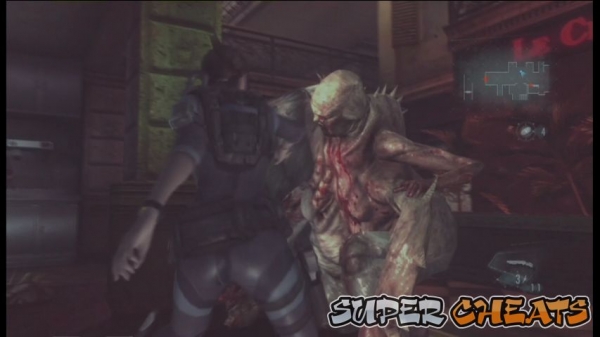
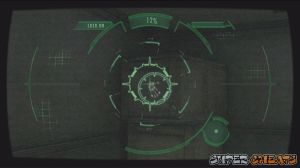
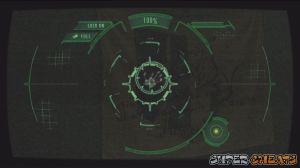
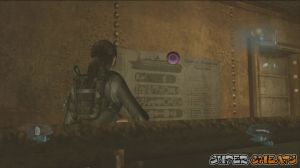
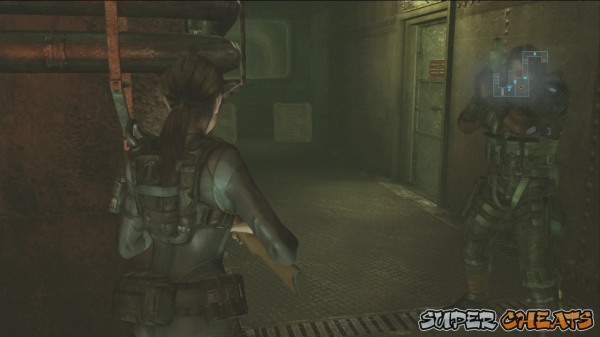
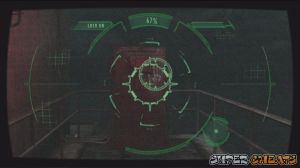
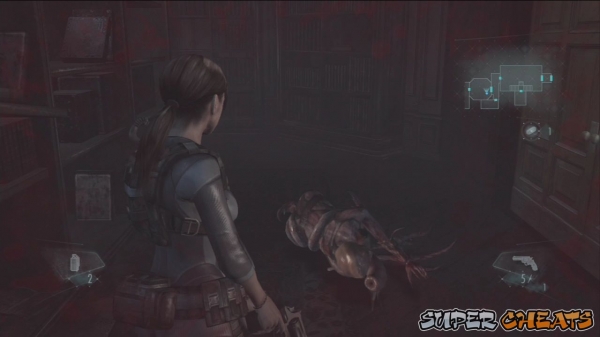
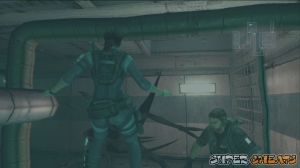
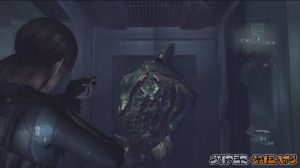
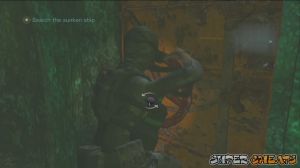
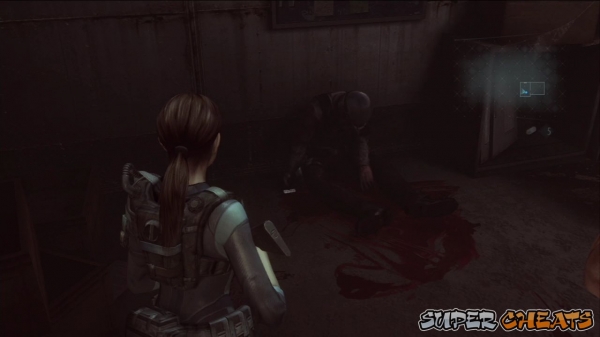
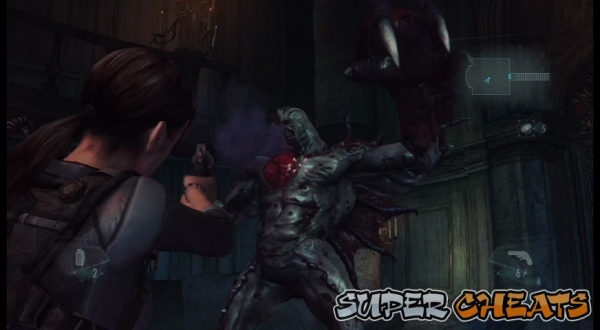
After the scene, kill the enemy. It may take multiple shots to the head before it goes down. Watch the next scenes. Once in control, read the short Genesis bioscanner manual since it will be a very helpful tool you can use throughout the entire game. Jump off the broken stairs and collect the ammo nearby. Scan the carcass using your Genesis tool. You have to check the beach and scan the carcasses until you get 100% analysis.

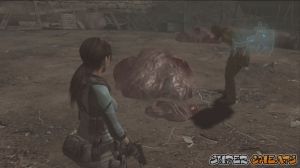
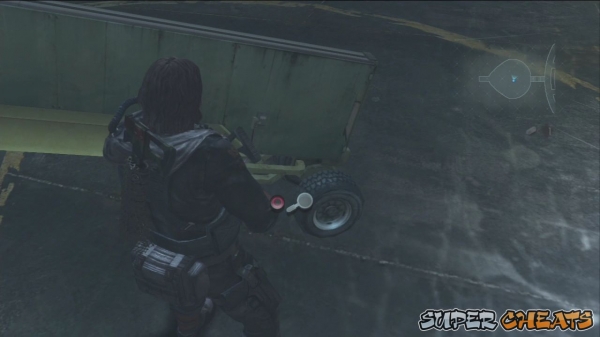
In the first beach, you can get 66%. Three large chunks and three small chunks on a pole, by the boat and another small one behind the shack, on top of the dump. The carcass near the pathway to the west will come to life so shoot it until it dies. Grab the green herb afterward.
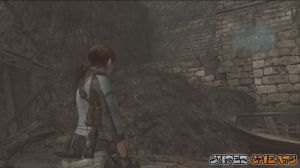
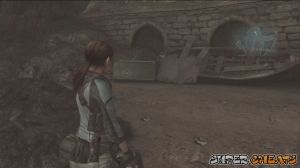
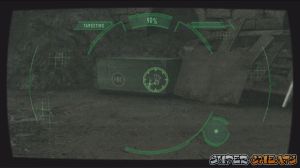
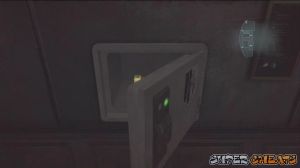
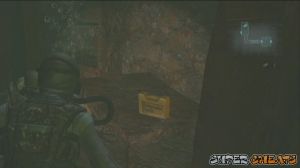
There's a small chunk inside the tunnel, a large chunk outside and another by the shore. Pick up the hand grenade by the barrel beside the large carcass then scour the area for more ammo and another grenade by the boats. There's also an FBC crate nearby. Scan it to find the first handprint (collectible) in the game.
There are two more chunks under the wooden walkway and another one in the corner, among the pile dump. Explore the deadend further west and scan the area to find a green herb.
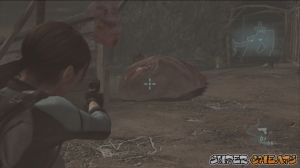
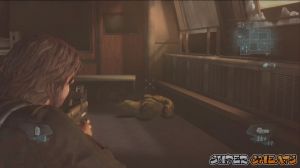
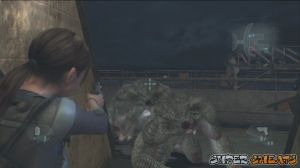
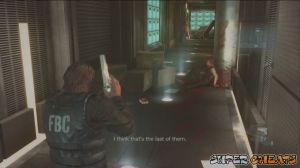
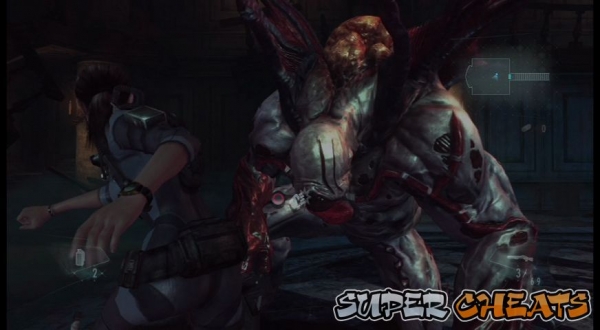
There should be more than enough carcasses to get 100% analysis. Once done, report back to your boss. A living carcass will burst through the shack's door. Kill it and hand over the samples for a scene and evaluation. Manually save your game and continue.
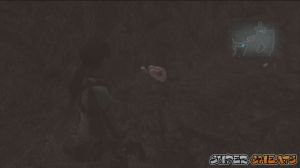
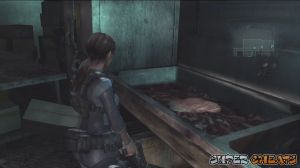
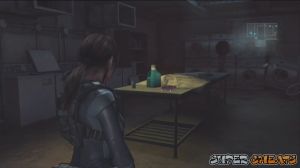
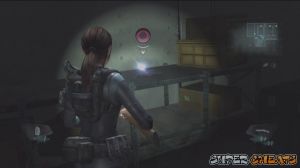
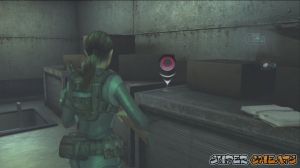
Once you're back, scan the corpse and an item near its head to find some ammo. There are other scannable objects here. Scanning the chunk of meat on the sink will also give a significant analysis boost.
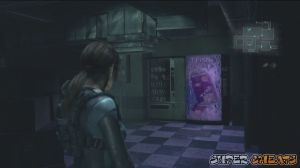
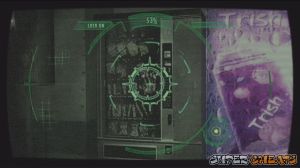
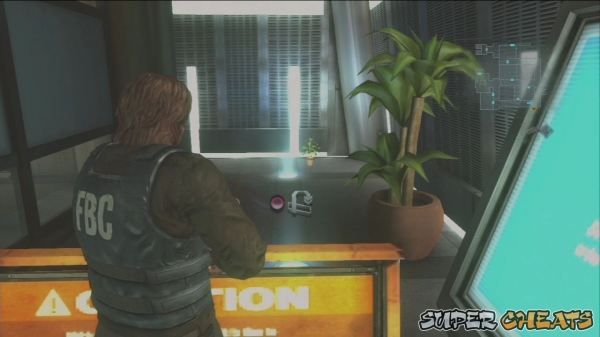
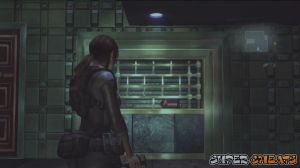
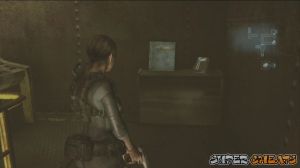
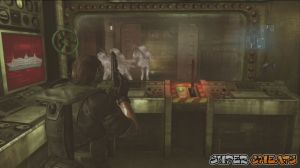
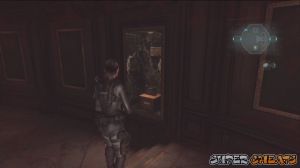
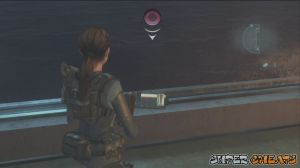
Before opening the next door to the north, return to the dining hall to the west and scan the food vending machine to find the second handprint in the game.
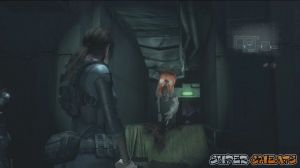
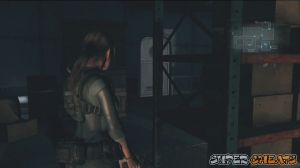
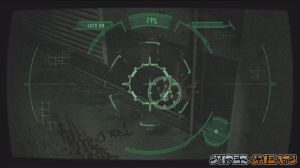
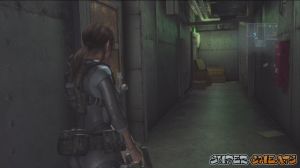
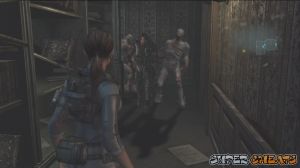
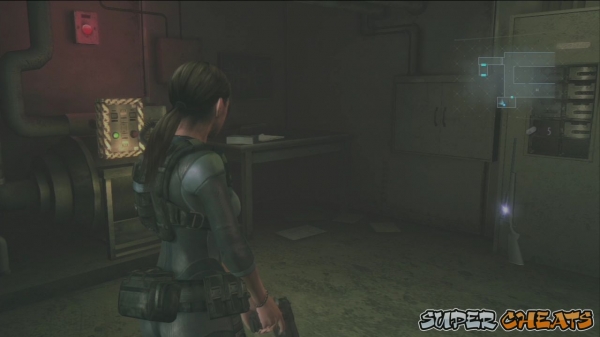
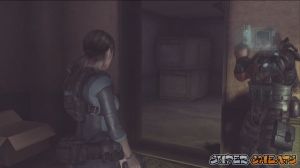
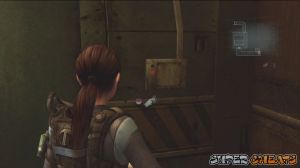
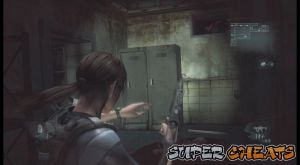
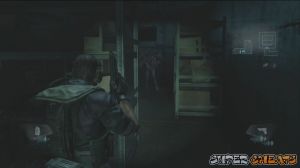
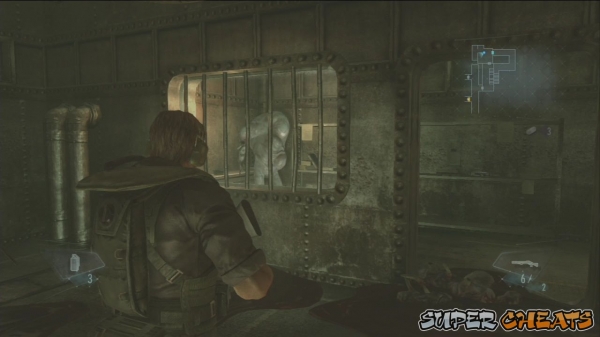
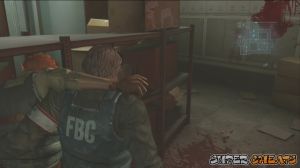
Before returning to the kitchen, backtrack to the small storage room to the southeast of your map, where you first caught a glimpse of the B.O.W. There's another handprint located along the corridor, outside of that room. It is on the wall to the lower right.
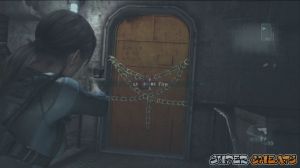
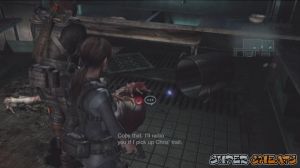
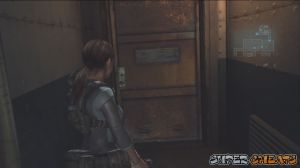
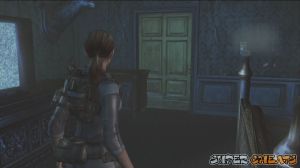
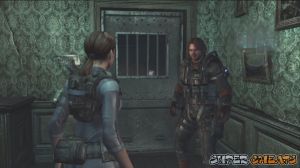
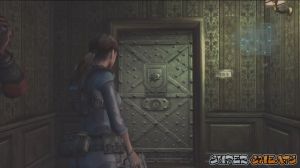
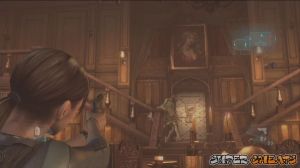
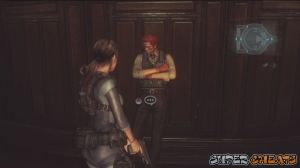
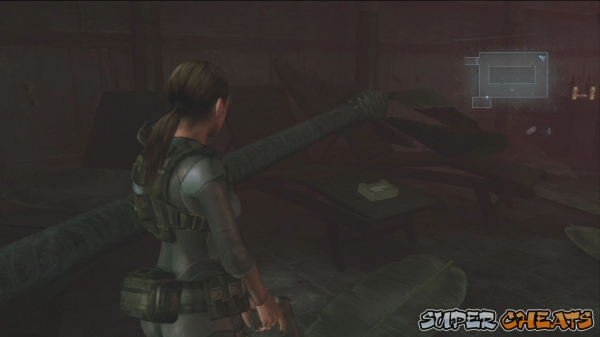
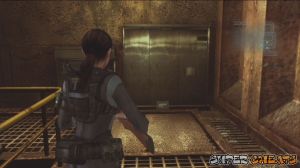
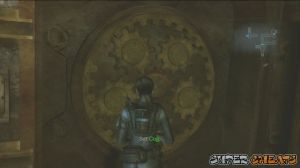
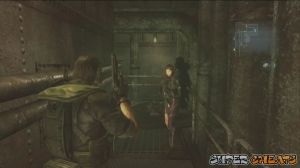
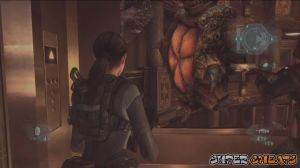
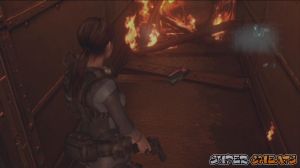
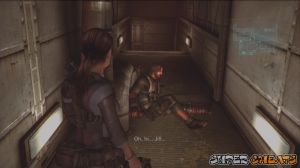
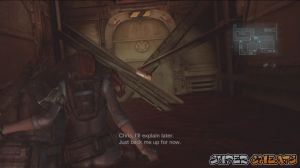
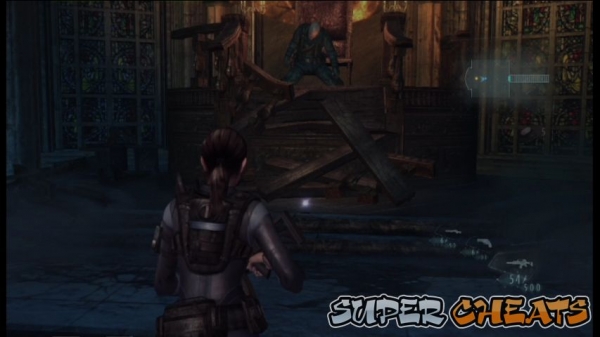
Return to the kitchen and go through the door to the north. Follow the walkway until you reach a fork. Examine the brown, heavy door to the west to find Chris. You need to find the key so go through the next door and go downstairs. It's a dead end so scan the floor to find a green herb. Go upstairs this time and pick up the green herb along the way. Continue along the corridor only to find it blocked. Enter the crew cabin and proceed to the shower room. There's a mutated enemy here so kill it then immediately scan it afterward. Scan the nearby bed to find some ammo.
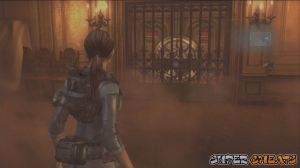
Go around the cabin and exit through the next door. The next door along the corridor bears and Anchor Mark. This leads to a weapon box. You can't open it for now so continue forth. The brown door to the right is locked so just go straight ahead.
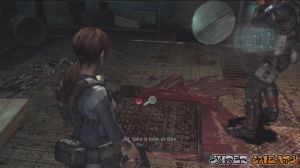
As soon as you enter the door, you'll hear a woman's scream. Go downstairs to see her murdered. Open the door to the infirmary and kill the enemies. Don't forget to scan them before or after killing them. Scan the area for items, including another handprint by the wall with some x-ray results. Scan the floor near the woman to find the Crew Quarters Area Key.

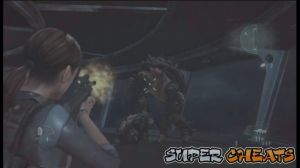
Exit the infirmary and kill the B.O.W along the way. Once you've exited to the hallway with two locked doors, open the first door to the left to enter the laundromat. There's a hand grenade on the table, some ammo and another grenade by the open washing machine (scan it). There's also a B.O.W that will emerge from one of the open machines there. Exit the room afterward.
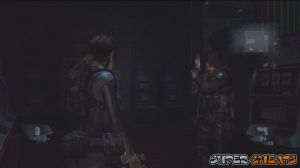
Enter the crew cabin next. There's a BOW waiting by the door so quickly kill it. Continue forth and two more BOWs then backtrack to meet up with Parker. Open the door to trigger a scene. Chapter complete.
Episode 2: Double Mystery
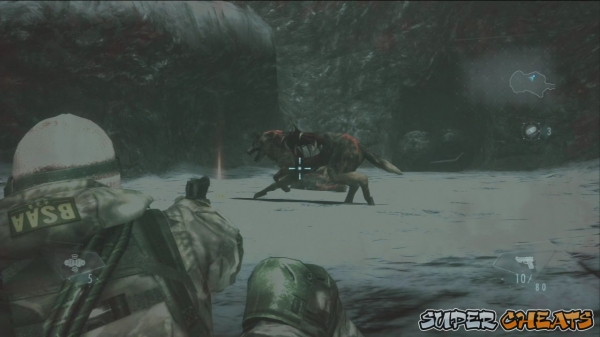
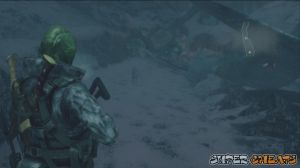
Scan the pilot's corpse then pick up the Flight Plan from him. Continue forth and destroy the crates along the way to find some items. Open the gate to proceed inside the mine. You'll encounter some infected wolves. Kill them quickly then scan them immediately as their corpses disintegrate almost immediately. Past the large cavern are two paths. Don't worry since they'll lead to the same area. Pick up the ammo and continue forth. Before jumping across the gap, kill the infected wolves and pick up the BOW Decoys on the nearby crate.
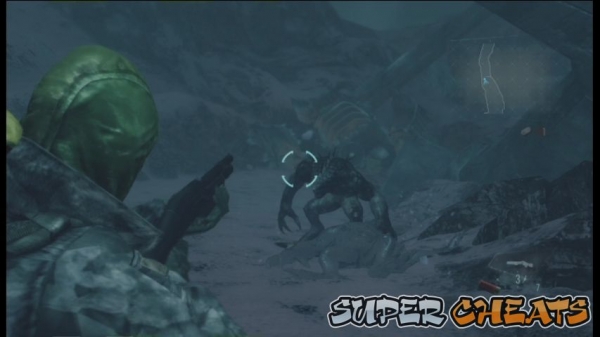
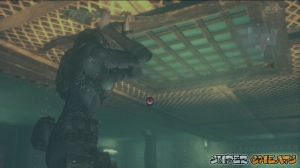
Continue to the large cavern. There's a lot of infected wolves that will appear so use your BOW Decoys to make your job a lot easier. After clearing the area, pick up the ammo and green herb, as well as extra handgun ammo and BOW Decoys by scanning. Proceed to the next corridor and you'll find some stalagmites to the left. Scan it to find another handprint.
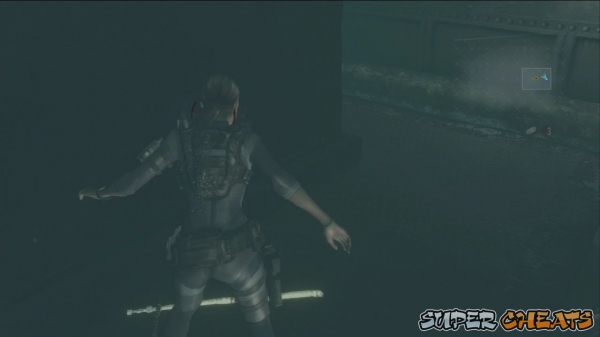
Continue forth and you'll find more crates. Destroy them to find additional supplies. Follow Jessica and jump to the next ice ledge. An accident happens and you'll find yourself temporarily incapacitated at the bottom of the pit and a large group of beasts unto you. Shoot a few of them but when their numbers get too much for you to handle, use your BOW Decoys to give you some breathing space. If you haven't used that much before reaching this point, you should have enough to survive until Jessica arrives. Climb the ladder then continue to the next area. Look over the ledge to trigger a scene.
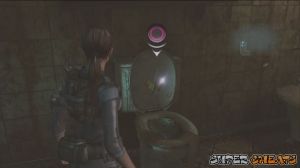
The control switches over to Jill. Push the table away from the nearby door then open it. In the bathroom, examine the toilet to find the screwdriver. Pick up the green herb in the corner as well.
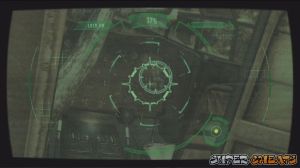
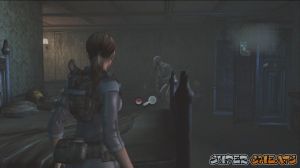
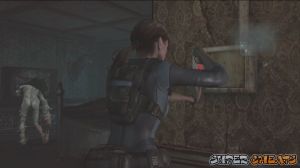
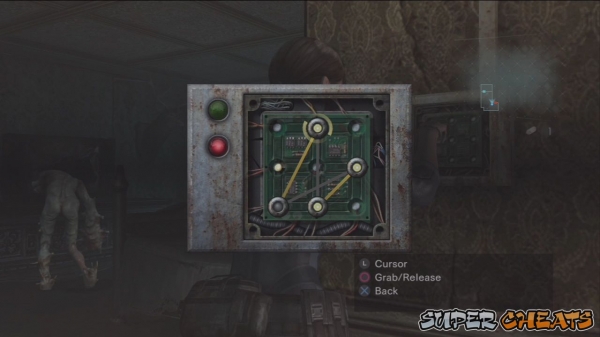
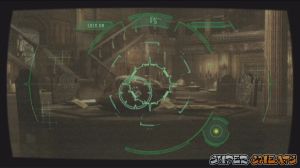
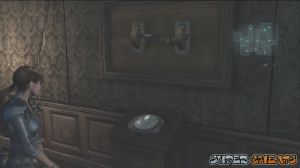
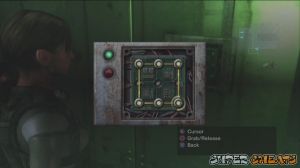
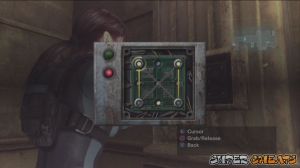
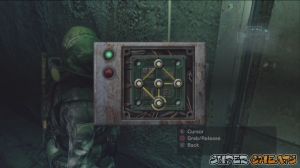
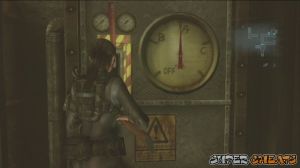
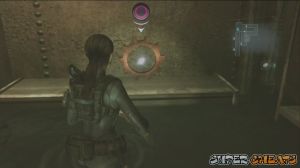
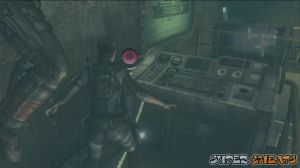
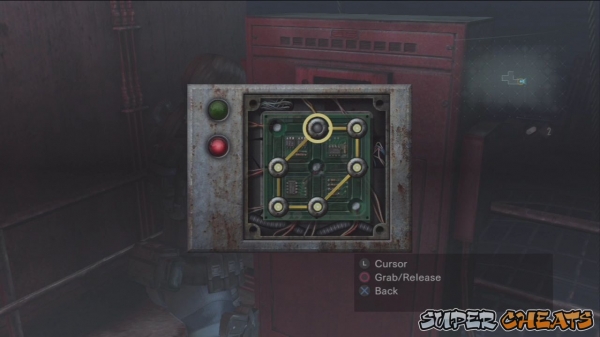
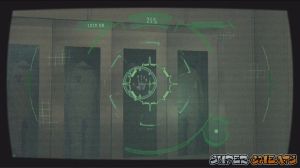
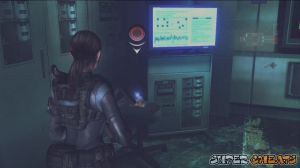
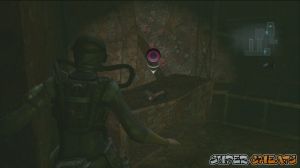
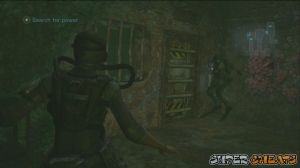
Go back to the bedroom and a BOW will appear. You don't have any weapons so you just have to evade it. Position yourself in front of the TV and let the BOW attack. Evade at the right time and it will hit the TV, trapping it there for a bit. Now go to the control panel by the other door and screw it open. You have to re-arrange the circuitry so that the buttons will be over the glowing orbs. Open the door to leave the room.
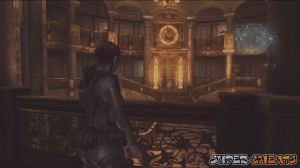
You have to keep avoiding the enemies and make your way to the eastern side of the immediate area. This is a straightforward path so you don't have to worry about getting lost. Pick up ammo along the way and continue until you reach the large dining hall (Cafeteria). Go downstairs to meet up with Parker. Go through the door and he'll hand you x3 BOW Decoys. Enter the first door then avoid the BOWs. Head to the next room. This room has a lot more BOWs so you may have to use your BOW Decoys to lessen their numbers.
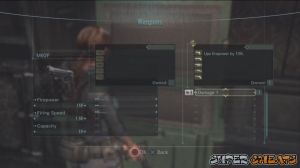
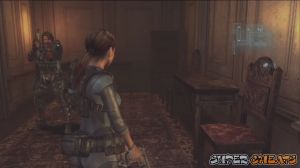
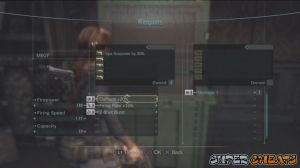
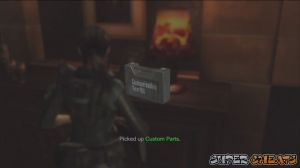
Head to the next room and go straight ahead. Pick up the Custom Parts on the cabinet beside the metal door. Kick the metal door to retrieve your weapons. After that, examine the green chest to modify your weapons. Install the Damage +1 upgrade to your handgun.
Once done, enter the room straight ahead and kill the BOW. Scan the bed to find a Hand Grenade underneath it. Backtrack through the two rooms and kill/ go past the BOWs. Scan the clock in the second room to find a green herb. Once you've reached the corridor where there's a door requiring a card key, scan the ornament on the table to obtain a Custom Part (+Firing Rate). You can return to the weapon room to upgrade your handgun again.
Return to the cafeteria and scan for some additional items. There's a Helm Door to the east but you can't open it yet so just take note of it. There's also a handprint in the turkey itself. Scan it then go upstairs. There's also another anchor door in the middle of the stairs. Ignore it for now and just take note of its location.
Go upstairs and scan the shelf in the middle-north to find a Hand Grenade. Kill the BOWs inside and continue forth. Make your way to the room where you woke up earlier. Enter that room and kill the BOW from before. Now go to the bathroom and scan the wall near the showerhead to find another handprint.
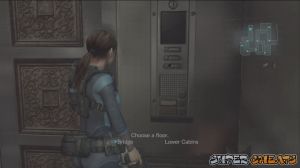
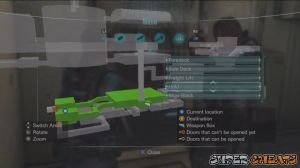
Exit to the corridor and shoot the lock open. There's also another Helm Door to the west so ignore it for now. Call the elevator and you'll have two options for your destination. Select the lower cabin first. Grab the green herb on the drawer then open the door ahead. This leads to the weapon box where you retrieved your weapons earlier.
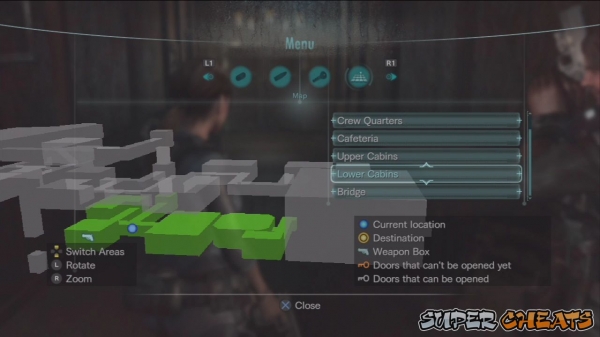
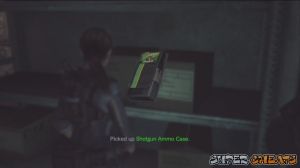
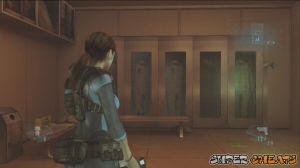
Return to the elevator and select the bridge this time. Continue to the locker room and loot the green herb, shotgun shells and ammo. Once you make it to the bridge, scan the lower right corner to find a Hand Grenade. There's also a handgun ammo case in the leftmost control panel.

Finally, there's a handprint on the window near the middle so scan it as well. Examine the destroyed panel for a scene. Chapter complete.
Episode 3: Ghosts of Veltro
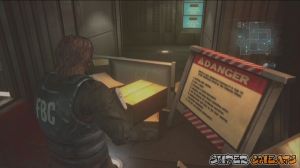
There are more enemies waiting inside. Before entering, vault over the yellow caution sign to find a green herb and some ammo in the corridor. Exit the conference room and turn to the right to find an M3 Shotgun beside the Danger Sign. Before going forth, turn around and enter the room at the end of the corridor to find shotgun shells, a green herb and a couple of hand grenades inside.

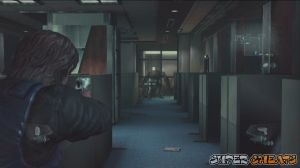
Continue to the next room to the west to find another green herb and some ammo in one of the lockers there. Exit that room and continue to the next hallway. Follow the straightforward path until you reach a staircase. Make your way to the 6th floor and you'll find a large double-door. Check the table to the right before opening it to find a grenade and ammo. Enter the office area and kill the three monsters patrolling the area. Loot the lockers for some ammo then exit the room.

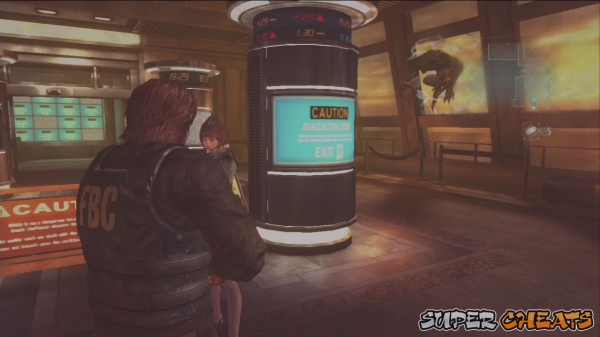
Head to the south and open the gate. The monsters chasing Jessica will be kind enough to wait until you finish the sequence. Head to the next room and collect the ammo and herbs then call the elevator. You have to defend yourself from waves of monsters that will attack. After a while, the elevator will arrive. Head there and push the button to close the door.
Disembark from the elevator and make your way to the helipad. After the scene, the control switches back to Jill.
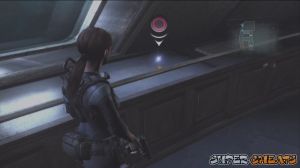
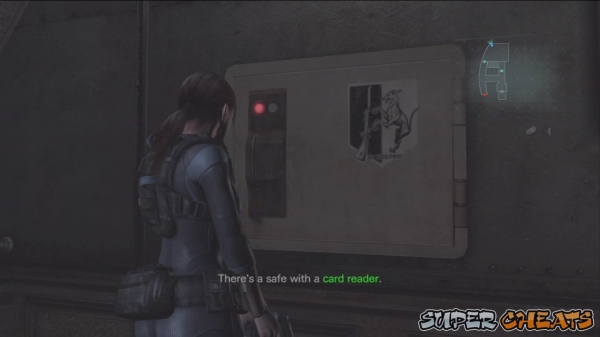
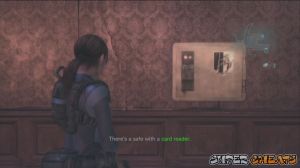
Go downstairs to reach the lower portion of the bridge. Collect the green herb and handgun ammo on the table ahead, near the elevator. Before taking the elevator, kill the BOW in the next hallway and enter the room to the northwest. Here you'll find a lot of goodies, including a Helm Key and Custom Parts. Collect the BOW Decoys and ammo. There's a card reader-protected safe in here as well. Take note of its location.
There's another helm door to the southwest. Open it using the key you found to find some valuable items inside. Start off by getting the ship's Upper Deck Map on the wall to the south. Pick up the Crest from the bookshelf then examine the captain's seat. Scan his open stomach to find shotguns shells. You can examine the nearby book as well to know the history of the ship.

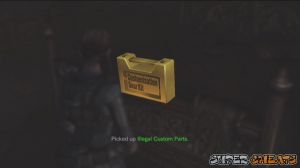
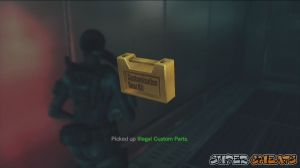
The elevator is not working so backtrack to the elevator you used to reach the bridge. Next, select the Upper Cabin to reach the second Helm Door you passed by earlier. Scan the bed to obtain “Illegal Custom Parts”
from underneath it. Return to the elevator and select the Lower Cabin and head to the weapon box room to upgrade your weapon using the custom parts you found earlier.
Make your way to the cafeteria where you'll find two new enemies. These fire projectiles so take them out from a distance. Before opening the helm door in the Cafeteria, go upstairs and make your way to the middle-northern room. There should be a shotgun displayed on the wall and an empty pedestal under it. Place the Crest you obtained earlier to get this shotgun, called Windham. A BOW will burst through the cabinet beside you so take it out and return to the cafeteria. When ready, open the helm door to proceed to the next area.
Once you've reached the large hall, go behind the large clock to the east to find a handprint behind it.
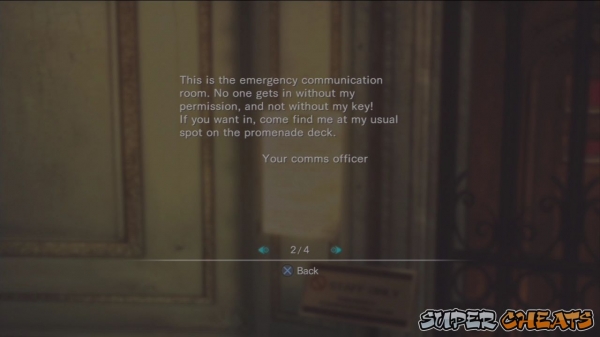
There's also a weapon box nearby. Upgrade your shotgun if you have the extra part(s). Examine the massive door behind the clock then examine the note posted beside it. You'll have to go to take the stairs and to the promenade deck.
In the same area, go downstairs and scan the broken display case on the wall to the northeast. You'll find another handprint there.
Next, take any of the stairs to the northwest/southwest to reach the third floor. Open the door to the southeast to reach the Solarium. There are free scanning targets here so just open your scanner and scan the chunk of flesh on the ceilings and on that massive lump. Hack the panel beside the green-lit door ahead to open it. Enter the room and scan the handprint on the electrical box.
There's also a M40A1 rifle, a custom part and a document on table to be added to your Key Items inventory. There's also a control to purify the pool. Activate it and leave the area since the filtration will take a while.
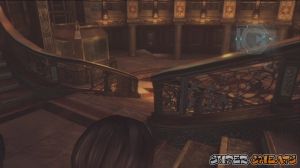
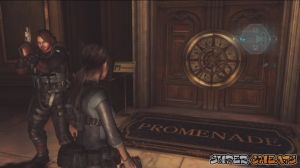
Back in the main hall, make your way to the bottom floor and enter the door leading to the promenade deck. Once there, destroy the crate at the bottom of the stairs to grab some handgun ammo. Go back upstairs and enter the door. Follow the corridor and grab the rifle and handgun ammo at the end. Enter the next door and take out the ranged enemies across.
Follow the path to the left to find a green herb, then go around and take the stairs to the lower floor to find a custom parts kit on the table. Enter the small storage room southwest of the table to find a Shotgun Ammo Case. There's also a weapon box nearby so use it to upgrade your weapons.
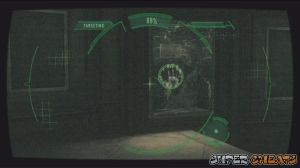
Go back upstairs and examine the white gate with red arrows to call your partner and lift it. The comms officer is located inside the room in the corner. Before opening it, grab the ammo and clear the area of enemies since you'll have to take it down.

This fight will take a while and will surely test your survival skills. First off, take note of the gas canisters. You need to detonate these when the boss gets near. This should stun it, allowing you to go up close and deal massive melee damage. Next, the enemies here will be endless. You'll encounter the basic and upgraded forms melee-type mutants, and the ranged mutant. The ranged mutant can also lay down traps that will prevent you from moving so make sure to watch where you're going.
Next, the ledges and windows. This will allow you to vault over them, giving you a quick escape. Keep on the move and concentrate your fire on the boss only. It's okay to shoot the ordinary, pesky enemies as long as it will help keep you alive. Take note that the health and ammo in this area is very limited so you'll have to do with what you have. Your partner will be completely ignored by the enemies as well so don't count on him. As usual, this boss' weakness is in the head. Try your best dealing damage with it. Kill the remaining enemies and get the Lifebouy Key from its corpse.
After the battle, scan the crate inside the room where the mutated comms officer came out.
In the same area and before leaving, go to the lower floor and go to the open kitchen. There's another handprint on the hanging cabinet.
Now open the Lifebouy door to the west and examine the elevator. Next, open the control panel so you can rewire it. From here, you can go back to the bridge or deck. There's no point in going back to the bridge for now so select Deck. Grab all ammo, green herb and grenades. There's some ammo inside the trash bin that you can reveal by scanning and a safe that's locked by a card reader. Both doors leading outside are locked in the similar fashion as well so ignore them for the meantime.
Check the handprint on the table to the left. Return to the elevator then go to Promenade Deck.
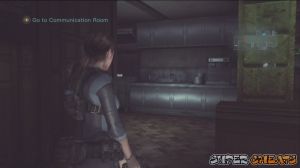
Make your way back to the main hall and head to the second floor. Open the door to the Communications Room using the Lifebouy Key and the chapter will be complete.
Episode 4: A Nightmare Revisited
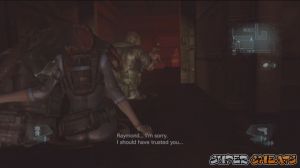
Once in control, collect the items nearby and scan the control panel to get some shotgun shells. You can examine the Safety Procedures nearby as well if you want. Leave the Comms room then take the Iron Anchor Key from Raymond. You have to go to the Casino in the first floor of the hall but before leaving, go upstairs and return to the Solarium. If you followed this walkthrough and activated the water-filtration system earlier, then the water should be clean by now.

Dive to the water and head to the nearest ladder. This will bring you to the diving pool's diving board. Climb the diving board to find a rifle ammo, machine gun ammo case and a handprint.
Return to the pool and go to the northeast corner ladder. Scan the stumbled artificial tree to get some ammo, get the custom parts on the nearby table and Illegal Custom Parts on the counter of the nearby hut. Collect the BOW Decoys, Grenades and ammo nearby. There are some meat chunks you can scan as well. Leave the Solarium and head back to the main hall.
Upgrade your weapons using the parts you acquired. Before moving to the casino, you can backtrack to the Cafeteria to open the Anchor Door there. Inside, you'll find more ammo. Scan the table near the wall to get a Custom Parts as well. Once done, enter the casino next.

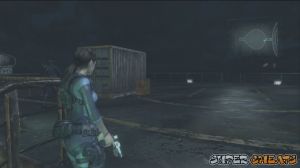
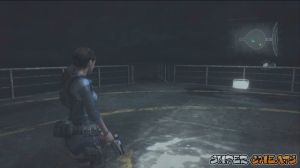
There's a small fountain in the middle of the casino with some fishes and a shining golden object on top. Just take note of this object of interest when the power returns. Turn right (south) and you'll find a Handgun Ammo Case by the grates.

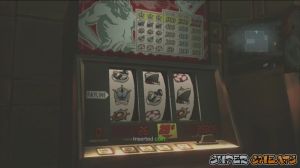
Turn to the right again and scan the slot machines to the southwest. You should find another handprint there.
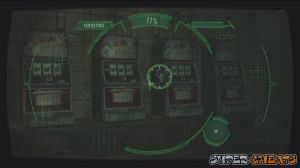
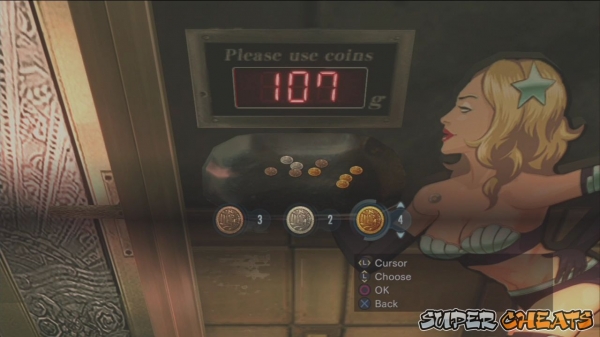
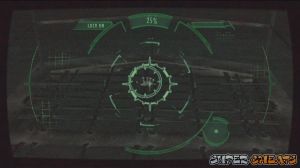
You'll also find a Green Herb to the northwest part of the room, beside the stairs. Now go upstairs to the northeast to find the breaker for the casino. Activate it to restore the power. Go to the fountain and press the button. This will transform the fishes into flesh-hungry beasts. Kill them all and grab the coin that they'll drop.
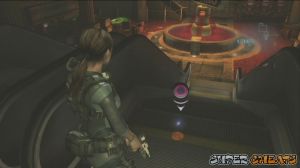
There's also a note by the fountain that'll say that the door to the VIP room needs 107 grams to open. Play the slot machine nearest to the stairs. Don't worry if you don't win since you'll always get your coin back. Keep playing until you hit the jackpot and get a Bundle of Coins. Now go to the VIP door and place the coins on the platter. You need to place 3 bronze, 2 silver and 4 gold coins to get the exact weight.

Once inside the VIP room, collect the ammo and scan the cabinet by the wall. You'll be able to obtain a Custom Part there as well. Now go down the ladder until you reach the bottom floor then use the next ladder to climb back up. Follow the tunnel to the Freight Lift. Before boarding the lift, check the southwest corner (refer to the map) to find a Custom Part again.
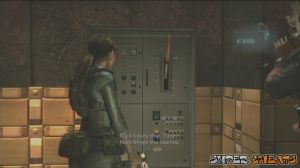
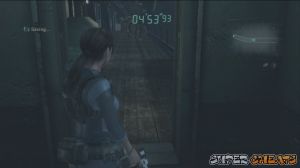
The key to operate the lift will be missing so enter the door to the south and follow it until you reach an elevator. It won't be operational so you have to rewire the nearby control panel again. Activate the elevator to return to the Crew Quarters.

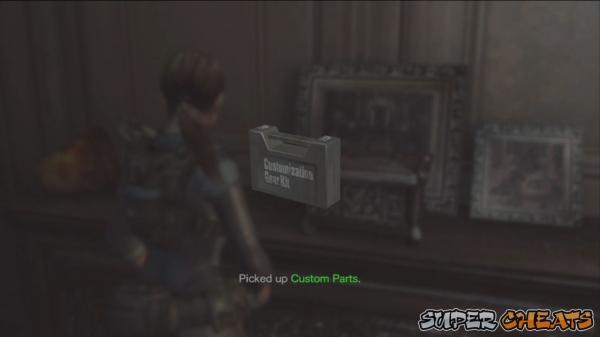
Make your way through the dining room and the kitchen. You'll finally reach the room where the dummy Chris was held. Enter it and kill the BOW inside. Scan the handprint on the Veltro banner, then grab the Custom Kit on the floor. Scan the corner beside it to find some handgun ammo. There's also a note on the table that you can examine.
Leave the room and then go upstairs. Continue forth until you reach the Iron Anchor door you found earlier. Enter it to find ammo, green herb, MP5 and a weapon box. Swap any weapon then apply the new upgrades you found. I suggest bringing in the MP5 and swap it with your M401 Rifle. There's a boss battle ahead so it is recommended to attach Bind, Damage +30 and Infighter to your MP5. Otherwise, you can opt to put these instead to your shotgun. There's also another custom part that you can pick up from the floor along the corridor outside, though you should be able to scan and tag it from the weapon box's location.

Leave the room and continue to the infirmary where you recovered the keys earlier. Enter the room and examine the note if you want. After doing so, you'll find the mutated Rachel outside the window. Pursue her and you'll encounter her immediately in the staircase outside the room. Aim for her head when you can and evade her lunge. She doesn't have that much attacks so you have to expect that she'll get in close to grab you or pummel you. After dealing enough damage, she'll cower and run away.


Follow her and take out the BOWs along the way. She'll appear inside the crew cabin's shower room. The space here is very limited so deal damage to her the best you can. Like before, she'll run away through the vents when enough damage is dealt.

Exit the crew cabin and you'll encounter a shooter BOW around the corner. Be prepared since Rachel will be here as well. Engage her and deal damage to her the best you can. Continue forth to the staircase and you'll encounter Rachel again.

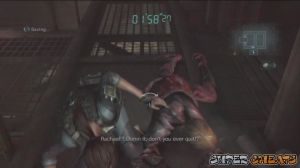
You'll eventually reach the dining room. Here, you'll have to finish her as more enemies come in. Parker will arrive to lend a hand. It will be a good idea to throw a grenade or two to soften the enemies up.


After defeating Rachel, pick up the Lift Key from her corpse then head back to the freight lift. Use the key on the panel then pull the lever to activate the lift. Chapter complete.
Episode 5: Secrets Uncovered
Examine the controls to open the locked down door. Get the grenade and the MG ammo by the shelf then exit the room. Exit through the next door and go to the next room. Scan the wall to the right to find a handprint.

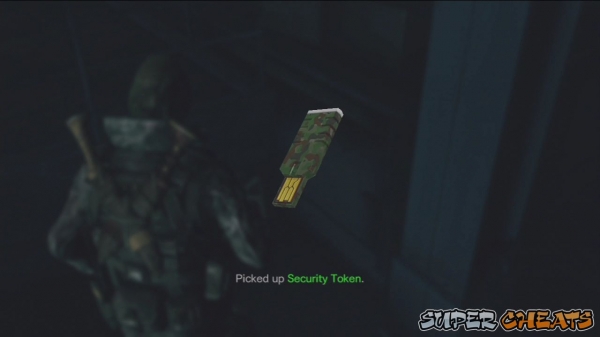
Loot the ammo and grenades nearby then scan the floor to obtain the Security Token. This sub-chapter will be complete afterward.
Control shifts back to Jill. Get off the lift then head to the northeast corner of the room. Scan the logbook on top of the box to find a handprint.

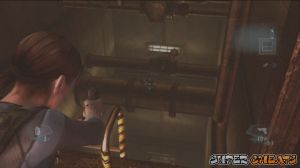
The door to the southwest requires a card reader so ignore it for now. Go through the northeastern door. If you noticed, there's an ammo case on top of the pipe but you can't reach it for now. Shooting it won't dislodge it from its location either. Ignore it for now then go down the ladder. Proceed through until you reach a control room. Scan the pipe beside the consoles to find a rifle ammo. There's also a weapon box here so customize / swap your weapons as necessary. Examine the warning screens to know where the problem is. You can't do anything with the consoles for now so just leave the room and continue.

Exit the room and turn right to find a couple of crates. Break them to obtain some ammo. You have to wade through flooded waters this time. There will be infected fishes as well; however, engaging won't be cost-effective as of this moment since you probably have limited ammo after your fight with Rachel last time. Follow the corridors until you reach a room with an elevated platform and green herb. Before reaching that room, you should have noticed steam blowing off from an overhead path. Take note of this since you'll have to return here in a short while.
Exit the room and quickly turn right (north) then left (west) to find a steel gate. Open and go upstairs. Scan the vent to find some MG ammo then enter the door. Ignore the console for now then grab the green herb ahead. There's also a note that will tell you how to operate the steam using the lever to the right.
A: Maintenance Room
B: Engine Room, Upper level
C: Engine room, lower level
Pull the lever once so it stops the steam from blowing in the lower level. Backtrack to the water and kill/ avoid the monsters along the way. There are MG ammo in the dead end to the south. One is on counter while the other should be scanned, submerged on the floor. Now enter the next gate and go through another door to reach the engine room's lower level. Turn to the right to find a custom parts kit.
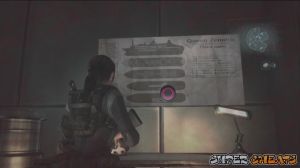
Now go around and obtain the Queen Zenobia Lower Interior Map on the wall. Go through the next door this time and go up the ladder. Pick up the ammo along the walkway and ignore the large cog door for now. There's also an Illegal Custom Part in the other platform with no way to reach it. Just take note of its location since you can't get it for now. Go downstairs and carefully kill the infected fishes before moving forth.
Enter the room to straight to the northeast and kill the monster inside to find an AUG and a custom kit. Exit the room and head south this time. There's some shotgun shells underwater in front of the stairs to the southwest so scan it and pick it up when you have the chance. Now go upstairs and destroy the crate to find a shock grenade. Enter the nearby door to find yourself in the engine room's upper level. Go straight to find a Machine Gun Ammo Case and a memo beside it. Examine the console to update your objectives.
Now pull the lever to remove the steam in the upper level. Pull the lever near Parker again so it stops to A. Now exit through the door behind Parker and go back to the previous room with a green herb and elevated platform.
Exit to that next room and you'll notice that the steam is gone now. There's also another out-of-reach Custom Part on top of the tank here. Like the Illegal Custom Part a while ago, ignore it for now since you'll be able to collect it in the later chapters. Grab the Cog and shock grenade in the room. Scan the floor beside the valve to find some shotgun shells. Now turn the valve so the dial turns to “Off”
Now you have to backtrack to Parker. Take note that enemies will spawn the areas you cleared so you have the option to run past them or engage them. After regrouping with Parker, go past him and exit through the other door. Now you have to go downstairs and make your way back to the Cog mechanism you saw earlier. Place the cog in the middle then operate the button to the left to reveal the Restart Key. Get the key and return to the engine room. Place the key on the other console and watch the next scene. Regroup with Parker to complete the section.
The control now switches over back to Keith. Follow the path and take out the BOWs along the way. Once you've reached the crash site, invisible Hunters will attack you. Fall back to the ledge you jumped from. This way, you can avoid getting surrounded. Let your partner stay in front so the enemies attack him. Keep your eye on the shimmers and distortion in front of you and feel free to shoot them. If you're using your shotgun, wait until they get into close range to knock them off. Take note that after they stagger, you can shoot at them while they're down. Keep doing this until your partner tells you that you've taken care all of them.

Collect all items you from the crates and scanning the area. Once done, find the terminal and examine it for a cutscene. Mission complete.

Episode 6: Cat and Mouse
Scour the area for more items. I won't be specifying their individual locations. Once done, continue through the steel Lifebouy door in the lower floor and make your way to the exit. You won't be able to use the weapon box here so just go past it. Once you've reached the promenade area's entrance and before opening the Helm Door, go downstairs to find a Hand Grenade in the corner.
Once you've reached the main hall, scan the space below the large clock's pendulum to get some shotgun shells. Now go upstairs and get some handgun ammo on the table near the weapon box. Now go downstairs and enter the Casino. Grab the green herb on the chair near the door and it will break open, revealing two massive chainsaw monsters.
You have to use your grenades here to stop them on their tracks. Pulse grenades are powerful enough to stun them and allow you to land a melee attack. Keep distance and don't allow yourself to get caught in their chainsaw attacks since you can instantly die regardless of your health. Use the slot machines, fountain and escalators to run around and lead them to circles while you're attacking their heads. Take care not to get caught by their foot traps.

After taking them out, obtain the Trident Key from one of them then continue to the door where they came from. Grab the green herb and hand grenade then open the door. Jump through the opening and immediately kill the bloated monster before it explodes near you. Exit the door and immediately kill the bloated monsters. Scan the pile of gore in front of you to find a hand grenade. This room has a lot of monsters so take them out before continuing. Scan similar piles ahead to find a handgun ammo and another grenade. Take the ladder up.
Kill the bloater immediately then jump down the next opening. You can't go anywhere else so ride the lift and go down. Go through the door to the northeast and jump down the ladder. Follow the corridor until you reach the control room. There are two exploding monsters and a clawed one outside. Before heading out, grab the two grenades on the console. Exit and throw a grenade in the middle. The double detonation should instantly kill the clawed monster as well.
Go through the next door and follow the corridor. The first corner has a ranged monster, while the second corner has an exploder and two normal monsters. Kill them and proceed further. In the next room, there's an exploder inside the room with several ammo. There's also a normal monster ahead but be careful since two more will spawn behind you. Kill the exploder and grab the much needed ammo. There's also a green herb in the corner, beside the valve.
The next room has an exploder and two ranged monsters. Shoot the exploder first then deal with the ranged monsters. Exit the room and kill the monsters ahead. Enter the gate to the south and head to the next door to complete the section.
The control will now switch to Jill. You have to find the pipe in the console Parker was operating earlier, this is beside the map display on the wall. After grabbing the wall, swim to the grate in the middle and pry it open.
It will fail the first time so find another pipe in the bottom of the room, middle-right side. Remember to take a breather using the air pockets at the top of the room. Pry open the grate for the second time to escape.
After the scene, scan the floor near you to find a hand grenade. There's an ammo box ahead and a Shotgun Ammo Case. Now you have to make your way back to the control room. Be careful since more infected fishes will be waiting to ambush you. Before reaching the control room, there will be two supply crates in the corner near the door. Open them for some ammo. After the cutscene, use the weapon box to upgrade/ swap weapons. Exit the control room and head to the ladder. You'll be ambushed by two normal monsters. Kill them and go up the ladder. Return to the lift and pull the lever for a cutscene.
Your next destination is the main hall. Exit the lift enter the tunnel to the north. Be careful of the monster on the ceiling. Take the ladders up until you reach the casino VIP room. Make your way to the main hall next. Once in the main hall, before taking the elevator, head to the northwest to find a broken display case with a Custom Parts kit. Regroup with Parker and take the elevator. A large monster will jump on top of the elevator. You have to quickly shoot its dangling limb's soft spot before it smashes you in, dealing heavy damage. Keep doing this until it lets up.
Once you've reached the observation deck, grab the ammo and green herb nearby then use the weapon box if you want. There's a boss battle ahead so make sure you don't get caught off guard.
This boss only has two attacks and will have predictable movements due its size and overall build. First is the charge. Evading it will require proper timing but it will help waiting for it to get into charging position (wait for it to lay down its massive, carapaced limb in front it) then quickly run away. The two gas tanks will help halt its charge, rendering it motionless. Use this chance to pump bullets to its unarmored parts.

After charging, it will be vulnerable for 3-4 seconds, enough time to pump lead to its squishy parts before moving away. It's attacks are devastating and can even knock down your character so do your best avoiding it. Also, aside from the two gas tanks, you don't have any other means of stopping the creature. Keep repeating the pattern until you defeat it. You can scan the remains several times to get your analysis up.


After defeating the boss, the remaining supplies in the room, including a Rifle Ammo box by the window. There are ammo under the seats so make sure to scan them as well. Once ready, go up the ladder. Scan the box to the left to find some handgun ammo then get the Veltro Key Card from the card nearby. There's also a Veltro Agent's Journal that you can read.
Open the door using the key card then collect the ammo from the ammo boxes right outside the door. Continue along the walkway and pick up the green herb before the stairs. Continue up and take the ladder to reach the antenna array. Scan the handprint on the electrical panel then operate it. Rewire the antenna .

Episode 7: The Regia Solis
There are more enemies in the library where Rachel will also make an appearance. She'll drop an illegal custom part so weight the risks of engaging her with your current ammo and health supplies.
Head to the lowest floor to find Raymond on the way to the Promenade. Once you're in the area, go downstairs and destroy the crate for some ammo. Now make your way to the dining area and you'll caught a glimpse of a Hunter. Carefully move and kill them when they attack you. Head to the lifebouy door where more of them are waiting. Have your shotgun ready. Your destination is the Deck but I suggest going to the Bridge first and open the safe there to get an Illegal Custom Part inside the briefing room in the level as the elevator.

Now return to the elevator and take the Deck level this time. There's also another safe here containing an Illegal Custom part. Now head outside and wait for the hunters to attack. Have your shotgun ready and repel their attacks. Grab the green herb near the weapon box and use the box as well to swap/upgrade your weapons. There's a weapon cache along the way. Prepare for two more waves of hunters that will appear in the helipad. Once done, destroy the crates for some much needed ammo and green herbs.
Before opening the UAV container, head to the edge of the foredeck to find a handprint there.
As soon as you're in control, destroy the crates for ammo. Follow Parker to the next area. Pick up the green herb and clear the walkway as fast as you can. Destroy the crates along the way for some extra ammo and use the explosive barrels to kill enemies faster. Once you enter the next room, throw a grenade to kill the ranged and exploding monster. Take the elevator down.

Exit the elevator and pick up the green herb by the doorway. Rachel will be here to make your job harder, regardless if you killed her back in the lower cabins earlier. First, head to the control room to the left. Scan the window to find another handprint. Grab the ammo behind as well. Exit the other door of that room to find a Custom Parts kit in the other end.
Quickly backtrack and go around the opposite way. Take out the ranged enemy blocking the ladder then jump down. Ignore the ranged BOW ahead then get the Magnum Ammo Case behind it. Continue forth and avoid the bear traps. The last corner will have a couple of traps and a ranged BOW. There's no way to get past this so throw a grenade to clear the path.
Save at least one BOW Decoy for the last turn since there's a chainsaw monster waiting at the end. Throw the decoy to the right, enough to give you space to run past the chainsaw monster. Pick up the RPG/rocket launcher ahead then enter the door. (If you missed it the first time around, like I did, don't worry; you can get it at the start of the next episode)
In this door, run through the corridor and go past Rachel. There will be ranged BOWs on the door. Just ignore them and run towards the door. Keep mashing the button to open it. Examine the set of radios ahead to activate the UAV and complete the episode.
Episode 8: All on the Line

Jump back to the water and dive to the bottom. Grab the ammo box there and open the door. Swim in the corridor and make sure to catch your breath by going up the open vents. Follow the path until you reach the large room with Cog mechanism (where you got the Reset Key). There will be swimming BOWs here; avoid them since you don't have any way of attacking them. Don't forget to grab the Illegal Custom Parts that's unreachable a while ago.

Continue swimming until you reach the control room. There's an ammo box in the middle so pick it up then swim up in the middle vent, where you pried it open a while ago. Climb up and jump back to the water at the other end of the tunnel. From there, enter the room to the right then swim to the next room. Grab the Custom Parts kit that's previously unreachable.


Continue swimming and you'll find an ammo box along the way. There's a broken window that you can swim through ahead; enter it to reach the control room easily. There's also an air pocket here that you can use. Continue through the next corridors and once you reached the ladder, grab the Rifle Ammo Case on the pipe near the ledge.

Continue to the lift and swim up to grab some air. You'll find a Custom Parts Kit and an ammo box on the lower platform underwater so dive down and grab them. Once done, climb up the ledge and pick up the green herb in the corner. Scan the boxes and electronic cabinets to find ammo. There's also another green herb in the corridor to the south.
Go through the tunnel to the northeast and jump down the water. Swim to the next ladder and climb up. Scan the floor near the fan to get some ammo then continue up to the casino VIP room. Scan the chairs to find some ammo then exit the room for a scene.
During this sequence, you have to gun down the grotesque tentacles. You have to mind your gun's temperature. Save your grenades when the tentacles are swarming towards you. Shoot also the pods that they release. The grenades replenish over time but you still have to make your shots count. You'll have to heal as necessary. Continue until you get a cutscene. After the scene, the section will be complete.


After the scene, you'll be partnering up with Chris. You'll have to make your way to the lift and dive again. Don't bother using the Pulse Grenade unless its necessary. Open the previously locked door and follow the corridors. Grab the handgun ammo along the way and exit to the next room. An BOW will emerge from the vent. Kill / avoid it then swim up to the open vent for air. Grab the ammo on the floor as well. Continue to the next corridor and grab the shotgun shells. Kill/ swim past the BOW and open the door to reach the hold. Make your way to the corner door again where you dove earlier then make your way back to the staircase where the trident door is located. Climb up the ladder and Chris will give you the Trident Key. Open the door to enter the lab.
Once inside, go past the door with fingerprint recognition system and vault over the broken window. Scan the room to find a Pulse Grenade and handgun ammo. Examine the computer to register your fingerprint. You can also use the weapon box nearby.


Return to the other door and operate the fingerprint sensor to the left. Once inside, scan the handprint on the locker to the left. There's also an Illegal Custom Part and some ammo on the bench. There's also a BOW Decoy under the shelves on the other side.

Now enter the sterilization chamber. A new BOW will make an appearance. Use your pulse grenade to stun it and wait until the door is opened. Fall back and engage it. The enemy is slow and the area's pretty wide so run around and shoot its unarmored parts until it explodes. Now for its surviving lower half, keep distance until it is taken out. Don't forget to scan it as well for additional analysis points.
Now before doing anything, scan the bloody side of the aquarium to find another handprint.
Before doing anything, pick up the L. Hawk from the seat in the corner then go back to Chris's sterilization chamber and scan the floor to find another Illegal Custom Part.
Once done, take the elevator to the west. After exiting, scan the left side of the first arc in the tunnel to find another handprint. Go through the tunnel and scan the flesh chunks for large analysis boosts. Pick up the handgun ammo along the way as well. Once done, head to the vault door in the end of the tunnel to complete the episode.
Episode 9: No Exit
Head inside and make your way to the security door. You'll encounter two BOWs along the way. Kill them and head to the next room. If you haven't collected all items here, you should be able to do so now. Take the elevator next. In the next room, you'll find more items. There will be two Rocket Launchers (though you can only swap one of your weapons and carry of launcher at a time), green herbs (one must be scanned from the dumpster), M401 rifle, BOW Decoys, a Python Magnum (and magnum bullets beside it), MG ammo, shotgun shells and Shock Grenades. Take note of their general locations.
Once ready, activate the two generators to activate the computer. There will be a lot of BOWs that will start pouring in. Stay on the upper platform for the meantime and take out the enemies that will go after you. One of the generators will reset so you have to go down and pull the lever down again. Use your grenades, especially the BOW Decoys if ever you feel that you're getting overwhelmed. I also suggest using the Rocket Launchers here to deal splash damage to multiple enemies. This way, you'll save green herbs and bullets. Eventually, hunters will also appear. Do the same tactic you did the first time you encountered them; find a corner and wait for them to attack to avoid getting surrounded. Once clear, gather the remaining supplies and ammo then regroup with Quint to examine the data.
After the cutscene, the control will switch to Jill. Before moving on, there are invisible laser barriers that will prevent your progress. Use your scanner to see them. Turn around from Chris and operate the panel on the wall. This will allow you to move forth. Then find another similar control box nearby and operate it. This should deactivate all lasers in the walkway. The door nearby won't open so head to the next door. Pick up the green herb along the way.

Examine the fingerprint scanner beside the door and enter the room. You'll find ammo (scan the corner beside the MG ammo to find some Magnum ammo) and a green herb. There's also a manifesto under the blacklight that you can read. There's also a Machine Gun Ammo case on the table in the middle.

Head to the next room and find a computer station in the corner. Scan the wall above the monitor to find a handprint.
You can find another Illegal Custom Part by scanning the reading equipment on the table beside the rifle ammo. There's also another note on the table in the middle, this time discussing the Malacoda mutation. Exit to the main viral container. Collect the ammo outside. There's also a weapon box and a green herb beside it. Head to the elevator and ride it down.
Exit the elevator and collect the ammo nearby. Use your scanner to see the invisible laser grids and make your way to the control panel. You can't do anything about the item by the corpse so ignore it for now. Press the button once then backtrack to the starting point. You should be able to go down the ladder next. Exit to the next door where you'll find a ranged BOW and two shielded BOWs. Use grenades if you have to then climb up the platform to find some ammo, a pulse grenade and an Illegal Custom Part. If you peek through the window, you'll find another Illegal Custom Part floating in the water. Just ignore it for now.
To open the next door, use the fingerprint scanner beside it. Continue through another door to find the map for the Laboratory on the wall. Scan the floor in the corner to get some shotgun shells then collect the other ammo in the room. You can't copy the passcode from the console yet so find the laser control console near the door. Use it to deactivate the laser grid you encountered earlier.
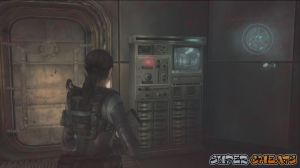
Return to the laser room with the corpse and examine the body. Read through the notes to obtain the Prototype Vaccine. Return back to the control room and use the inoculator. Next, examine the console to enter the employee ID and download the data.
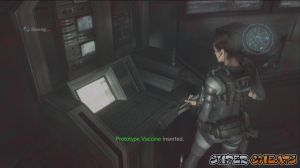
Wait until the download is complete then get the Authentication Code from the console. Now leave the room and make your way back to Chris. The room will be filled with virus-infected water so you have to swim out of the area. The laser grids will still be active so don't just go swimming blindly. You have to swim above the laser traps and through the broken window. Swim up for air. Before finding the ladder to regroup with Chris, we must dive again to get the Illegal Custom Parts you saw floating around a while ago. Dive to the window level and swim north. You should find it along the way. Now swim to the ladder and climb up to regroup with Chris. Use the weapon box as necessary.

Now examine the terminal to initiate the virus neutralization program. Now you have to fend yourselves from multiple BOWs. Take out the ranged BOWs and stay on the upper platforms. Shielded BOWs will make an appearance and will be able to jump on the platforms. Just switch platforms as necessary. Don't forget to scan them as well. After defeating all enemies, cutscene plays and the episode will be complete.
Episode 10: Tangled Webs

You'll now have to control Jill again. Follow Chris as he leads you out of the lab. Jump to the hole and dive down. Follow the corridor and you should see an Illegal Custom Parts kit before the next corner. Debris will fall down on it but that doesn't mean you can't get it. Pick it up and continue swimming through the hallway to reach a ladder. Go up and follow Chris. Once you exit the door, an explosion will occur nearby. Check where it happened to find a Handgun Ammo Case.
Jump down from the ledge and follow the path. Attempt to follow Chris, only to have your path stopped by an explosion. Open the door nearby and continue until you find Parker. Talk to him and assist him. Continue to the next door and grab the handgun ammo. Move on and your path will be hindered by steam. Backtrack a bit and turn off the steam using the button past the group of floating BOWs.
Two BOWs will emerge from the water. Shoot the nearby gas tank to soften them up then finish them off with your handgun. Continue forth to meet up with Chris. Turn around first to find some handgun ammo by the blocked door. Kill the group of BOWs in front of Chris by shooting the gas tank nearby. Kill a couple more ranged BOWs in the next turn by doing the same. Kill the last BOW in the boiler room and continue through the door. Follow the walkway for a cutscene.
After the scene, you'll have another countdown. You have to make your way out of the ship and go to the foredeck before the time runs out. Head to the door and destroy the crate to find a green herb. There's also a weapon box nearby that you can use if you want. Jump down the ledge to encounter another knight BOW charging towards you. Stop it on its tracks by shooting the gas tank by the wall. Kill it then turn the valve to the left to turn off the fire stream.

Continue to the end of the walkway and grab the MG Ammo from the crate. Take the ladder up and kill the ranged BOW there. Proceed to the end of the path and jump to the shaft. Kill the two BOWs then grab the Custom Parts in the crate. Climb up the ladder afterward.

Continue to the viewing deck of the ship and run ahead. Be careful of the falling lifeboats and debris. Once you've reached the end, watch the following scene and the episode will be complete.
Episode 11: Revelations

Don't waste your ammo since the only way to take out the parasites is by using rocket launchers These are dropped by your support chopper. You have to evade/ shoot out the projectiles the parasites will release and you have to move from side to side to avoid getting crushed by the slam attacks of the parasites. The rocket launchers are only one-shot weapons but they're powerful enough to take out the parasites. Take out all tentacles to complete this sequence.
Against the giant T-Abyss mutation
In this sequence, you have to use the mounted machine gun on the chopper to deal with the multiple parasites. Like before, keep an eye on your gun's temperature to avoid overheating. You can also launch grenades but use these only when multiple parasites are converging or if you need some breathing space. The grenades are slow to recover so you'll have to rely on your gunning skills to take out the parasites. The weakness of these parasites are on their heads. However, hitting them with gunfire on their main bodies will still damage and kill them, only much longer. Connected grenade shots can also instantly take them out as well. Continue shooting them and the projectiles they release until the infected host opens its mouth. Keep shooting at it until you get the chance to target it using a missile launcher and land the killing blow on the beast.
Shredding an abomination to pieces
After the scene, we'll be controlling Parker again on another flashback. However, we will start fresh this time. You'll have very little ammo. Move forth and take out the hunter. To conserve ammo, stun it then hit it with a melee. Once done, pick up the green herb then enter the elevator. Exit the elevator and pick up the ammo on the floor. Take out he hunters then talk to Raymond to help him up.
Follow the path to the west (refer to the map) then enter the storage room. You should find some ammo and a green herb inside. Head to the next door and pick up the ammo along the way. Take out the hunter that will appear along the way and another one that will be waiting as you turn around the corner. Before entering the conference room to the south, you should go straight ahead and enter another storage room that contains a handgun ammo, hand grenade and green herb inside.

Enter the conference room and pick up another handgun ammo on the table. Exit to the next corridor and continue forth until you can leave Raymond down. Turn around and run past the conference room. Vault over the caution sign to find a green herb and MG ammo ahead. Now backtrack and vault over another sign to the north that will take you to the staircase. Go upstairs and kill the hunter then pick up the green herb along the way.


Ignore the 4th floor door for now then continue upstairs. Take out the hunter there and pick up the green herb and ammo by the door. Now go down to the 4th floor and enter the door. Pick up the ammo on the floor in the corner then continue to the next room. Open one of the lockers there to find more handgun ammo. Clear the room of hunters. Loot the nearby lockers for more ammo and green herb then pick up the tourniquet. There's also a grenade in the corner cubicle, before reaching the double-doors. You should see it on your way out.


Make your way back to Raymond and take out the enemies along the way. When you reach the corridor with Raymond, take out more enemies and tend to him. After the scene, open the door behind him and continue to reach the elevator. Take out the BOW there then pick up the ammo on the bench and inside the crate. Take the elevator next.


Exit the elevator and collect the supplies nearby. Make your way to the lobby and take out more hunters. Assist Raymond until he gets inside then kill all nearby hunters. Once done, replenish your ammo and herb supplies with the scattered items in the area and the scene will follow. This completes the current episode.
Episode 12: The Queen Is Dead
Next, cut open the next door and swim through a bunch of dead blobs and a corpse. Continue to the next hallway and you'll see a blob eating a corpse. Turn left from that intersection where the blob came from to find a room with MG and rifle ammo, as well as a Rifle Ammo Case. Exit the room and swim to the next door. Pick up the handgun ammo on the floor then cut the next hatch open. There's an electronic door in this room. Pick up the ammo from the ammo box in the shelf to the right then cut the next hatch open while Chris fixes the wires on the door.
Head to the next room and you'll find the power button in the other side of the grates. You have to go around the corridors to get there. The problem is there's some blobs swimming about. For the first blob, wait for it to go away and pick up the magnum ammo from the floor. You have to swim to the ceiling to avoid it. Go around the corner to find the hole near the floor that you can go through. Head to the next hole and pick up the pulse grenade. In the next room, there's another blob that's going around. Just follow its direction, grab the floating ammo along the way and swim through another hole to reach the power button. Grab the MG ammo as well then press the button. Now backtrack to Chris and open the door. Pick up the rifle ammo swim up the ladder for a scene.
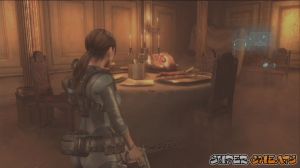
After the cutscene, pick up the voice recorder from the corpse. Move along to the next room and grab the shotgun shells from the table. Scan the corpse to get some MG ammo. Open the next door to reach a dining room. Scan the floor to find a hand grenade, green herb and MG ammo from the broken clock. Scan the wall with the markings to find another handprint. Head to the next room for a scene.

After the scene, scan the floor to find a hand grenade. Pick up the ammo and green herb here then use the weapon box nearby. Pick up your best weapons then open the helm door. Go downstairs and continue forth to the next door. Scan the base of the throne where Norman sits to find the last handprint. Scan the rooms further for some ammo and pick up the other supplies as well if you need to. Norman will drop his PDA. Pick it up and leave the area to complete this section.

This is the final boss fight in the game and it can either be frustrating or easy. The key here is evasion. (For Asian PS3 users, press the Circle button instead of the X button + yung left analog stick to evade) The battle will be divided to three stages. Suggested weapons here would be the Magnum, Shotgun, Rocket Launcher or Machine Gun. The boss has the ability to teleport and create illusions; you'll know if he'll use it when you see his only eye start to glow. Also, it's only weakness is its exposed heart. It will only get exposed when he's using his special attack.
For the first stage, the boss will just teleport near you and perform a smash attack that can cause AoE damage. The only way to stop this is to face him and shoot his heart before his attack lands. You only have a few seconds to react and your attack should be powerful enough to stagger him. That's why you have to use the magnum or shotgun in this stage. If his attack connects, expect high damage to your character or even get knocked down. Keep repeating this method until the boss staggers completely, allowing you to perform a charged melee attack. There are only two extra green herbs here. However, as long as you keep your cool, 2-3 herbs should be enough to last you through this battle.


For the second part, he'll start making a copy of himself and attempt to smash you. You can easily distinguish the real one from the purple smoke that he's emitting from his mouth. React quickly and shoot its heart to stagger it and stop the attack. It will also start sending illusions to confuse you. Take note; as long as you don't see a purple smoke coming from the enemy, don't turn around or run. After sending his copies, he will follow shortly after. As long as you're anticipating his attacks and react accordingly, then you shouldn't have problems stopping him.


For the third phase, the boss will start rushing towards you, with the combination of a few decoy attacks and a real, heavy swing that will send you flying. Prepare to evade whenever he vanishes; otherwise, use the time to reload whenever you're facing the illusions. During this stage, his heart will be exposed most of the time so showering it with bullets using your MG while keeping distance is a good way to keep dealing damage.

If you're having problems evading, you can exploit the weapon box by opening it at the right time, before the boss hits you. You'll be immune while opening it. Keep repeating this method until the squishy organ on his back turns to red. You can attack it or continue concentrating on his heart until he is defeated.


Post a Comment