Tom Clancy's The Division

Introduction
The guide is a work in progress and will be updated regularly
Tom Clancy’s The Division is an online action-RPG set in an immersive & realistic urban open world.
Everything starts on Black Friday, when a devastating pandemic sweeps through New York City, and society starts to collapse into chaos. You are humanity’s last hope: a member of The Division, a unit of sleeper agents activated to save what remains.
WHEN SOCIETY FALLS, WE RISE
The Division, a classified unit of self-supported tactical agents, is activated. Leading seemingly ordinary lives among us, The Division agents are trained to operate independently of command, as all else fails.
This is our guide to playing and surviving a city of dangerous challenges and opportunities to help.
The guide is a work in progress and will be updated regularly
The game opens with a slick video showing the start and spread of a virus through New York and the subsequent breakdown of society. Leading to the activation of the Division agents and finally to your own activation, finishing in the character customisation interface..
Game Play Basics
The Division is a cover based, third person shooter with character based RPG elements.
The basic controls allow you to walk or sprint around the environment and also to climb over and onto obstacles / objects. Holding the climb button as you sprint towards a fence / wall / vehicle will let you immediately vault over or on to it. Clearing fences in this way lets you continue to run without stopping your progress forwards.
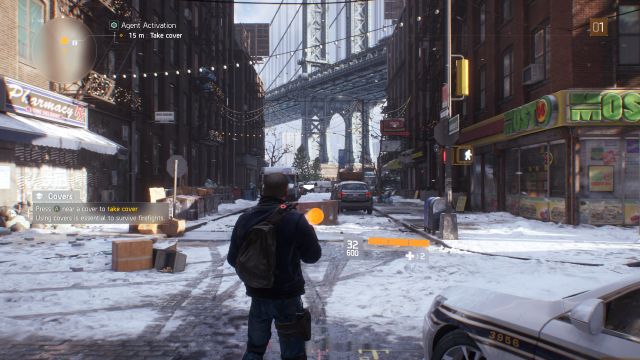
You are heavily encouraged to use cover in the environment during combat and this works pretty well and is generally essential to make surviving most Encounters far easier. The only downside is that being stationary behind cover can lead you to miss the odd enemy that chooses to run up to you from the side to attack you at close range, often with a baseball bat. So try to keep a note of all the enemies in an encounter.
Moving from cover to cover is the best way to keep alive
You are equipped with a primary main weapon and a side arm, and later you gain a secondary main weapon. Pressing or double tapping 'Y' on xbox switches between the Weapons.
Loot
The Weapons and other equipment in the game can be bought at Vendors but also collected from some fallen enemies or crates in the game. Although these pickups are not common.
Keep an eye out though for some containers and packs in the game world as they can give you medkits and other items. As well as the restock crates that appear in and around mission areas to refill your ammo.
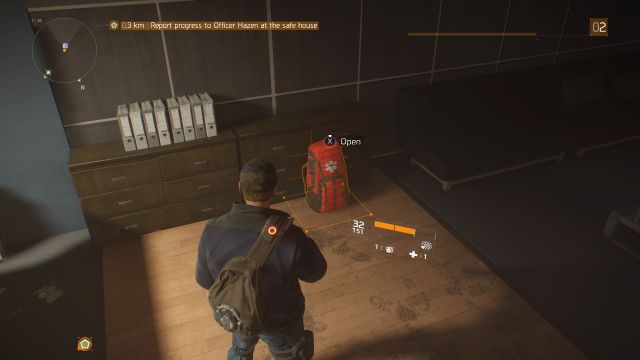
Medkit pack
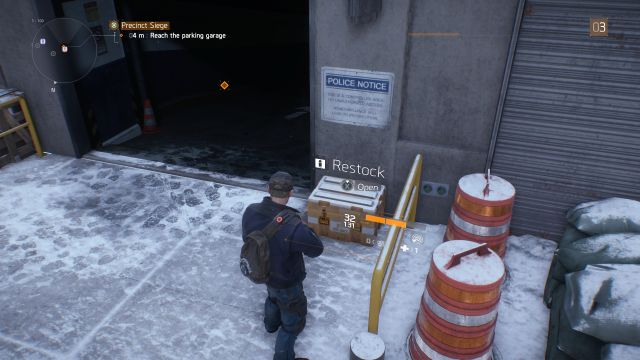
Restock Crate
Red Barrels
Yes! There are red barrels in the game. Shoot when enemies are near and benefit.
Safe House
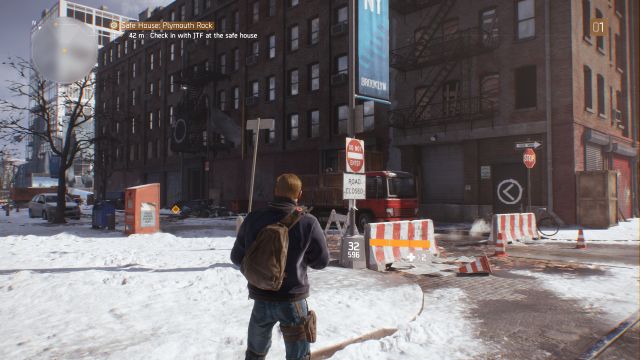
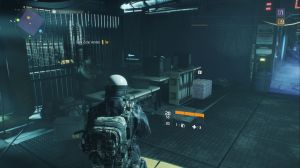
There are many safe house locations around the city as you explore ranging from small rooms to the larger Base of Operations. These rooms / buildings serve as a hub away from the enemies on the street to restock ammo and as a public area where other real world players can interact with you to form groups.
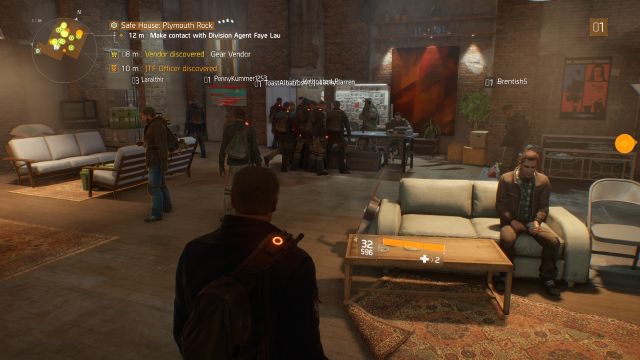
The safe house is a public area
Many safe house locations also have NPC's or information boards where you can discover new missions. As well as Vendors where you can buy new Weapons and equipment.
Map and Missions
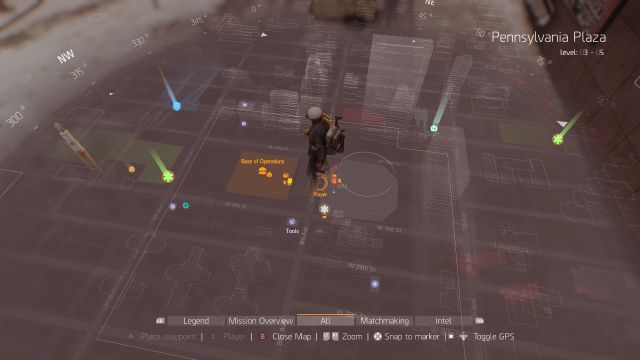
Step into the map
Move the pointer over missions and objects to select them as an active quest.
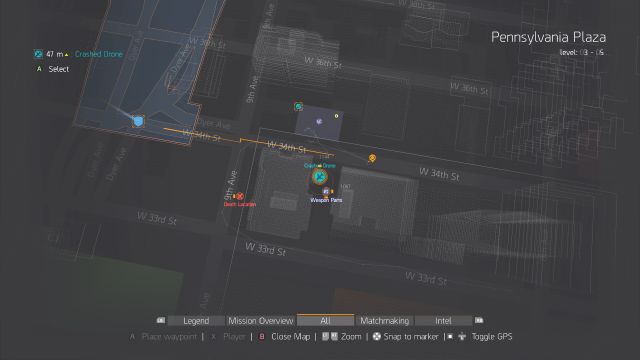
Nearby items and missions
When a mission is selected the map will show you a route to get there. This route will also appear in the hud while moving around the city. Bear in mind though that this route will follow the man Street routes while there maybe quicker shortcuts available using back alleys and passages. Or even going over or through buildings.
Missions
There are Main Missions and Side Missions to complete to progress through the story line and complete the upgrading of your Base of Operations. As well as other Encounters to earn you XP and find resources and gear.
Check out 'Main Missions', 'Side Missions' and 'Encounters' for more info.
Multiplayer
The game allows a drop in / drop out multiplayer co-op experience where you can invite friends or match make with other online players in the area. Your group of up to 4 players can free roam the city to complete quests and EncountersDark Zone
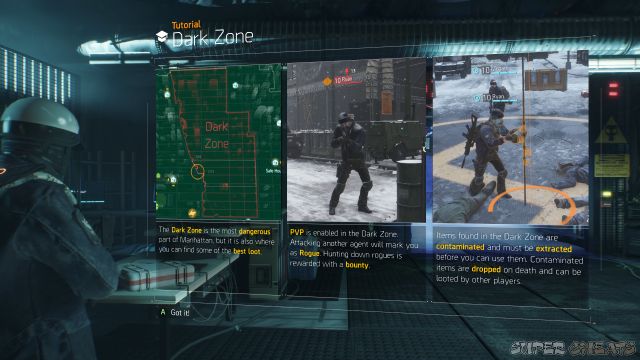
The Dark Zone is a mash up of pvp and pve combat where you get to choose who to side with and who to attack. It is a public area where you will find other players spawning that are in the same level bracket as yourself. But they may be friendly or not.
The 'zone' is based in the central areas of Manhattan in a walled off quarantine zone. It is divided into 6 zones with increasingly higher level AI enemies in each zone as you move north. You can initially access it at certain decontamination points, safe room checkpoints along the exterior. Within these safe rooms you will have specific Dark Zone where you can buy gear with Credits that you can only earn in combat in the safe zone.
pve Combat takes the same form as outside the zone and drops area similarly random. But the gear found inside is designed to be at a higher level than outside. The catch is though that you can just wander out with your loot. It is contaminated to the only way to retrieve it is to have it extracted and decontaminated for you.
Crafting
You will need to collect resources from locations around the city (shown as small purple icons on the map). The following resources can be found:
- Fabric
- Weapon Parts
- Tools
- Division Tech
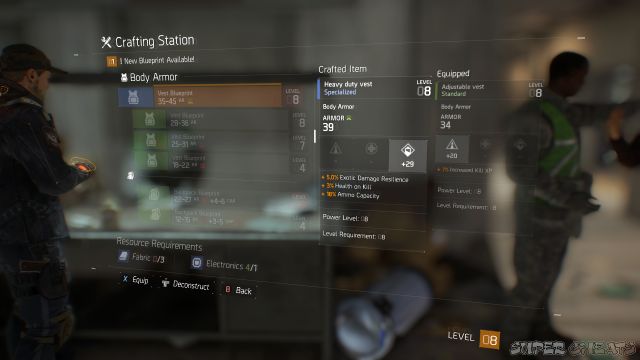
or you can dismantle unwanted guns and gear from your inventory. Lower level resources (eg green) can also be traded up for higher level ones (eg blue) in the crafting menu.
One you have the resources needed for an item you can go ahead and craft it , there is no credit cost for doing so.
Vendors
All of the vendors are available at the Base of Operations except the Dark Zone vendors who can only be found in the dark zone safe rooms at the dark zone access points.Most of the safe rooms around the city will have one or more of the regular vendors in them.
Main Vendors
Weapon Vendor
In the lobby of the Base of Operations. Sells Weapons applicable to your rank of different qualities. Will also buy all unwanted items.
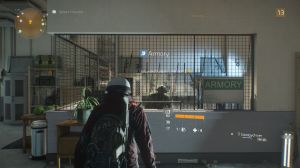
Gear Vendor
In the lobby of the Base of Operations. Sells armour and wearable Gear applicable to your rank of different qualities. Will also buy all unwanted items.
Mods Vendor
In the lobby of the Base of Operations. Sells Weapon mods applicable to your rank of different qualities. Will also buy all unwanted items.
Additional Vendors
Rewards Claim Vendor
The Rewards claim vendor is found at the very back of the Base of Operations by following the corridor through the door that it almost immediately opposite the entrance. Walk past the stair to the Tech wing and continue to the back. This guy will have any items that you have eared through pre -order bonuses, owning other games or other promotional activity which the game may put out. If you have earned them, all the items are free and can be simply transferred to your inventory.
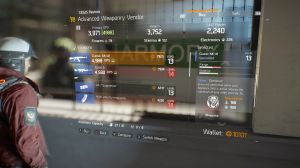
Advanced Weapons Vendor
Available in the Tech wing of the Base of Operations after you complete the 'Armory' upgrade. This vendor sells a small selection of higher tier Weapons and gear. You can also sell items here.
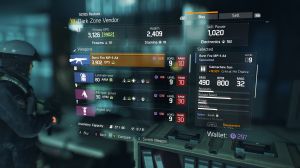
Dark Zone Vendor
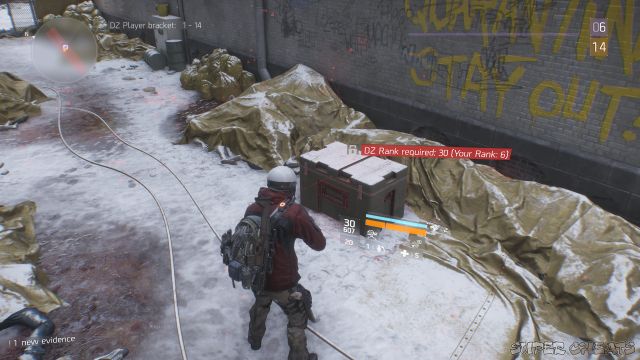
Available at each of the Dark Zone safe rooms. (some entry points and locations inside the dark zone) These vendors sell specific dark zone guns and Gear and only accepts dark zone Credits as payment (earned from combat in the dark zone) Items for sale are only available if you are above specific dark zone ranks though (10 or higher).
Supply Line Vendor
Available after upgrading the supply line option in the Security Wing. This vendor sells cosmetic items for your Appearance, and skins for your Weapons.
Special Vendors
Vendors requiring Phoenix Credits to buy items.
Special Gear Vendor
Available in the Base of Operations after reaching level 30. Find high end (gold) and superior (purple) items for sale in return for Phoenix Credits.
Dark Zone Special Vendor
Found in the highest Dark Zone area (DZ06).
Credits
Credits are the currency of the game. Usd for buying Weapons, gear and mods from the Vendors. There are 3 types of credits.
The main credits earned from doing missions in the city can be used at the main Vendors in the cities safe houses.
Dark Zone credits are earned by killing enemies in the dark zone and collected from where they fall. These are only used in the dark zone Vendors. Remember that you will lose some credits each time you die in the dark zone so your total may go down as well as up.
Phoenix credits. They can be spent in the special gear vendor in the Base of Operations or the special Dark Zone vendor found in the last (highest) dark zone area DZ06.
These can be earned after hitting the level cap at 30, by replaying the missions at Challenge difficulty, completing daily challenges and killing special names enemies throughout the city.
Target intel
Target intel are credits you receive from the Search and Destroy Assignments added in Update 1.2. They are then needed to purchase / activate the High Value Target missions available from the HVT officers in the Base of Operations.
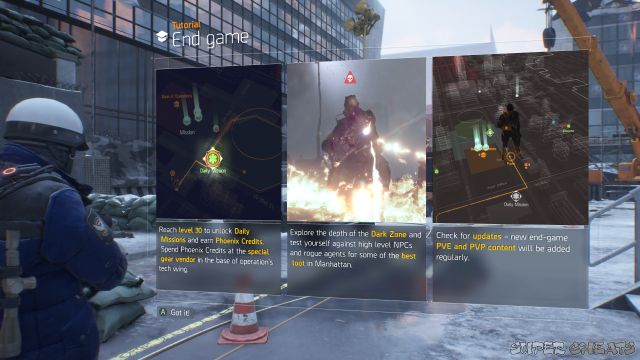
End Game
Once you reach level 30 you will unlock some end game options. The main objective of the end game is to earn the high end Weapons and items that will allow you to maximise your agents abilities and performance.
Special gear Vendor
Daily missions
Daily assignments
Weekly assignments
Incursions
High Value Tagets
Special gear Vendor
Daily missions
Daily assignments
Weekly assignments
Incursions
High Value Tagets
Strategic Homeland Division (SHD)
SHD is the Division, a classified unit of highly trained, self-supported tactical agents.
You take the role of an agent in the Strategic Homeland Division to save what's left of New York City. In general you are an independent agent of a self-supported tactical unit, but whilst in the public areas of the city you can attack other agents and go rogue or join up with other agents to accomplish tasks.
Joint Task Force (JTF)
Allies
The JTF is a collection of law enforcement and other emergency and government agencies. They were in charge of keeping the city under control and managing the outbreak but have been unsuccessful and now need the help of you and the SHD to restore order.
They maintain the Base of Operations centre and cab also be found at checkpoints in the city. Assisting them in taking down enemies around the city will be part of your missions.
Enemies
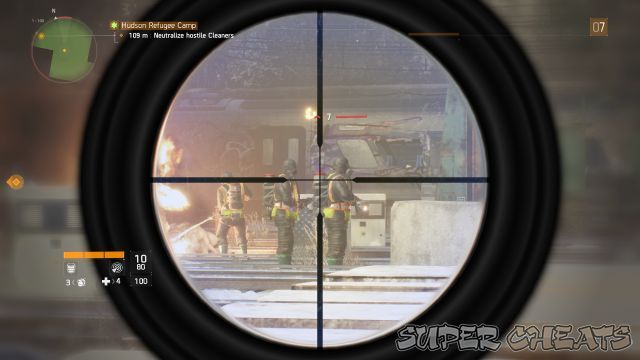
The Cleaners are former New York City workers (Garbage men, janitors, custodians, etc.) who lost everything during the outbreak. They are convinced that the only way to save the city from the virus is to burn everything down, including the people still living in it.
Cleaners can appear in many locations throughout the city and can be very dangerous. They are armed with flamethrowers as well as normal Weapons. If you allow them to get too close to you the flamethrowers will deal a lot of damage to you very quickly.
They have a weak spot though. Shooting the fuel tanks on their back from range will ignite and after a few seconds cause an explosion. Taking out the cleaner in one go and, if you are lucky, damaging other enemies close by.
Rioters
They may be part of various specific Encounters and will appear in waves or just in small random groups causing trouble in the city.
Rikers
The Rikers are escaped convicts from Rikers Island. They come from various gangs but they decided to unite under LaRae Barrett for the sake of the "power by numbers" motto. Unlike the petty thug Rioters who are simply taking advantage of the anarchy, the Rikers are hardened criminals who revel in it, even threatening to plunge the city into the stone age if they can't claim New York for themselves.
Civilians
Neutral
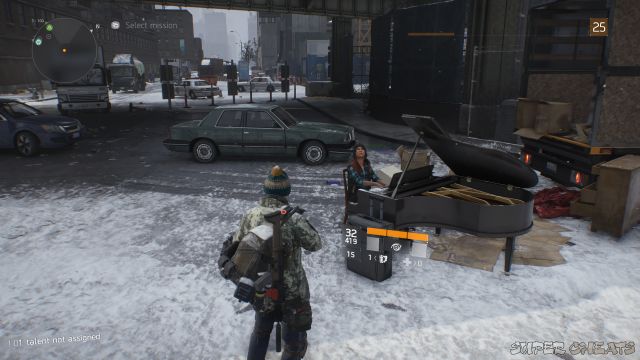
Civilians roam the streets and generally keep out of your way. Most will react to your presence and will run away if you approach with your weapon raised. A few civilians will highlight as being in need and if you do not show aggression they will approach you and request help.
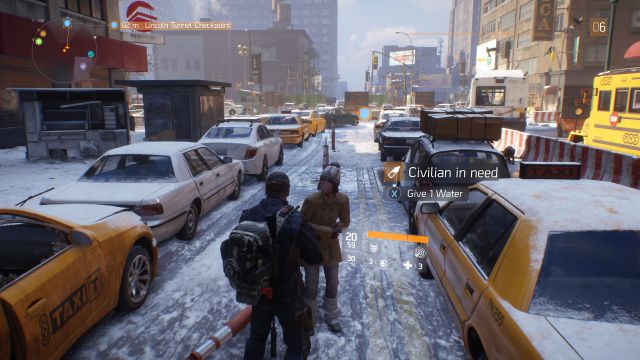
The item they need will be shown and you have the option to give it to them. This is normally medkits, food or Water supplies that you may have found in backpacks and containers around the city. If you give the item to the civilian then you will be rewarded with a random level gear item.
Some civilians are also found as hostages in Encounters with Street gangs. When you release them don't expect any thing other than a thank you from them. But do check the room they were held in as there is generally a box with a loot item in it.
Civilians roam the streets and generally keep out of your way. Most will react to your presence and will run away if you approach with your weapon raised. A few civilians will highlight as being in need and if you do not show aggression they will approach you and request help.
The item they need will be shown and you have the option to give it to them. This is normally medkits, food or Water supplies that you may have found in backpacks and containers around the city. If you give the item to the civilian then you will be rewarded with a random level gear item.
Some civilians are also found as hostages in Encounters with Street gangs. When you release them don't expect any thing other than a thank you from them. But do check the room they were held in as there is generally a box with a loot item in it.
Last Man Battalion
Enemies
The Last Man Battalion (LMB), is a private military company. The LMB was hired by prestigious Wall Street companies to protect assets during the outbreak, but were abandoned when the crisis worsened. Now they aim to retake New York and establish a new world order by force.
Base of Operations
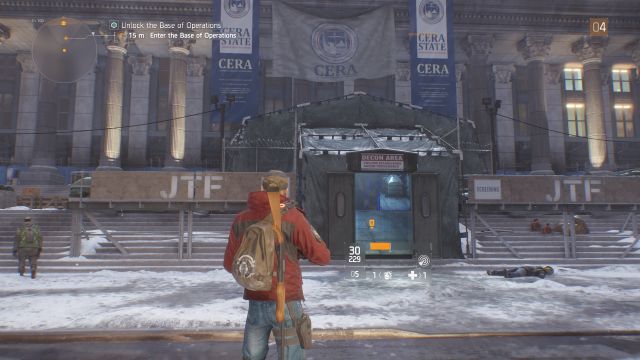
Your base of operations
This is a Safe House for you with mission boards / givers, Vendors and resupply crates. It also serves as a hub for the main mission series in the game. Unlike other safe rooms though this is not a public area. It is for you only.
To activate each wing you will need to assist / rescue the a key person to run it. Once they return to the BoO the wing is set up and you are able to begin unlocking the various areas and restore the base to full working capacity.

Help Paul Rhodes restore power supply to activate the Tech wing
At the entrance to the BoO you will find a status board with your progress through each wings activtation shown.
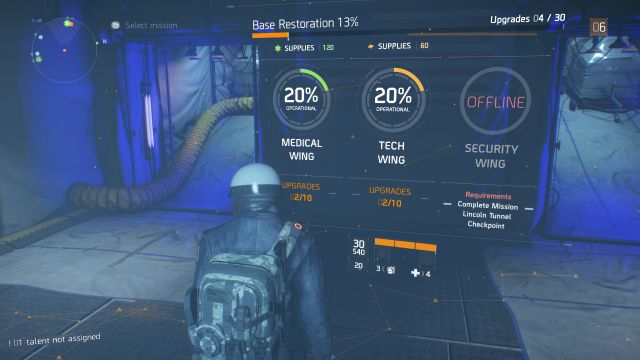
Medical Wing
Tech Wing
Security Wing
Vendors
The BoO has Weapons, gear, and mods Vendors to buy Gear from .The gear available will always be in your current level range. There is also a special vendor found at the back of the corridor opposite the main entrance. This is the Rewards Claim Vendor. If you have any items that you are owed as part of a pre-order bonus. Or from owning other related games then this is where you can pick them up.
Crafting Station
The Crafting station lets you create Weapons and gear from parts and supplies found around the map. You can also get the components by breaking down items in your inventory.

Stash
The stash box is for you to store items that you want to keep but don't want to maintain in your Backpack. Good for the hoarders amongst us who want to hold on to interesting but not very useful items and not run out of space in your inventory. If you create multiple characters it will also be a place to share items as they will all have access to the same stash.
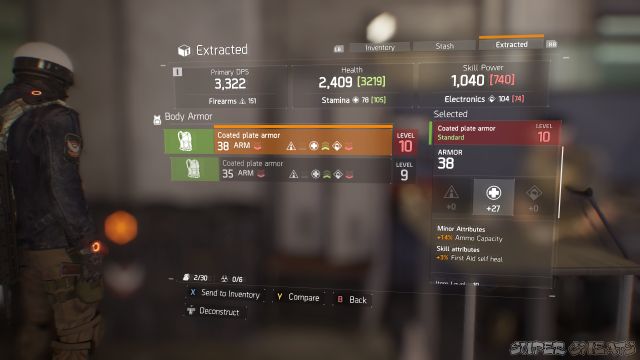
It is also the place that Dark Zone gear will appear in after you have successfully extracted it.
Map Districts / Areas
The game zone covers Manhattan and an area of Brooklyn at the start of
the game. The island of Manhattan is separated into districts as listed
below. Each district has a level range to showing the levels of enemies
that you might encounter there. Entering a zone for the first time will
mark it as discovered on your map and allow missions and items to be found. You will also get exp.
Brooklyn (level 1-3)
Chelsea (level 2-4)
Hudson Yards (level 2-4)
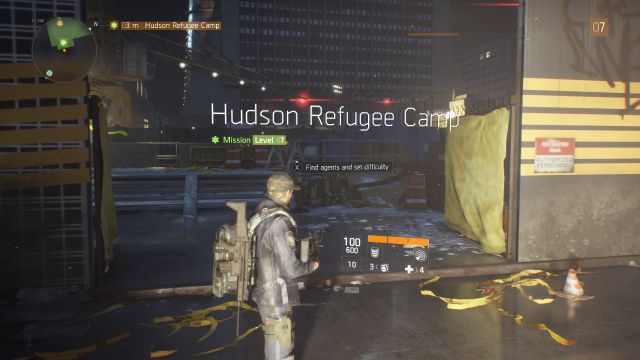
Camp Hudson (level 3-4)
Pennsylvania Plaza (level 3-5)
Garment District (level 5-9)
Tenderloin (level 9-12)
Hell's Kitchen (level 10-13)
Times Square (level 10-13)
Clinton (level 14-15)
Flatiron District (level 15-16)
Gramercy (level 16-18)
Stuyvesant (level 18-19)
Kips Bay (level 20-23)
Murray Hill (level 24-26)
Turtle Bay (level 27-28)
Midtown East (level 28-30)
There will be a Safe House in each area. Accessing the safe house for the first time will then allow you to fast travel to it from elsewhere in the map. The safe house will also have an information board, interacting with this will mark the Encounters in that area on your map. And a mission co-ordinator who will mark the Side Missions for you.
Brooklyn (level 1-3)
Chelsea (level 2-4)
Hudson Yards (level 2-4)
Camp Hudson (level 3-4)
Pennsylvania Plaza (level 3-5)
Garment District (level 5-9)
Tenderloin (level 9-12)
Hell's Kitchen (level 10-13)
Times Square (level 10-13)
Clinton (level 14-15)
Flatiron District (level 15-16)
Gramercy (level 16-18)
Stuyvesant (level 18-19)
Kips Bay (level 20-23)
Murray Hill (level 24-26)
Turtle Bay (level 27-28)
Midtown East (level 28-30)
There will be a Safe House in each area. Accessing the safe house for the first time will then allow you to fast travel to it from elsewhere in the map. The safe house will also have an information board, interacting with this will mark the Encounters in that area on your map. And a mission co-ordinator who will mark the Side Missions for you.
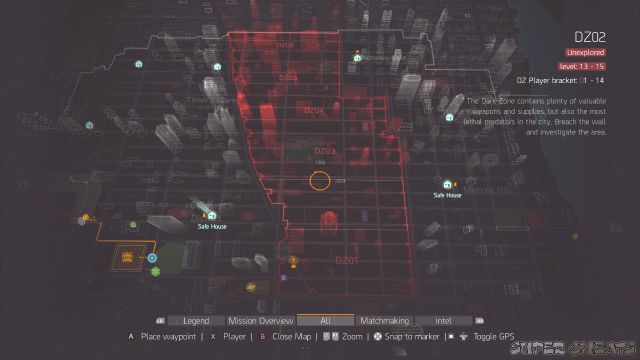
Dark Zone
DZ01 (level 10-12)
DZ02 (level 13-15)
DZ03 (level 16-18)
DZ04 (level 22-24)
DZ05 (level 27-29)
DZ06 (level 29-30)
The levels are the minimum levels of AI enemies found in those zones, but they will also adjust to your own game rank level (outside the Dark Zone).So if you are already at rank 22 for example then all areas in the Dark Zone will be at around that level of higher)
The zone is a public area where you will find other players in the same level bracket as yourself.
Taking out enemies in this area will reward you with specific Dark Zone experience points (for your Dark Zone Rank) and Dark Zone Credits to allow you to buy dark zone gear at the Vendors found only in the dark zone safe room/access points.
There are also boxes and crates found around the dark zone where you can find gear and weapon items as well as special Dark Zone Chests that contain higher grade Dark Zone items. These chests though are locked and accessible either with a dark zone key (rare find from combat in the dark zone) or at a specific level.
PvE
There will be roaming gangs of AI enemies around most corners in the dark zone whose levels will match the areas. So when you first enter to DZ01 you will find gangs of level 10-12. They will be in larger groups than outside the zone. And multiple gangs may converge giving you a large force to deal with.
The enemies will also be higher grade so will be armoured and well equipped. So taking them on by yourself is risky.
Sticking with other human players will be the best strategy. You can join up in groups or just follow each other around and assist in taking out the enemies.
Once you have defeated the AI enemies you will be able to collect any drops they have left behind. This is where the real fun begins. When you have items collected you will notice your character has a small yellow pack on their back.
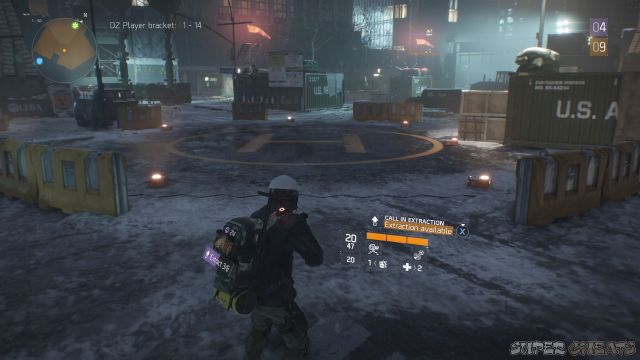
Extraction
Any items that you collect in the dark zone are 'contaminated' and cannot be simply taken out. To collect the items you must 'extract' them. This means finding your way to one for the many extraction areas in the zone and calling in a helicopter to extract them for you. To do this make you way to the large H heli landing pad in the centre of an extraction area and follow the prompt to fire your flare. You will then need to wait for 90 seconds for the helicopter to arrive. All other played in the vicinity will be able to see that an extraction is in progress. And AI enemies nearby may also be attracted to the location. So you many need to be ready to defend yourself.
At this point (if you have made it this far) you are at your most nervous as dying means dropping all your gained loot and having to respawn back at one of the safe rooms on the edge of the zone. Dropped loot will remain where you died for a short time for you to go back and retrieve. But other players can steal it.
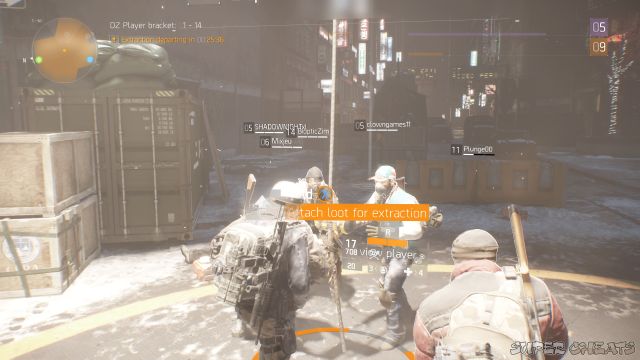
If you manage to survive the wait for the helicopter then when it arrives a rope will lower from it and you can move forward and attach your pack of loot to it. After a few seconds it will leave again and your good will end up in the stash container back in the Base of Operations or other Safe House.
PvP
The PvP element of the dark zone is that players can choose to attack each other. Either for fun or more likely to try to steal their loot. Waiting for other players to call in a helicopter and then killing them and taking their stash and extracting it yourself is a high risk but quickly rewarding way to play the zone.
Attacking other players though will mark you and any team mates you are joined with as Rogue. You will now be marked as enemies on the map and all 'Friendly' agents will now be able to attack you without consequence and gain experience and credit for doing so.
In many cases the risk here is larger than the potential reward. But being the bad guy for a while is kind of cool and if you can get away with it and survive you are rewarded with extra rank and Credits for dark zone gear.
Team up
Well you can wander the dark zone alone. But dealing with the larger gangs and dissuading other agents from considering you an easy kill for your loot stash means that sticking with a group is your best bet. In general most players are happy to help each other out.
If you are alone then helping out in a fire fight and using the Emotes to signal your friendly ness will go a long way to keeping you safe.
Dying
Dying in the dark zone is bad for you, obviously. But there is a penalty. You will lose a proportion of your held dark zone currency. If you are carrying a lot of currency with you then the amount you lose will be higher. So it is best to spend it while you have it at the various dark zone Vendors.
You will also lose an amount of dark zone XP. The amount will depend on how you died, if you die as a Rogue agent then you will lose more of both. Although getting kills as a rogue agent will gain you more of both. Dying as a rogue agent will also mean a much longer respawn time.
Finally you will also drop any gear items that you have collected on your dark zone run that you haven't already extracted. Items that you drop and some of the currency that you dropped will remain on the ground with your body so you do have the possibility to respawn and make your way back to it to reclaim it. However any other agents in the area can also loot it from your corpse before you get back to it. So be quick.
UPDATES 1.1
Supply Drops
Added in Update 1.2 supply drops are the regular (if not very frequent) Appearance of special crates at selected points on the map. The arrival points are random each time but several crates will appear around the map and your hud will allow you to locate the nearest one.
The creates will contain 2 items (Weapons / gear) and these items do not need to be extracted. So opening the crate will immediately grant you the contents. However each crate will be guarded by tough AI enemies, and you will have to compete with any other nearby agents who may also want to get at the crate. Rogue alert. You will have 5 minutes to find, attack and claim one or more crates before they disappear.
UPDATES 1.2
Hijack Extractions
When a player attaches a bag to the extraction rope, another player now has the ability to sever the rope. Severing the rope will cause all extraction bags to fall to the ground, scattering their contents as a public loot drop. Hijacking an extraction will instantly mark you as Rogue!
The extraction departure timer once the helicopter arrived has been increased to 60 seconds. This will give more time for hijacks and mean you will need to defend your extraction for longer.
Sealed Cache
Named and Elite enemies in the Dark Zone can now drop Sealed Caches that contain mystery items. Sealed Caches need to be extracted before they can be opened, just like regular loot drops.
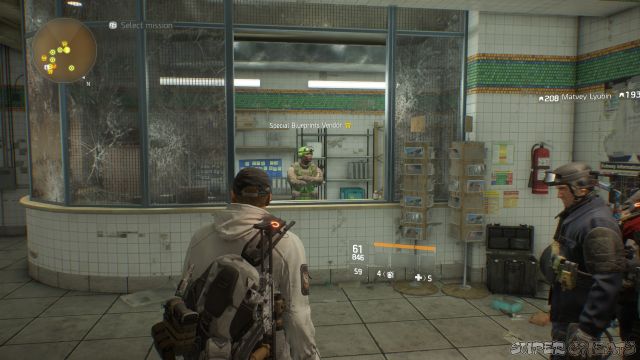
The Terminal
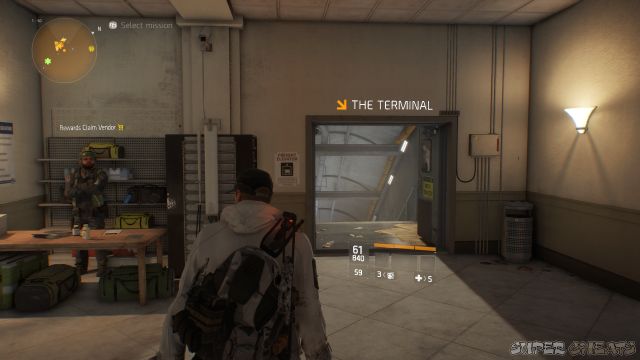
This area is a social space where you can find other players. It has your stash, the new Special Blueprints Vendor (which has split from the special Weapons Vendor in the Base), HVT mission Vendors and a restock crate. As well as the entrance to the Underground which is the arena for the first main expansion for the game. The passageway to the underground will take you to the TOC to participate in the missions for the dlc.
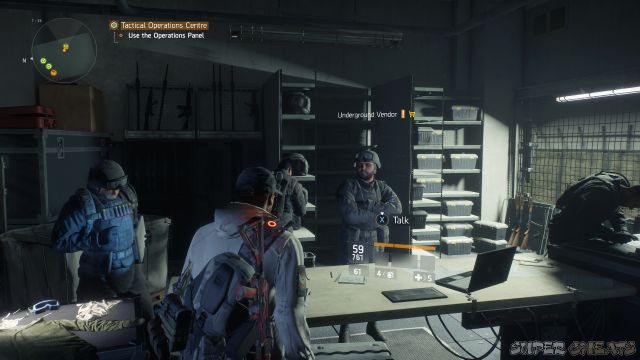
Tactical Operations Center
Accessed from The Terminal (down the steps) is is open to players with the expansion, onc they have completed the initial set up mission that leads to its use. In the TOC you will find the Underground Operations desk where you can configure and activate the missions (in various stages and difficulties) and matchmake with others to complete the missions. Finding a group is necessary on the harder difficulties.
The TOC also has its own Vendor. The Underground Vendor, who stocks Weapons, gear and mods similar to the special weapons vendor in the Base of Operations. You can buy high end and gearset items here for Phoenix Credits, but you need to first reach certain Underground ranks to be eligible.
Main Missions
At the start area of main game mission you will find a prompt to match make with other online agents. Teaming up is a good way to make the missions much easier, and earn some achievements. But if you are not under levelled and have reasonable gear then you should be able to get through them on your own.
Side Missions
The missions break down into various types.
Bounties
Kill a specific names enemy. This will mean approaching a guarded location and working your way through several areas of enemies before reaching your main goal. The areas will have higher level lieutenants that you will need to deal with first.
Uplink Repair
This is a times mission, the timer will start when you activate the first switch. You will need to complete several tasks including activating panels or starting generators to get the communication equipment working again. Your progress towards each objective will be hindered by enemies so you will need to take them out quickly. There should be plenty of time to deal with the various objectives unless you get lost finding your way to the next one.
Uplink repair mission
Missing Person
Mission person missions involve travelling to points on the map to investigate Evidence in the form of ECHO playbacks. These are multi-part missions which the completion of one echo leading to the location of the next. You will possibly encounter enemies on the way to or at the echo locations so be prepared to clear them out. Some missing persons are found in unusual circumstances.
Encounters
At the locations of each encounter check the area for highlighted containers with supplies to help upgrade the various wings in the Base of Operations.
Types of encounters are:
Hostage Rescue
Medical These encounters involve clearing an area of enemies. You will then be asked to search the area for a key (highlighted on your hud) to collect and then proceed to release the hostages from a locked room / cell.
Assault the Stronghold
Security In these encounters game members will have occupied a building and you will be required to take them all out. They may be several waves of enemies.
JTF Support
Security You will encounter JTF agents under attack from gang members. Help them take out the waves of enemies that may come from various direction until the attack is over.
Virus Research
Medical Collect data on the virus by activating the highlighted research consoles. You will have a time limit to activate them all (2 or 3) which will be places in or around a building. Once they are all activated you will then need to proceed to a marked location to upload the data (also in a time limit). The upload location will be guarded by enemies that you will need to take out before completing the mission.
Virus Research Encounter
Arms Deal Disruption
Tech Travel to the location of the arms deal and take out the enemies present. You will then need to tag the crate for JTF pickup which start the second wave. Here you will need to defend the crate against several waves of enemies who will try to destroy it or kill you. You must hold out for a set amount of time until JTF agents arrive to claim the crate.
Arms Deal Disruption
Water Supply
Medical Enter a tunnel system to find a Water supply / pumping station. There will be Cleaners here attempting to sabotage the water supply to stop the JTF from putting out their fires. Clear the are of enemies and then activate the water supply wheel to start the next phase. You will no have a time limit to move to and activate several more water supply controls within the room but you will be under attack from more waves of enemies as you do so. Clear enemies as fast as you can and move to the control point. Once you have successfully activated all the controls and cleared all enemies the mission will end.
Mercy Drop
Tech Mercy drop encounters involve reaching a supply drop that has been captured by enemies. Clear the area of enemies and then defend the drop from further waves until the timer runs out and reinforcements arrive.
Supply Acquisition
Tech When you approach the location there will be Rioters stealing supplies. Take out the enemies to clear the area first. There will be supply boxes on the ground that you need to pick up and carry back to a storage box. Picking them up will force you to move slowly and you will only be able to use the sidearm (pistol) to shoot. Waves of enemies will appear to try to stop you. You can drop the box you are carrying at any time by going into cover or switching Weapons. Make as much progress as you can between waves to move the boxes to the storage location. Once all boxes a stored the JTF will appear to collect it and control the area
Incursions
Incursions are a new mission type that follows on from the main storyline missions with new high difficulty longer missions to challenge the well equipped players. The Division’s take on raids, these mission are designed for Multiplayer co-op, 4 players are recommended. They will be a serious challenge but will offer the best Rewards if you can beat it.Falcon Lost
One incursion mission has been made available for free in the April Update 1.1 with more to be release later as part of future dlc. This first mission is called Falcon Lost as has you going into an Underground Water-treatment facility being used as a base by the LMB in search of a lost JTF patrol code names Falcon. Take down the LMB and recover the plant.
Falcon Lost
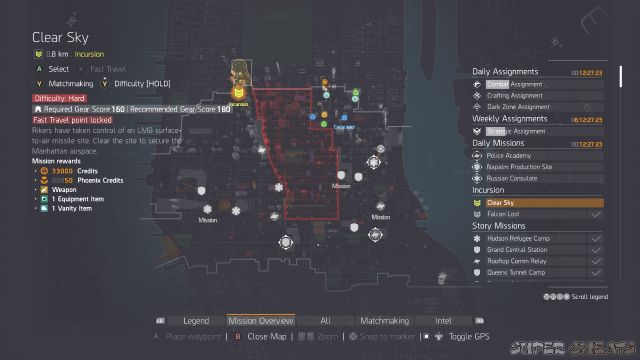
Clear Sky
This second incursion was released with Update 1.2
Hard mode has a minimum gear score requirement of 160 with a recommended level of 180.
Dragon’s Nest
Made available as part of the Underground dlc at the same time as Update 1.3.
Travel to Hell’s Kitchen and investigate rumors of a new Cleaner weapon that can wreak havoc throughout Manhattan.
High Value Targets
Search and Destroy
Each Safe House (not the Base of Operations) will now have an intel board here you activate that areas search and destroy missions. These are like the previous Encounters and will set you waypoints in the surrounding zone to go to and eliminate the small group of enemies there. There will be 3 to complete. Each one will give you one Target Intel credit. Once you have done all three you need to return to the safe house and turn in the mission which will reward you with a high end item and 2 additional intel Credits.
(Intel Credits may also drop from some enemies)
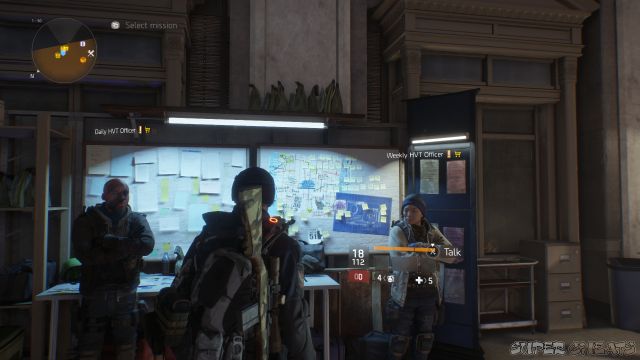
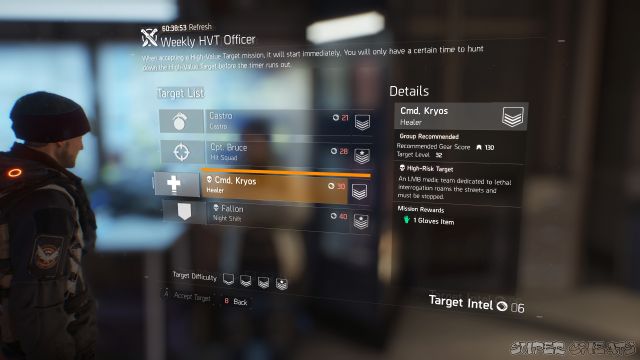
HVT Officers
Once you have collected some Intel Credits (minimum 5) you can head to the Base of Operations to visit the new HVT Vendors in the Security wing to the right of the entrance. There are 2 vendors here, for Daily and Weekly missions. The missions have a varying cost in intel credits required to activate them depending on the difficulty.
The officers will have a range of high value target missions to complete. You will need to purchase the missions with the intel Credits acquired previously. The mission will involve travelling to a location on the map and eliminating a named boss, after taking out several waves of enemies. This is similar to the boss fights in the existing missions. However there is a time limit added here, the length depends on the difficulty of the mission. If you fail to complete the mission before the time runs out the enemy will leave and you won't be able to try again until the following day or week.
NOTE When playing as a group only one person (the leader) needs to pay the intel Credits to activate the HVT mission. But all the party members will get the reward on completion.
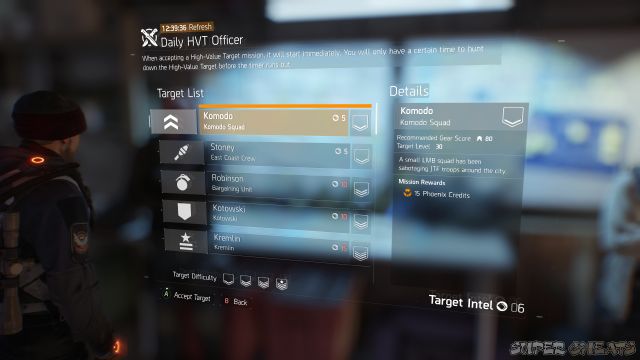
Daily missions
Ranging from 5-15 Credits these missions respawn every day and will reward you with 15 - 20 Phoenix Credits and high end items. These missions can be done alone although you may need reasonable gear for some of the more difficult ones.
Weekly missions
These missions cost more Credits to activate and feature harder and more enemies. You will receive a larger number of Phoenix Credits or a gearset item as reward. It is recommended that you tackle these as a group to avoid wasting your intel credits and chance to complete them for a week.
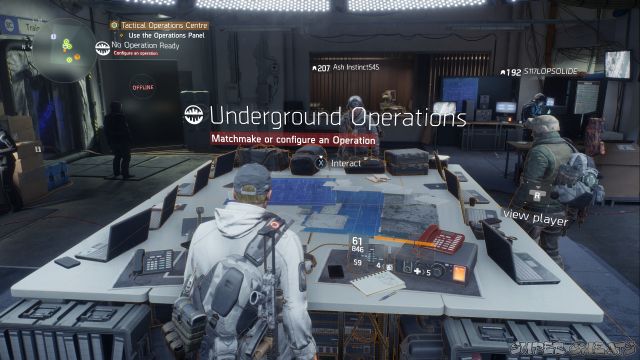
Underground Operations
Access to the missions is via the TOC found down the stairs from The Terminal social hub in the Base of Operations. Once you have access to the area (there is a small set up mission to do first) you will be able to 'plan' missions and activate them to play from the central desk. The operations are of different lengths and difficulties that you decide when setting them up. although you will need to do short (single Phase) missions first to unlock longer ones.
Each mission will take you into various parts of the Underground areas in the hunt for 1 or more gangs and their leaders. This is much like the above ground missions but the new environments are distinctive.
Once you have set up the require mission you can pass through the subway station entrance to reach the train to launch it. You will be transported to and from missions via a subway cutscene
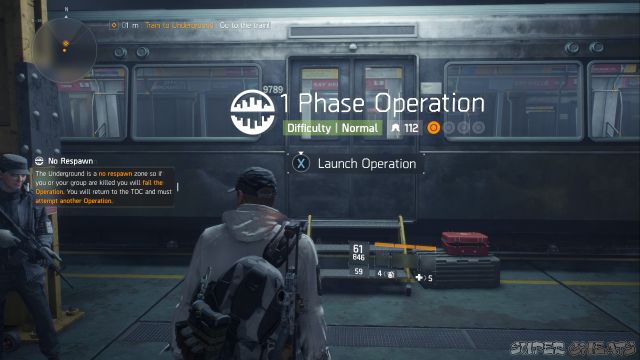
No Respawn
All missions done in the Underground areas are in a no respawn zone. This means that if your squad is wiped then you will have to reset and restart the mission from the TOC.
Normal or hard missions are suited for solo players, while the Challenging and new Heroic mode missions will probably require a good group.


Post a Comment