Far Cry Primal

Far Cry Primal
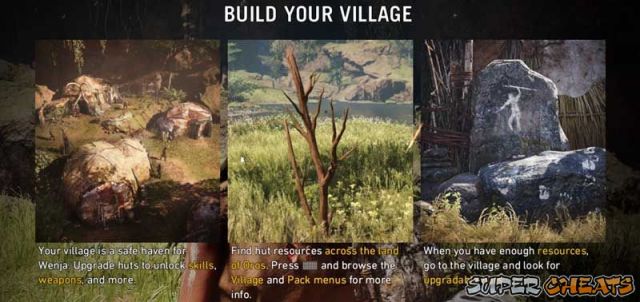
Return to the Stone Age and call upon your primal instincts. Far Cry Primal is a first person survival game where you control Takkar. A Beast Master who commands various animals to fight with him. Rescue tribesmen and build your village. Defeat rival tribes and conquer the land with your tribe and your beasts, and unlock your full potential as the leader and the beast master.
IMPORTANT! Read the Tips section first. The first two tips will be very important.
Welcome to the Far Cry Primal guide. Please use the menu on the right to navigate.
Please check back for updates to this guide. We'll be constantly updating it over the coming weeks as we play through the game and discover the best strategies to play through and complete the game.
Settings
Controls
Control Scheme - View the control scheme of the game

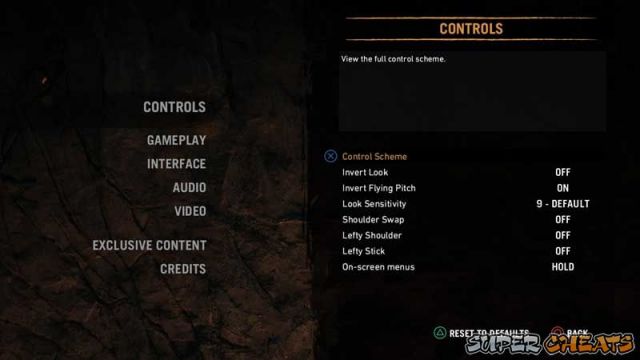
Invert Look - Invert the vertical control for your Right stick.
Invert Flying Pitch - Inverts the vertical control for flying your owl.
Look Sensitivity - Adjusts how fast your character looks around when using the right stick.
Shoulder Swap - Switch L1 with L2 and R1 with R2
Lefty Shoulder - Switch L1 with R1 and L2 with R2
Lefty Stick - Switch Left stick with Right stick
On-Screen menus - Switch between hold or toggle L1 to access Weapon Wheel.
Gameplay

Vibration - Turn controller vibration on or off
Aim Assist - Gives a very momentary lock on an enemy if the general center of your screen has a visible enemy in it.
Melee Assist - Similar with Aim Assist, Centers the screen for a moment on the enemy directly in front of you.
Search Animations - Turn the search and gather animations on or off
Important: During the first few times of gathering or skinning, it is okay to leave this on. However after a while, the animation will get annoying and possibly get you in trouble. So turn this off after you've seen the animations or turn it off outright.
Story Recaps - Gives you a recap of the story so Far. You can turn this off if you want but it is okay to leave it on because you have an option to skip the scene. Unlike Search Animations where you cannot skip the animation.
Interface
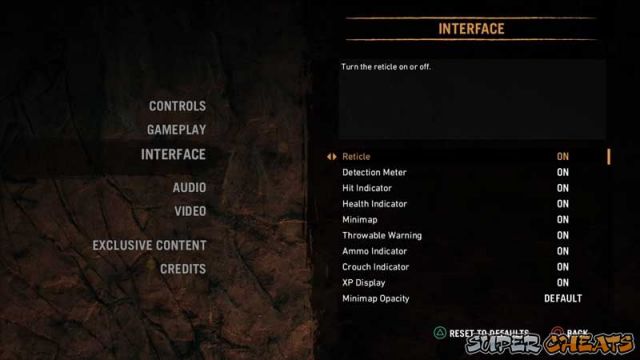
Reticle - Turn the reticle in the center on or off
Detection Meter - Turn off the white indicator that shows up if you are close to being detected by enemies.
Hit Indicator - Turn the hit direction detector on or off. This helps you find where an attack is coming from.
Health Indicator - Turn the health bar on or off.
Minimap - Turn the mini map on the bottom of the screen on or off.
Throwable warning - Turn the warning for thrown bombs on or off
Ammo Indicator - Turn the ammo count display on or off
Crouch Indicator - Turn the small crouch icon in the lower right on or off.
XP Display - Turn the exp earned display on or off.
Minimap Opacity - Adjusts the transparency of the minimap.
Trail on Minimap - Turn the trail you leave on the minimap on or off (this helps you know if you have suddenly took a wrong turn)
On-Screen controls - Turns the option to have buttons prompts displayed on the screen.
Interaction Prompt - Enable or disable prompt display.
Objectives - Select between objectives always being shown or only when needed.
Found items readout - Turn the item pickups text on or off.
World Icons - Choose to display the mission icons in your HUD too and not only on the map.
Enemy Tags - Turns enemy tags on or off
Object Highlights - Turns the highlight of interactive objects on or off.
Beast Indicators - Show a display above your beast to display health and order given to it.
Crafting Indicator - Turn the indicator that informs when you can craft an item on or off.
Owl Cooldown - Choose whether to display the owl cooldown icon.
Collectible Updates - Enable or disable feedback when collecting certain items.
Tutorial Messages - Turn hints on or off
Cold Meter - Displays a meter depicting your resistance to the cold.
Audio
Unfortunately, the audio options are severely lacking in this game.
Master Volume - Adjusts the overall level of the game.
Music - Turn background music on or off
Video
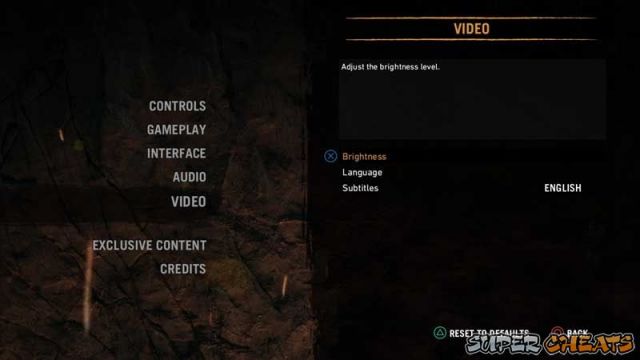
Brightness - Adjust the brightness level
Language - Selects the language the subtitles and all the text in the game will be in.
Subtitles - choose to have subtitles on or off. (This is an odd one since the spoken language in the game is a made up language and turning subtitles off will cause the player to understand nothing the characters are saying)
Tips
We have a few tips for Far Cry Primal that we hope may greatly help you in your conquest of the land of Oros. Some of these can be done relatively early on in game so it is a good idea to do them.
Level up fast throughout the game
Exp is earned through doing almost all the tasks in this world. Gaining enough EXP will cause you to level up. Leveling up doesn't give you stats but skill points. Skill points are very important since having a lot will enable you to fully flesh out Takkar and get him ready for his journey.
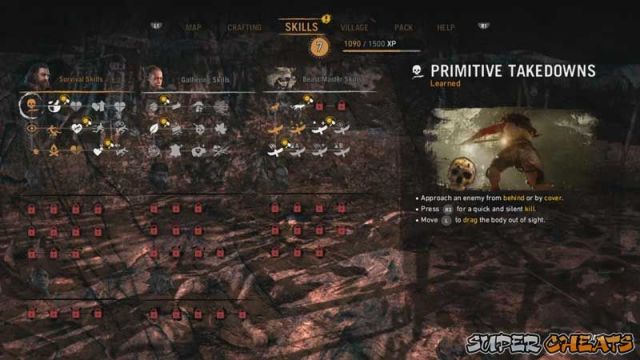
Doing the following two tips will be a good investment in the long run. As depicted here in the picture below, I currently have 60% more exp earned which can be seen beside the exp bar in the Skills page.
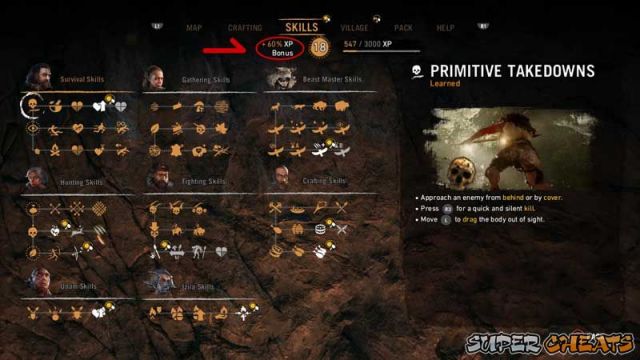
Important: If you want to gain the most of this tip, it is best done at the earliest you can allow to gain the most exp in the long run.
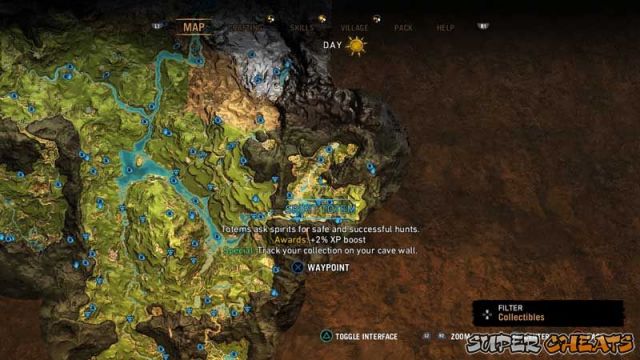
Spirit Totems:
You may have found some scattered around, but since one of them is locked behind a mission, you should do the Spirit Totem village mission first. Each Spirit Totem placed on their pedestal gives a 2% increase in obtained experience. There are only 12 totems for a total of 24% bonus experience. They are relatively easy to find around the world especially if you go on your map and filter for collectibles only.
Village Population:
The Village Population does a few things. It is a requirement for hut upgrades for your tribesmen, they increase the daily resources you gain in your reward stash, and as the topic implies, after having a certain amount of villagers, 70 above to be exact, every 10 wenja you have in your village will give another 2% more exp.
You can gain population from random wenja events that you simply come across while traveling. The rule of thumb here is if there are wenja involved like being held prisoner or a group of wenja fighting another group of Udam or Izila (rarely both). The amount of wenja that survives is usually the amount of villagers gained. So try to save as much of them as possible.
You can also gain more population by capturing Bonfires or Outposts. Some wenja missions marked on the map as orange icons, will also reward you with some villagers.
Use up your village resources when available
You can only carry so much resources even after you have crafted a better bag to carry more. That being said, it is wise to use your carried village resources immediately when maxing them out since some village huts use more or less 30 of a resource among other needed resources to upgrade. For example, some huts require 30 North Rock when at max, you can only carry 50. Its better to use it immediately so when you next gather more of that resource, you can spend it on other huts.
Getting Tougher (VERY tanky)
A few missions into the game, after doing the Vision of Ice mission, you will be given a location of an Udam fort. In this fort is an Udam officer named Dah. The fort is very difficult to tackle early on but can be made ridiculously easy by simply obtaining the Mammoth Rider skill and get a mammoth to wreck the fort, effectively capturing the fort and its general, Dah.
After capturing Dah and doing some of his missions, you will unlock his short but very effective (almost too effective) skill tree. You can check the Skills you can get from our Skills page.
The Skills we are pertaining to are the Melee Resistance 1 and Melee Resistance 2 skills. These skills are so noticeable that even when you are deliberately trying to kill yourself in the middle of an enemy camp, it may take a while.
I personally limited had four health bars before I took these Skills. After taking these skills, I felt no need to get the other 2 more health bars since the game will be too easy if I did. And there is no way to reset skills learned so only get these skills if you want to make things easy.
You can also mix and match like getting just level one of the skill, but remember doing so means you can't get the Skills beyond the skill you are trying to avoid.
Early Sabertooth Tiger
Early on in the game, you will receive a mission titled "The Bone Cave". During this mission there are a bunch of Cave Lions you will encounter. You can tame one if you haven't yet. But the best beast you can tame here is the final beast that pops into the area. A Sabertooth Tiger. You can find one in the overworld sure. But it is risky and sometimes you just don't find one even if you do go to a spot marked as an area with Sabertooth tigers. So doing this mission to obtain one early on is a good idea since sabertooth tigers are one of THE best beasts you can tame. They are the fastest and you can also ride them provided you have the Beast Rider skill.
Uplay rewards
If you log in with your Uplay account, you may be able to obtain a few nifty things. Especially if you have had points from other games. You can check your progression in the menus. You may even have earned a few tasks that give you points in uplay.

In my opinion, the best reward you can get here is the Kapala Shard weapon. It is a long range throwing weapon that can one shot kill most enemies. Especially if done with a Shard Takedown (fighter skill)
Crafting
There are three instances of crafting in the game. Two of which you will see a lot of. Of those two, one is where you first craft the weapon / item making it available for use, the second is replenishing your supplies of that item.
The first type of crafting where you unlock the item to make it available for use can be obtained by accomplishing various things like upgrading your cave, acquiring other wenja specialists and upgrading their huts.
You can see the requirements for an upgrade of an item to be made.
You can also see the effects of doing an upgrade along with any special bonuses if applicable.
The second type of crafting occurs from the Weapon Wheel and is used to replenish your supplies of arrows, clubs, spears, throwables.. etc..
The items required for crafting them is displayed here as well.
The third, and by no means least important of them are the hut (in Takkar's case, a cave) upgrades. These will unlock more Skills or Crafting Recipes to be made. These use village resources. Different Materials you get from resource nodes. For example, All the wood resource nodes give the weapon resource "Hardwood". Village resources are, in the starting zone, they give Alder Wood. The northern area gives North Rock, and the southern gives South Rock.
Skills
There are numerous skills in Far Cry Primal. But the skills you choose may largely depend on your playstyle. There is no definite playstyle that trumps all the others. The only playstyle that you should go for is the one that is fun for you as a player.
Survival Skills - Takkar
Primitive Takedown - Already learned by default
Approach an enemy from behind of by cover.
Press R3 for a quick and silent kill.
Move the Left Stick to drag the body out of sight.
Primitive Heal 1 - Requires 1 skill point
Hold Triangle to manually heal 1 health bar.
More healing options are in the food (d-pad left) menu.
Extra Health 2 - Requires 2 skill points
Gain +1 health bars.
You can have up to 6 in total.
Primitive Heal 2 - requires 3 skill points
Heals +1 health bars when manually healing, up to 3 total.
More healing options are in the food menu(d-pad left).
Extra Health 4 - Requires 6 skill points
Gain +1 Health Bars.
You can have up to 6 in total.
Hunter Vision - Already learned by default
Hold R3 for enhanced vision.
View enemies, animals, resources, and blood trails.
Lasts 8 seconds
Extends to your owl companion
Primitive Agility - Already learned by default
Press L3 to sprint, then Circle to slide.
Hold R1 to keep any throwable weapon in your hand, and release to throw it.
Sprint Heal - requires 1 skill point
Hold Triangle to heal yourself while sprinting with L3.
Uses the default recipe from the food menu (d-pad left).
Crouch Sprint - requires 2 skill points
Move faster when crouched with Circle.
Sprint Forever - requires 3 skill points
Sprint forever without slowing down after running with L3.
Sprint speed is permanently increased.
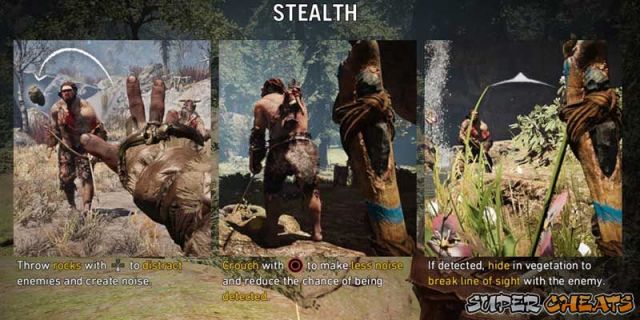
Primitive Stealth - Already learned by default
Press d-pad down to throw a rock and distract enemies.
Hold R3 to move a dead body out of sight.
Primitive Fire - Already learned by default
Use hardwood to light campfires.
Set your weapons on fire from the weapon wheel by highlighting them and pressing Square.
Extra Health 1 - requires 1 skill point.
Gain +1 health bar.
Can have up to 6 in total.
Gathering Skills - Sayla
Constuct Sayla's hut to unlock this skill tree.
Reveal Terrain 1 - requires 1 skill point
Reveal +200 feet of terrain around you in the Map menu.
Uncovers more activities and missions.
Show resources - requires 1 skill point.
Wood, stone, and other village resrouces are displayed on your minimap.
Find rare resources - requires 2 skill points
Improved chance of finding more rare wood, stone, and reeds when gathering.
Reveal Terrain 2 - requires 3 skill points
Reveal +400 feet of terrain around you in the Map menu.
Uncovers more activities and missions.
Show plants - requires 1 skill point
Plants are displayed on your minimap
Find resources 1 - requires 1 skill point.
Find more wood, stone, reeds, clay, and rock dust when gathering.
Search Takedown - requires 2 skill points.
Automatically search an enemy while performing a takedown.
Find rare plants - requires 2 skill points.
Improved chance of finding more rare plant parts when gathering.
Skinning 1 - requires 2 skill points.
Find +2 meat when skinning most animals.
Skinning 2 - requires 2 skill points.
Find +2 animal fat and +2 animal hide when skinning most animals.
Beast Reviving - requires 2 skill points.
Reviving your tamed beasts requires fewer red leaves.
Find resources 2 - requires 2 skill points.
Find even more wood, stone, reeds, clay, and rock dust when gathering.
Beast Master Skills - Tensay
Complete the Vision of Beasts to bring Tensay into your village which also unlocks this skill tree.
Tame Canines - already learned in Beast Master mission
Can tame: dholes, rare dholes, wolves, white wolves, and rare striped wolves.
Tame Wildcats - requires 1 skill point
Can tame: leopards, jaguars, rare black jaguars, cave lions, and rare black lions.
Tame Apex Predators - requires 2 skill points AND to have tamed 5 other animals from the previous sets.
Can tame: sabretooth tigers and brown bears.
Tame Cunning Beasts - requires 3 skill points AND to have tamed 8 other animals from the previous sets.
Can tame: cave bears and badgers.
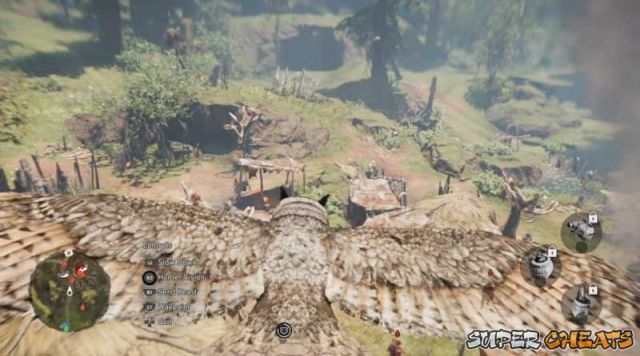
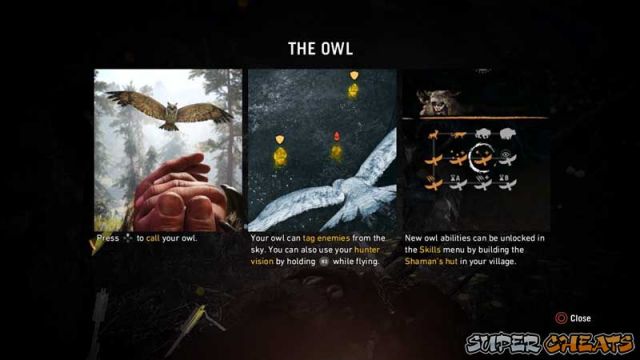
Owl Companion - Learned by completing Vision of Beasts mission
Press D-pad Up to summon your owl
Scout ahead to tag enemies
Owl: Hunter Vision - learned along Owl Companion skill
Hold R3 to use hunter vision with your owl
Other hunter vision skills e xtend to your owl.
Owl: Weapon drop - requires 3 skill points.
The owl can drop your sting bombs, berserk bombs, and fire bombs.
Owl: Tagging Range
The owl's tagging range for enemies is greatly increased.
If the Tag Animals skill is learned, the tagging range for animals is also increased.
Owl: Attack 1 - requires 1 skill point
Your owl can perform a dive attack with R2.
Kills most regular enemies.
Can free caged animals.
80 second cooldown time.
Owl: Cooldown 1 - requires 2 skill points.
The owl attack cooldown is reduced from 80s to 65s.
Owl: Attack 2 - requires 3 skill points
The dive attack can now kill powerful elite enemies.
Owl: Cooldown 2 - requires 3 skill points.
The owl attack cooldown is reduced from 65s to 40s.
Hunting Skills - Jayma
Jayma is one of the lost wenja. Complete the On the Hunt mission to unlock her and her skill tree.
Hunter Vision: Sacks - requires 1 skill point
Reseource sacks can now be seen with hunter vision.
This skill extends to your owl companion.
Craft Arrows 1 - requires 1 skill point
Craft 2 arrows instead of 1 from the weapon wheel.
Resource cost does not change.
Craft Arrows 2 - requires 2 skill points.
Craft 4 arrows instead of 2 from the weapon wheel.
Resource cost does not change.
Craft Arrows 3 - requires 4 skill points.
Craft 8 arrows instead of 4 from the weapon wheel.
Resource cost does not change.
Tag Enemies - requires 1 skill point
Hold L2 while aiming to tag enemies.
Works with clubs, bows, and the spear.
Tags are permanent.
Your owl companion can also tag enemies.
Reduced Fall Damage - requires 1 skill point
Receive less damage when falling from a great height.
Tag Animals
Hold L2 while aiming to tag animals.
Works with clubs, bows. and the spear.
Tags are permanent.
Your owl companion can also tag animals.
Animal Wounds - requires 6 skill points.
Increase the amount of damage your weapons inflict on animals.
Hunter Vision: Plants - requires 1 skill point
Plants can now be seen with hunter vision.
This skill extends to your owl companion.
Bow Sprint Reload - requires 2 skill points
Reload any bow with a fresh arrow while sprinting.
Press L3 to sprint.
Bow Handling - requires 3 skill points
When aiming a bow with L2, the sway is greatly reduced.
Fighting Skills - Karoosh
Complete the Brother in Need to bring Karoosh to your village and unlock this skill tree.
Shard Takedown - requires 2 skill points
Press R3 to begin a takedown on an enemy.
Then press R2 to throw a shard at a second enemy.
You must have shards to use this skill.
Heavy Takedown - requires 3 skill points
Press R3 to takedown the large and powerful chieftain enemies.
Chain Takedown - requires 4 skill points
Kill multiple enemies in sequence.
Start with a standard takedown (R3).
Use the Left stick as prompted to chain it between nearby enemies.
Death From Above - requires 1 skill point
Jump or fall onto an enemy below you for a quick and brutal kill.
Mammoth Rider - requires 2 skill points
Approach a young mammoth and hold Square to ride it.
Sprint with L3.
Attack enemies with R3
Use your weapons as normal.
Beast Rider - requires 2 skill points
Ride more beasts (after taming them)
Can ride Sabertooth Tiger, Bloodfang Sabertooth, and Brown Bear.
Mammoth Rider controls apply here.
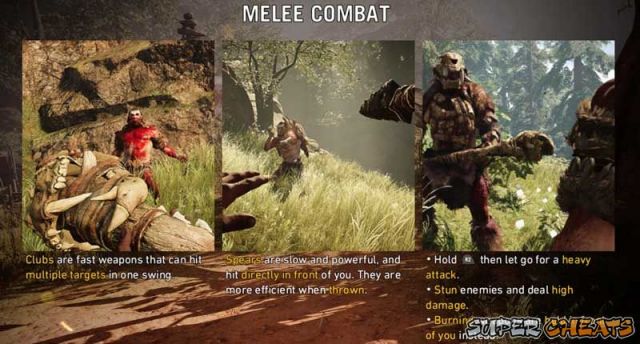
Club & Spear Handling - requires 1 skill point
Aiming sway is greatly reduced for clubs and spears.
Weapon Agility - requires 1 skill point
Switching between weapons with Triangle is much faster even when sprinting.
Aiming your weapon with L2 is also much faster.
Use Weapons While Moving Bodies - requires 1 skill point
While moving a dead body, you can aim and throw any club or spear.
Extra Health 3 - requires 4 skill points
Gain +1 health bars.
You can have up to 6 in total.
Crafting Skills - Wogah
Find Wogah and complete Trapped & Blood of Oros to bring him to your village and unlock this skill tree.
Double Clubs - requires 2 skill points
Craft 2 clubs instead of 1 from the weapon wheel
Applies to all club types.
Resource cost does not change.
Vicious Traps - requires 1 skill point
Traps deal more damage when triggered by enemies or animals.
Precision Sling - requires 2 skill points
Sling head shots will pierce through enemy headgear.
Double Spears - requires 3 skill points
Craft 2 spears instead of 1 from the weapon wheel.
Resource cost does not change.
Food Boosts 1 - requires 1 skill point.
Effects of Food recipes are increased from 60s to 90s.
Double Sting Bombs - requires 2 skill points
Craft 2 sting bombs instead of 1 from the weapon wheel.
Resource cost does not change.
Double Traps - requires 2 skill points
Craft 2 traps instead of 1 from the weapon wheel.
Resource cost does not change.
Double Shards - requires 3 skill points
Craft 2 shards instead of 1 from the weapon wheel.
Applies to all shard types.
Resource cost does not change.
Double Bait - requires 1 skill point
Craft 2 bait instead of 1 from the weapon wheel.
Resouce cost does not change.
Food Boosts 2 - requires 1 skill point
Effects of Food recipes are increased from 90s to 120s.
Food Boosts 3 - requires 2 skill points
Effects of Food recipes are increased from 120s to 150s.
Udam Skills - Dah
Capture the Big Darwa Fort and confront its commander, then build his hut to obtain these skills.
Melee Resistance 1 - requires 2 skill points
Receive less damage from animal attacks and enemy melee hits.
Also reduces the chance of being knocked down by enemies.
Double Berserk Bomb - requires 2 skill points
Craft 2 berserk bombs instead of 1 from the weapon wheel
Resource cost does not change
Melee Resistance 2 - requires 4 skill points
Receive even less damage from animal attacks and enemy melee hits.
Primitive Heal 3 - requires 4 skill points
Heals +1 health bars when manually healing. up to 3 total.
More healing options are in the food menu.
Izila Skills - Roshani
Capture Fire Screamer Fort and confront its commander. Then build his hut to obtain these skills.
Fire Resistance - requires 2 skill points
Reduce the amount of damage you take from fire.
Double Fire Bombs - requires 3 skill points
Craft 2 fire bombs instead of 1 from the weapon wheel.
Resource cost does not change.
Fire Takedown - requires 3 skill points
Press R3 to begin a takedown on an enemy.
Then press R1 to smash a fire bomb onto the enemy.
You must have fire bombs to use this skill.
Fire master 1 - requires 6 skill points
You no longer need animal fat to set your weapons on fire.
Fire Master 2 - requires 4 skill points
If you set a weapon on fire, all subsequent weapons you equip will be automatically set on fire.
Press Square in the weapon wheel to extinguish the fire at any time.
Enemy Types
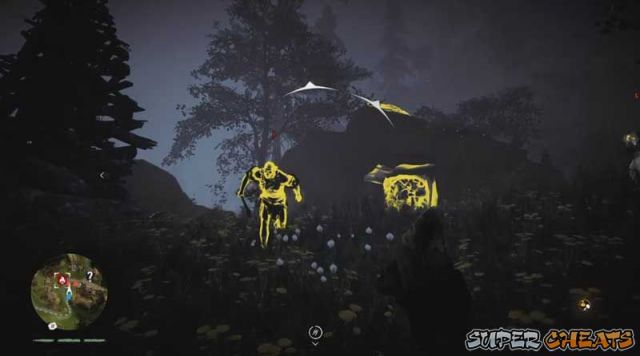
Far Cry Primal has a variety of enemy types present much like the recent Far Cry games. Some can be relatively easy to dispose off and other are more tricky to handle. Tagging them manually (need a skill from the hunter skill tree) or through the owl companion will reveal their types and show icons above their heads.
Diamond icon - These enemies will be very common during your first hours of the game. They are regular enemies that do not do anything special and don't have any armor on.
Spear Head (Looks a bit like the saving icon the game uses) - These are a slight upgrade from the regular diamond ones in that they are better geared offensively and will sometimes use arrows or spears to do long range damage. They can defend themselves if you get close though.
Lightning icon - These are targets that are fast and quick to close in and deal damage to you. Very hard to kill especially in a mob and they are all charging at you.
Bomb icon - These are the artillery units. You may have first encountered this unit during the assault on your village. These units throw poison bombs if they are Udam, or fire bombs if they are Izila.
Shield icon - Enemies that are heavily armored. They usually don't die even if you headshot them. You must destroy their armor or just brute force it with damage. Either way they are a pain to deal with.
Horn icon - These are usually just found in Outposts. These enemies are rather dangerous than the others since they can call reinforcements without using the stationary horn to call for reinforcements. Take them out immediately.
Target or Reticle icon - These are long range units that have a sling or bow and arrow as a weapon. They also have superb vision in spotting intruders. They will usually be on a place high-up to give a good vantage point.
White Horn - In some cases you might tag a structure and it have a white horn icon. These structures can be used by ANY unit if it detects an enemy. So taking these out by damage, fire, or interacting (break) with it will destroy it which leaves only the enemies with a horn to call in for reinforcements.
Later on in the game, some of those icons stated above will no longer be just red but sometimes be yellow. The yellow color indicates a tougher, armored version of the unit.
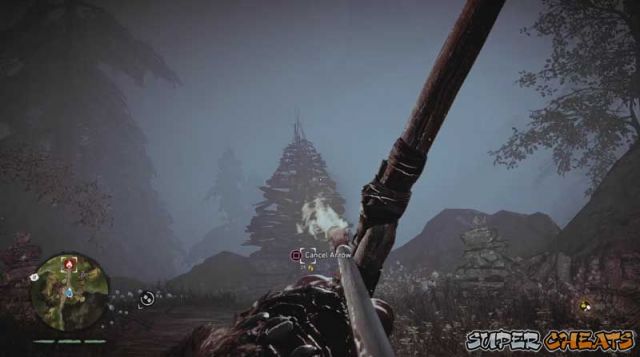
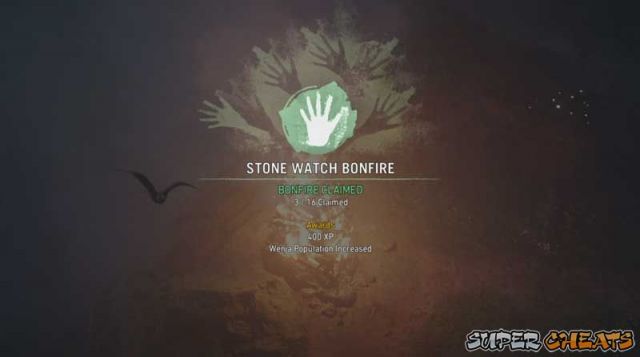
Bonfires
Bonfires are similar to the towers that were present in the recent Far Cry games. They provide some XP, Population, a fast travel point you can essentially teleport to on the map, a place to rest to change the time of day, and a stash so you can access the reward stash from away from home.
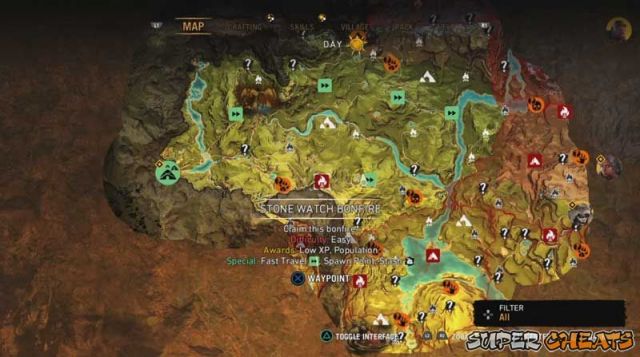
These bonfires usually consist of a few enemies in a small space. You can capture bonfires by defeating every enemy around it and then lighting the big pyramid-like structure on fire.
TIP:Aside from the rewards previously stated, bonfires also reveal some special places of interest, most notably, Spirit Totems. If you use our Guide and can't find the spirit totem icon anywhere, you may have to capture a bonfire in the surrounding areas to reveal them.
Outposts
Outposts are enemy camps that guard certain parts of the map. These camps vary in size and difficulty but are generally a lot tougher than Bonfires. They also have horns that any unit can use to call in for reinforcements.
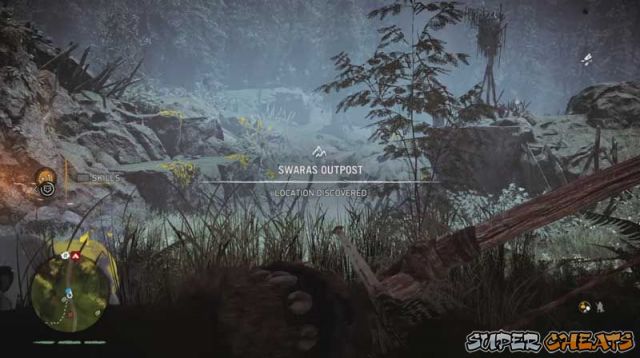
Capturing outposts is simple. Just kill all the enemies in the camp. If they call for reinforcements, kill them as well. The basic strategy in capturing outposts is scouting with your owl first.
The next is picking the enemies off one by one. Or you could always just run into the camp and hope you can take them all. Do note that capturing an outpost undetected will give a bonus.
After all enemies are slain, the outpost is yours. They give pretty much the same bonuses as Bonfires.

Village Upgrades
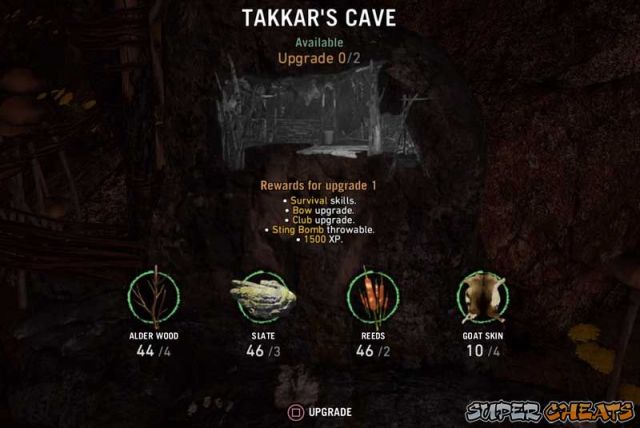
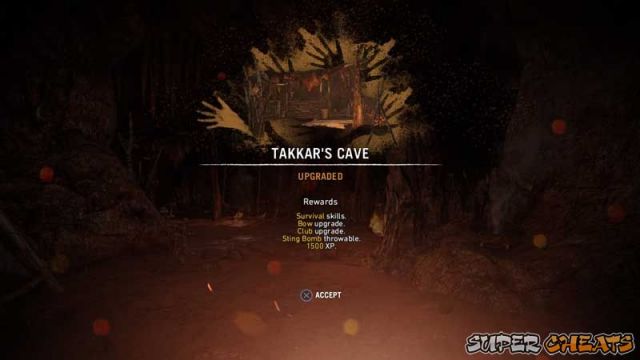
Takkar's Cave Upgrade 1
4 Alder Wood
3 Slate
2 Reed
10 Goat Skin
Rewards for Upgrade 1 : Survival Skills, Bow Upgrade, Club Upgrade, Sting Bomb throwable, 1,500 XP
Takkar's Cave Upgrade 2
35 Alder Wood
25 Slate
10 Reed
4 Badger Skin
40 Village Population
Rewards for Upgrade 2 : 3000 XP
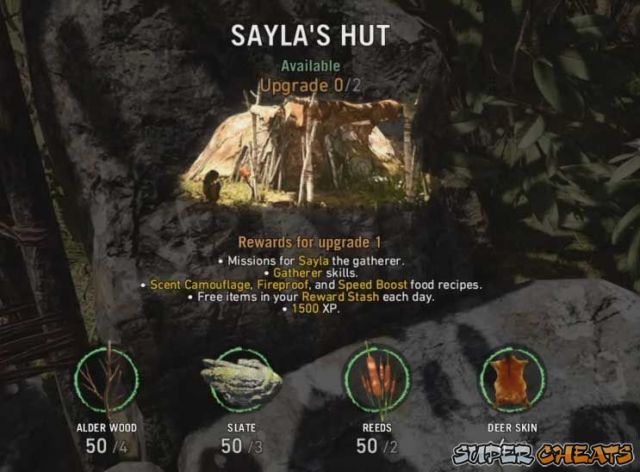
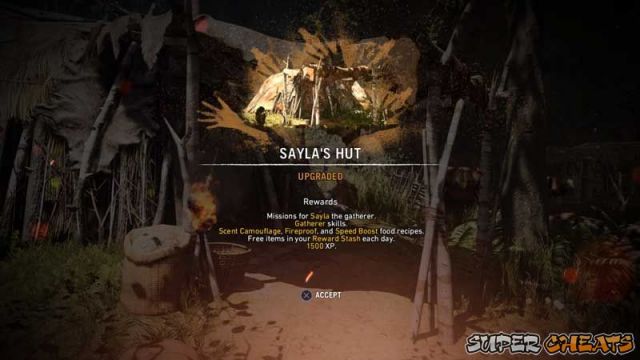
Sayla's Hut Upgrade 1
4 Alder Wood
3 Slate
2 Reed
2 Deer Skin
Rewards for Upgrade 1 : Daily rewards in rewards stash, 1,500 XP
Sayla's Hut Upgrade 2
35 Alder Wood
20 Slate
20 Reed
4 Mammoth Skin
40 Village Population
Rewards for Upgrade 2 : Full Health Food Recipe, Ultimate Boost Food Recipe, Rare items may be obtained from reward stash.
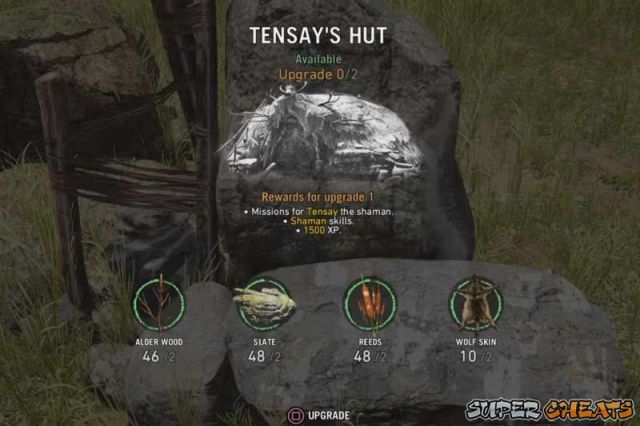
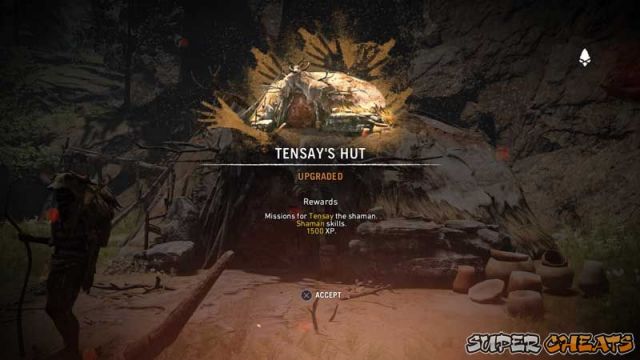
Tensay's Hut Upgrade 1
2 Alder Wood
19 Slate
2 Reed
4 Wolf Skin
Rewards for Upgrade 1 : Tensay Missions, Shaman skill tree, 1,500 XP
Tensay's Hut Upgrade 2
38 Alder Wood
15 Slate
16 Reed
1 Rare Lion Skin
40 Population
Rewards for Upgrade 2 : 3,000 XP
Jayma's Hut Upgrade 1 - Requires to have brought Jayma to the village
5 Alder Wood
4 Slate
3 Reed
1 Brown Bear Skin
Rewards for Upgrade 1 : Hunter Skill Tree, Sling, Long Bow, 1,500 XP
Jayma's Hut Upgrade 2
45 South Maple
30 South Stone
15 South Rock Dust
2 Rare Deer Skin
40 Village Population
Rewards for Upgrade 2 : Double Bow, 3,000 XP
Karoosh's Hut Upgrade 1 - Requires to have brought Karoosh to the village
4 Alder Wood
5 Slate
2 Reed
4 Wolf Skin
Rewards for Upgrade 1 : Warrior Skill Tree, Two-Handed Club, Winter Clothing, 1,500 XP
Karoosh's Hut Upgrade 2
30 North Cedar
35 North Black Rock
20 North Clay
1 Stripe Wolf Skin
40 Village Population
Rewards for Upgrade : 3,000 XP
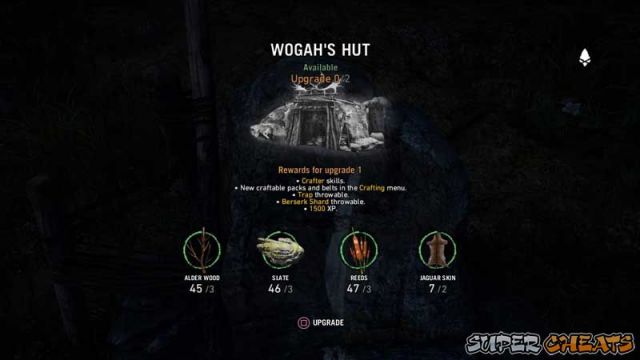
Wogah's Hut Upgrade 1 : Requires to have brought Wogah to the village
3 Alder Wood
3 Slate
3 Reed
2 Jaguar Skin
Rewards for Upgrade 1 : Crafter Skill Tree, Packs and Belts, Trap, Berserk Shard, 1,500 XP
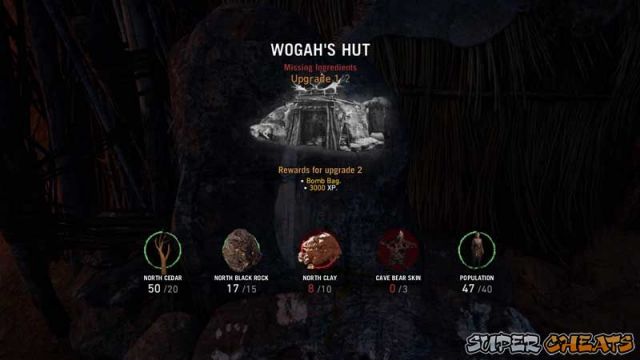
Wogah's Hut Upgrade 2
20 North Cedar
15 North Black Rock
10 North Clay
3 Bear Skin
40 Village Population
Rewards for Upgrade 2 : Bomb Bag, 3,000 XP
Dah's Hut Upgrade 1 - Requires to have brought Dah to the village
15 North Cedar
15 North Black Rock
15 North Clay
1 Rare Dhole Skin
40 Village Population
Rewards for Upgrade 1 : Udam Skill Tree, 1,500 XP
Dah's Hut Upgrade 2
35 North Cedar
25 North Black Rock
20 North Clay
1 Rare Rhino Skin
50 Village Population
Rewards for Upgrade 2 : Continue Dah's Story, 3,000 XP
Roshani's Hut Upgrade 1 - Requires to have brought Roshani to the village
25 South Maple
20 South Stone
15 South Rock Dust
2 Rare Elk Skin
40 Village Population
Rewards for Upgrade 1 : Izila Skill Tree, 1,500 XP
Roshani's Hut Upgrade 2
50 South Maple
40 South Stone
30 South Rock Dust
2 Rare Bitefish Skin
50 Village Population
Rewards for Upgrade 2 : 3,000 XP
Crafting Recipes
The Crafting featured here are upgrades to the various items you use and other various convenience crafts like 2 bombs for the resource cost of 1.
Takkar Crafting
Bow Upgrade 1 - Unlocked during the first mission in the game where you craft a bow.
Bow Upgrade 2 - Requires Takkar's cave to be upgraded to level 1.
Requirements:
Takkar's Cave level 1
6 South Stone
8 South Rock Dust
Club Upgrade 1 - Unlocked during the first mission in the game where you craft a club in a cave.
Club Upgrade 2 - Requires Takkar's cave to be upgraded to level 1.
12 South Maple
6 South Rock Dust
4 South Stone
Club Upgrade 3
3 Rare South Maple
2 Rare South Stone
10 South Rock Dust
Spear Upgrade 1 - Unlocks after you find your village.
4 Alder Wood
2 Slate
1 Reed
Spear Upgrade 2
6 North Cedar
6 Reeds
6 Bone
Spear Upgrade 3
12 North Cedar
8 North Black Rock
6 North Clay
Spear Upgrade 4
10 South Maple
1 Rare South Stone
10 South Stone
Spear Upgrade 5
4 Rare South Maple
4 Rare South Stone
20 South Rock Dust
Bait - Unlocked during the main story
Sting Bomb Upgrade 1 - Requires Takkar's Cave level 1
4 Animal Hide
2 Bee Cluster
Arrow Quiver Upgrade 1 - Unlocks after you arrive at your village for the first time.
3 Dhole Skins
Arrow Quiver Upgrade 2
2 Feathers
Arrow Quiver Upgrade 3
4 Brown Bear Skin
Arrow Quiver Upgrade 4
4 Rare Feathers
Guts Bag Upgrade 1
- All upgrades further increase the amount of Meat, Bait, and Animal Fat you can carry.
- Unlocks after you arrive at your village for the first time.
2 Boar Skin
Guts Bag Upgrade 2 - Unlocks after first Tensay mission
4 Dhole Skin
Guts Bag Upgrade 3
5 Yak skin
Guts Bag Upgrade 4
5 Tall Elk Skin
Kapala Shard Upgrade 1 - Only obtainable as a reward from Uplay and is not upgradeable.
Jayma Crafting
Sling Upgrade 1 - Find Jayma the hunter, bring her to your village and build her hut.
4 South Maple
2 South Stone
8 Animal Hide
Long Bow Upgrade 1 - Becomes available after you build Jayma a hut.
13 North Cedar
12 Black Rock
10 North Clay
Double Bow Upgrades 1 - Do Jayma's quests to unlock and then build her 2nd level hut
5 Rare North Cedar
5 Rare South Maple
5 Rare Reeds
Wogah Crafting
Grappling Claw Upgrade - It is unlocked during the mission where you get Wogah.
Club Belt Upgrade 1 - Available after Wogah joins the village
3 Dhole Skin
Club Belt Upgrade 2
3 Jaguar Skin
Club Belt Upgrade 3
4 Leopard Skin
Club Belt Upgrade 4
4 Sabretooth Skin
Spear Belt Upgrade 1 - Available after Wogah joins the village
3 Wolf Skin
Spear Belt Upgrade 2
4 Cave Lion Skin
Spear Belt Upgrade 3
2 Bitefish Skin
Spear Belt Upgrade 4
5 Woolly Rhino Skin
Trap Upgrade - Available after Wogah joins the village and has a level 1 hut
12 Hardwood
8 Animal Hide
6 Bone
Pack Upgrade 1 - Available after Wogah joins the village and has a level 1 hut
2 Goat Skin
Pack Upgrade 2
3 Tapir Skin
Stone Shard Upgrade 1 - Available after Wogah joins the village and has a level 1 hut
3 Blood of Oros
4 Animal Hide
Stone Shard Upgrade 2
4 Rare South Stone
8 Animal Hide
Hunter Belt Upgrade 1 - Available after Wogah joins the village and has a level 1 hut
2 White Wolf Skin
Hunter Belt Upgrade 2
3 Mammoth Skin
Hunter Belt Upgrade 3
1 Rare Jaguar Skin
Berserk Shard Upgrade 1 - Available after Wogah joins the village and has a level 1 hut
3 Blood of Oros
8 Animal Hide
1 Rare North Yellow Leaf
Throwing Shard Belt Upgrade 1 - Available after Wogah joins the village and has a level 1 hut
3 Goat Skin
Throwing Shard Belt Upgrade 2
3 Badger Skin
Throwing Shard Belt Upgrade 3
4 Monkey Skin
Throwing Shard Belt Upgrade 4
4 Sabretooth Tiger Skin
Bomb Belt Upgrade 1 - Available after Wogah joins the village and has a level 1 hut
3 Cave Bear Skin
10 Deer Skin
Bomb Belt Upgrade 2
3 Bitefish Skin
10 Boar Skin
Karoosh Crafting
Two Handed Club Upgrade 1 - Available after Karoosh joins the village and has a level 1 hut
8 North Cedar
8 Bone
Two Handed Club Upgrade 2
4 Rare North Cedar
4 Blood of Oros
20 North Clay
Winter Clothing Upgrade 1 - Available after Karoosh joins the village and has a level 1 hut
4 Wolf Skin
Winter Clothing Upgrade 2
2 White Wolf Skin
2 Rare Yak Skin
Dah Crafting
Berserk Bomb Upgrade 1 - Available after capturing a certain Udam tribesman.
2 Clay Pot
2 North Yellow Leaf
Roshani Crafting
Fire Bomb Upgrade 1 - Available after capturing a certain Izila tribesman.
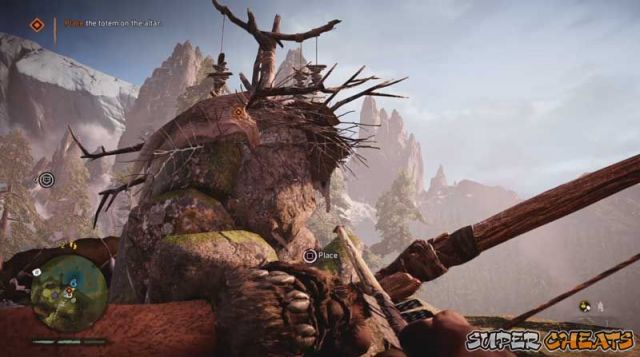
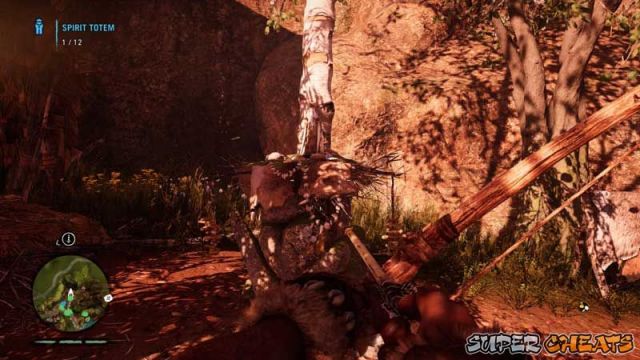
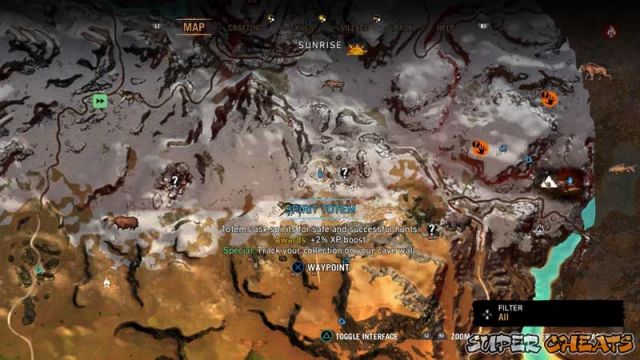
Spirit Totems
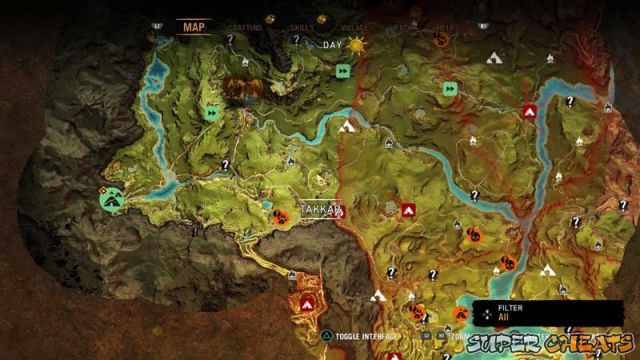
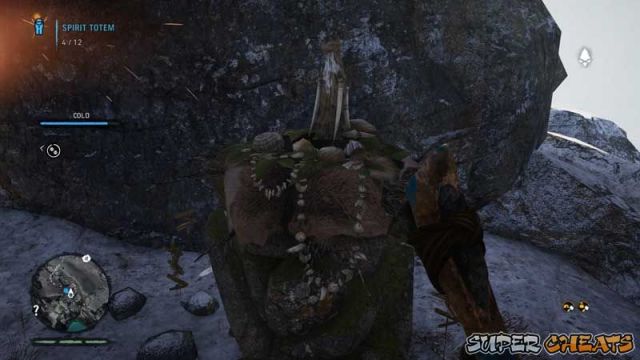
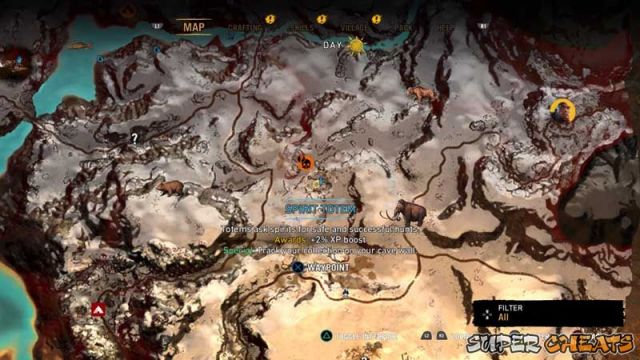
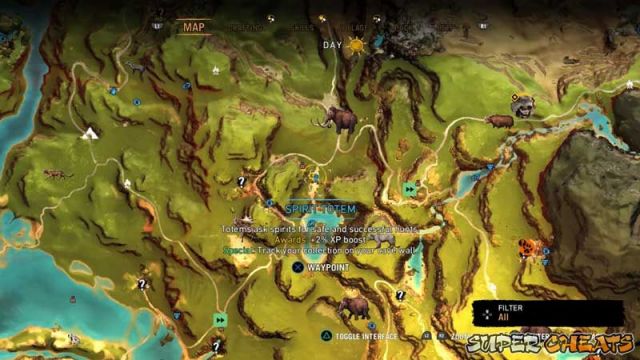
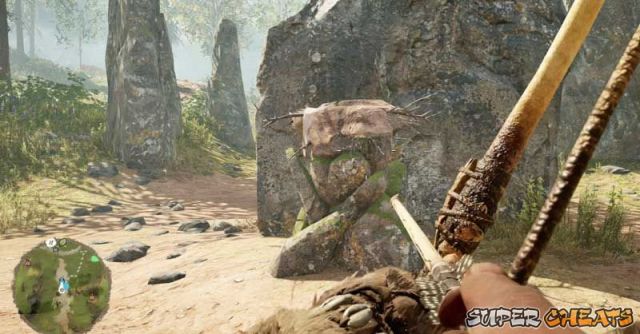
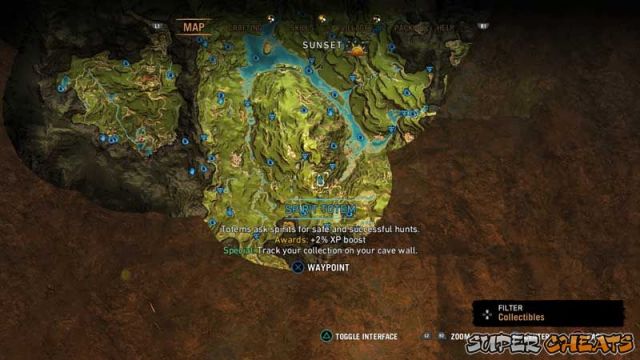
Spirit Totems are shrines honoring the spirits that the wenja pray for protection. They are scattered across Oros. Paying respect to them gives you a bonus in the form of +2% exp gained. These are the only collectible that gives a good reward for completing.
TIP: If they don't appear on the map, you must capture a bonfire to reveal objects in the general vicinity. You can also obtain these in any order.
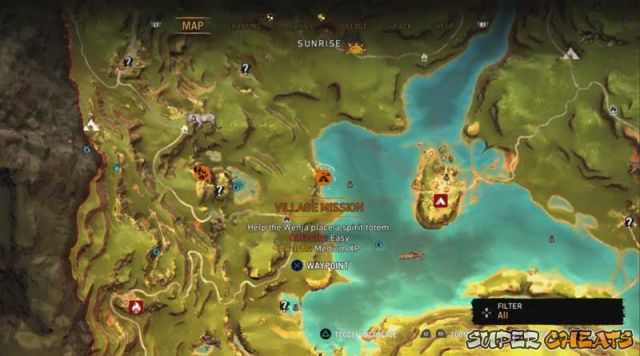
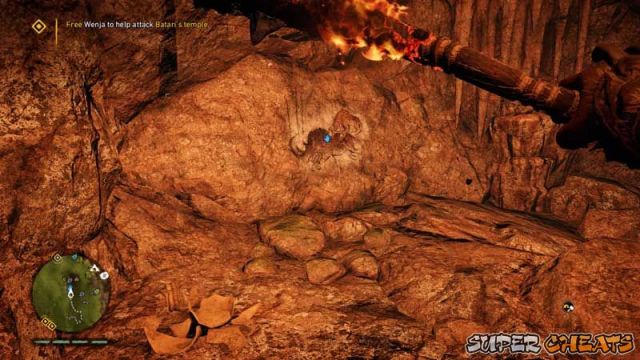
Since one of the totems are found strictly in a mission, do the "Spirit Totem" mission first to kick things off. The Spirit Totem mission can be obtained when you have built huts for Jayma, Karoosh, & Wogah. You will find a wenja NPC that will give you village quests. These are marked by round orange icons with question marks. He will have you go help a wenja that was going to place a totem but failed.
Totem 2:
Totem 3:
Totem 4:
Totem 5:
Totem 6:
Totem 7:
Totem 8:
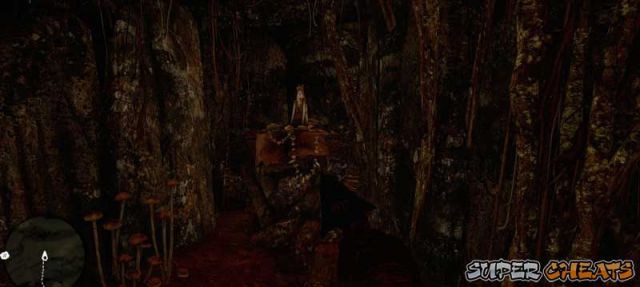
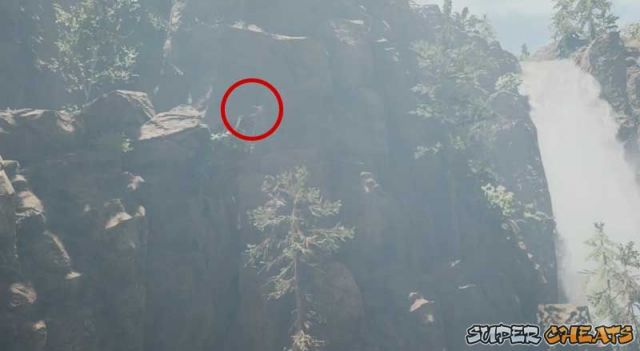
Totem 9: This shrine is a bit hidden. It is in the mouth of a cave.
Totem 10: It is inside a cave so look around for the entrance resembling the one in the picture.
Totem 11:
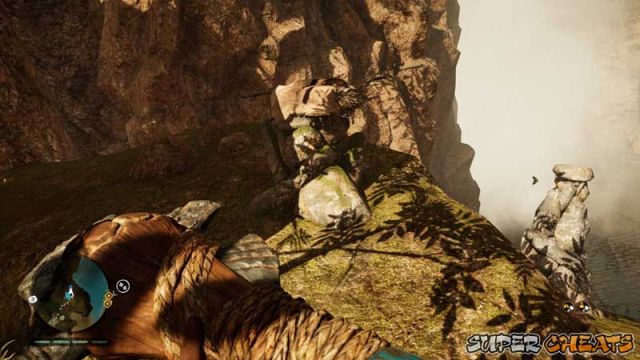
Totem 12: This one is also inside a cave. Nothing complex though so its all fine.
Daysha Hands
Daysha Hands are little glowing rocks that have spiritual energy. They are pretty easy to spot especially at night due to their glow standing out in the darkness.
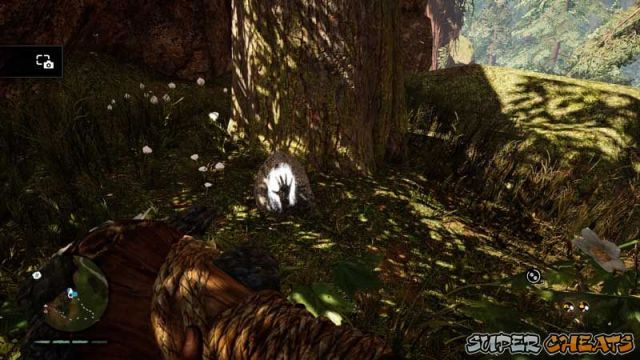
They can be seen from the map, by default if you zoom in closely, they show up in the mini map if you happen to come close to one for it to pop up in the mini map, or you can see them across the whole map by enabling the collectible filter on.
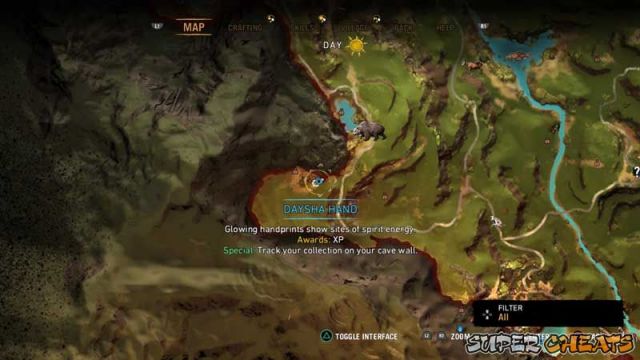
TIP: To find collectibles easier, go to the map, press D-Pad Up or D-Pad Down to open up the filter menu. Scroll down to highlight Collectibles to highlight only collectibles from all across the map.

IMPORTANT: Collecting Daysha Hands only gives some EXP and nothing else. The only achievement that is tied to collectibles is obtaining any combination of 80 collectibles. By following the Tips we have told you, you don't have to collect all the hands to get max level.
Wenja Bracelet
Wenja Bracelet
Wenja Bracelets are bracelets left by your fallen wenja brethren. They are pretty hard to find without turning on hunter vision to place a glow on them.
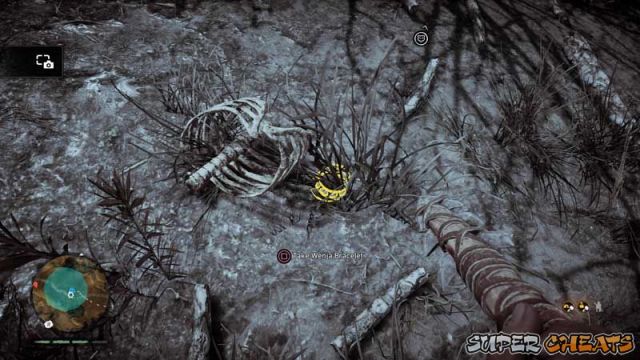
They can be seen from the map, by default if you zoom in closely, they show up in the mini map if you happen to come close to one for it to pop up in the mini map, or you can see them across the whole map by enabling the collectible filter on.

TIP: To find collectibles easier, go to the map, press D-Pad Up or D-Pad Down to open up the filter menu. Scroll down to highlight Collectibles to highlight only collectibles from all across the map.
IMPORTANT: Collecting Wenja Bracelets hands only gives some EXP and nothing else. The only achievement that is tied to collectibles is obtaining any combination of 80 collectibles. By following the Tips we have told you, you don't have to collect all the Wenja Bracelets to get to max level.
Cave Paintings
Cave Paintings are, as they say, Paintings.. hidden in caves. The process of finding them is itself a challenge. They are usually accompanied with Daysha Hands somewhere in the same cave.
Cave Paintings can be seen from the map however they are usually hidden underground in caves so you can't necessarily find one easily without traversing deep within caves.
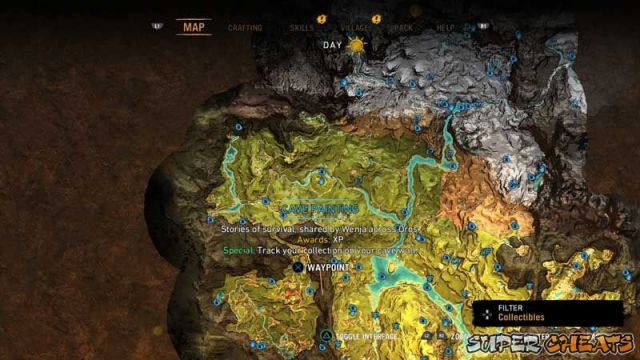
TIP: To find collectibles easier, go to the map, press D-Pad Up or D-Pad Down to open up the filter menu. Scroll down to highlight Collectibles to highlight only collectibles from all across the map.
IMPORTANT: Finding Cave Paintings only gives some EXP and nothing else. The only achievement that is tied to collectibles is obtaining any combination of 80 collectibles. By following the Tips we have told you, you don't have to find all the Cave Paintings to get max level.
Wenja Bracelets are bracelets left by your fallen wenja brethren. They are pretty hard to find without turning on hunter vision to place a glow on them.
They can be seen from the map, by default if you zoom in closely, they show up in the mini map if you happen to come close to one for it to pop up in the mini map, or you can see them across the whole map by enabling the collectible filter on.
TIP: To find collectibles easier, go to the map, press D-Pad Up or D-Pad Down to open up the filter menu. Scroll down to highlight Collectibles to highlight only collectibles from all across the map.
IMPORTANT: Collecting Wenja Bracelets hands only gives some EXP and nothing else. The only achievement that is tied to collectibles is obtaining any combination of 80 collectibles. By following the Tips we have told you, you don't have to collect all the Wenja Bracelets to get to max level.
Cave Painting
Cave Paintings are, as they say, Paintings.. hidden in caves. The process of finding them is itself a challenge. They are usually accompanied with Daysha Hands somewhere in the same cave.
Cave Paintings can be seen from the map however they are usually hidden underground in caves so you can't necessarily find one easily without traversing deep within caves.
TIP: To find collectibles easier, go to the map, press D-Pad Up or D-Pad Down to open up the filter menu. Scroll down to highlight Collectibles to highlight only collectibles from all across the map.
IMPORTANT: Finding Cave Paintings only gives some EXP and nothing else. The only achievement that is tied to collectibles is obtaining any combination of 80 collectibles. By following the Tips we have told you, you don't have to find all the Cave Paintings to get max level.
Izila Masks
Izila Masks
Izila Masks are masks the Izila have placed all around their territory to give them blessings. You don't "collect" it like the other collectibles. You destroy them by shooting them or even if you manage to hit it with melee. The tooltip says destroying these lowers the Izila morale. However this isn't the case and does nothing to the Izila you face.
You can find it on the map ONLY in Izila territory. It is an inverted triangle that seems like a face (of course. its a mask).
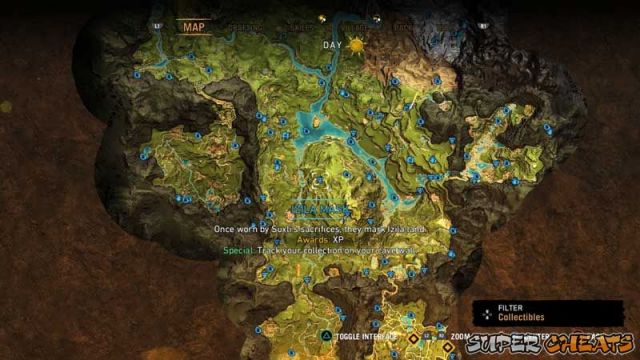
TIP: To find collectibles easier, go to the map, press D-Pad Up or D-Pad Down to open up the filter menu. Scroll down to highlight Collectibles to highlight only collectibles from all across the map.
IMPORTANT: Collecting / Destroying Izila Masks only gives some EXP and nothing else. The only achievement that is tied to collectibles is obtaining any combination of 80 collectibles. By following the Tips we have told you, you don't have to collect / destroy all the Izila Masks to get max level.
Trophies
There are numerous trophies waiting to be claimed in Far Cry Primal but fortunately, they are easy to obtain with some being simply a bit tedious. Not hard.
Listed below are the trophies you can get. They are placed in sections like trophies you can not miss to the other ones that require a bit of effort.
If there are special instructions to be included, it will be included.
Non-Missable trophies
These trophies are obtained just by playing through the story.
This Way To Oros - Silver
Survive the mammoth hunt.
Spearproof - Silver
Repel the Udam attack.
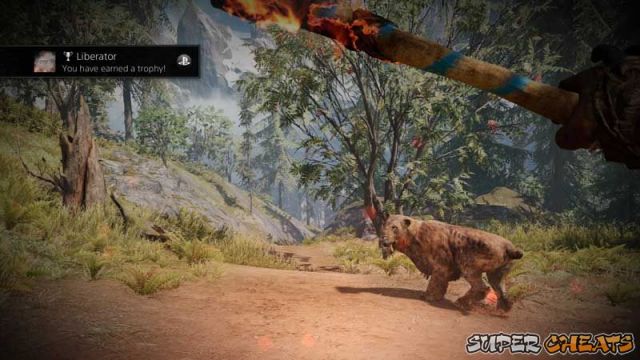
Liberator - Silver
Rescue a Wenja captive from the Izila.
- During the Tensay mission "The Taken Wenja", make sure to release the Wenja held captive in the camp.
Uncaged - Silver
Escape the Udam caverns.
Krati, Krati, Krati! - Gold
Steal the Izila Mask of Krati.
Deadeye - Bronze
Karoosh joins the Wenja village.
Spiritual Advisor - Bronze
Tensay joins the Wenja village.
Mister Fix-It - Bronze
Wogah joins the Wenja village.
Gray Huntress - Bronze
Jayma joins the Wenja village.
To Ash - Bronze
Complete the mission, The Fall of Batari.
Evolution in Action - Bronze
Complete the mission, The Hunt for Ull.
Conquest - Bronze
Capture all forts
- You get this naturally from taking Dah and Roshani by capturing the Big Darwa Fort and Fire Screamer Fort respectively.
Other easily obtained trophies
These trophies are semi-missable but are really easy to do that you just might get most or all of them just by playing the game.
Twelve Labors - Silver
Complete any 12 Specialist missions.
- Complete missions for Sayla, Tensay, Jayma, Karoosh, Wogah, Dah, or Roshani.
Here Kitty - Bronze
Tame the bloodfang sabretooth.
Big Teddy - Bronze
Tame the Great Scar Bear.
Endangered - Silver
Fight the bloodtusk mammoth.
Good Boy - Bronze
Tame the Snowblood Wolf.
Home Improvement - Bronze
Build or upgrade any 2 village huts.
Subdivisions - Bronze
Your Wenja tribe reaches a population of 20.
Tears Of Shame - Silver
Kill and skin 1 tamed beast.
- This is a bit tricky because sometimes the game wont recognize it. Find a tamable beast (Best if its not a badger since badgers can get back up once when dying. Making it take longer) Tame it and shoot arrows, or better yet, spears at its head. Kill it. When it is dying, do not heal it and let the timer run out. When it finally dies, skin the animal.
Killer's Belief - Bronze
Eliminate 25 enemies using any takedown.
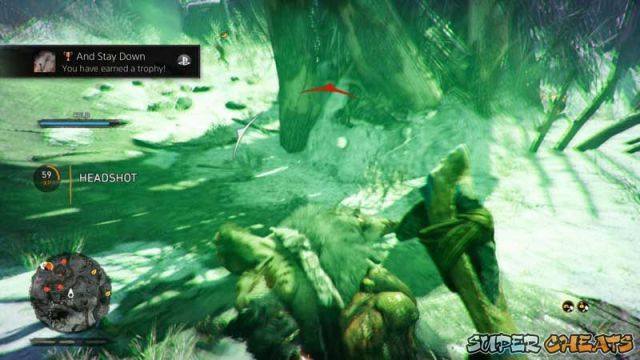
And Stay Down - Bronze
Eliminate 100 enemies using a club.
Skewered - Bronze
Eliminate 100 enemies using a spear.
Sharpshooter - Bronze
Eliminate 100 enemies using a bow.
Outta My Way - Bronze
Eliminate 25 enemies while riding any beast.
- Obtain the Mammoth Rider or Beast Rider Skills and just find and kill enemies.
Armorer - Silver
Use the Crafting ability 100 times to craft weapons or arrows.
Skirmish - Bronze
Capture 10 Outposts.
Menagerie - Bronze
Tame 7 beasts.
Fancy Friend - Bronze
Tame 1 rare beast.
- You will most likely run into a rare beast during your first hours of the game. Provided you have unlocked and obtained the Beast Master Skills, you can tame these rare variations of the normal enemies. They have different design compared to their regular version and leave a "scent trail" when they move around and hunter vision is on.
Veterinarian - Bronze
Heal a tamed beast 25 times.
Mapmaker - Bronze
Discover 15 hidden locations.
- Just go towards 15 of the locations on the map that is marked "?"
Trophies that require much more effort.
Apex Predator - Platinum
Obtain all the Trophies.
- Self Explanatory
Real Estate Baron - Silver
Complete all hut upgrades.
- Just keep gathering ingredients and upgrading all the huts.
Inflammable - Bronze
Eliminate 50 enemies with fire.
David And Goliath - Bronze
Eliminate 10 enemies using a sling.
- This is a bit challenging because it is hard to properly kill someone with the sling. Best used on stationary targets and kill them with headshots.
Bad Trip - Bronze
Influence 25 enemies using poison.
BEES! - Bronze
Eliminate 10 enemies using sting bombs.
Quickdraw - Bronze
Eliminate 15 enemies using throwing shards.
Right On Target - Bronze
Kill a target 50 feet away or more using a spear.
- Spears have a horrible throwing trajectory. To help with this trophy, get higher ground from your enemy to add additional distance and to correct the arc less. You can also call your owl, aim at the ground that is almost under the target and set a waypoint (L1) This will put a mark on the spot. You can see the distance now and adjust distance accordingly.
Bullseye - Bronze
Kill a target 70 feet away or more using an arrow.
- Generally same as above but easier.
Gotcha - Bronze
Eliminate 10 enemies using hunting traps.
- Place traps and you can lead enemies by tossing stones to lure them towards traps. DONT accidentally throw stones onto the trap since it can trigger the traps.
Sic 'Em - Bronze
Eliminate 50 hostile targets using a tamed beast.
Feathered Friend - Bronze
Eliminate 15 enemies using your owl.
Expert Wenja - Silver
Learn all Skills.
- As long as you have followed our Tips in the Tips section, you will be getting as much XP as you need.
Kanda Of Faith - Bronze
Climb to the peak of Pardaku Lookout and leap off.
Expansion - Gold
Capture all Outposts.
Cave Hoarder - Bronze
Pickup 80 collectibles.
- This is the most time consuming of all the trophies. It has you gather a combination of 80 of any collectible (Spirit Totems, Daysha Hands, Wenja Bracelet, Cave Painting, Izila Masks) If you will begin tackling this trophy, go to the map and switch the filter for Collectibles.
Good Neighbor - Bronze
Complete 15 "Help Wenja" quests.
- Those orange icons on the map where Wenja all around need help with stuff.
Crush Your Enemies - Bronze
Complete 10 "Tribal Clash" quests.
- The orange icons with a skull on it.
Master Tracker - Bronze
Complete 5 "Beast Kill" quests.
- Orange icons with a bear claw on it.
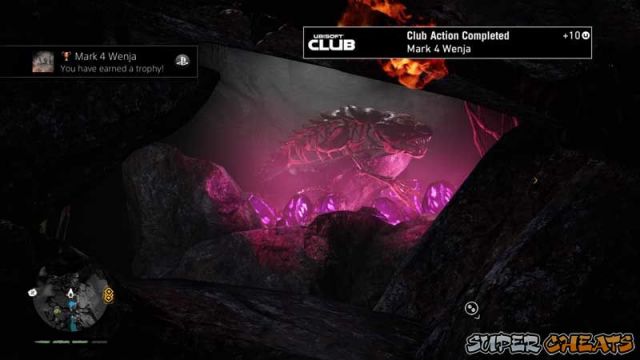
Mark 4 Wenja - Bronze
Discover the future past
- This requires you to view an Easter Egg. Head to the designated area and enter the cave.
You just need to see the easter egg to get the trophy. The cave doesn't have anything special else in it.
Easter Eggs
Far Cry Primal has a handful of easter eggs that can be found in Oros. These range from nods to shows, other games, or even their own company. Here are a few we found. Maybe you can find even more!
Flintstones vehicle - Flintstones series
To the southeast of the map, there is a small body of water with a vehicle that looks like vehicles from the Flintstones.

Blood Dragon - Far Cry Blood Dragon
Head toward the location on the map to find a cave. Inside, you can peek at the skeletal remains of a Blood Dragon from another Ubisoft game of the same name. Too bad you can't tame a live one.
Assassin's Creed leap of faith - Assassin's Creed franchise
During the Fly like a bird mission, Urki performs the Leap of Faith from the Assassin's Creed franchise. It even has a haystack underneath to cushion his landing.
Assassin's Creed logo - Assassin's Creed franchise
to the south of the map, Just near where you start the Snowblood Wolf beast hunt, the Assassin's logo can be seen on the ground. There even is a neat haystack and an Izila who failed the landing. The only weird thing is... where did he jump from??


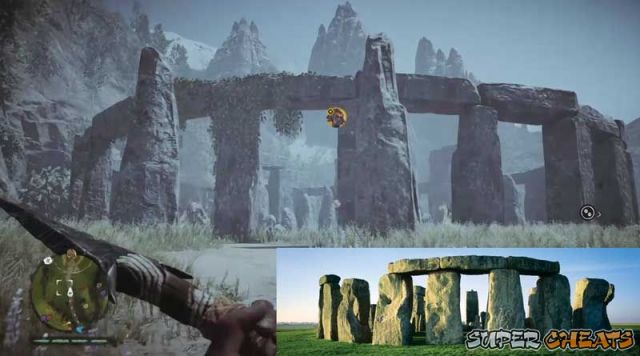
Stonehenge
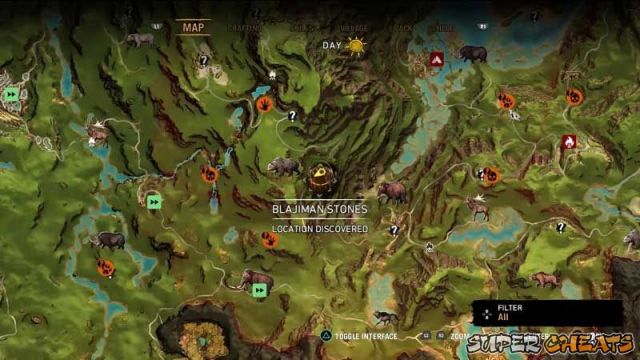
The Blajima stones closely resembles the Stonehenge in real life. In game, they were used for "sacrifices". This by no means that the Stonehenge was used for the same purpose.... or could it?
Ubisoft logo
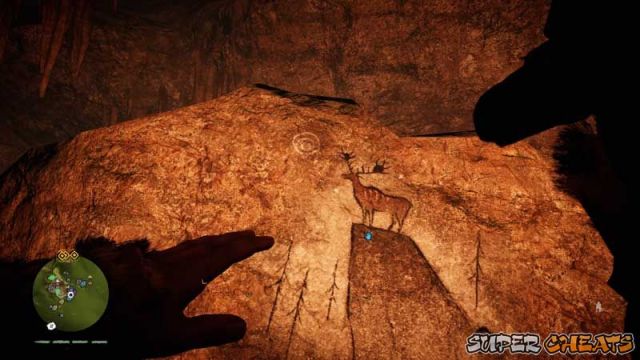
Ubisoft places another mark on their game in the form of an easter egg. The sun in the Cave Painting is the Ubisoft logo.
Karoosh - Big Boss (Metal Gear Series)
Karoosh closely resembles Big Boss. The damaged eye, The bandana, The hairdo. Him being an excellent warrior.
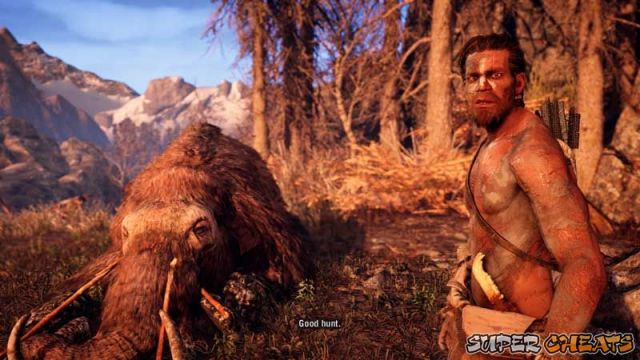
 Prologue
When the controls are handed over to you, press Circle to crouch and follow Dalso. Follow him until you find a small mammoth. Your other tribesmen will separate the small mammoth from its herd with fire. You have to now chase the mammoth down and kill it.
Just keep running around the small mammoth and do not let it charge at you. If it does damage you, hold Triangle to heal up. There are also spears sticking out of the ground that your tribesmen placed. Just run into these to restock on spears. You can stab the mammoth by going near it and pressing R2, or throwing it by holding L2 then Pressing R2 to throw. Throwing does more damage but you lose the spear. Regain it by walking over to the scattered spears around the site, or walking over to the spear you just threw. If it missed, you can pick it up. If it is stuck in the mammoths body, then you can't get it without it hurting you.
Continue the onslaught and secure your kill.
 Path to Oros
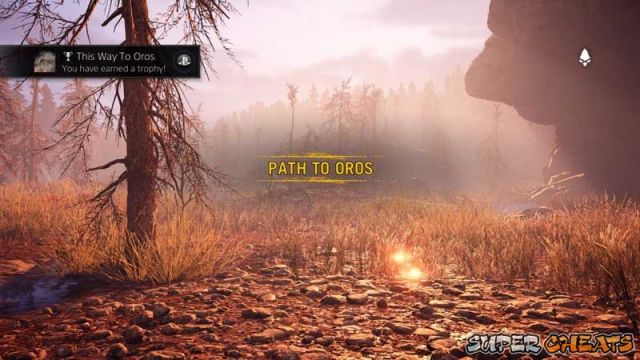
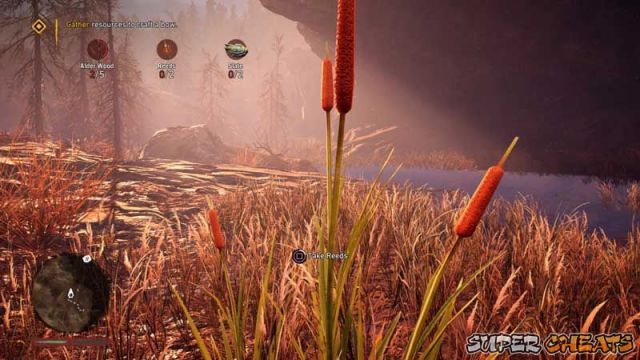
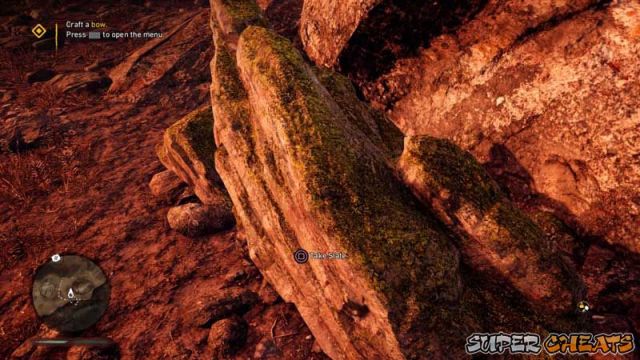
After just barely surviving the Tiger attack by falling down a steep mountainside, you must now craft a bow from the available materials around. They are visible if you know what you are looking for and they even "shine" a bit to indicate that you are able to interact with them. You can gather them in any order.
TIP: If you are getting tired or even dizzy from the gathering animation where Takkar goes down and actually gathers the plant, or just want to save time, Turn off the "Search Animation" by going into Options > Gameplay > Search Animations
You can gather Reeds from the plants that look like they have hotdogs stuck on them.
Slate can be obtained from certain rock formations
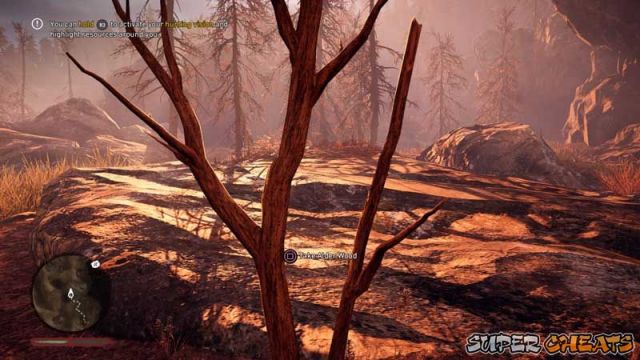
And last but no means least, Alder. This particular resource is important as you need this to craft arrows for your bow. You'd want a lot of this resource so you wont always chase after your arrows to reclaim them. They are tall noticeable upright twigs. More like dried up shrubs or small trees.
You can also, as the help text says, use Hunter Vision to see things more easily for a limited time. This can be turned on or off and doesn't cost anything to trigger.
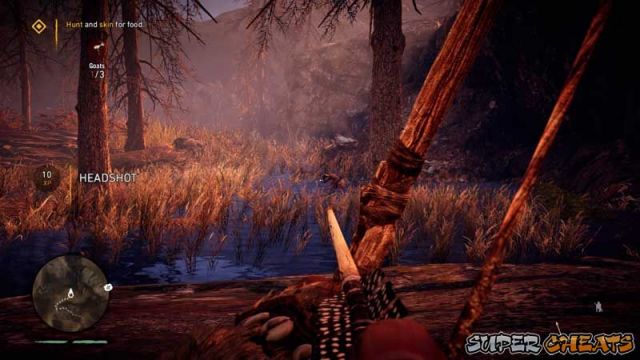
After gathering the required items and Crafting your bow, the next thing you will need is to hunt some goats for meat to heal yourself. These targets can be seen running around the place and eating grass.

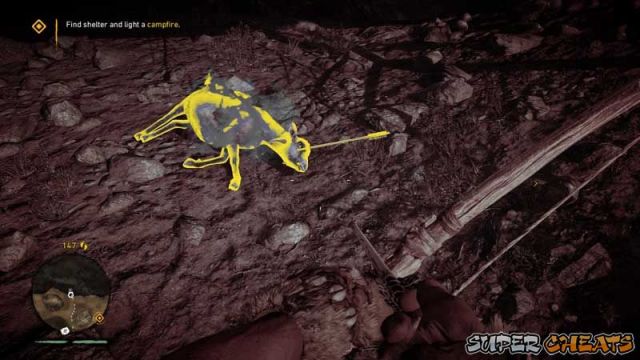
You can hunt them two ways. Shoot them anywhere on their body to make them bleed out. Follow their blood trail (you can use Hunter Vision to see the targets AND their blood clearly) till they finally die,
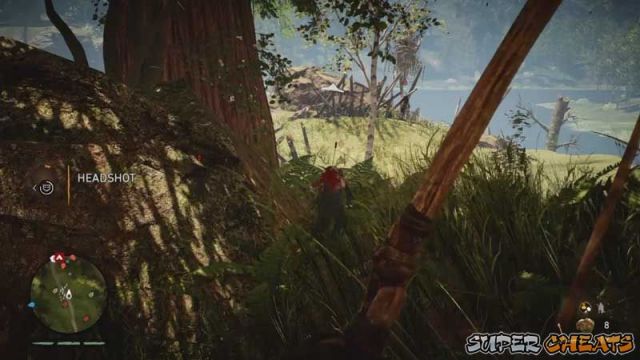
or you can just go up and aim a nice good headshot to instantly kill them. Doing a headshot also gives more experience points.
TIP: It is advisable to gather as much as you can from this starting area since it is VERY abundant and the resources respawn rather quickly. The Alder resource or Hardwood resource you gain from harvesting Alder is important, as previously mentioned, for arrows. Meat from goat will help a lot too for your survivability.
When you are done, proceed to the cave and light the campfire. You will then be able to craft a club and set it on fire to clear the blocking vines.
TIP:You can hold the torch forward and attempt to burn things by pressing and holding R2. However, be VERY careful with flames as they spread fast and can burn you if not careful.
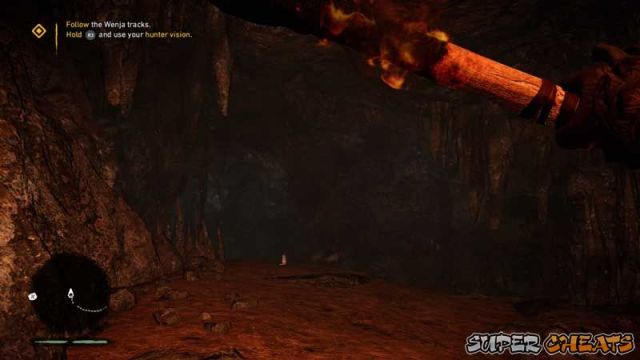
Continue inside the very linear cave. There is no need to use the Hunter Vision to see the tracks since the cave is very straightforward. But do so if you want to. At the end of the path, you will find the tiger that just attacked you and another Wenja.
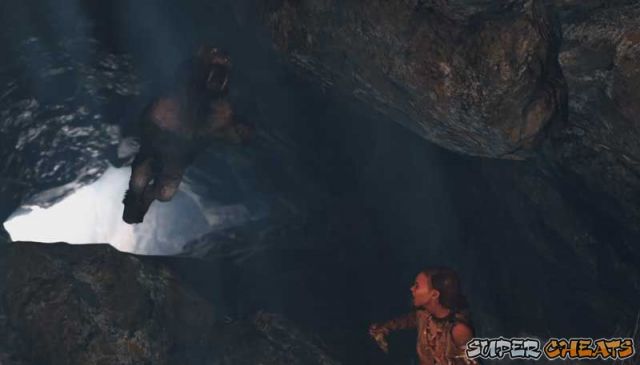
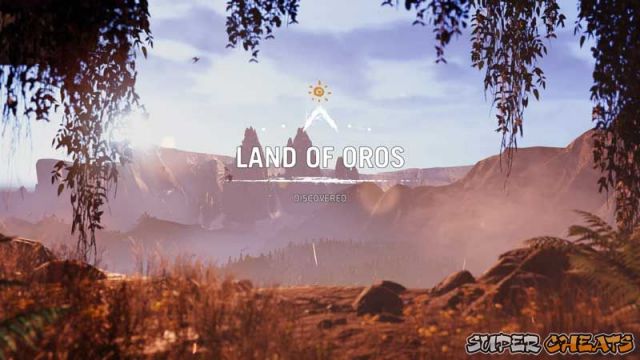
After the cutscene, you will find yourself in the land of Oros.
After a few words with Sayla, you follow her into her small camp. Here you will see that she was injured by the tiger attack.
Deep Wounds
This mission is really short. The objective is just to collect medicinal herbs to treat Sayla's wound. Go to the river and using your Hunter Vision, you will see special plants that glow red (just because its a quest marked object) regularly, these don't glow red.
Collect the required amount and bring them back to Sayla to patch her up. Mission completed.
After the cutscene
Vision of Beasts
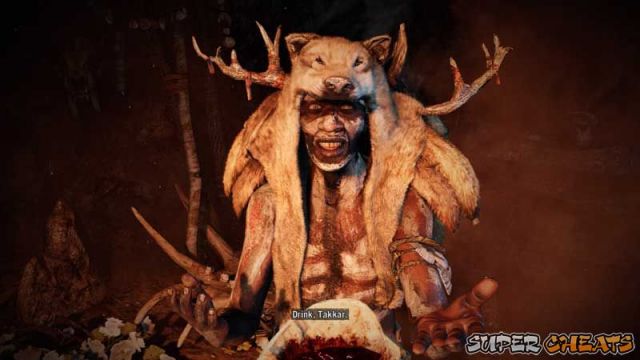
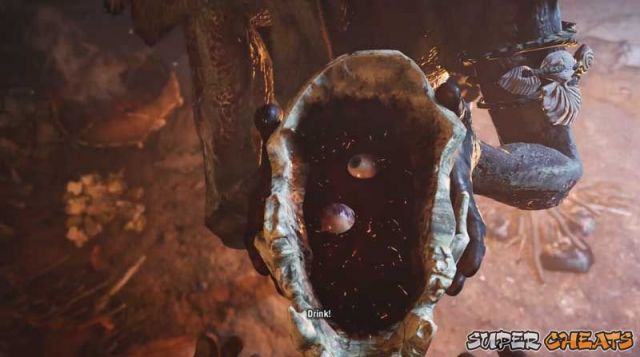
Head up to Tensay's cave to the north east of your camp, near a brown bear icon. Enter the cave to find Tensay just doing his thing. He tells you that he was calling for a strong spirit and Takkar showed up and now believes Takkar is chosen. He then adds his another ingredient to his mixture. He guts a rat and pours its blood into it then later adds your blood. He then makes you drink this wonderful brew.
Drinking the concoction induces a trippy vision. A vision of beasts to be exact.
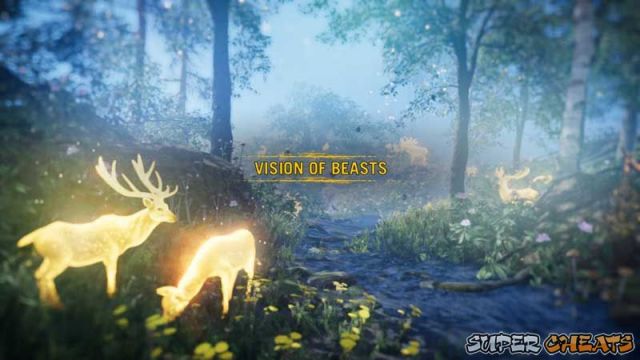
This section is really easy since you are simply tasked to follow the Guide which is the owl. The controls are default flight controls so remember that when moving around. You don't get penalized anyway if you "die" in this vision. Just a minor setback.
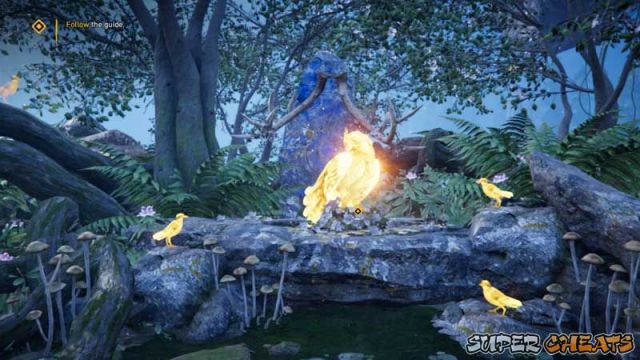
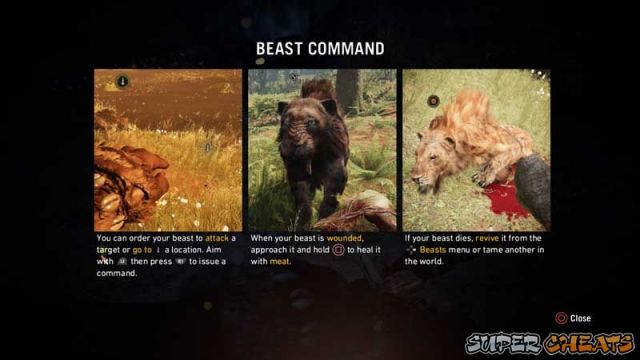
The visuals in this part of the game are rather nice. Don't forget to enjoy while taking this short stroll. Upon reaching the end, you will get to tame the owl and it will accept you as Beast Master.
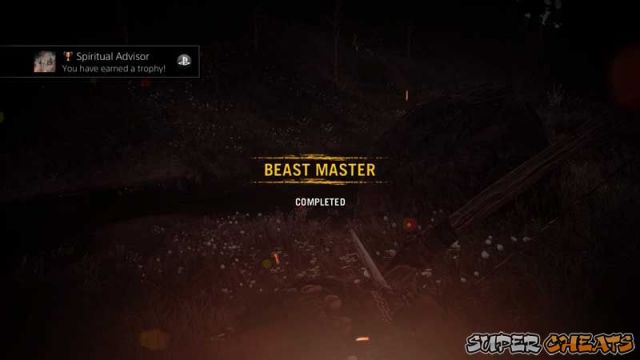
 Beast Master
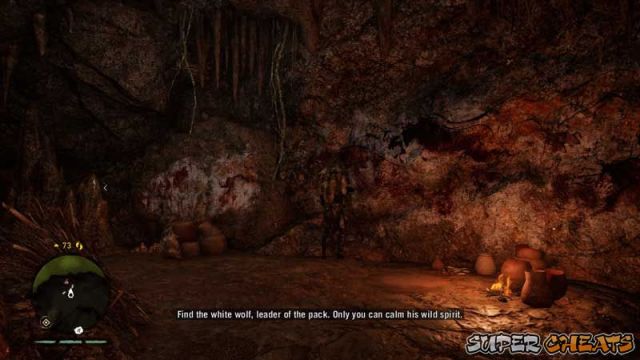
After having the Vision of Beasts, it is now time for you to put it to actual use. The game will tell you how to do so. After exiting the cave, the game will prompt you to use your owl to scout for the wolf hunters. They wont show up unless you use the owl so in this section, it is required.
Press D-pad Up to call your owl and control it as it searches.
Let the owl head over just a few meters ahead of the cave you just came out of and you will see the camp they have set up.
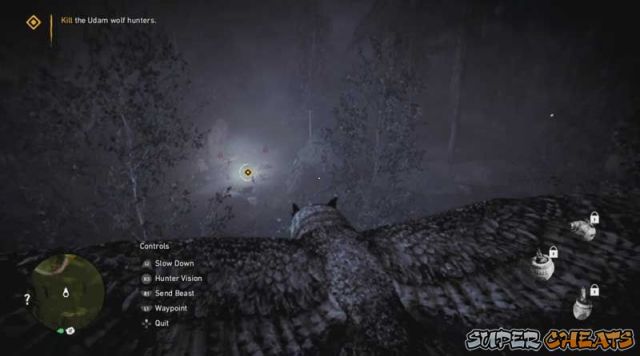
Kill the hunters to make some progress
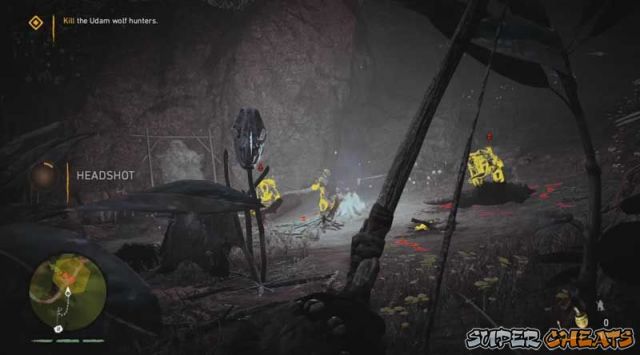
When you have killed them all, you will now track the white wolf. Turn on your Hunter Vision to see the tracks left by the wolf. Simply follow the tracks to their end.
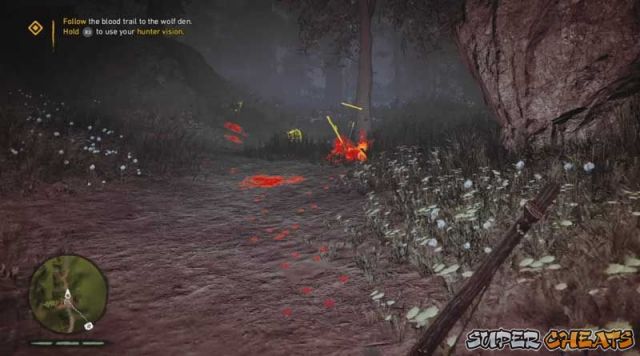
If you haven't already, craft some bait from meat to use for taming.
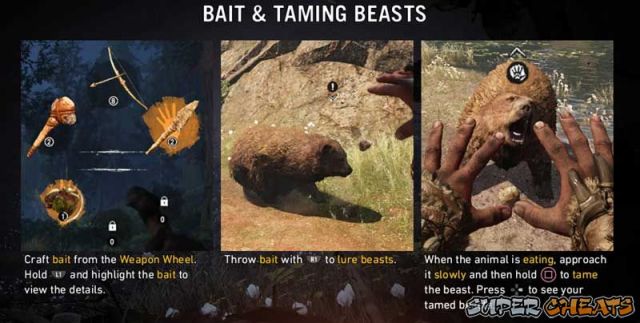
Head on over to the white wolf. It is possible that he is being bothered by some goats running around. Don't approach him when he is facing you or just hide behind some obstacles to remain out of sight.
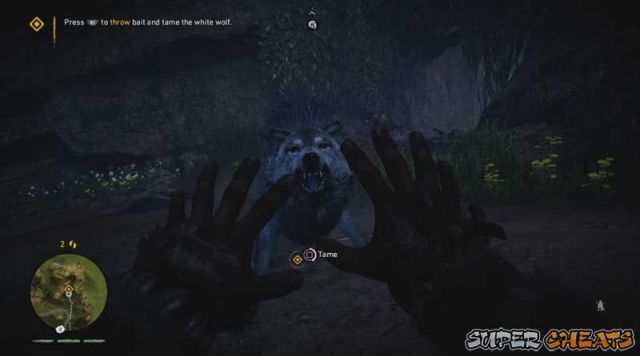
Using the bait you have created, toss it over to him. Quietly head on over to the preoccupied beast by remaining crouched.
When you are within range, the tame option will be available by pressing Square. Just keep holding square till the beast is tamed.
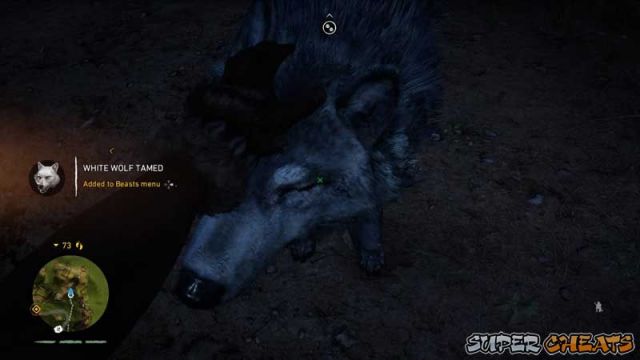
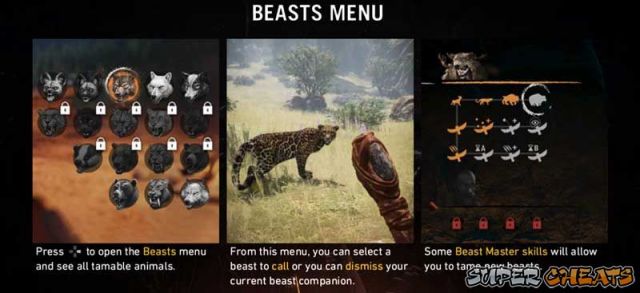
You can also check the available beasts that you have tamed by going into the Beast menu (D-pad Right)
Now to use your beast in battle. The game will have you hunt down two Udam relatively close to your location. Command your beast to attack by pressing R1 while looking at an enemy.
You may approach this however you wish but its advisable to have your beast go after one target while you go after another. Like a synced attack.
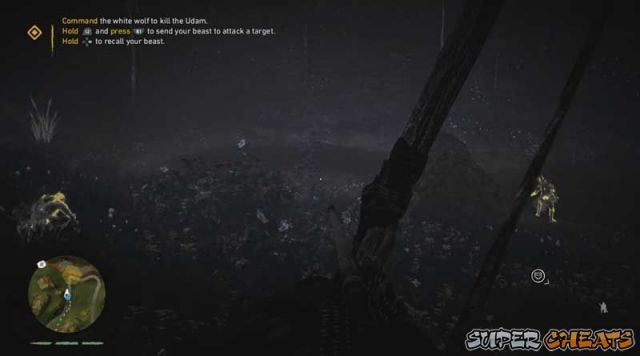
When you have slain them, the mission will now complete and you can now tame other animals. Better animals can be tamed after you learn the prerequisite skill.
Village upgrade tutorial
After learning the ropes on your beasts, head over to Sayla and speak to her about improving your village. This section will simply have you create huts for Sayla, Tensay, & yourself.
Note:If you haven't been collecting resources up to this point, then you will have to go gather some before you can continue. If you are going to gather, take note at how much resources Sayla, Tensay, & your (Takkar's cave) costs to upgrade to go and upgrade them in one go.
First to build is Sayla's hut. It costs:
4 Alder wood
3 Slate
2 Reeds
2 Deer Skin
Next is Tensay's hut. It costs:
2 Alder wood
2 Slate
2 Reeds
2 Wolf skin
Last but by no means least, Takkar's cave. It costs:
4 Alder wood
3 Slate
2 Reeds
4 Goat skin
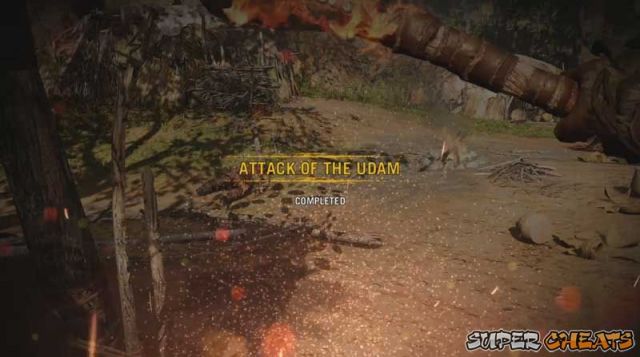
After upgrading these, speak with Sayla. She will be in a deeper section of Takkar's cave. She will give you a club that you will use to beat more Udam up with. After the scene, it will automatically transition to the next day. Attack of the Udam
The day after you get your village up running, as you casually walk out of your cave, you are greeted by a conveniently placed melee tutorial.
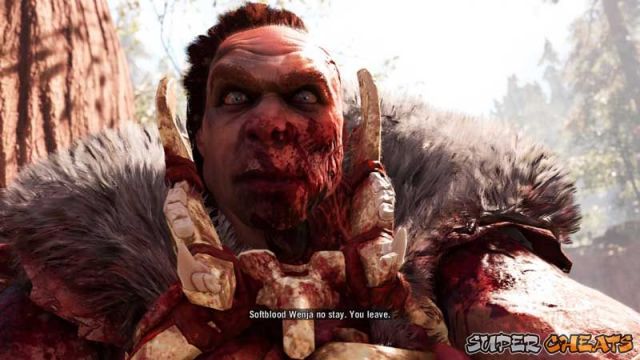
This indicates that you will probably be doing a lot of that in a while. As you head out, you are greeted with a scene of the Udam entering your village. You also get to meet their leader, Ull.
Shortly after him greeting you, the mission finally starts.
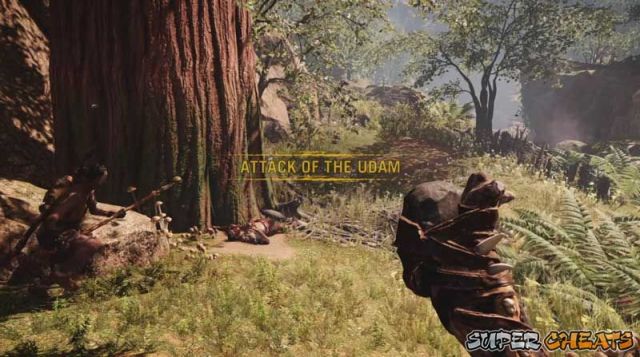
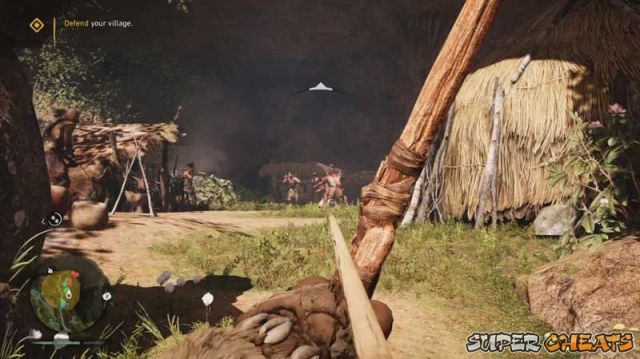
The first wave of Udam will come from the front gates. You can see the red icons of enemies on your mini map so head over there to defeat them.
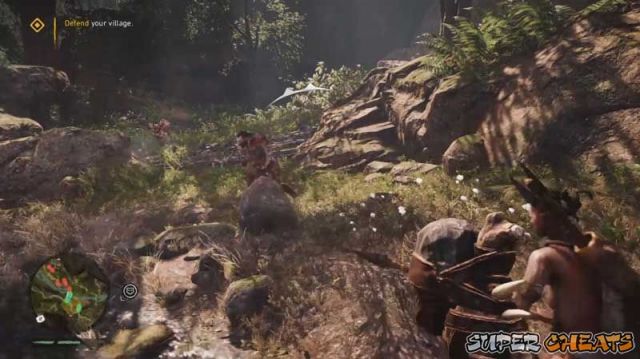
The next area that the Udam will be coming from is rather odd. They will be coming from inside a cave. So head over there to halt their advance.
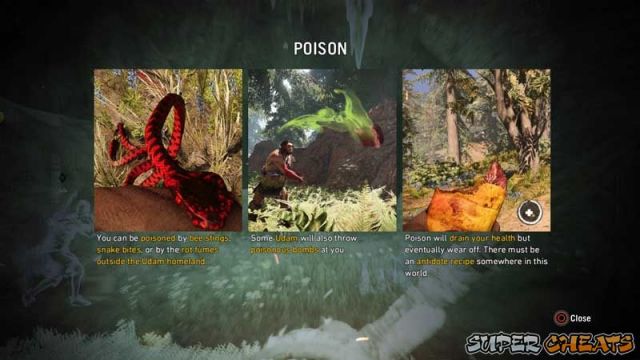
You will find some enemies that are coming from the cave will be new. These enemies lob poisonous bombs that afflict you with poison.
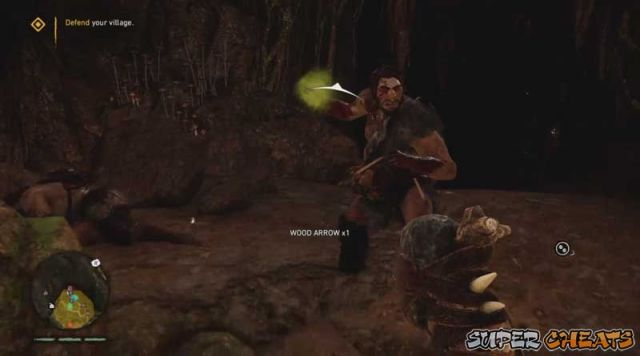
Poison works just as you might expect poison would work.
The next attacks will be c oming from both the front and the cave so work between them in a balanced way. You will have the other wenja fight so it wont rely all on you.
After this attack, speak with Sayla. She will say that it is time to attack the Udam.
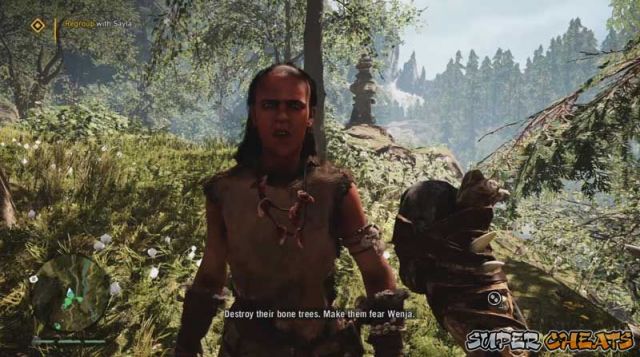
The camp she is referring to is rather Far. There will be a random amount of Udam along the way but there will always be a lot. Sometimes you can find them being battled by your own wenja tribesmen. You can choose to go straight to the camp or eliminate every Udam you find.
Upon reaching the camp, the objective changes to destroy their bone trees. These are highlighted in red in hunter vision.
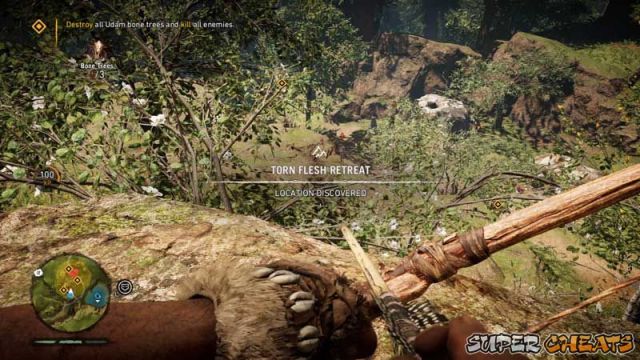
TIP: You can also choose to go stealthy as well. A single approach holds no advantage over the other. It all depends on how you wish to tackle things.
You can easily destroy the bone trees with fire. Simply ignite your weapon and set it on fire. Even your arrows can be set on fire and shot at the bone trees to destroy them from affar.
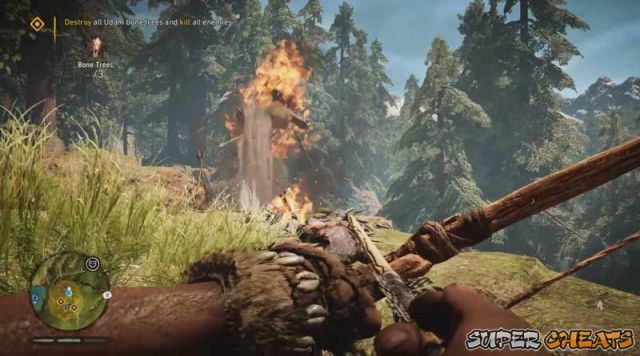
Destroy all three bone trees and the mission will complete.
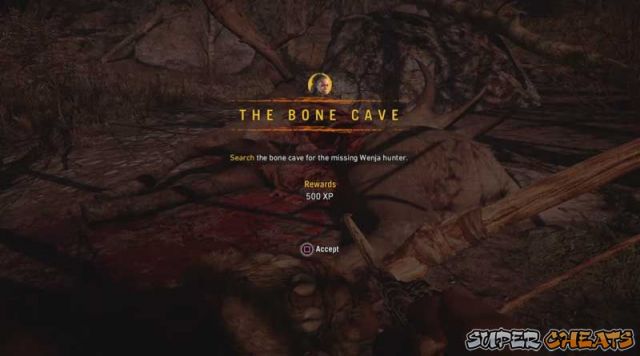
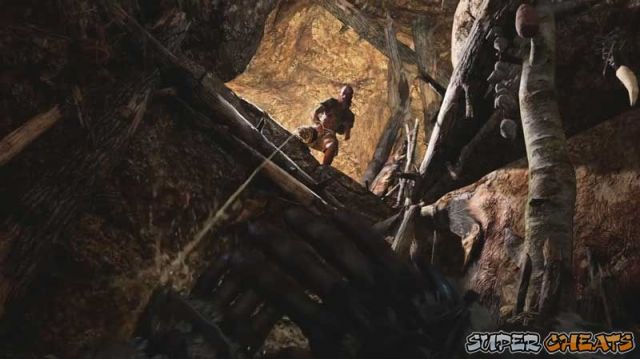
 The Bone Cave
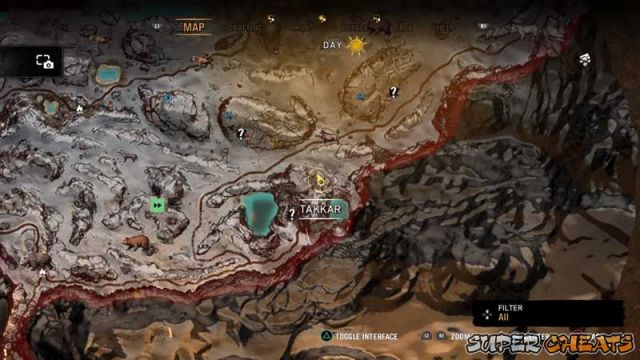
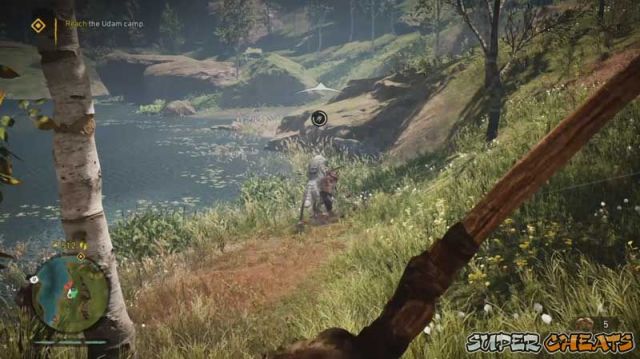
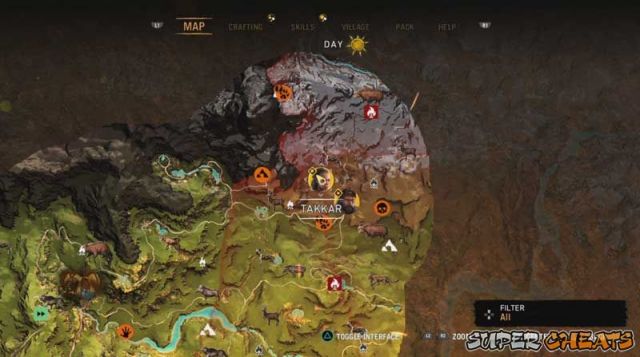
After accepting Sayla's request, head over to the map marker to the north east of your village.
Upon arriving there, the game will give you a choice to start the mission. Choose to accept.
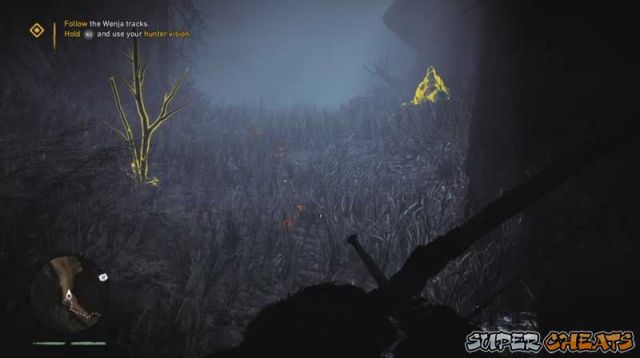
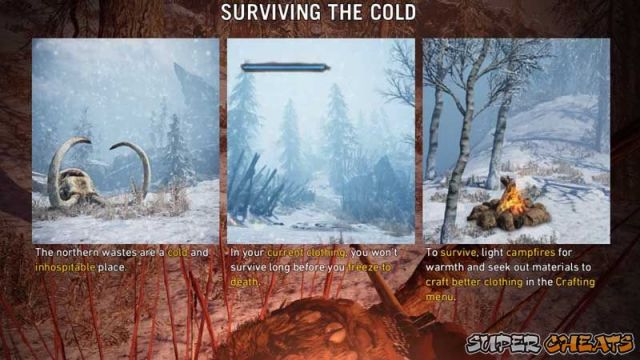
Enable your hunter vision and follow the tracks way into the cold northern area.
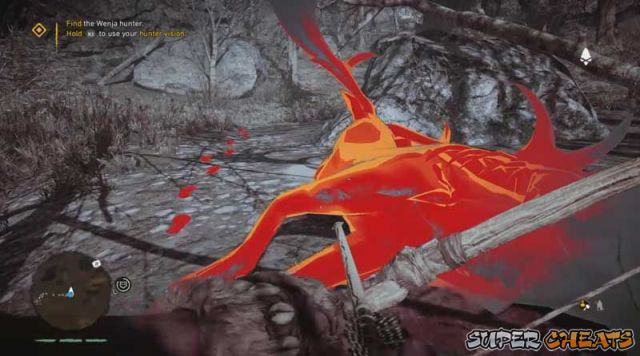
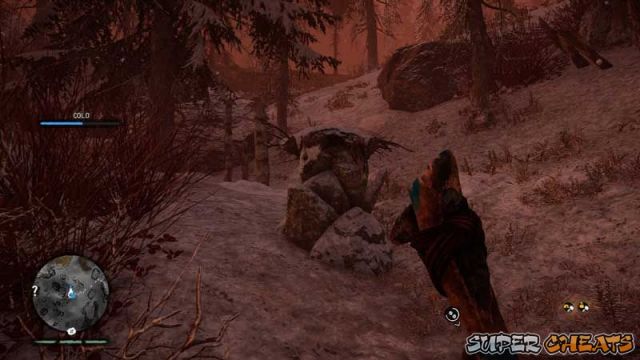
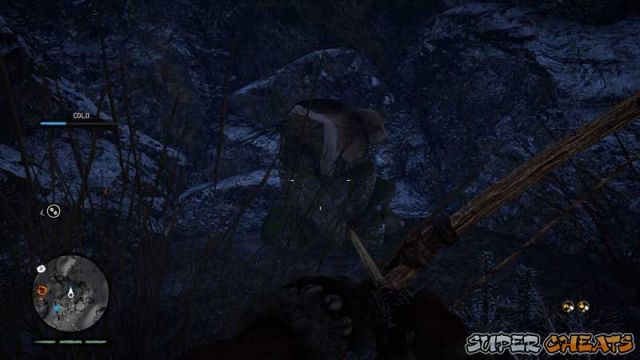
You will notice a "cold" bar appear on your screen. This means you can only stay so long in the cold areas before you freeze to death.
Keep following the trail and you will find a cave which the hunter has entered.
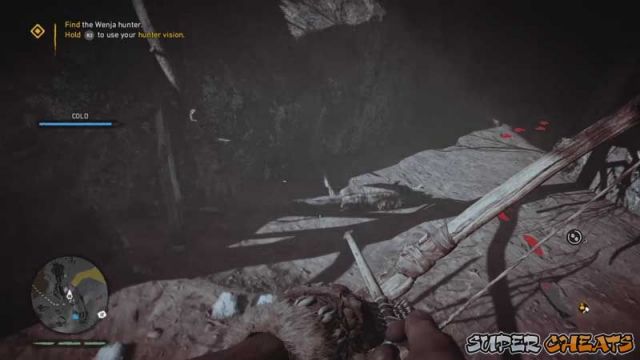
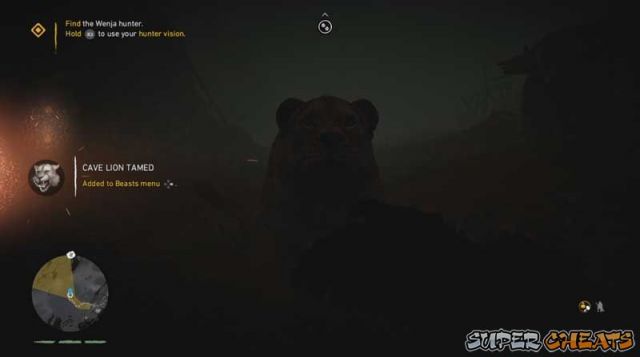
Head into the cave and be advised that there are two cave lions in here.

It is highly likely that you haven't come across a cave lion to tame in the earlier areas of the game. So tame or kill them.
Continue following the tracks and you will find the injured wenja hunter.
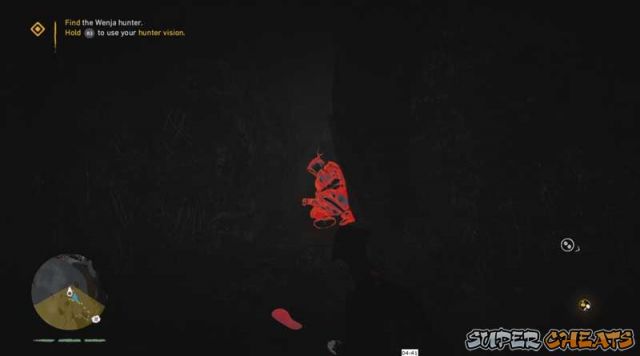
He will ask some healing supplies such as herbs from you. There are plenty scattered in this very cave so its not much of a problem.
He also warns you that there are more beasts in the cave. Two beasts. One of which is particularly interesting and will get you an awesome pet very early on. One is a cave lion. Dispatch it however you wish.
However... the second beast that is in this cave is a very nice sabertooth tiger. Getting one early on in the game is a very good option. Tame it immediately.
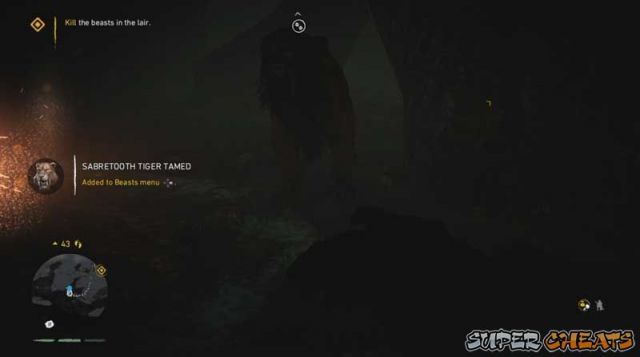
After handling the two beasts, give the supplies to the hunter and complete the Bone Cave mission.
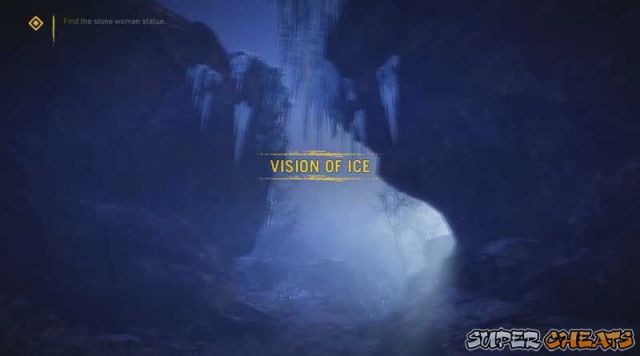
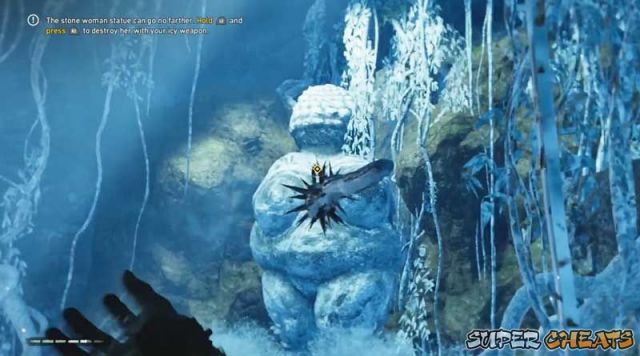
 Vision of Ice
Go to Tensay's hut to start the mission. He will have you drink another strange concoction. This time with Udam eyeballs.
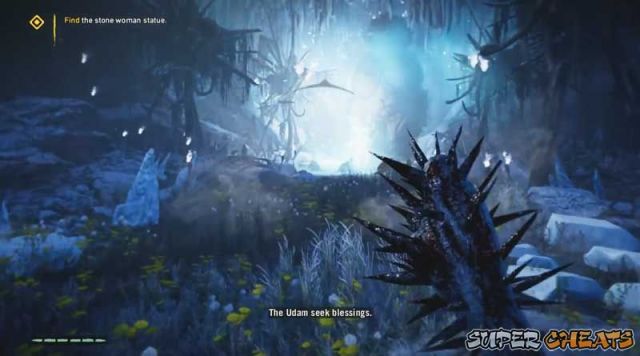
When you wake in the dream, you will find yourself in an Icy area. Find the stone woman statue just a few meters from where you started.
Behind the stone statue seems to be Ull. He tells you not to touch it. But you have to do so anyway.
Interact with the stone woman statue to trigger the next transition.

This next area will give you a very powerful spiked club. It is a linear path of foes to get to the cave entrance.
The path in the cave will be filled with enemies but they shouldn't be a problem with your six health bars and spiked club. Later, the stone statue will launch some attacks that can knock you back. These are very linear and can be avoided by staying on the side. Just keep moving forward till you reach the very end where a lot of enemies will swarm you. Fight them off. You can also throw your club at the enemies just like you would shoot an arrow (L2 to aim R2 to throw).
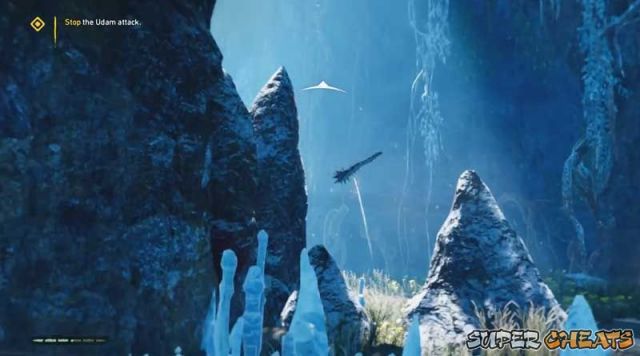
After all the enemies have been dealt with, throw your club at the stone woman statue to complete the vision.
Finishing this mission will unlock the Big Darwa fort that is very deep into the north eastern territory. Capturing this fort unlocks Dah. The Lost Wenja
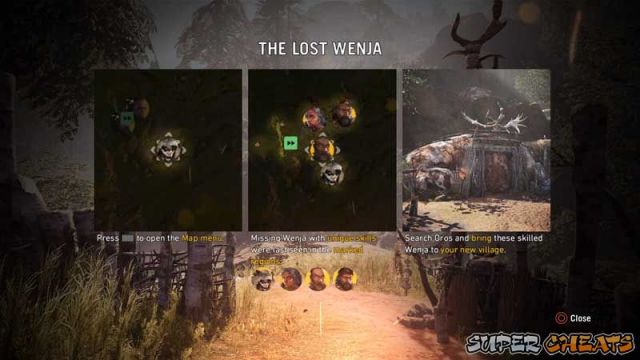
After the village attack you are then instructed to find the other Wenja with special Skills. These are Jayma, Wogah and Karoosh. Their missions act as one big mission to further improve your tribe and yourself by way of unlocking their skill trees. They can be done in ANY order.
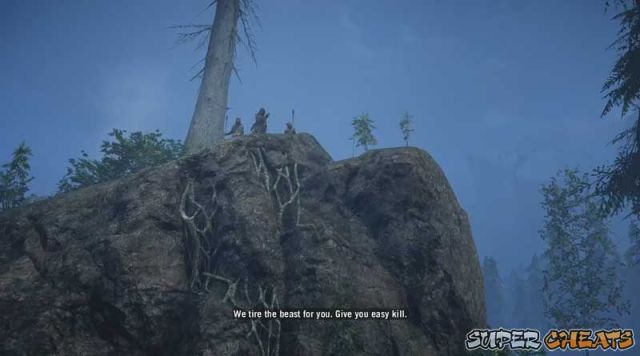
On The Hunt
Jayma the hunter is the closest to the camp in the direction of the south east.
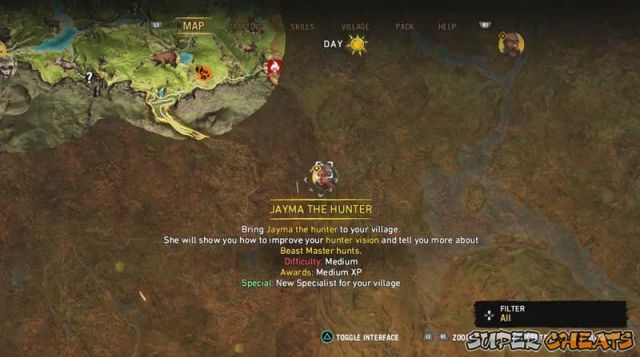
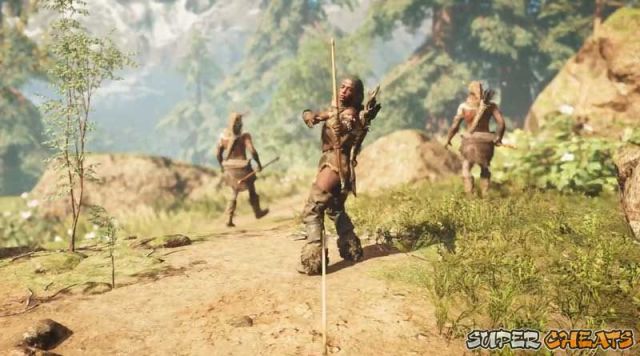
Head over to her to her map marker to meet her. She then claims you scared off the bear they were hunting for two days. You then tell them you can do way better. So now you are challenged to hunt the bear.
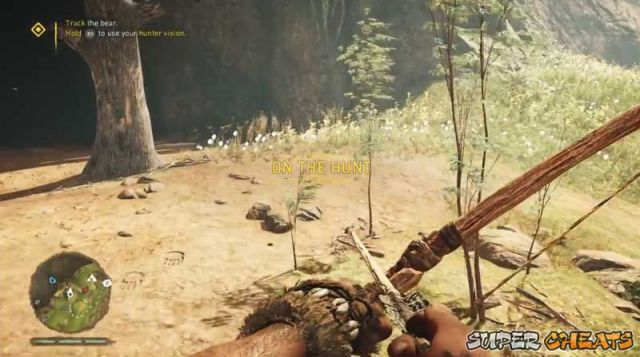
Enable your hunter vision to find the bear tracks. This part will take the most time in the mission. It may be easy or difficult depending on your luck with random encounters.
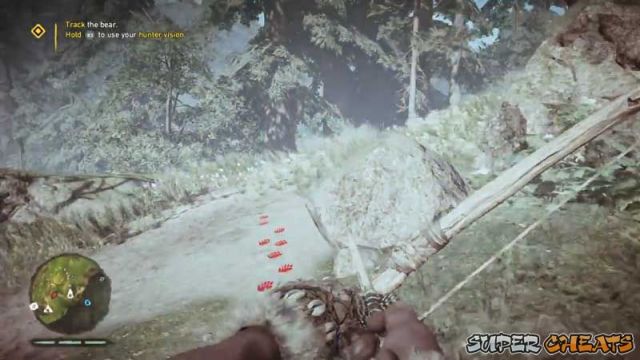
After the very linear tracking section, you will eventually find the area the bear is in. You may have run into this feature already if you just went exploring.
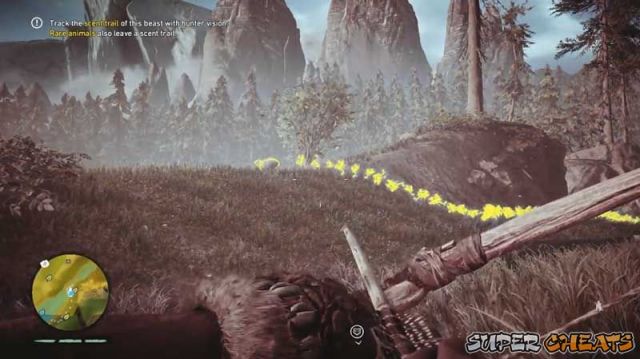
The game tells you to turn on your hunter vision and look for the scent of the bear. It is also stated that rare animals exhibit this trait as well, seeming like the ground they walk on is on fire.
After you find the bear, fight and kill it. The fight is relatively easy as long as you are good with your aim. Two spears to the head should end it pretty soon. Arrows to the head are good too but will take more time.
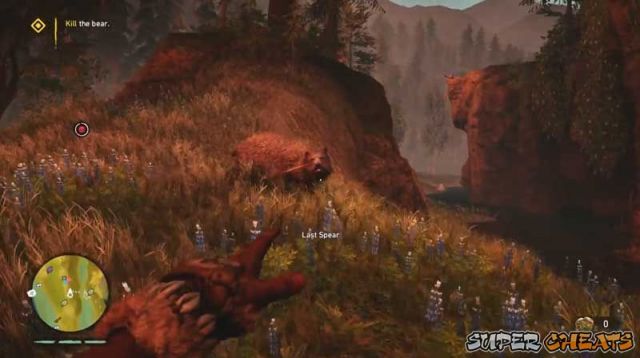
TIP: Another much simpler tactic is to just tame the bear. First, Go into your Beasts menu and dismiss whatever beast is with you so they don't attack the feeding bear. Toss some bait at the bear and tame it. The game will STILL tell you to kill the bear so simply eliminate him from the game by dismissing the bear you just captured. The mission will proceed normally.
When the bear goes down, skin it and head over to the next map location to meet up with Jayma.
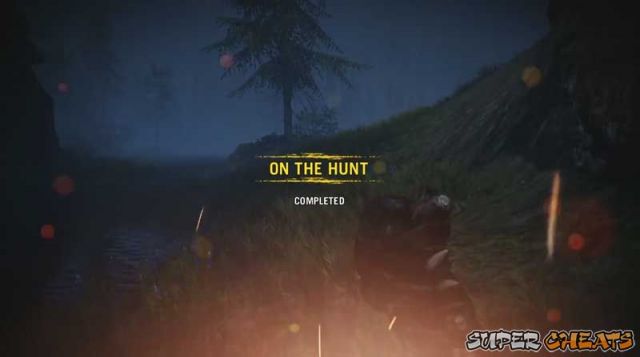
She will now join your tribe and teach you her Hunting skill tree and the On The Hunt mission is complete.
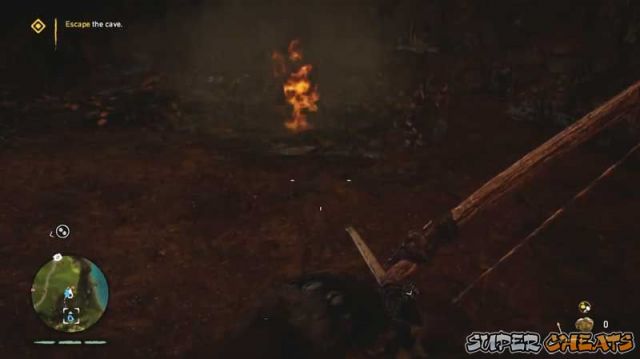
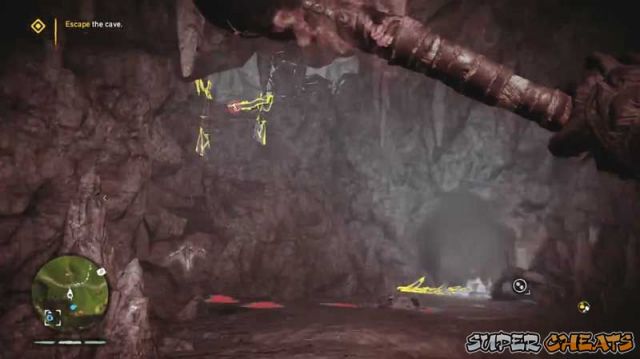
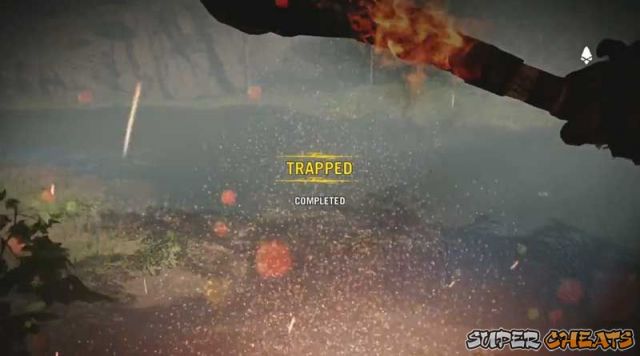
 Trapped
Head on over to Wogah's map marker to the east of the village.
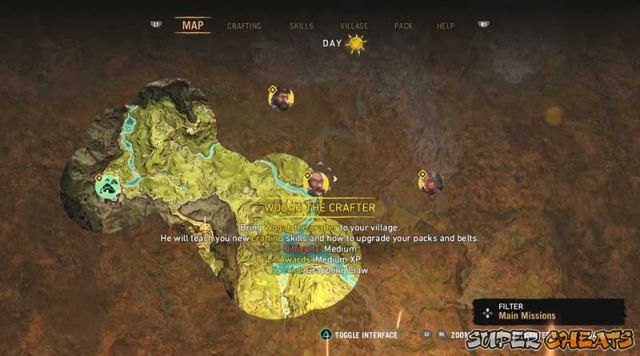
His dwelling will be located under the hill.
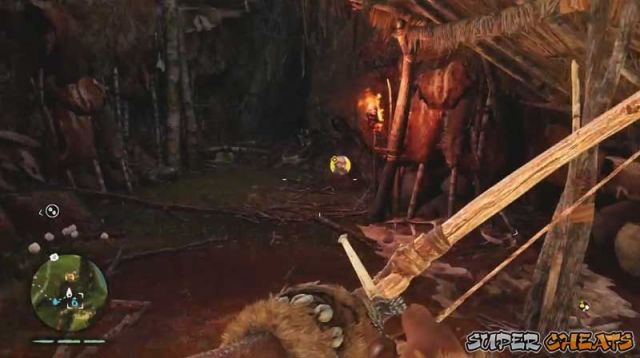
Approach the entrance to trigger a cutscene.
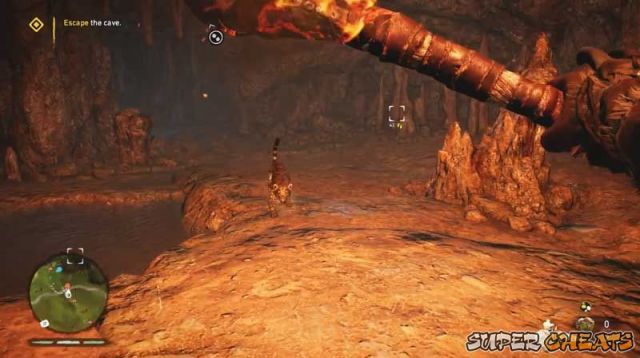
After Wogah mistakes you for an Udam and gives you a shower and insults you, your are now in the, quite literal mission named Trapped. First, set fire to any of your weapons by using animal fat. If you don't have animal fat, there are some scattered around this cave.
Light the pieces of wood and branches in the middle of the room. If you are having trouble finding it, enabling hunters vision will show it. After burning them, you can now jump down. You can jump into the water and climb out of it to avoid damage instead of landing on the ground and taking damage.
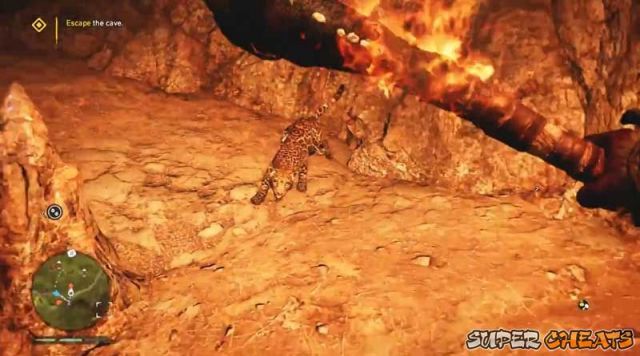
Be warned though, this area has a jaguar in it. They can be killed easily with fire though so light your melee weapons and keep waving / hitting the cat with it.
After dispatching of the jaguar, follow the trail to find a dead jaguar with the grappling hook lodged in it.

The grappling hook allows you to climb specific areas marked by the grappling hook icon.
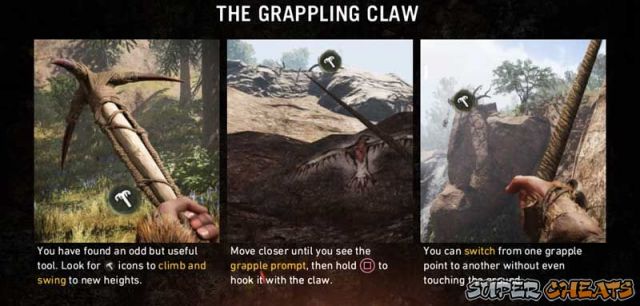
With the grappling hook, head back to the main area and look for the spot where you can grapple to. A trail can be seen if hunter vision is enabled.
Climb up to reach the next area.
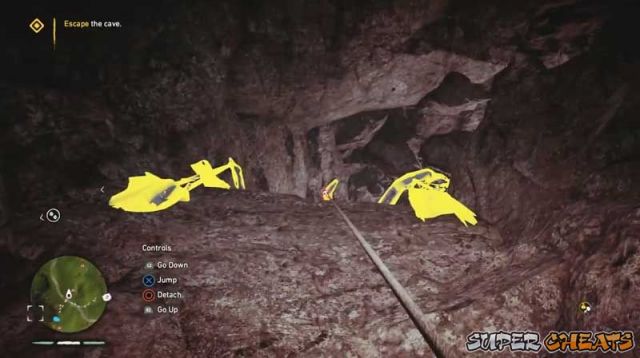
Keep moving forward until you will have to drop down into a pit with 3 jaguars.
Before attempting to go down, you should have a weapon that is lit with fire. You can do this upon landing but it is dangerous. After landing, go after the cats with your weapon. Dispose of them however you wish.
Find the next grappling point and climb to the exit where you will complete the mission and continue to Wogah's next mission which will actually make him join the tribe.
Izila Masks are masks the Izila have placed all around their territory to give them blessings. You don't "collect" it like the other collectibles. You destroy them by shooting them or even if you manage to hit it with melee. The tooltip says destroying these lowers the Izila morale. However this isn't the case and does nothing to the Izila you face.
You can find it on the map ONLY in Izila territory. It is an inverted triangle that seems like a face (of course. its a mask).
TIP: To find collectibles easier, go to the map, press D-Pad Up or D-Pad Down to open up the filter menu. Scroll down to highlight Collectibles to highlight only collectibles from all across the map.
IMPORTANT: Collecting / Destroying Izila Masks only gives some EXP and nothing else. The only achievement that is tied to collectibles is obtaining any combination of 80 collectibles. By following the Tips we have told you, you don't have to collect / destroy all the Izila Masks to get max level.
Trophies
There are numerous trophies waiting to be claimed in Far Cry Primal but fortunately, they are easy to obtain with some being simply a bit tedious. Not hard.
Listed below are the trophies you can get. They are placed in sections like trophies you can not miss to the other ones that require a bit of effort.
If there are special instructions to be included, it will be included.
Non-Missable trophies
These trophies are obtained just by playing through the story.
This Way To Oros - Silver
Survive the mammoth hunt.
Spearproof - Silver
Repel the Udam attack.
Liberator - Silver
Rescue a Wenja captive from the Izila.
- During the Tensay mission "The Taken Wenja", make sure to release the Wenja held captive in the camp.
Uncaged - Silver
Escape the Udam caverns.
Krati, Krati, Krati! - Gold
Steal the Izila Mask of Krati.
Deadeye - Bronze
Karoosh joins the Wenja village.
Spiritual Advisor - Bronze
Tensay joins the Wenja village.
Mister Fix-It - Bronze
Wogah joins the Wenja village.
Gray Huntress - Bronze
Jayma joins the Wenja village.
To Ash - Bronze
Complete the mission, The Fall of Batari.
Evolution in Action - Bronze
Complete the mission, The Hunt for Ull.
Conquest - Bronze
Capture all forts
- You get this naturally from taking Dah and Roshani by capturing the Big Darwa Fort and Fire Screamer Fort respectively.
Other easily obtained trophies
These trophies are semi-missable but are really easy to do that you just might get most or all of them just by playing the game.
Twelve Labors - Silver
Complete any 12 Specialist missions.
- Complete missions for Sayla, Tensay, Jayma, Karoosh, Wogah, Dah, or Roshani.
Here Kitty - Bronze
Tame the bloodfang sabretooth.
Big Teddy - Bronze
Tame the Great Scar Bear.
Endangered - Silver
Fight the bloodtusk mammoth.
Good Boy - Bronze
Tame the Snowblood Wolf.
Home Improvement - Bronze
Build or upgrade any 2 village huts.
Subdivisions - Bronze
Your Wenja tribe reaches a population of 20.
Tears Of Shame - Silver
Kill and skin 1 tamed beast.
- This is a bit tricky because sometimes the game wont recognize it. Find a tamable beast (Best if its not a badger since badgers can get back up once when dying. Making it take longer) Tame it and shoot arrows, or better yet, spears at its head. Kill it. When it is dying, do not heal it and let the timer run out. When it finally dies, skin the animal.
Killer's Belief - Bronze
Eliminate 25 enemies using any takedown.
And Stay Down - Bronze
Eliminate 100 enemies using a club.
Skewered - Bronze
Eliminate 100 enemies using a spear.
Sharpshooter - Bronze
Eliminate 100 enemies using a bow.
Outta My Way - Bronze
Eliminate 25 enemies while riding any beast.
- Obtain the Mammoth Rider or Beast Rider Skills and just find and kill enemies.
Armorer - Silver
Use the Crafting ability 100 times to craft weapons or arrows.
Skirmish - Bronze
Capture 10 Outposts.
Menagerie - Bronze
Tame 7 beasts.
Fancy Friend - Bronze
Tame 1 rare beast.
- You will most likely run into a rare beast during your first hours of the game. Provided you have unlocked and obtained the Beast Master Skills, you can tame these rare variations of the normal enemies. They have different design compared to their regular version and leave a "scent trail" when they move around and hunter vision is on.
Veterinarian - Bronze
Heal a tamed beast 25 times.
Mapmaker - Bronze
Discover 15 hidden locations.
- Just go towards 15 of the locations on the map that is marked "?"
Trophies that require much more effort.
Apex Predator - Platinum
Obtain all the Trophies.
- Self Explanatory
Real Estate Baron - Silver
Complete all hut upgrades.
- Just keep gathering ingredients and upgrading all the huts.
Inflammable - Bronze
Eliminate 50 enemies with fire.
David And Goliath - Bronze
Eliminate 10 enemies using a sling.
- This is a bit challenging because it is hard to properly kill someone with the sling. Best used on stationary targets and kill them with headshots.
Bad Trip - Bronze
Influence 25 enemies using poison.
BEES! - Bronze
Eliminate 10 enemies using sting bombs.
Quickdraw - Bronze
Eliminate 15 enemies using throwing shards.
Right On Target - Bronze
Kill a target 50 feet away or more using a spear.
- Spears have a horrible throwing trajectory. To help with this trophy, get higher ground from your enemy to add additional distance and to correct the arc less. You can also call your owl, aim at the ground that is almost under the target and set a waypoint (L1) This will put a mark on the spot. You can see the distance now and adjust distance accordingly.
Bullseye - Bronze
Kill a target 70 feet away or more using an arrow.
- Generally same as above but easier.
Gotcha - Bronze
Eliminate 10 enemies using hunting traps.
- Place traps and you can lead enemies by tossing stones to lure them towards traps. DONT accidentally throw stones onto the trap since it can trigger the traps.
Sic 'Em - Bronze
Eliminate 50 hostile targets using a tamed beast.
Feathered Friend - Bronze
Eliminate 15 enemies using your owl.
Expert Wenja - Silver
Learn all Skills.
- As long as you have followed our Tips in the Tips section, you will be getting as much XP as you need.
Kanda Of Faith - Bronze
Climb to the peak of Pardaku Lookout and leap off.
Expansion - Gold
Capture all Outposts.
Cave Hoarder - Bronze
Pickup 80 collectibles.
- This is the most time consuming of all the trophies. It has you gather a combination of 80 of any collectible (Spirit Totems, Daysha Hands, Wenja Bracelet, Cave Painting, Izila Masks) If you will begin tackling this trophy, go to the map and switch the filter for Collectibles.
Good Neighbor - Bronze
Complete 15 "Help Wenja" quests.
- Those orange icons on the map where Wenja all around need help with stuff.
Crush Your Enemies - Bronze
Complete 10 "Tribal Clash" quests.
- The orange icons with a skull on it.
Master Tracker - Bronze
Complete 5 "Beast Kill" quests.
- Orange icons with a bear claw on it.
Mark 4 Wenja - Bronze
Discover the future past
- This requires you to view an Easter Egg. Head to the designated area and enter the cave.
You just need to see the easter egg to get the trophy. The cave doesn't have anything special else in it.
Easter Eggs
Far Cry Primal has a handful of easter eggs that can be found in Oros. These range from nods to shows, other games, or even their own company. Here are a few we found. Maybe you can find even more!
Flintstones vehicle - Flintstones series
To the southeast of the map, there is a small body of water with a vehicle that looks like vehicles from the Flintstones.
Blood Dragon - Far Cry Blood Dragon
Head toward the location on the map to find a cave. Inside, you can peek at the skeletal remains of a Blood Dragon from another Ubisoft game of the same name. Too bad you can't tame a live one.
Assassin's Creed leap of faith - Assassin's Creed franchise
During the Fly like a bird mission, Urki performs the Leap of Faith from the Assassin's Creed franchise. It even has a haystack underneath to cushion his landing.
Assassin's Creed logo - Assassin's Creed franchise
to the south of the map, Just near where you start the Snowblood Wolf beast hunt, the Assassin's logo can be seen on the ground. There even is a neat haystack and an Izila who failed the landing. The only weird thing is... where did he jump from??
Stonehenge
The Blajima stones closely resembles the Stonehenge in real life. In game, they were used for "sacrifices". This by no means that the Stonehenge was used for the same purpose.... or could it?
Ubisoft logo
Ubisoft places another mark on their game in the form of an easter egg. The sun in the Cave Painting is the Ubisoft logo.
Karoosh - Big Boss (Metal Gear Series)
Karoosh closely resembles Big Boss. The damaged eye, The bandana, The hairdo. Him being an excellent warrior.
Prologue
When the controls are handed over to you, press Circle to crouch and follow Dalso. Follow him until you find a small mammoth. Your other tribesmen will separate the small mammoth from its herd with fire. You have to now chase the mammoth down and kill it.
Just keep running around the small mammoth and do not let it charge at you. If it does damage you, hold Triangle to heal up. There are also spears sticking out of the ground that your tribesmen placed. Just run into these to restock on spears. You can stab the mammoth by going near it and pressing R2, or throwing it by holding L2 then Pressing R2 to throw. Throwing does more damage but you lose the spear. Regain it by walking over to the scattered spears around the site, or walking over to the spear you just threw. If it missed, you can pick it up. If it is stuck in the mammoths body, then you can't get it without it hurting you.
Continue the onslaught and secure your kill.
Path to Oros
After just barely surviving the Tiger attack by falling down a steep mountainside, you must now craft a bow from the available materials around. They are visible if you know what you are looking for and they even "shine" a bit to indicate that you are able to interact with them. You can gather them in any order.
TIP: If you are getting tired or even dizzy from the gathering animation where Takkar goes down and actually gathers the plant, or just want to save time, Turn off the "Search Animation" by going into Options > Gameplay > Search Animations
You can gather Reeds from the plants that look like they have hotdogs stuck on them.
Slate can be obtained from certain rock formations
And last but no means least, Alder. This particular resource is important as you need this to craft arrows for your bow. You'd want a lot of this resource so you wont always chase after your arrows to reclaim them. They are tall noticeable upright twigs. More like dried up shrubs or small trees.
You can also, as the help text says, use Hunter Vision to see things more easily for a limited time. This can be turned on or off and doesn't cost anything to trigger.
After gathering the required items and Crafting your bow, the next thing you will need is to hunt some goats for meat to heal yourself. These targets can be seen running around the place and eating grass.
You can hunt them two ways. Shoot them anywhere on their body to make them bleed out. Follow their blood trail (you can use Hunter Vision to see the targets AND their blood clearly) till they finally die,
or you can just go up and aim a nice good headshot to instantly kill them. Doing a headshot also gives more experience points.
TIP: It is advisable to gather as much as you can from this starting area since it is VERY abundant and the resources respawn rather quickly. The Alder resource or Hardwood resource you gain from harvesting Alder is important, as previously mentioned, for arrows. Meat from goat will help a lot too for your survivability.
When you are done, proceed to the cave and light the campfire. You will then be able to craft a club and set it on fire to clear the blocking vines.
TIP:You can hold the torch forward and attempt to burn things by pressing and holding R2. However, be VERY careful with flames as they spread fast and can burn you if not careful.
Continue inside the very linear cave. There is no need to use the Hunter Vision to see the tracks since the cave is very straightforward. But do so if you want to. At the end of the path, you will find the tiger that just attacked you and another Wenja.
After the cutscene, you will find yourself in the land of Oros.
After a few words with Sayla, you follow her into her small camp. Here you will see that she was injured by the tiger attack.
Deep Wounds
This mission is really short. The objective is just to collect medicinal herbs to treat Sayla's wound. Go to the river and using your Hunter Vision, you will see special plants that glow red (just because its a quest marked object) regularly, these don't glow red.
Collect the required amount and bring them back to Sayla to patch her up. Mission completed.
After the cutscene
Vision of Beasts
Head up to Tensay's cave to the north east of your camp, near a brown bear icon. Enter the cave to find Tensay just doing his thing. He tells you that he was calling for a strong spirit and Takkar showed up and now believes Takkar is chosen. He then adds his another ingredient to his mixture. He guts a rat and pours its blood into it then later adds your blood. He then makes you drink this wonderful brew.
Drinking the concoction induces a trippy vision. A vision of beasts to be exact.
This section is really easy since you are simply tasked to follow the Guide which is the owl. The controls are default flight controls so remember that when moving around. You don't get penalized anyway if you "die" in this vision. Just a minor setback.
The visuals in this part of the game are rather nice. Don't forget to enjoy while taking this short stroll. Upon reaching the end, you will get to tame the owl and it will accept you as Beast Master.
Beast Master
After having the Vision of Beasts, it is now time for you to put it to actual use. The game will tell you how to do so. After exiting the cave, the game will prompt you to use your owl to scout for the wolf hunters. They wont show up unless you use the owl so in this section, it is required.
Press D-pad Up to call your owl and control it as it searches.
Let the owl head over just a few meters ahead of the cave you just came out of and you will see the camp they have set up.
Kill the hunters to make some progress
When you have killed them all, you will now track the white wolf. Turn on your Hunter Vision to see the tracks left by the wolf. Simply follow the tracks to their end.
If you haven't already, craft some bait from meat to use for taming.
Head on over to the white wolf. It is possible that he is being bothered by some goats running around. Don't approach him when he is facing you or just hide behind some obstacles to remain out of sight.
Using the bait you have created, toss it over to him. Quietly head on over to the preoccupied beast by remaining crouched.
When you are within range, the tame option will be available by pressing Square. Just keep holding square till the beast is tamed.
You can also check the available beasts that you have tamed by going into the Beast menu (D-pad Right)
Now to use your beast in battle. The game will have you hunt down two Udam relatively close to your location. Command your beast to attack by pressing R1 while looking at an enemy.
You may approach this however you wish but its advisable to have your beast go after one target while you go after another. Like a synced attack.
When you have slain them, the mission will now complete and you can now tame other animals. Better animals can be tamed after you learn the prerequisite skill.
Upgrade your village
After learning the ropes on your beasts, head over to Sayla and speak to her about improving your village. This section will simply have you create huts for Sayla, Tensay, & yourself.
Note:If you haven't been collecting resources up to this point, then you will have to go gather some before you can continue. If you are going to gather, take note at how much resources Sayla, Tensay, & your (Takkar's cave) costs to upgrade to go and upgrade them in one go.
First to build is Sayla's hut. It costs:
4 Alder wood
3 Slate
2 Reeds
2 Deer Skin
Next is Tensay's hut. It costs:
2 Alder wood
2 Slate
2 Reeds
2 Wolf skin
Last but by no means least, Takkar's cave. It costs:
4 Alder wood
3 Slate
2 Reeds
4 Goat skin
After upgrading these, speak with Sayla. She will be in a deeper section of Takkar's cave. She will give you a club that you will use to beat more Udam up with. After the scene, it will automatically transition to the next day. Attack of the Udam
The day after you get your village up running, as you casually walk out of your cave, you are greeted by a conveniently placed melee tutorial.
This indicates that you will probably be doing a lot of that in a while. As you head out, you are greeted with a scene of the Udam entering your village. You also get to meet their leader, Ull.
Shortly after him greeting you, the mission finally starts.
The first wave of Udam will come from the front gates. You can see the red icons of enemies on your mini map so head over there to defeat them.
The next area that the Udam will be coming from is rather odd. They will be coming from inside a cave. So head over there to halt their advance.
You will find some enemies that are coming from the cave will be new. These enemies lob poisonous bombs that afflict you with poison.
Poison works just as you might expect poison would work.
The next attacks will be c oming from both the front and the cave so work between them in a balanced way. You will have the other wenja fight so it wont rely all on you.
After this attack, speak with Sayla. She will say that it is time to attack the Udam.
The camp she is referring to is rather Far. There will be a random amount of Udam along the way but there will always be a lot. Sometimes you can find them being battled by your own wenja tribesmen. You can choose to go straight to the camp or eliminate every Udam you find.
Upon reaching the camp, the objective changes to destroy their bone trees. These are highlighted in red in hunter vision.
TIP: You can also choose to go stealthy as well. A single approach holds no advantage over the other. It all depends on how you wish to tackle things.
You can easily destroy the bone trees with fire. Simply ignite your weapon and set it on fire. Even your arrows can be set on fire and shot at the bone trees to destroy them from affar.
Destroy all three bone trees and the mission will complete.
The Bone Cave After accepting Sayla's request, head over to the map marker to the north east of your village.
Upon arriving there, the game will give you a choice to start the mission. Choose to accept.
Enable your hunter vision and follow the tracks way into the cold northern area.
You will notice a "cold" bar appear on your screen. This means you can only stay so long in the cold areas before you freeze to death.
Keep following the trail and you will find a cave which the hunter has entered.
Head into the cave and be advised that there are two cave lions in here.
It is highly likely that you haven't come across a cave lion to tame in the earlier areas of the game. So tame or kill them.
Continue following the tracks and you will find the injured wenja hunter.
He will ask some healing supplies such as herbs from you. There are plenty scattered in this very cave so its not much of a problem.
He also warns you that there are more beasts in the cave. Two beasts. One of which is particularly interesting and will get you an awesome pet very early on. One is a cave lion. Dispatch it however you wish.
However... the second beast that is in this cave is a very nice sabertooth tiger. Getting one early on in the game is a very good option. Tame it immediately.
After handling the two beasts, give the supplies to the hunter and complete the Bone Cave mission.
Vision of Ice Go to Tensay's hut to start the mission. He will have you drink another strange concoction. This time with Udam eyeballs.
When you wake in the dream, you will find yourself in an Icy area. Find the stone woman statue just a few meters from where you started.
Behind the stone statue seems to be Ull. He tells you not to touch it. But you have to do so anyway.
Interact with the stone woman statue to trigger the next transition.
This next area will give you a very powerful spiked club. It is a linear path of foes to get to the cave entrance.
The path in the cave will be filled with enemies but they shouldn't be a problem with your six health bars and spiked club. Later, the stone statue will launch some attacks that can knock you back. These are very linear and can be avoided by staying on the side. Just keep moving forward till you reach the very end where a lot of enemies will swarm you. Fight them off. You can also throw your club at the enemies just like you would shoot an arrow (L2 to aim R2 to throw).
After all the enemies have been dealt with, throw your club at the stone woman statue to complete the vision.
Finishing this mission will unlock the Big Darwa fort that is very deep into the north eastern territory. Capturing this fort unlocks Dah. The Lost Wenja
After the village attack you are then instructed to find the other Wenja with special Skills. These are Jayma, Wogah and Karoosh. Their missions act as one big mission to further improve your tribe and yourself by way of unlocking their skill trees. They can be done in ANY order.
On The Hunt
Jayma the hunter is the closest to the camp in the direction of the south east.
Head over to her to her map marker to meet her. She then claims you scared off the bear they were hunting for two days. You then tell them you can do way better. So now you are challenged to hunt the bear.
Enable your hunter vision to find the bear tracks. This part will take the most time in the mission. It may be easy or difficult depending on your luck with random encounters.
After the very linear tracking section, you will eventually find the area the bear is in. You may have run into this feature already if you just went exploring.
The game tells you to turn on your hunter vision and look for the scent of the bear. It is also stated that rare animals exhibit this trait as well, seeming like the ground they walk on is on fire.
After you find the bear, fight and kill it. The fight is relatively easy as long as you are good with your aim. Two spears to the head should end it pretty soon. Arrows to the head are good too but will take more time.
TIP: Another much simpler tactic is to just tame the bear. First, Go into your Beasts menu and dismiss whatever beast is with you so they don't attack the feeding bear. Toss some bait at the bear and tame it. The game will STILL tell you to kill the bear so simply eliminate him from the game by dismissing the bear you just captured. The mission will proceed normally.
When the bear goes down, skin it and head over to the next map location to meet up with Jayma.
She will now join your tribe and teach you her Hunting skill tree and the On The Hunt mission is complete.
Trapped Head on over to Wogah's map marker to the east of the village.
His dwelling will be located under the hill.
Approach the entrance to trigger a cutscene.
After Wogah mistakes you for an Udam and gives you a shower and insults you, your are now in the, quite literal mission named Trapped. First, set fire to any of your weapons by using animal fat. If you don't have animal fat, there are some scattered around this cave.
Light the pieces of wood and branches in the middle of the room. If you are having trouble finding it, enabling hunters vision will show it. After burning them, you can now jump down. You can jump into the water and climb out of it to avoid damage instead of landing on the ground and taking damage.
Be warned though, this area has a jaguar in it. They can be killed easily with fire though so light your melee weapons and keep waving / hitting the cat with it.
After dispatching of the jaguar, follow the trail to find a dead jaguar with the grappling hook lodged in it.
The grappling hook allows you to climb specific areas marked by the grappling hook icon.
With the grappling hook, head back to the main area and look for the spot where you can grapple to. A trail can be seen if hunter vision is enabled.
Climb up to reach the next area.
Keep moving forward until you will have to drop down into a pit with 3 jaguars.
Before attempting to go down, you should have a weapon that is lit with fire. You can do this upon landing but it is dangerous. After landing, go after the cats with your weapon. Dispose of them however you wish.
Find the next grappling point and climb to the exit where you will complete the mission and continue to Wogah's next mission which will actually make him join the tribe.
Blood of Oros
After exiting the cave, head on over back to Wogah's dwelling. You will find him with a surprised look.

He will then request some Blood of Oros which looks like obsidian. The mission will start and you will have to go to a nearby camp. This camp has two Udam guarding it.
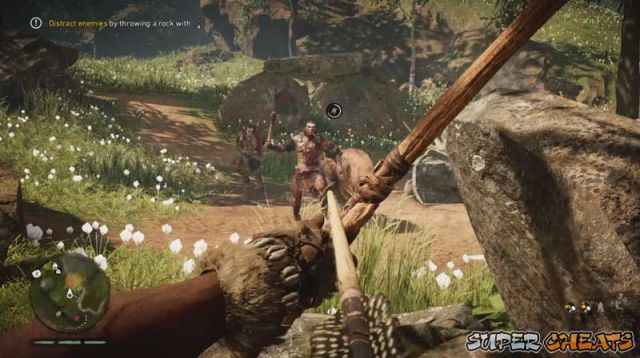
After disposing the Udam, burn on the vines blocking the stones around the camp. "Investigate" or look into them to find a big sparkle. Hinting the location of the Blood of Oros, which is rather Far away.
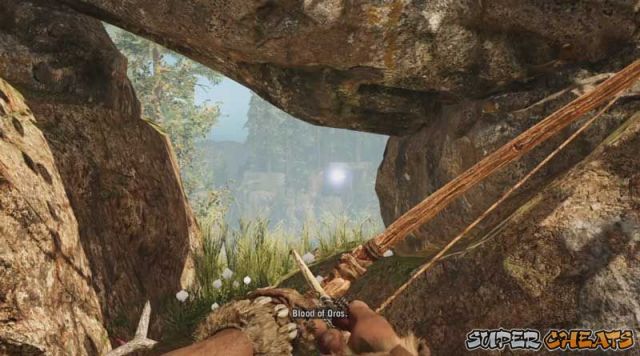
Heading to the location you will find a some Udam mining the stones. Eliminate them all to mine in peace.

When the coast is clear, go ahead and mine all the Blood of Oros you need.
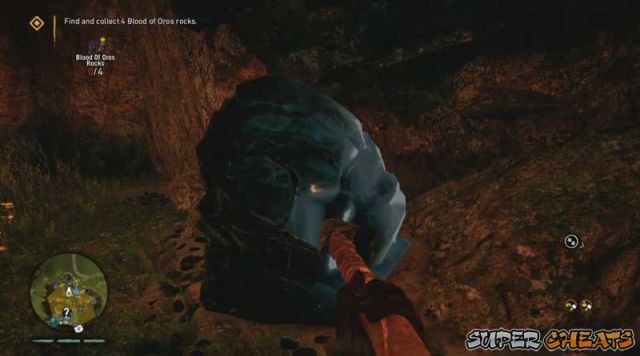
Mining all the required Blood of Oros will automatically complete the mission and add Wogah to your tribe.
After exiting the cave, head on over back to Wogah's dwelling. You will find him with a surprised look.
He will then request some Blood of Oros which looks like obsidian. The mission will start and you will have to go to a nearby camp. This camp has two Udam guarding it.
After disposing the Udam, burn on the vines blocking the stones around the camp. "Investigate" or look into them to find a big sparkle. Hinting the location of the Blood of Oros, which is rather Far away.
Heading to the location you will find a some Udam mining the stones. Eliminate them all to mine in peace.
When the coast is clear, go ahead and mine all the Blood of Oros you need.
Mining all the required Blood of Oros will automatically complete the mission and add Wogah to your tribe.
Brother in Need
Head over to Karoosh's map marker to the north east of your village.
Upon arriving at the marker, you will find an injured wenja warrior. He tells us the Udam are fighting against a lone warrior and asks if you can help him.
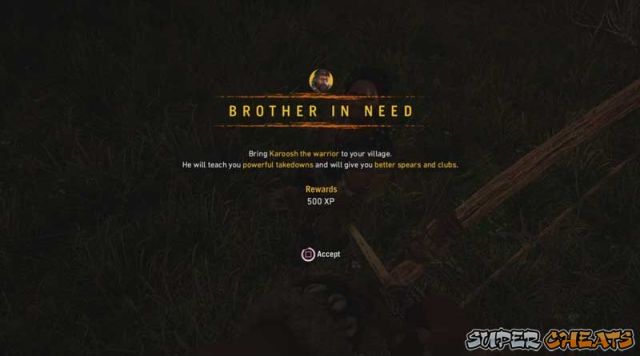
Head over to the marked area to find Karoosh taking on some Udam.
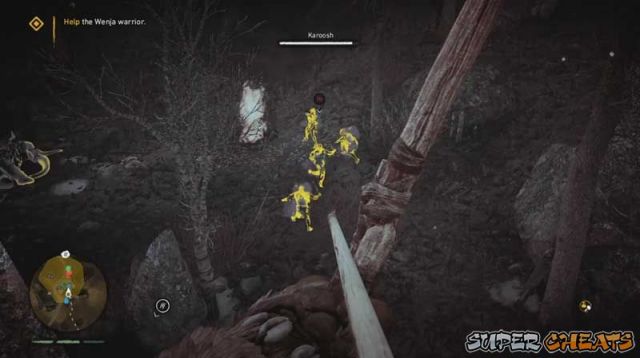
Help him kill them and you will get to meet Karoosh and he then talks about himself and an Udam warrior who killed his son. He asks that you help him do this.
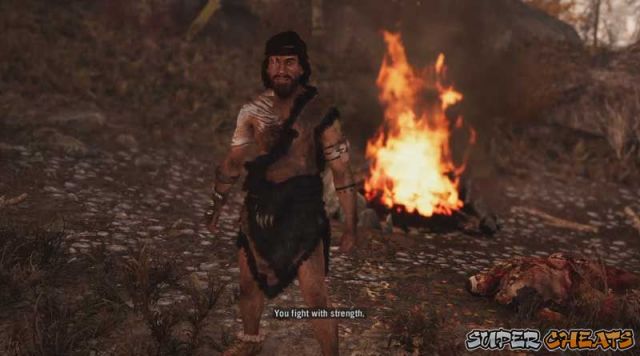
Now you must pick up Udam bodies and throw them into the fire in the middle of the area. Do this by Holding R3 over an opponent's dead body and press the same button to toss them into the fire.
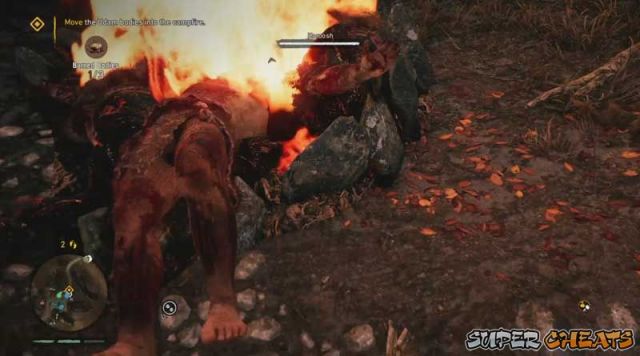
After tossing in three bodies, simply kill all the remaining Udam.
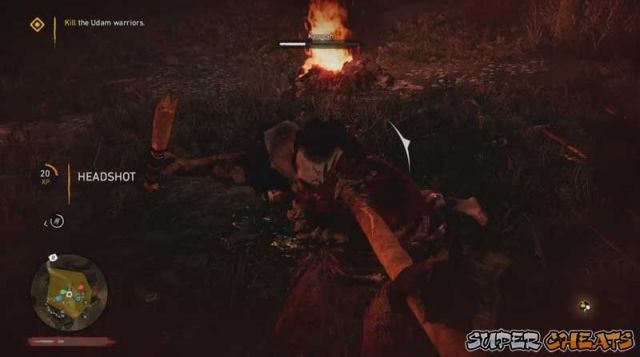
Survive and eliminate all the Udam attackers to have Karoosh join your village and complete the mission.

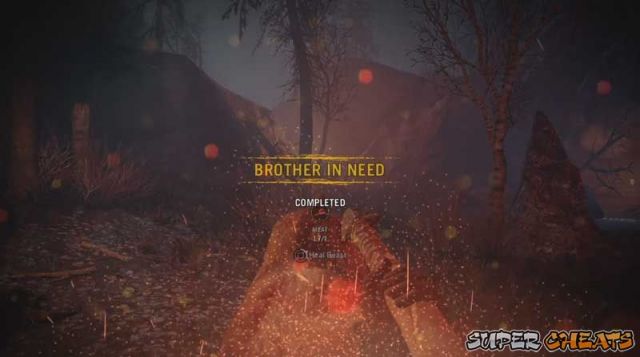
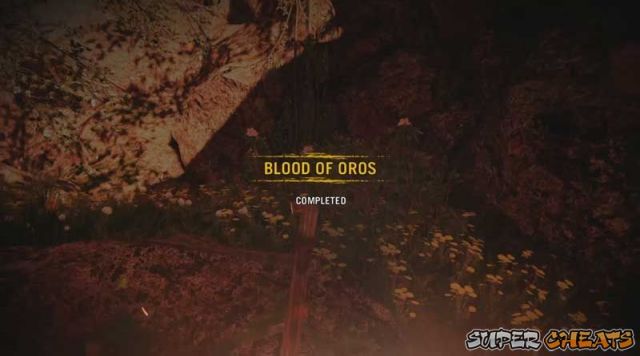 Peak of Oros - Wogah Mission - Unlocks Rare Feathers (Can obtain Rare Feathers randomly when plucking normal feathers from animals)
Head over to Wogah's map marker to start the Peak of Oros mission. It is close to the village, a little bit north northeast.
Upon arriving, you will see one of the awesome spots in Oros, Eagle Cry Peak. It has a small body of water, a small waterfall, and a sick diving spot at the top. Make your way up the cliff-side. The path is linear so there is no worry of getting lost.
Your first real obstacle is a grappling point that has you swinging across a chasm and landing on the Far side.
Going along the path climbing and swinging with your grappling hook, you will find your first nest with the rare feathers. However an eagle is guarding it.
You may choose to get rid of the eagle now because it may attack you randomly.
You can attempt to shoot it down with an arrow while it is flying which is harder. Or you can wait for it to attack since it beelines for you when it attacks, leaving it open to your shot.
Whether you decide to kill it or ignore it, pick up the rare feathers from the nest.
Continue up the cliff and you will find the hardest part of this mission. The part where you swing from root to root without landing. You'll get the hang of this soon. Just make your swings wider to get you more altitude and giving you more time to attach the grappling hook to the next root.
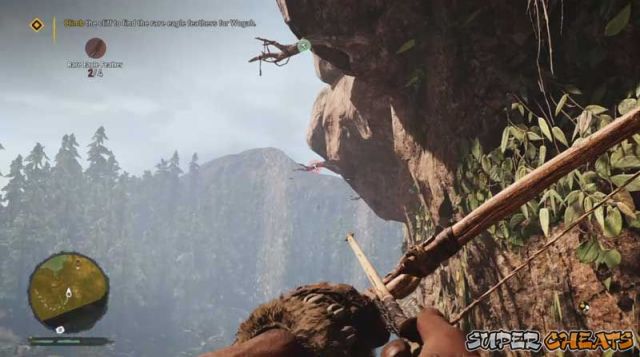
When you climb up to the peak, there will be another eagle. Turn him into BBQ if you want to by setting your arrow on fire and shooting him which will also cook him. To make it even more ridiculous, use a flaming spear.
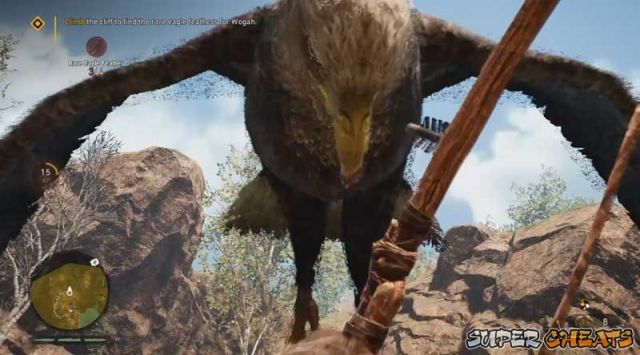
Go and grab the last feather and you will be prompted to take a dive below.
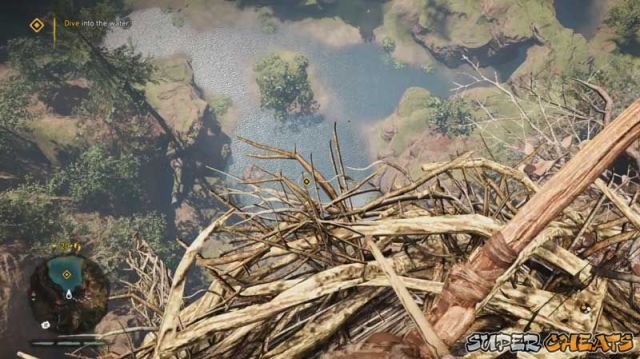
Go and take a dive into the water below.
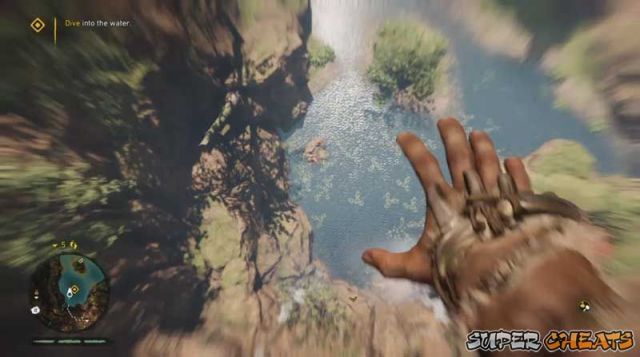
The mission is completed and you now have the chance to get rare feathers among other feathers you pluck.
 The Tall Elk
Head over to Jayma's map marker to begin the mission.
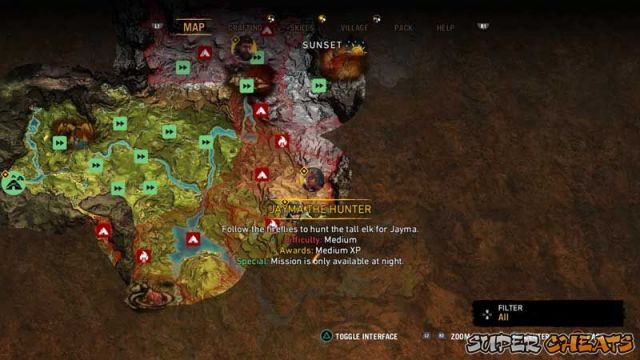
Upon arrival, head over to the elk dung to accept the mission.
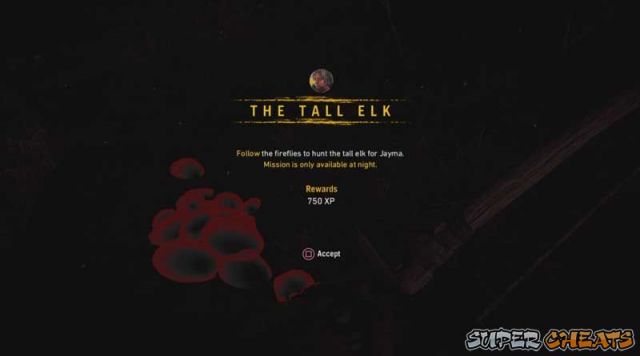
You will have to follow the fireflies to find the tall elk.
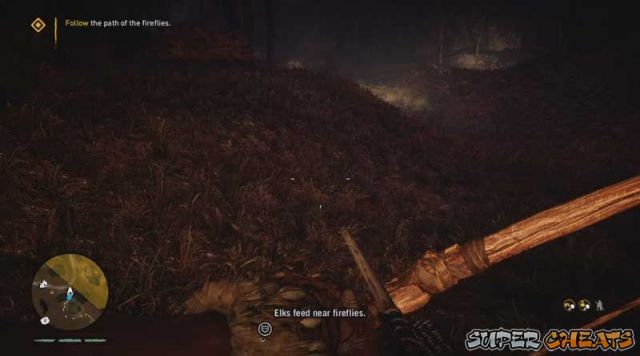
To have an easier time, you may turn on hunter vision to easily see the elk tracks. This mission will pretty much end up like most of the tracking missions.
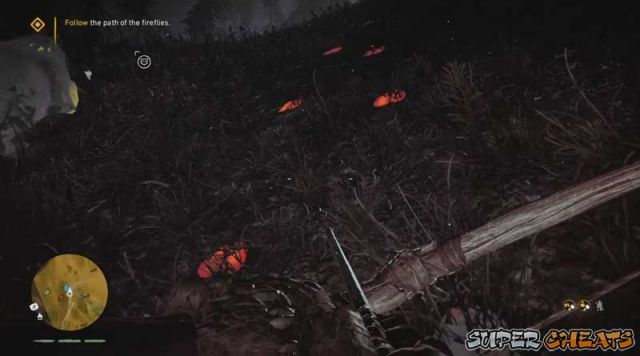
You will eventually reach a basin. Go down into the basin.
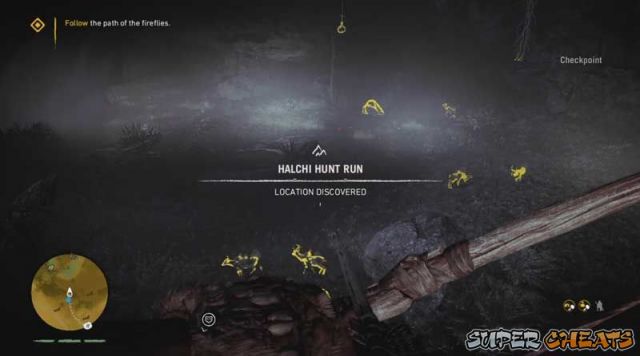
Sit tight and wait for the tall elk to show up.
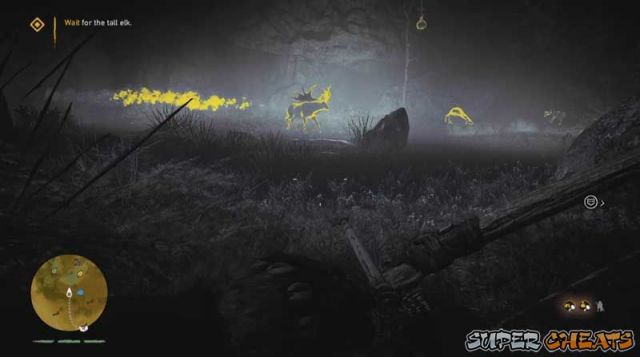
Just as you approach the elk, some udam will want to hunt it for themselves. Kill the tall elk and skin it before the udam do.
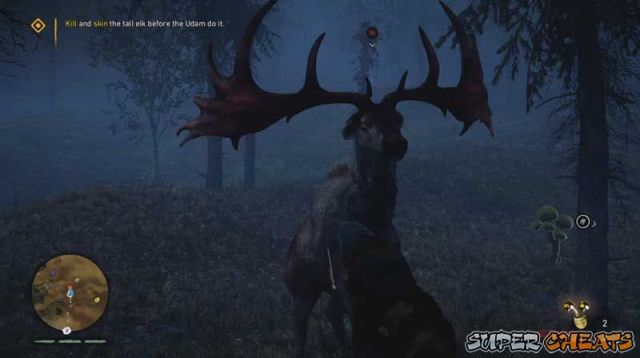
Skin the tall elk to complete the mission. If you have a Uplay account signed in, you should obtain a bonus that will award you with points.
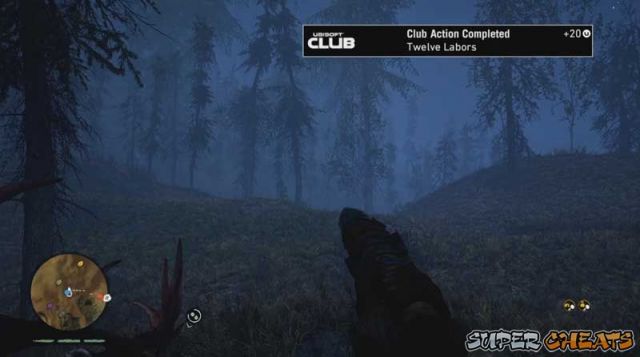
Head over to Karoosh's map marker to the north east of your village.
Upon arriving at the marker, you will find an injured wenja warrior. He tells us the Udam are fighting against a lone warrior and asks if you can help him.
Head over to the marked area to find Karoosh taking on some Udam.
Help him kill them and you will get to meet Karoosh and he then talks about himself and an Udam warrior who killed his son. He asks that you help him do this.
Now you must pick up Udam bodies and throw them into the fire in the middle of the area. Do this by Holding R3 over an opponent's dead body and press the same button to toss them into the fire.
After tossing in three bodies, simply kill all the remaining Udam.
Survive and eliminate all the Udam attackers to have Karoosh join your village and complete the mission.
Peak of Oros
Head over to Wogah's map marker to start the Peak of Oros mission. It is close to the village, a little bit north northeast.
Upon arriving, you will see one of the awesome spots in Oros, Eagle Cry Peak. It has a small body of water, a small waterfall, and a sick diving spot at the top. Make your way up the cliff-side. The path is linear so there is no worry of getting lost.
Your first real obstacle is a grappling point that has you swinging across a chasm and landing on the Far side.
Going along the path climbing and swinging with your grappling hook, you will find your first nest with the rare feathers. However an eagle is guarding it.
You may choose to get rid of the eagle now because it may attack you randomly.
You can attempt to shoot it down with an arrow while it is flying which is harder. Or you can wait for it to attack since it beelines for you when it attacks, leaving it open to your shot.
Whether you decide to kill it or ignore it, pick up the rare feathers from the nest.
Continue up the cliff and you will find the hardest part of this mission. The part where you swing from root to root without landing. You'll get the hang of this soon. Just make your swings wider to get you more altitude and giving you more time to attach the grappling hook to the next root.
When you climb up to the peak, there will be another eagle. Turn him into BBQ if you want to by setting your arrow on fire and shooting him which will also cook him. To make it even more ridiculous, use a flaming spear.
Go and grab the last feather and you will be prompted to take a dive below.
Go and take a dive into the water below.
The mission is completed and you now have the chance to get rare feathers among other feathers you pluck.
The Tall Elk - Jayma Mission
Head over to Jayma's map marker to begin the mission.
Upon arrival, head over to the elk dung to accept the mission.
You will have to follow the fireflies to find the tall elk.
To have an easier time, you may turn on hunter vision to easily see the elk tracks. This mission will pretty much end up like most of the tracking missions.
You will eventually reach a basin. Go down into the basin.
Sit tight and wait for the tall elk to show up.
Just as you approach the elk, some udam will want to hunt it for themselves. Kill the tall elk and skin it before the udam do.
Skin the tall elk to complete the mission. If you have a Uplay account signed in, you should obtain a bonus that will award you with points.
The Taken Wenja - Tensay Mission
The Taken Wenja
Head over to the Tensay map marker to enter the mission area.
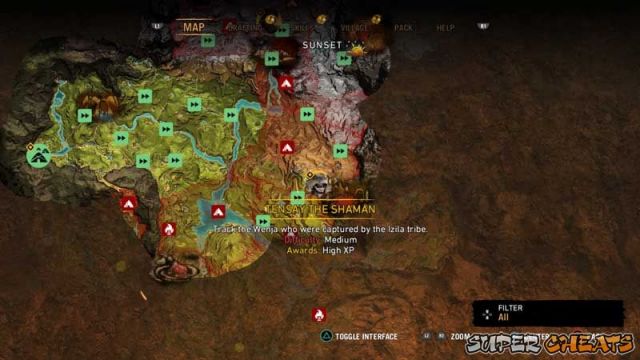
Head over to the battle site to start the mission.

As per all tracking missions, turn on your hunter vision to easily see the tracks. There are a bunch of arrows and spears littered through the track so you may stock up in case you were not on full stock.
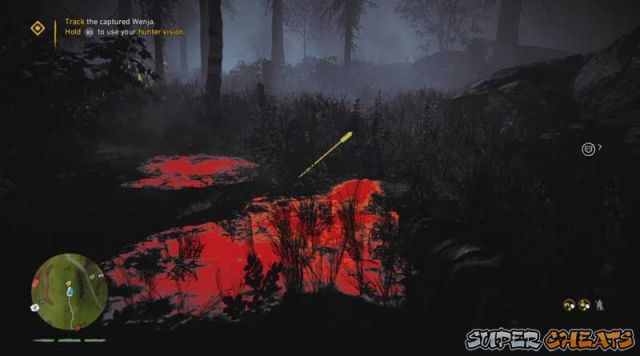
You will find burnt corpses of fallen wenja indicating that they have lost the battle.
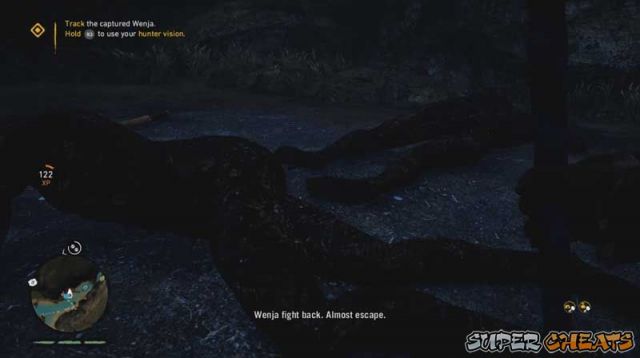
Head into the submerged cave. You can find some bloody handprints on the walls. Hunter vision shows up clearly.

You will eventually come out of the cave and see some izila that have captured an Udam and a Wenja. Things quickly turn bad for the Udam. Your wenja brother will be sacrificed though.
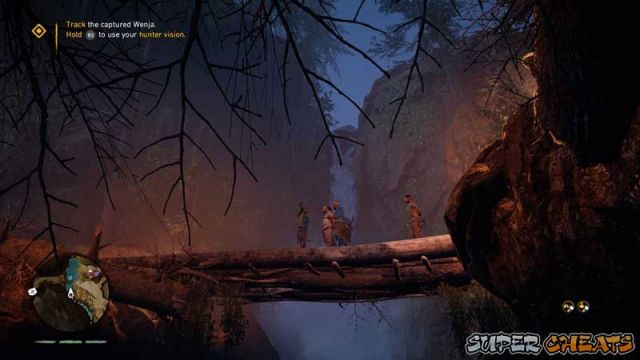
You will now be tasked in burning their camp. This goes just like all the destroy missions go. Light your weapons ablaze and set things on fire.
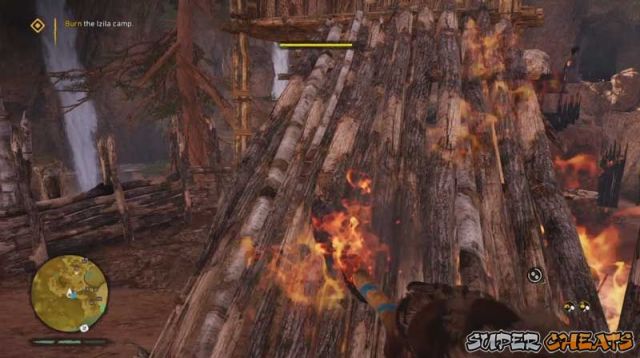
TIP: Release the captured wenja to help you in this mission because setting structures on fire will summon more enemies. Having the wenja around to help makes things quicker.
After burning the camp up, leave the area. However, you are ambushed by the enemy and are taken hostage.
You meet the Izila's leader, Batari. She offers to spare you if you serve only her. You refuse so she throws you into the burning pit.

After falling into the burning pit, you may be injured and even burning. Heal immediately if need be. Face the east and look for a body of water. It has an underwater tunnel that leads out.
You may choose to go back into the camp and kill the izila in there but this offers no bonus whatsoever. You can do that or just simply exit the area.
After the short cutscene with Tensay, he will say that Batari uses the wenja as slaves in the marshlands. He also shows you a izilan camp you can capture.

The Great Beast
Head over to Jayma's map marker to begin the quest.
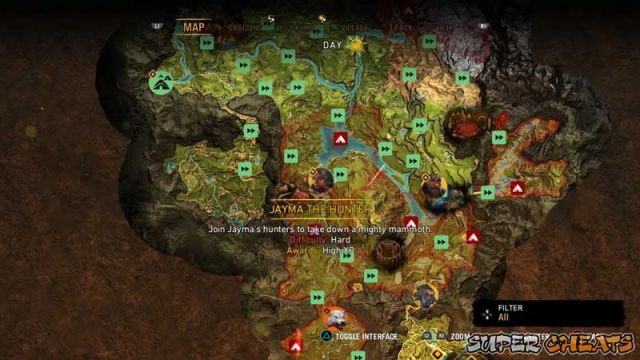
Interact with the broken tree trunk to begin the mission.
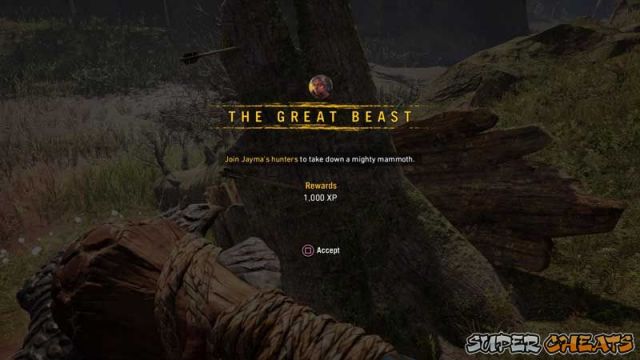
Follow the map marker to meet some wenja hunters.
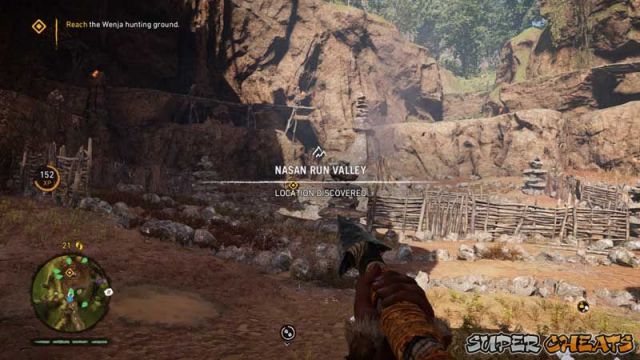
They will instruct you to lure a mammoth to their hunting ground.
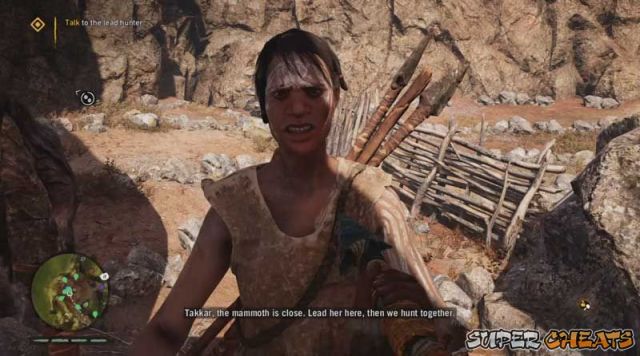
Head over to the next map marker to find the mammoth going about its business. Politely ask it to come with you by chucking a spear at it.
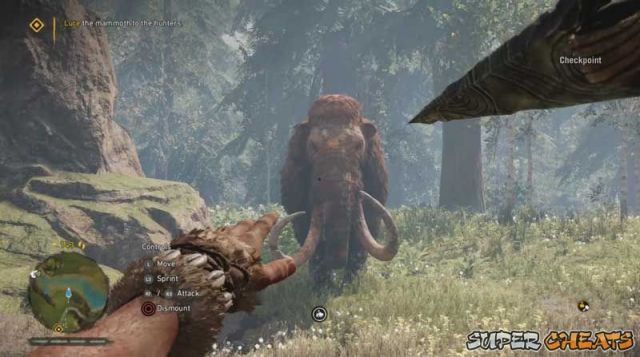
Run back to the hunters when it begins chasing you. This can be done safely if you have the beast ride ability and run while riding your beast, or shoot the mammoth from afar so it has to travel a long way to get you. Of course you should be running back to the hunters.
When the mammoth arrives, bring it down with the help of the hunters.

Skin it to complete the mission.
 Stomp Udam
IMPORTANT: You must have the Mammoth Rider skill from Karoosh's skill tree to do this mission.
Head over to Karoosh's map marker over in the cold northern area. If you haven't crafted some winter clothing, best do so now. I like to craft the first level of winter clothing for a bit of immersion since the final clothing gives you immunity to the cold. It is a personal preference but I think it is nice to look for warmth sometime. This is even remedied easily by setting your weapons on fire or to make it faster, burn a forest to make yourself warm.
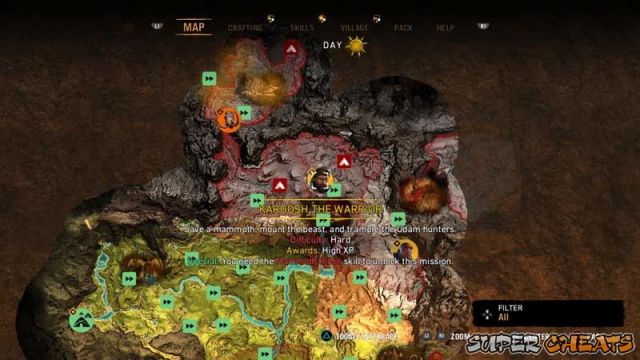
Head over to the bone tree the Udam made to start the mission. They create these bone trees from mammoth bones.
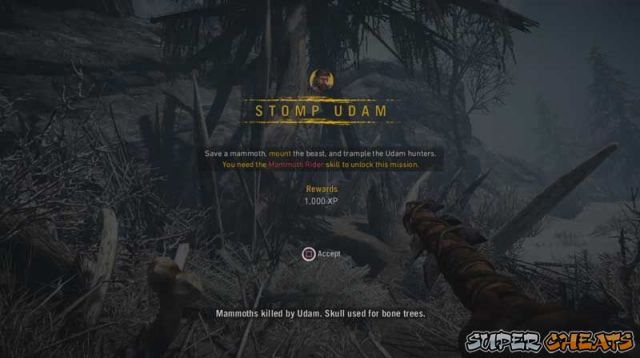
Continue on to the camp of Udam. You will find them making fun of a mammoth before killing it to make their bone trees.

You can choose to kill all the surrounding enemies or just make a mad dash to the mammoth and ride it. The special controls are shown beside the mini map.
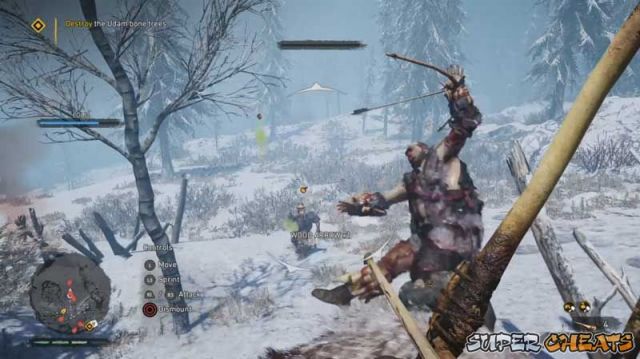
Destroy the Udam bone trees littered across the camp. They are those spiky looking structures you see around Udam camps. This seems to be their production facility.
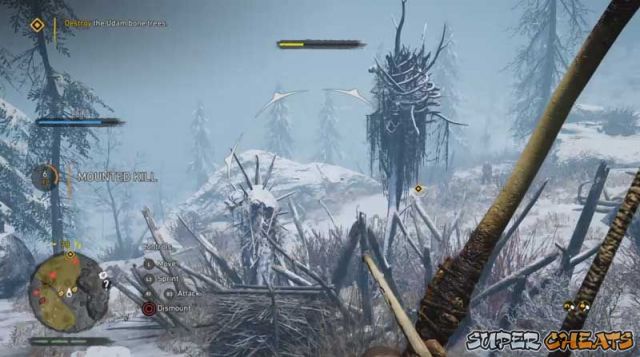
After filling up the destruction meter by messing up their bone trees, go to the marked location and bring back the mammoth to its herd.
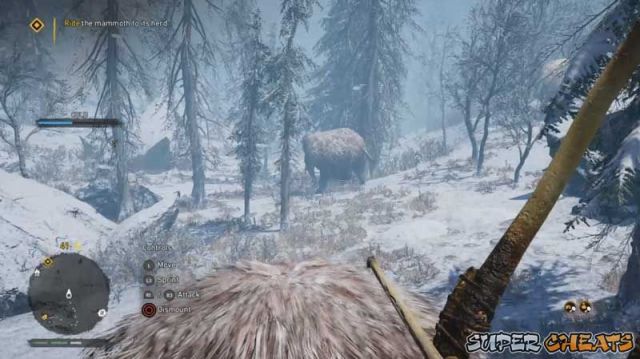
TIP: His other mammoth friends may or may not take too kindly to you especially if you have a predatory beast with you like the Sabretooth Tiger. So be prepared to run or kill the aggressive ones if their icons on the mini map turns red.
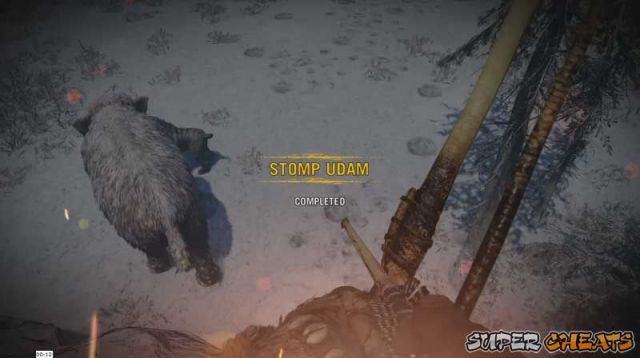 Eye for an Eye
After completing the Stomp Udam mission, you find that Karoosh has gone off to face Mog by himself. Go after him by heading towards his map marker to begin the mission.
Make your way towards the next map marker. You may have to do some grappling to reach it. Search for the mouth of the cave where Mog resides.
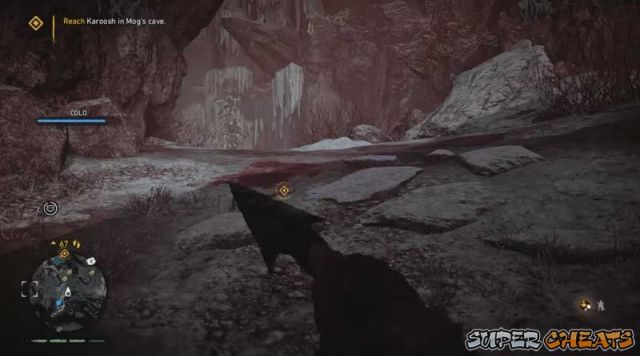
Keep following the marker and you will find a heavily injured Karoosh and Mog's dead body.
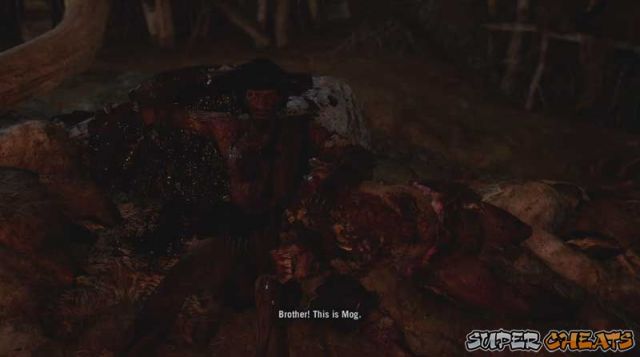
He will be saying stuff like being ready to die but you say he can't die yet. So heal him up by giving him some green leaves.
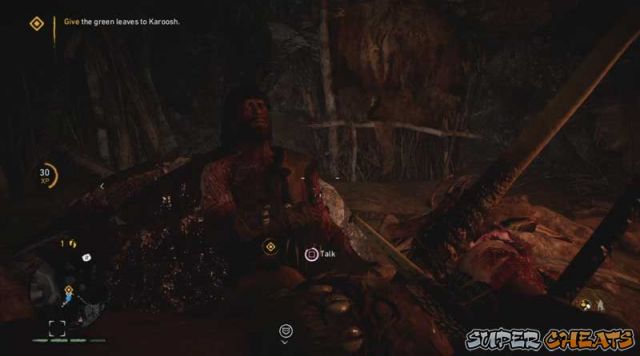
Karoosh will still be injured so take care of him as you exit the cave.
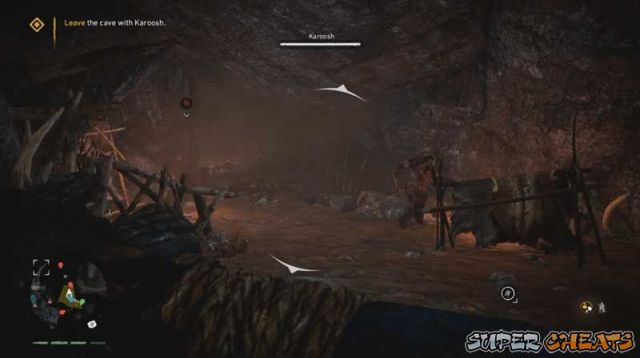
When you are clear, Karoosh will thank you for saving him and he is proud to stand by you.
After this, the mission will be complete.
 Big Darwa Fort
The Big Darwa Fort is situated at the entrance into the Udam land. It is a very heavily fortified fort and can be a real challenge if you don't have the later Skills or upgraded equipment. It IS doable with a lower level Takkar.
You can approach this fort just like you approach any outpost. But expect it to be a lot harder. The fort has a center area with smaller areas to the left and right. If you want to take on this fort by regular means, you must move around very stealthily since facing all the troops plus reinforcements will be very difficult.
Scout all the areas with your owl, and if possible, use the bombs the owl has.
Also remember that your beast may make or break stealth runs. If you want to do better at stealth, maybe consider on dismissing your beast since it can alert enemies unintentionally.
Another VERY important skill if you decide to take on the fort with just yourself, you should get the Heavy Takedown to be able to eliminate the elite units. Without it, alerting the base is almost sure-fire.
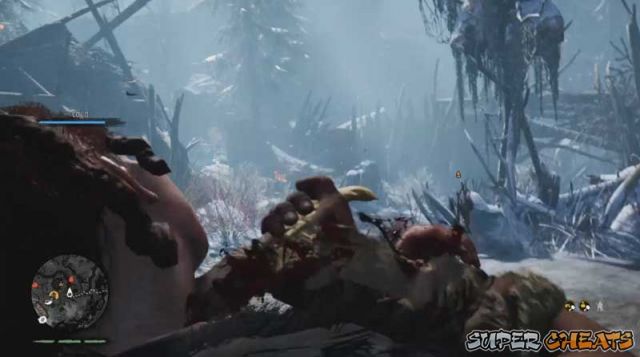
A special elite unit can be found. This is Dah. He has a rhino helmet unlike the others (although its hard to distinguish. The most notable difference is having an HP bar. When you engage him or go near him, an HP bar will appear. You must defeat all the enemies to capture the fort.

The easiest way to capture this fort early is having the skill Mammoth Rider. It can be obtained from Karoosh and his skill tree. There are a bunch of mammoths outside the camp so you can get one there and go to town on the fort.
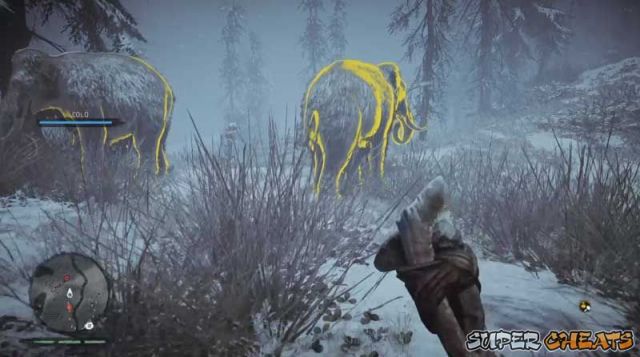
Riding on a mammoth is basically easy mode so just waltz into the fort and mess everyone up. Do note that both you and the mammoth are NOT invincible. You can still die if you get too overconfident.
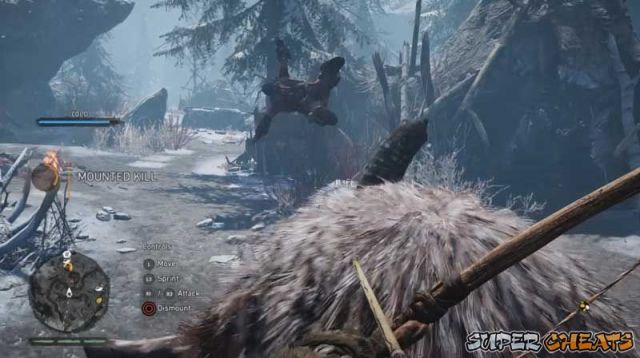
After capturing the fort, you will see a little cutscene involving Dah.
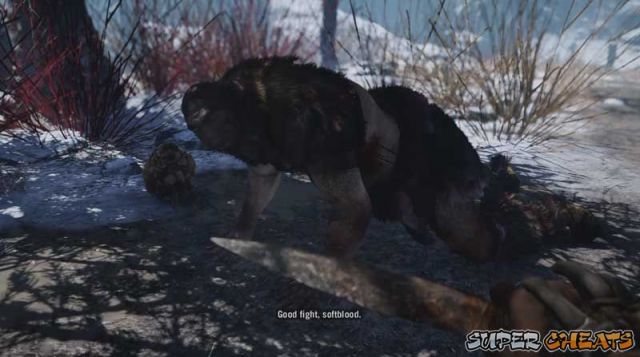
You will tell him to teach the Wenja how to make the poison bombs.
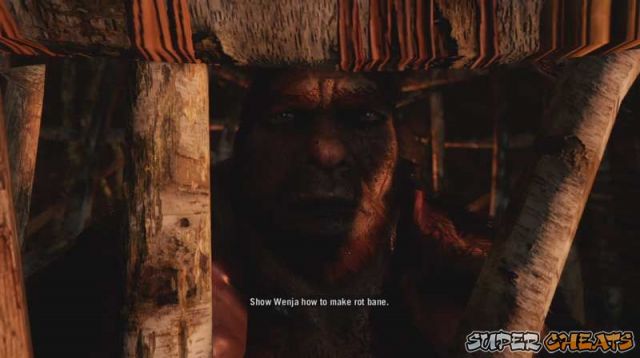
Congratulations on getting a new specialist. Not only does he teach you how to make the Berserk Bombs (Which are amazing), his skill tree is ridiculously good so get on with building his hut.
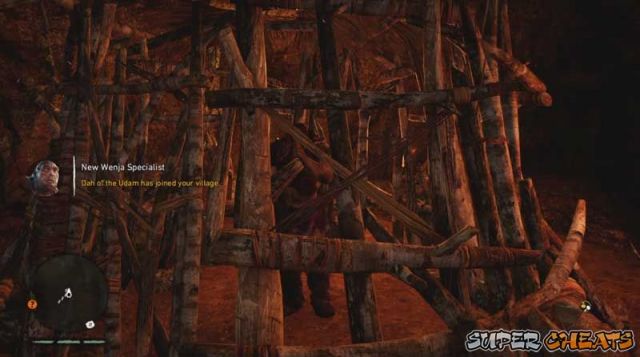 Wenja Welcome
When you go to Dah's cage to check on him, you will find that he has been taken to the forest by the other wenja to drown him.
Head over to Dah's Mission marker to begin the mission.
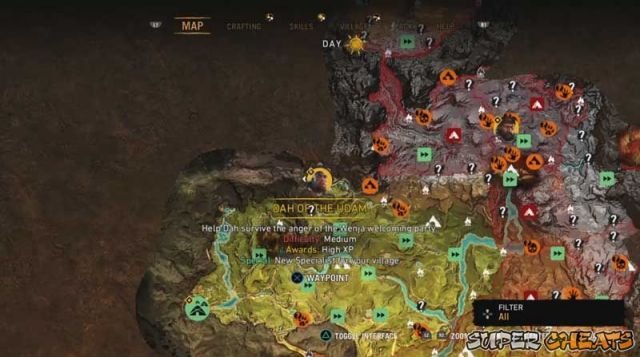
You will find a bunch of wenja gathered around the hole to watch him slowly drown due to the rising water.
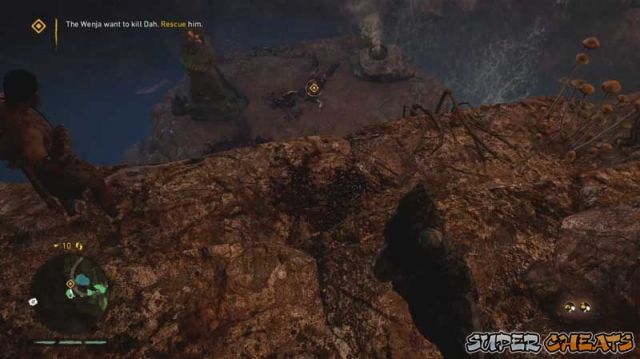
Speak to Dah.

If you look at the area, and turn on your hunter vision, the rocks you need to close up are highlighted in red.
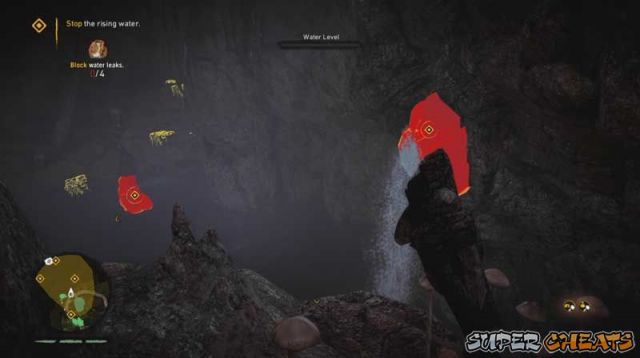
Before going in the water, kill the bitefish in the water. It will cause you some trouble when you dive in.
Tip: You can use the food boost that gives you better performance in the water to help you do things faster here.
Approach the rocks and press Square to interact with them. The middle rock can't be reached without the water level rising. So do the other three first.
After closing up the leaks, release Dah from his restraints to complete the mission
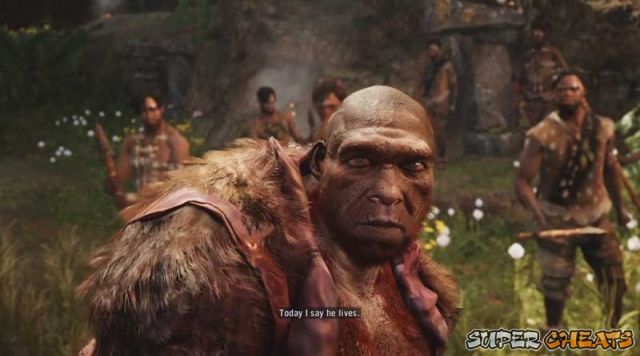 Bone Dust - (Must upgrade Dah's Cage into a hut first & have done Wenja Welcome quest)
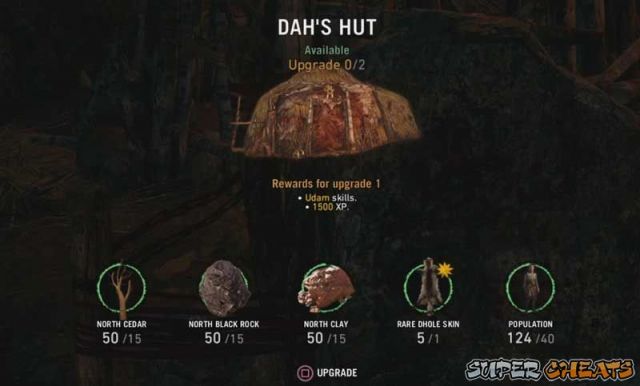
Upgrade it to also unlock the other Udam Skills in Dah's tree.

After upgrading his cage into a hut, go inside and speak to him. He will be having a problem with "Skull Fires" and asks you for an odd quick fix.

He tells you that a big fix is in an Udam camp Far to the east.

Head over to Dah's map marker to the east of the cold northern area.
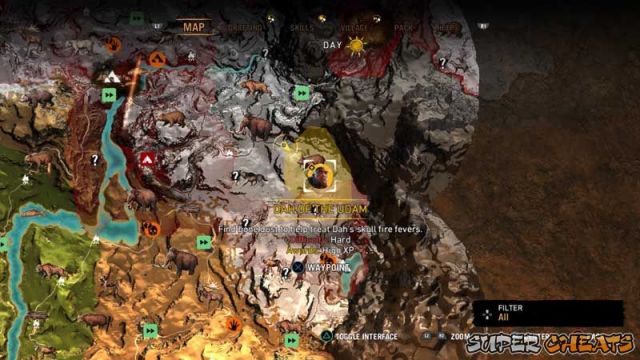
When you reach the area, find the Udam camp.
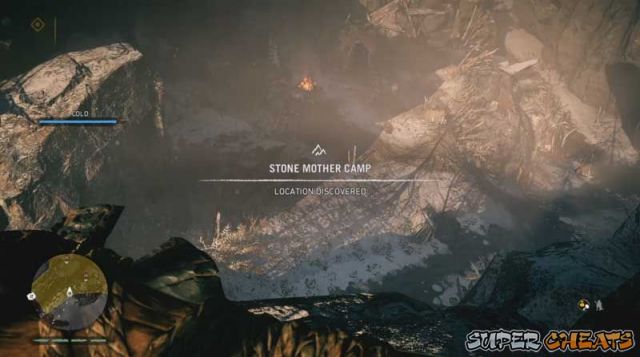
You can simply use your owl to scout the area and look for the healer. The healer is highlighted in red.
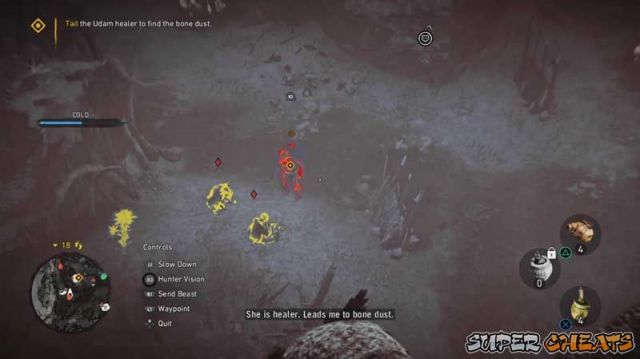
You can still use the owl to tail her if you want. The healer will simply go into her hut and you'd have to get the bone dust inside.
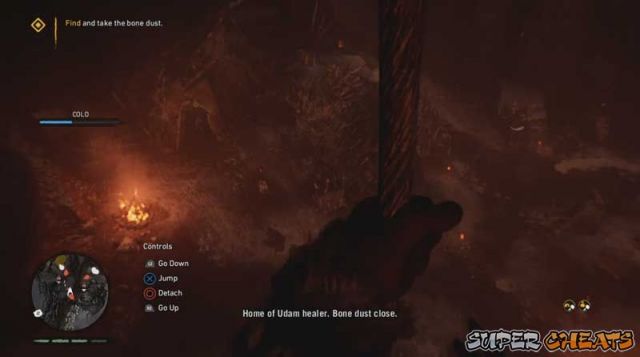
You can either kill everyone in the camp or go in the hut, find the bone dust, and run out the camp. Inside the hut, there are skulls with something in them. One of them will have bone dust so inspect them all. Enabling hunter vision highlights them in red and they have smoke coming out of them.
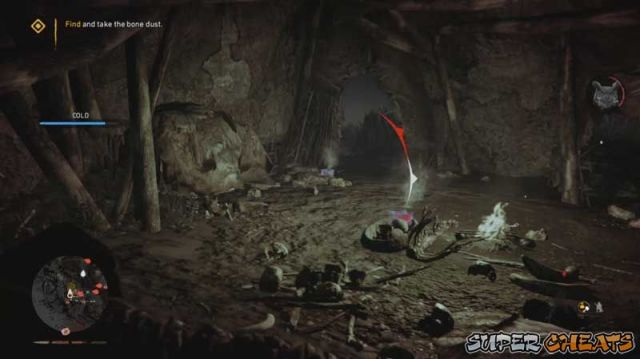
After you have obtained the bone dust, Get out of the camp to complete the mission.
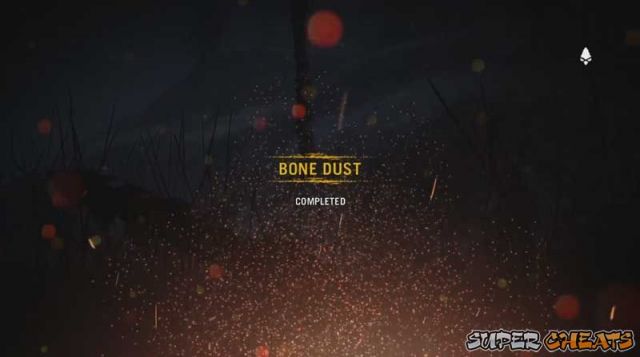 Sisters of Fire
Head over to Dah's hut to claim the mission. He says he has been hunting these Izila sisters for some time now. He now passes the task to you.
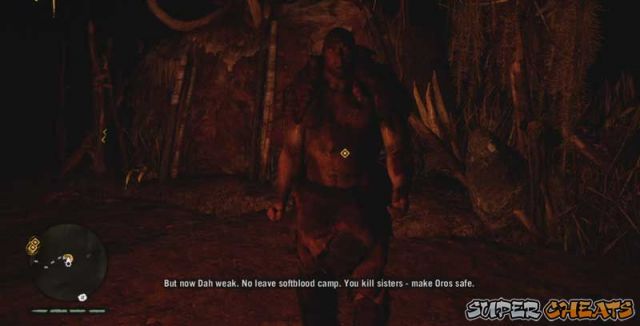
A new map marker will appear on the map. Head over there to begin the mission.
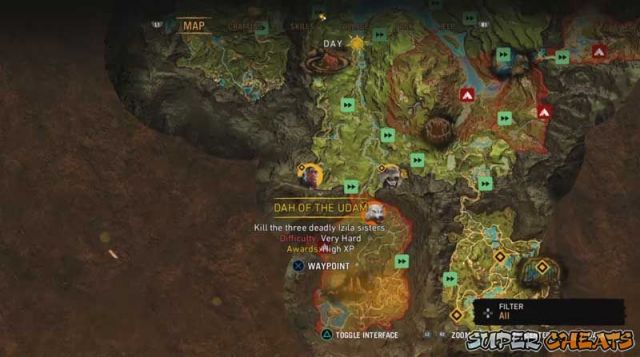
This mission is very similar to attacking an outpost so approach it like one. Scout with the owl to get a good idea of their unit composition and positions.

Kill all the enemies in the camp and while doing so, kill the special units. The sisters will be marked red in hunter vision.
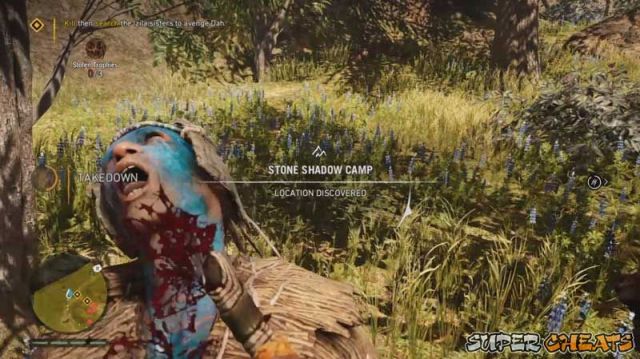
Loot their bodies to obtain the Udam Trophies they took from fallen Udam.
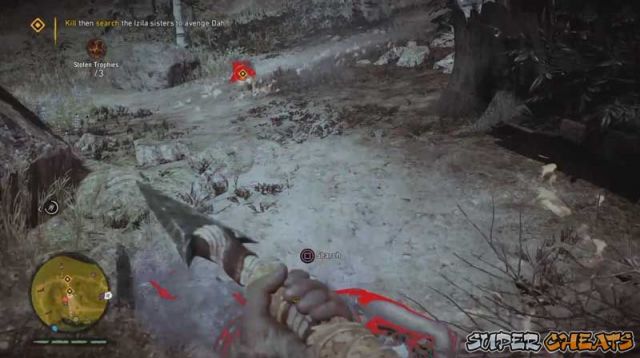
After collecting them all, the mission will automatically complete.
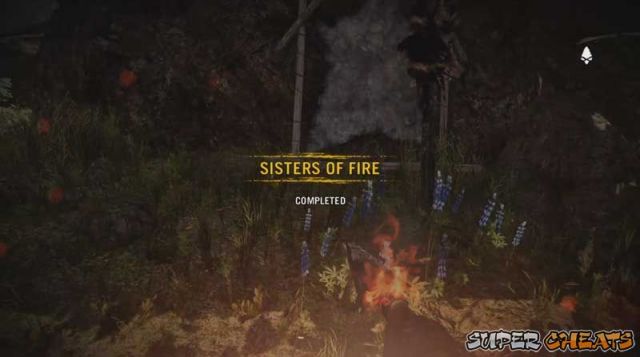 Vision of Fire
Speak to Tensay to get another vision regarding the Izila. Very much similar to the Vision of Ice for the Udam.

You find yourself in Izila territory and see the Izila worried about something.
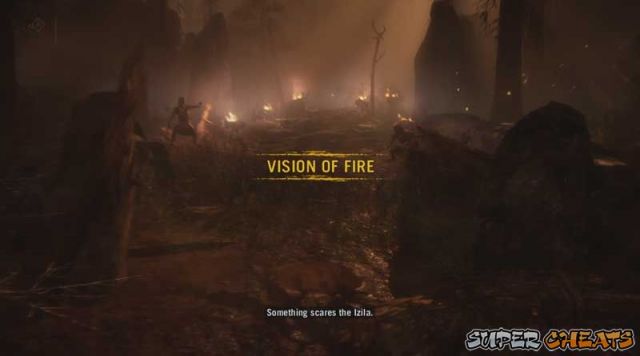
Towards the end of this small area, you will find Batari guarding an item.
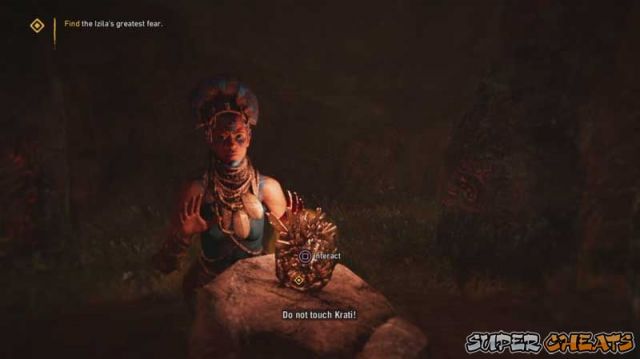
Interact with it to begin the next segment which is rather fun.
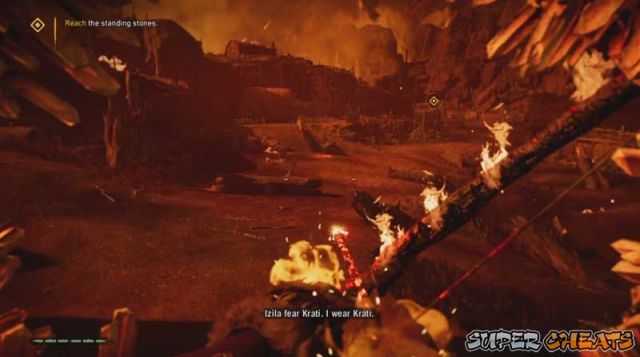
In this mode, you will be wearing the Krati mask which the Izila fears. You will be very powerful during this segment.
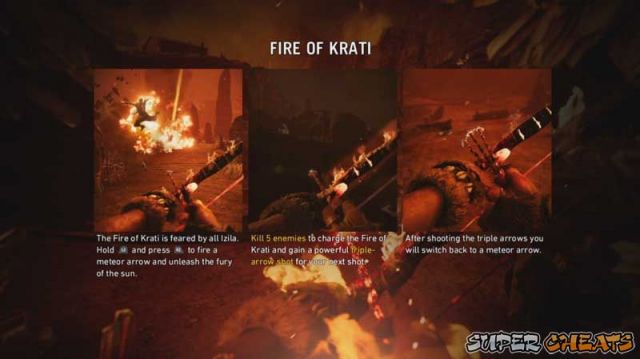
Proceed to kill the Izila and head for the standing stones.
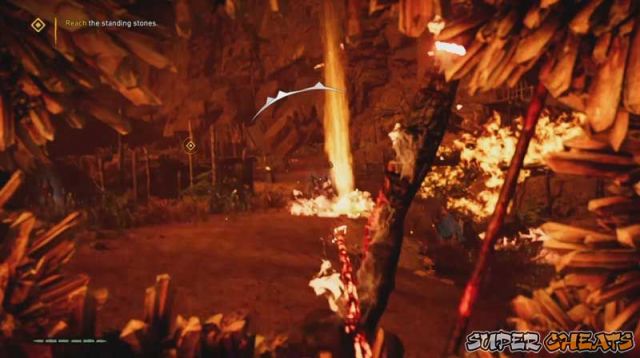
After destroying the four standing stones, the next area will have you break the moon with your triple meteor shots. To do this, as the help screen previously stated, every 5 Izila killed gives you a triple shot you can use to shoot the moon.

Continue up the steps to find more Izila to kill to enable the triple shot and shooting the moon.

When the moon breaks, the vision of fire mission will be complete and you will be transported back to Tensay.
 Fire Screamer Fort - Roshani Acquisition
The Fire Screamer Fort is a fort located near the entrance into Izila Homeland just as the Big Darwa Fort guarde the entrance Into Udam Land. Capturing it should be easier since at this part of the game, your gear should be way better than what you had during the Big Darwa Fort. Not only that, the location of the fort makes it easier to scout.
Go to the Fire Screamer Fort map marker to begin the capture attempt.
As usual, send your owl to do some recon work.
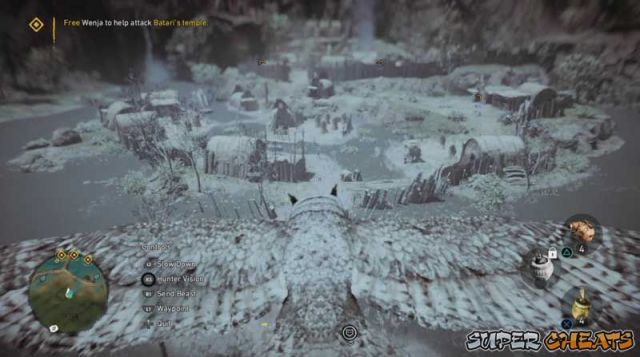
The camp will be littered with enemies. Armored ones too. The camp has three elevation levels. The widest and lowest section is at the front of the camp. The second is a very small area in the center, and the final level at the highest area are some standing stones. This is where Roshani is. He will have a round target-like marker on his head.
After killing the enemies, you may want to go and fight Roshani head on so deal with him however you want.
When you beat him, he will willingly offer to teach the Wenja how to make fire bombs.
You then take him to your village and lock him up. Roshani will now have reluctantly (for now) joined the Wenja.
Head over to the Tensay map marker to enter the mission area.
Head over to the battle site to start the mission.
As per all tracking missions, turn on your hunter vision to easily see the tracks. There are a bunch of arrows and spears littered through the track so you may stock up in case you were not on full stock.
You will find burnt corpses of fallen wenja indicating that they have lost the battle.
Head into the submerged cave. You can find some bloody handprints on the walls. Hunter vision shows up clearly.
You will eventually come out of the cave and see some izila that have captured an Udam and a Wenja. Things quickly turn bad for the Udam. Your wenja brother will be sacrificed though.
You will now be tasked in burning their camp. This goes just like all the destroy missions go. Light your weapons ablaze and set things on fire.
TIP: Release the captured wenja to help you in this mission because setting structures on fire will summon more enemies. Having the wenja around to help makes things quicker.
After burning the camp up, leave the area. However, you are ambushed by the enemy and are taken hostage.
You meet the Izila's leader, Batari. She offers to spare you if you serve only her. You refuse so she throws you into the burning pit.
After falling into the burning pit, you may be injured and even burning. Heal immediately if need be. Face the east and look for a body of water. It has an underwater tunnel that leads out.
You may choose to go back into the camp and kill the izila in there but this offers no bonus whatsoever. You can do that or just simply exit the area.
After the short cutscene with Tensay, he will say that Batari uses the wenja as slaves in the marshlands. He also shows you a izilan camp you can capture.
The Great Beast - Jayma Mission
Head over to Jayma's map marker to begin the quest.
Interact with the broken tree trunk to begin the mission.
Follow the map marker to meet some wenja hunters.
They will instruct you to lure a mammoth to their hunting ground.
Head over to the next map marker to find the mammoth going about its business. Politely ask it to come with you by chucking a spear at it.
Run back to the hunters when it begins chasing you. This can be done safely if you have the beast ride ability and run while riding your beast, or shoot the mammoth from afar so it has to travel a long way to get you. Of course you should be running back to the hunters.
When the mammoth arrives, bring it down with the help of the hunters.
Skin it to complete the mission.
Stomp Udam - Karoosh Mission
IMPORTANT: You must have the Mammoth Rider skill from Karoosh's skill tree to do this mission.
Head over to Karoosh's map marker over in the cold northern area. If you haven't crafted some winter clothing, best do so now. I like to craft the first level of winter clothing for a bit of immersion since the final clothing gives you immunity to the cold. It is a personal preference but I think it is nice to look for warmth sometime. This is even remedied easily by setting your weapons on fire or to make it faster, burn a forest to make yourself warm.
Head over to the bone tree the Udam made to start the mission. They create these bone trees from mammoth bones.
Continue on to the camp of Udam. You will find them making fun of a mammoth before killing it to make their bone trees.
You can choose to kill all the surrounding enemies or just make a mad dash to the mammoth and ride it. The special controls are shown beside the mini map.
Destroy the Udam bone trees littered across the camp. They are those spiky looking structures you see around Udam camps. This seems to be their production facility.
After filling up the destruction meter by messing up their bone trees, go to the marked location and bring back the mammoth to its herd.
TIP: His other mammoth friends may or may not take too kindly to you especially if you have a predatory beast with you like the Sabretooth Tiger. So be prepared to run or kill the aggressive ones if their icons on the mini map turns red.
Eye for an Eye - Karoosh Mission
After completing the Stomp Udam mission, you find that Karoosh has gone off to face Mog by himself. Go after him by heading towards his map marker to begin the mission.
Make your way towards the next map marker. You may have to do some grappling to reach it. Search for the mouth of the cave where Mog resides.
Keep following the marker and you will find a heavily injured Karoosh and Mog's dead body.
He will be saying stuff like being ready to die but you say he can't die yet. So heal him up by giving him some green leaves.
Karoosh will still be injured so take care of him as you exit the cave.
When you are clear, Karoosh will thank you for saving him and he is proud to stand by you.
After this, the mission will be complete.
Big Darwa Fort - Dah Acquisition
The Big Darwa Fort is situated at the entrance into the Udam land. It is a very heavily fortified fort and can be a real challenge if you don't have the later Skills or upgraded equipment. It IS doable with a lower level Takkar.
You can approach this fort just like you approach any outpost. But expect it to be a lot harder. The fort has a center area with smaller areas to the left and right. If you want to take on this fort by regular means, you must move around very stealthily since facing all the troops plus reinforcements will be very difficult.
Scout all the areas with your owl, and if possible, use the bombs the owl has.
Also remember that your beast may make or break stealth runs. If you want to do better at stealth, maybe consider on dismissing your beast since it can alert enemies unintentionally.
Another VERY important skill if you decide to take on the fort with just yourself, you should get the Heavy Takedown to be able to eliminate the elite units. Without it, alerting the base is almost sure-fire.
A special elite unit can be found. This is Dah. He has a rhino helmet unlike the others (although its hard to distinguish. The most notable difference is having an HP bar. When you engage him or go near him, an HP bar will appear. You must defeat all the enemies to capture the fort.
The easiest way to capture this fort early is having the skill Mammoth Rider. It can be obtained from Karoosh and his skill tree. There are a bunch of mammoths outside the camp so you can get one there and go to town on the fort.
Riding on a mammoth is basically easy mode so just waltz into the fort and mess everyone up. Do note that both you and the mammoth are NOT invincible. You can still die if you get too overconfident.
After capturing the fort, you will see a little cutscene involving Dah.
You will tell him to teach the Wenja how to make the poison bombs.
Congratulations on getting a new specialist. Not only does he teach you how to make the Berserk Bombs (Which are amazing), his skill tree is ridiculously good so get on with building his hut.
Wenja Welcome - Dah Mission
When you go to Dah's cage to check on him, you will find that he has been taken to the forest by the other wenja to drown him.
Head over to Dah's Mission marker to begin the mission.
You will find a bunch of wenja gathered around the hole to watch him slowly drown due to the rising water.
Speak to Dah.
If you look at the area, and turn on your hunter vision, the rocks you need to close up are highlighted in red.
Before going in the water, kill the bitefish in the water. It will cause you some trouble when you dive in.
Tip: You can use the food boost that gives you better performance in the water to help you do things faster here.
Approach the rocks and press Square to interact with them. The middle rock can't be reached without the water level rising. So do the other three first.
After closing up the leaks, release Dah from his restraints to complete the mission
Bone Dust - Dah Mission
Upgrade it to also unlock the other Udam Skills in Dah's tree.
After upgrading his cage into a hut, go inside and speak to him. He will be having a problem with "Skull Fires" and asks you for an odd quick fix.
He tells you that a big fix is in an Udam camp Far to the east.
Head over to Dah's map marker to the east of the cold northern area.
When you reach the area, find the Udam camp.
You can simply use your owl to scout the area and look for the healer. The healer is highlighted in red.
You can still use the owl to tail her if you want. The healer will simply go into her hut and you'd have to get the bone dust inside.
You can either kill everyone in the camp or go in the hut, find the bone dust, and run out the camp. Inside the hut, there are skulls with something in them. One of them will have bone dust so inspect them all. Enabling hunter vision highlights them in red and they have smoke coming out of them.
After you have obtained the bone dust, Get out of the camp to complete the mission.
Sisters Of Fire - Dah Mission
Head over to Dah's hut to claim the mission. He says he has been hunting these Izila sisters for some time now. He now passes the task to you.
A new map marker will appear on the map. Head over there to begin the mission.
This mission is very similar to attacking an outpost so approach it like one. Scout with the owl to get a good idea of their unit composition and positions.
Kill all the enemies in the camp and while doing so, kill the special units. The sisters will be marked red in hunter vision.
Loot their bodies to obtain the Udam Trophies they took from fallen Udam.
After collecting them all, the mission will automatically complete.
Vision of Fire
Speak to Tensay to get another vision regarding the Izila. Very much similar to the Vision of Ice for the Udam.
You find yourself in Izila territory and see the Izila worried about something.
Towards the end of this small area, you will find Batari guarding an item.
Interact with it to begin the next segment which is rather fun.
In this mode, you will be wearing the Krati mask which the Izila fears. You will be very powerful during this segment.
Proceed to kill the Izila and head for the standing stones.
After destroying the four standing stones, the next area will have you break the moon with your triple meteor shots. To do this, as the help screen previously stated, every 5 Izila killed gives you a triple shot you can use to shoot the moon.
Continue up the steps to find more Izila to kill to enable the triple shot and shooting the moon.
When the moon breaks, the vision of fire mission will be complete and you will be transported back to Tensay.
Fire Screamer Fort - Roshani Acquisition
The Fire Screamer Fort is a fort located near the entrance into Izila Homeland just as the Big Darwa Fort guarde the entrance Into Udam Land. Capturing it should be easier since at this part of the game, your gear should be way better than what you had during the Big Darwa Fort. Not only that, the location of the fort makes it easier to scout.
Go to the Fire Screamer Fort map marker to begin the capture attempt.
As usual, send your owl to do some recon work.
The camp will be littered with enemies. Armored ones too. The camp has three elevation levels. The widest and lowest section is at the front of the camp. The second is a very small area in the center, and the final level at the highest area are some standing stones. This is where Roshani is. He will have a round target-like marker on his head.
After killing the enemies, you may want to go and fight Roshani head on so deal with him however you want.
When you beat him, he will willingly offer to teach the Wenja how to make fire bombs.
You then take him to your village and lock him up. Roshani will now have reluctantly (for now) joined the Wenja.
Seeds of The Sun - Roshani Mission
Seeds of the Sun
Head over to Roshani's cage to start the mission. He will tell you about an event the Izila hold and suggests you take the seeds for food.
Go to the map marker near the center of the map.
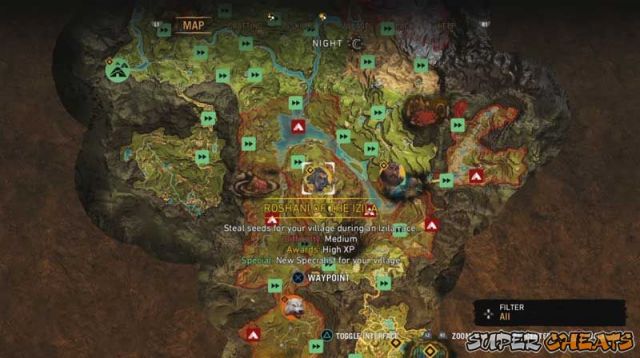
Upon arriving, look for the standing stone where the marker will be at. It is highlighted red in hunter vision.
Just a few feet from where you start the mission is the first area. If you have hunter vision on looking out the cliff, you can already see one of the bags highlighted in red. Killing the Izila here is optional.
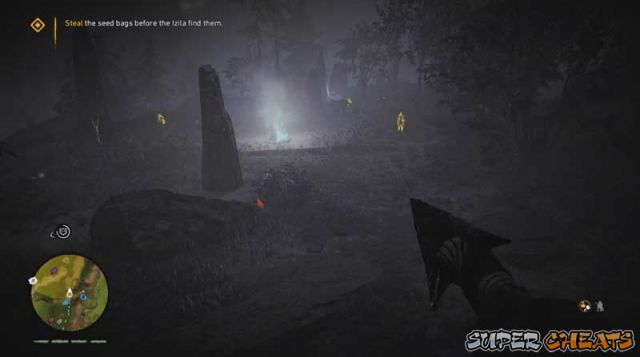
The next area has the seed beside a boulder that is near a bee cluster.

The last seed bag is near the water, at the side facing the other side of the river.
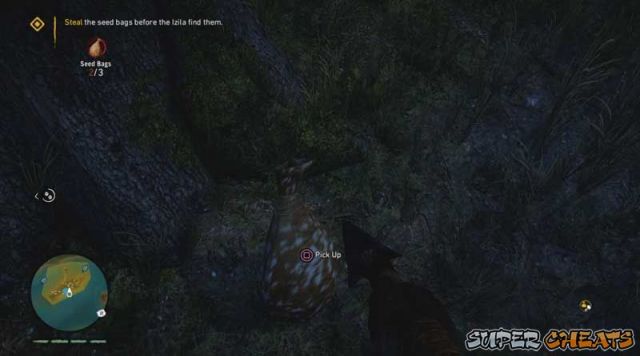
After obtaining all three, exit the area to complete the mission. You can even swim to the other side for a quick exit.
Blood Sacrifice
After building Roshani a hut, enter it and get another mission from him. You will find him worrying about an abducted Wenja and the captors saw him in your village.
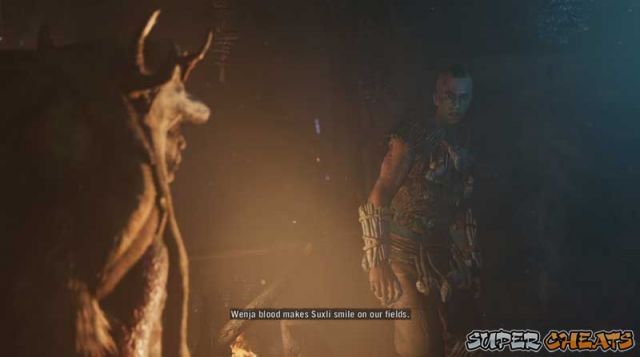
Tensay comes in and demands Roshani to tell you the reason. You find out it is for sacrifice. You must go and stop them from sacrificing your tribesman.
Head over to the map marker again, around the southern portion of the map.
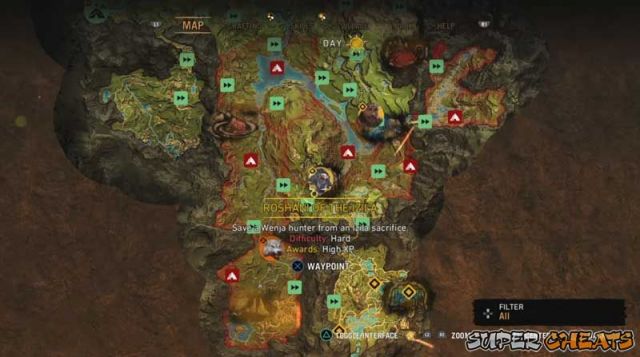
As you approach the area, you will notice it looks very similar to the Stonehenge in real life.
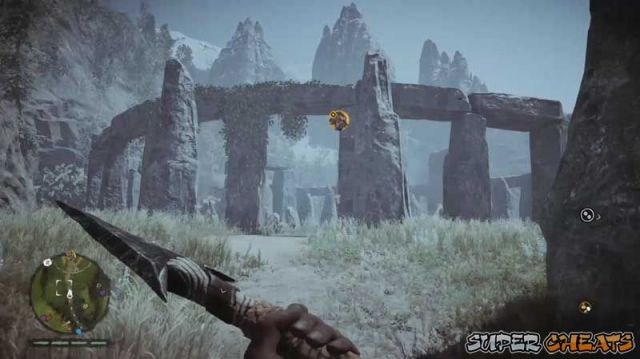
You will find some Izila dancing around the sacrifice. There are other Izila around. Deal with them however you please.
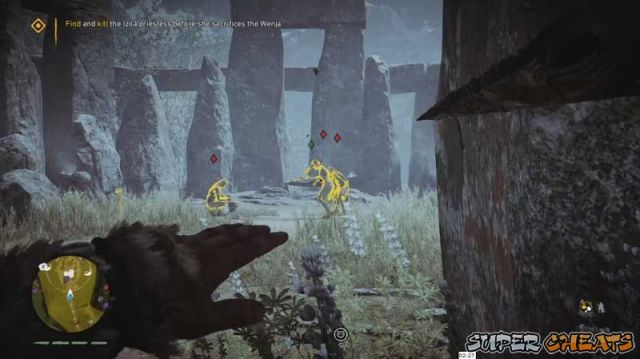
The priestess is late so if you managed to kill all the Izila fairly quickly, she might arrive without a clue. She will be marked in red in hunter vision.
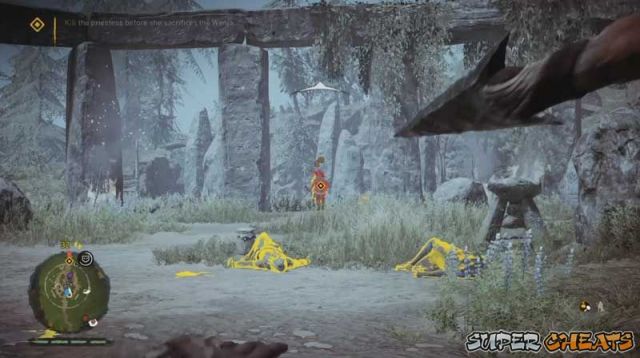
After all the reinforcements are dead, free the Wenja to finish the mission.
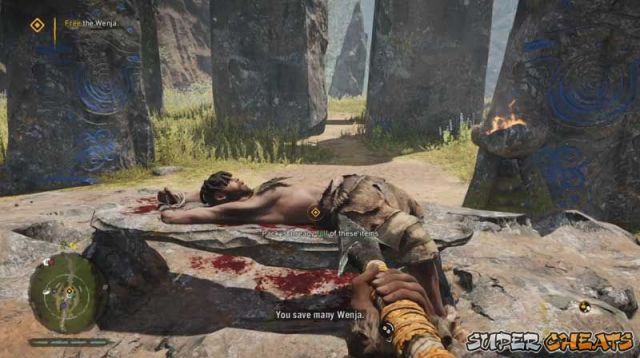 The Blaze
After upgrading Roshani's Hut, speak to him again and he will tell you to strike the Izila to scare them off. They are highly agricultural people and by attacking one of their main farms, you will be dealing a great blow to them. Head to the map markers and find the farm.
Once again, use your owl for recon.
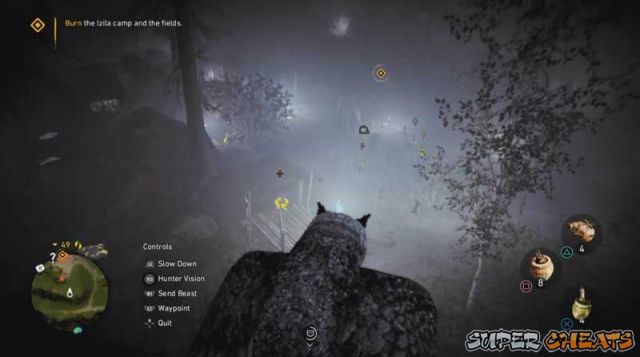
You will find that there are quite the number of Izila troops stationed here. Good thing that there are some Wenja captives that will fight if you free them.
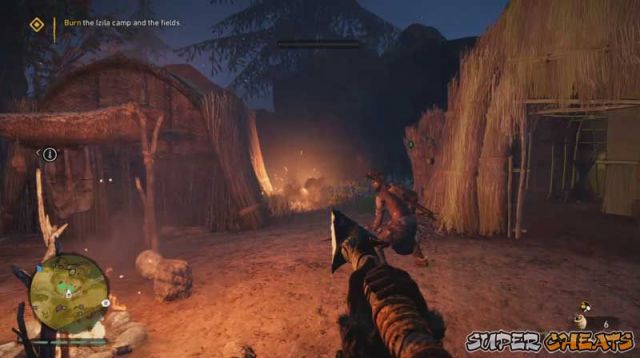
While ridding the place of enemies, burn everything you see. Most notable the ones that look like wheat farms.
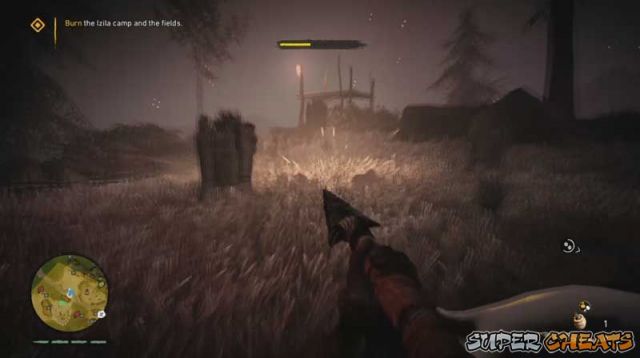
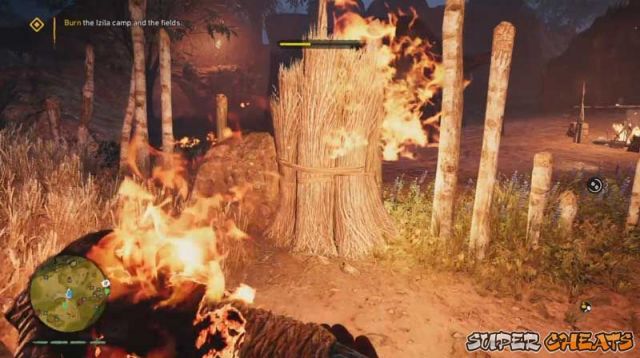
Keep on burning these and the mission will be complete.
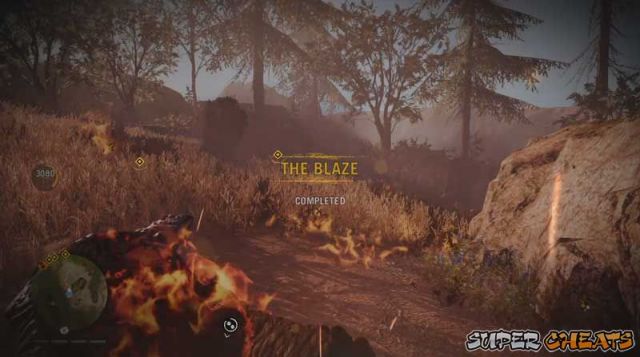 Fly Like A Bird
Urki is a side-character that has no impact on the story or gameplay. The character himself is an easter egg of a character named Hurk from Far Cry 4. He even speaks with a weird accent like a modern man trying to speak the Wenja language. His missions are pretty much joke missions.
Head on over to his map marker to start his first mission.
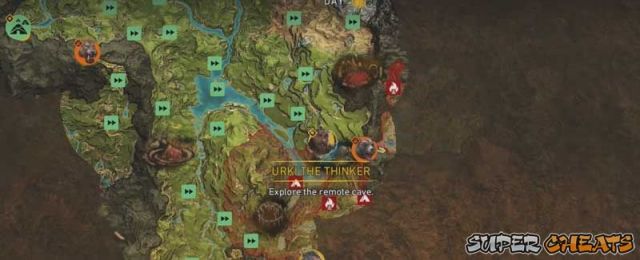
You will find him in a dilemma of wanting to fly like a bird, hence the title. You casually tell him that feathers are the reason he can't fly. He then asks you to help him gather ingredients.
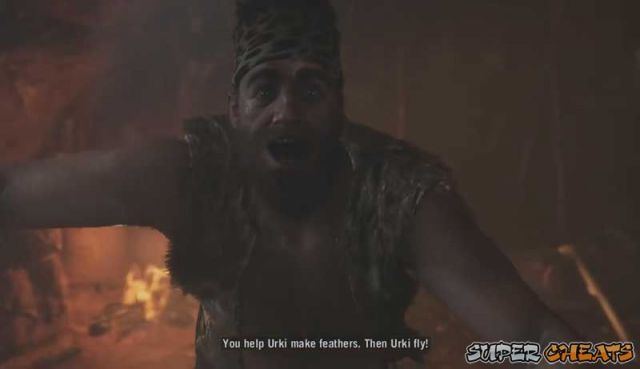
Head to the map marker near Urki's hut to begin collecting. Everything you need for the mission can be found in this area.
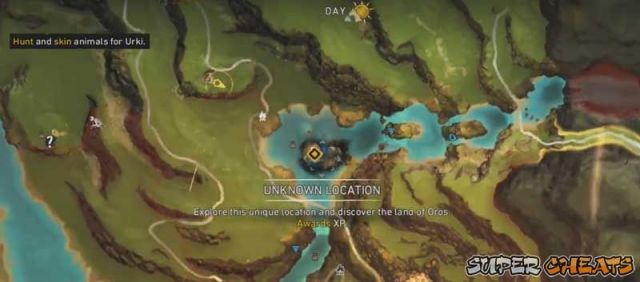
The only one of note that is a bit tricky to hunt is the raven. You can shoot it down from the sky if you can, but the shoreline closest to the hut, has two ravens land on it to rest. You can shoot them here to collect their feathers.
After collecting the required items, head to the next marker to find Urki getting ready to launch. He then tells you to watch him fly. Head to the map marker that is close to your current location to watch him.
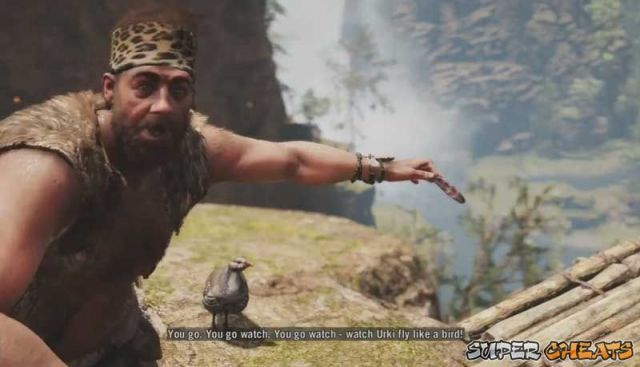
And here we see an Assassin's Creed easter egg. The way Urki first leaps is similar to the Assassin's Creed leap of faith. He even lands on a conveniently placed haystack just like the ones in Assassin's Creed games.
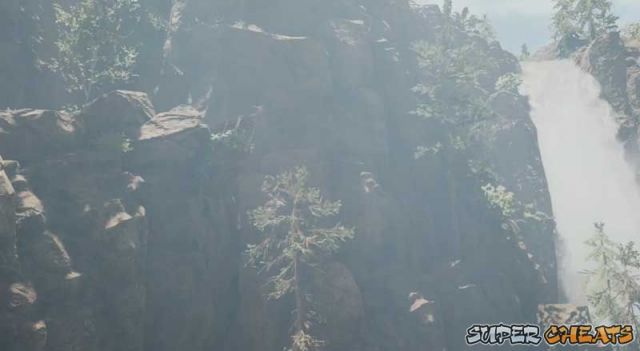 Strong Like Rock
Head over to Urki's home to begin the mission. It is at the same place from before.
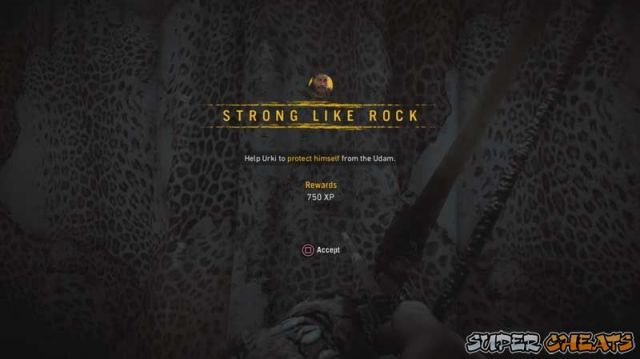
You will find Urki with a dead Udam. He somehow was able to survive an attack from an Udam. Not any Udam. If you notice, it is an armored Udam that looks a bit like Ull. Him surviving means he is either lucky or somewhat skilled.
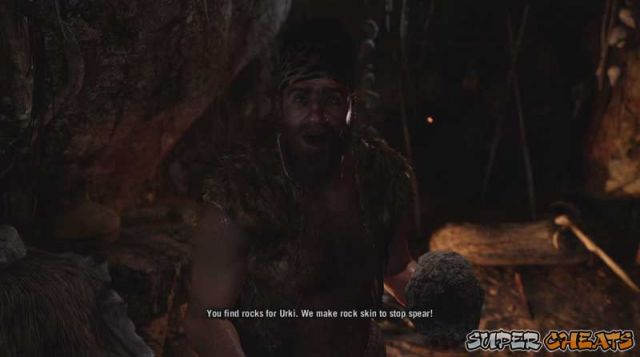
With your help, he will come to the realization that he needs to have rock-like skin and asks you to gather special rocks for him (never explained whats so special about the specific rocks). Head to the map marker to find an Izila camp. The rocks are highlighted in red when hunter vision is enabled.
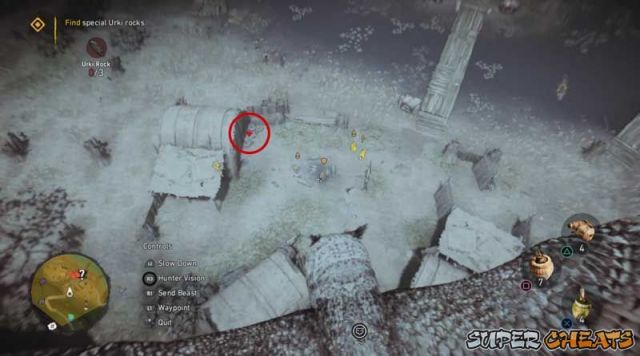
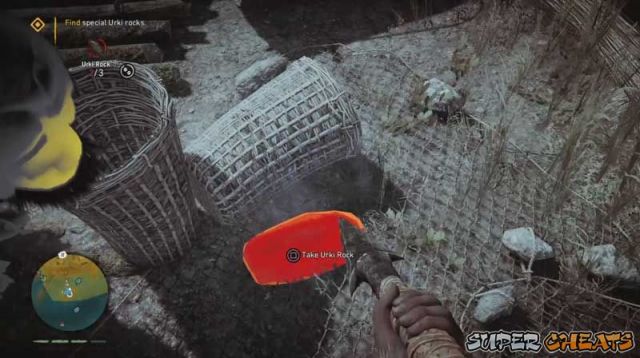
After gathering the three rocks, head back to Urki and give him the rocks. He will make something out of it.
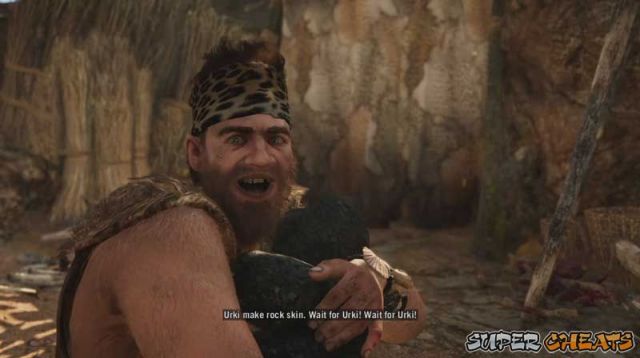
He will come back out sporting what looks to be body armor. He will ask you to throw a spear at him. This obviously ends badly for him as he flies into the background and crashes the other objets. This completes this mission.
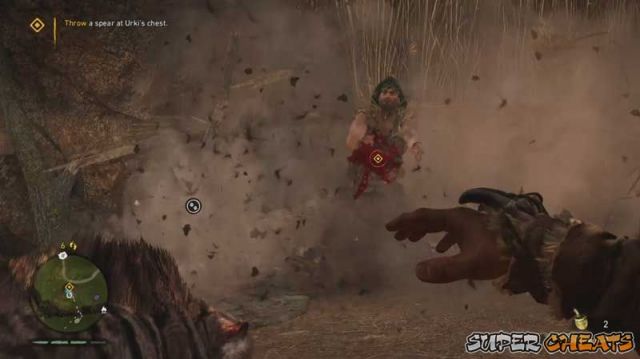 Urki's New Stink
Once again, head over to Urki's home to begin his mission.
Upon entering, he will get startled and think you are a bear. Glad that you aren't he complains on how bears like to attack him. Because of your input, again, he drums up another idea to have a new scent so bears won't attack him anymore.
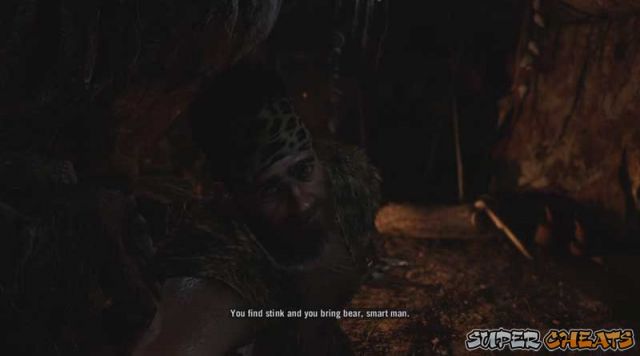
Head over to the marked areas on your map. Everything the mission needs can be found in these zones.
First is the Rhino Dung which can be found around the closest area. Be warned that some of the dung are placed close to the Rhinos so you MIGHT get attacked by some of them.
Move on to the next area. This area will hold the bears and some Honeycombs. Tame a bear and get the honeycombs.
After collecting all the ingredients, head over to Urki's location on the map and give him the ingredients.
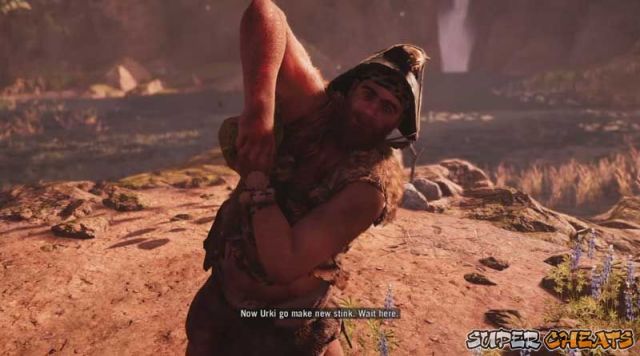
After "applying" his new stink, command the bear to attack him.
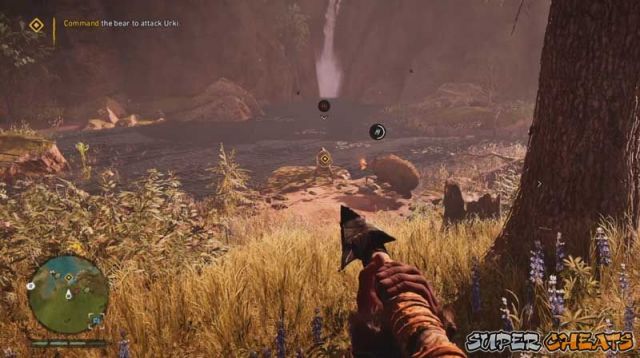
This of course, like his other ideas, doesn't go so well for him and gets himself mauled.
 Into Udam Land
Go into Sayla's hut to start a cutscene. She speaks about screams and wishes you could stop them but the way to the Udam land is blocked by rot fumes.
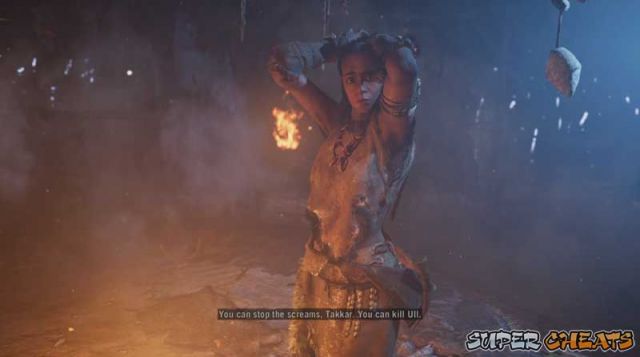
She says she knows how to make an antidote and needs some ingredients. Go to the place indicated in the map.
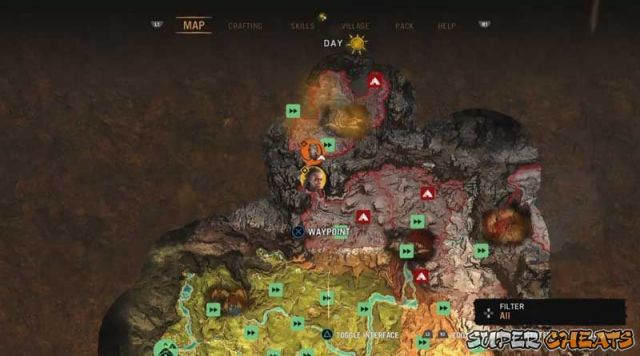
You will find an odd-looking stone structure that seems to be sheltering the herbs you are looking for.
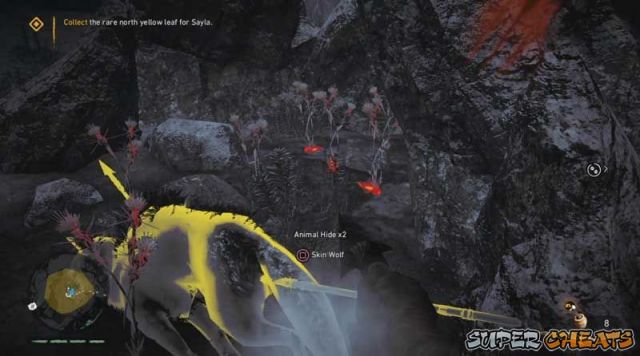
Just as you are picking the roots, some Udam show up along with Ull, and knock you out.
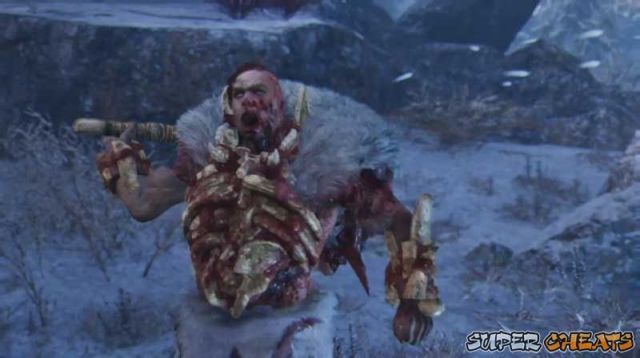
You wake up in prison and receive some choice words from Ull.

Your next task is to escape your cell. Follow the tracks that are marked in red. Grab the conveniently placed Grappling Hook and get out of the cell.
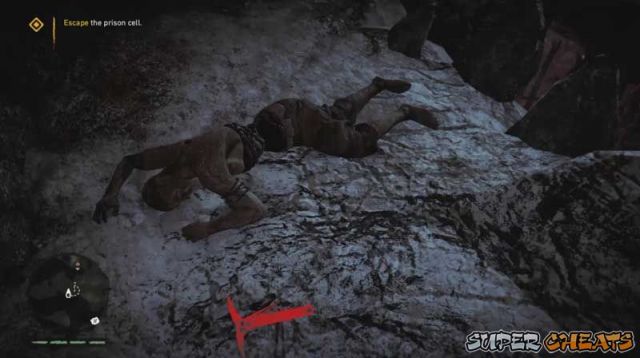
Next, retrieve the gear they have confiscated. It is along the tracks and being tampered by an Udam. Say hi to him.
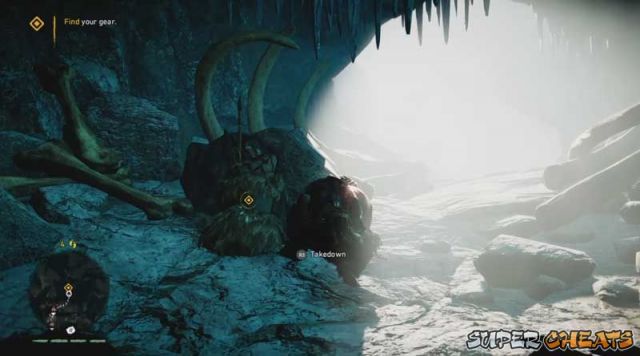
Continue following the tracks. Note that if you do not have cold protection, remember to watch your cold meter. You can also find some Udam who seem to be "shivering" it could be because of the Skull Fire or.. they are just cold. Probably the latter. So help keep them warm by setting their bed on fire. Good Takkar.
Eventually, you will reach a cavern with some enemies. Dispose of them and continue following the tracks.

You will again find another cavern with more enemies. Dispose of them again. (You can find more "cold" Udam. Warm them up ;)
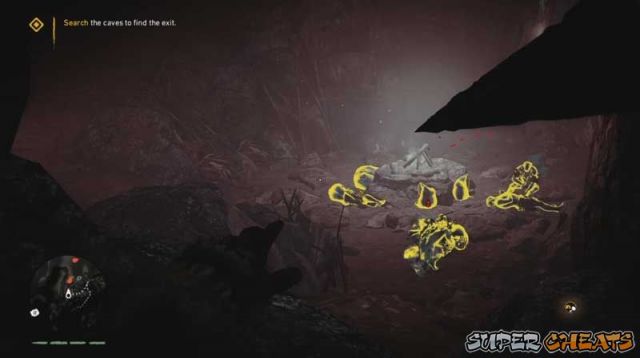
Here, you will find yourself in the last cavern. You will be tasked to kill the Cave Guardian. He is up there, in the center doing some... "business".

You can take him out instantly if you have the Shard Takedown skill by sneaking up into the cheering Udam behind him and throwing a shard his way.
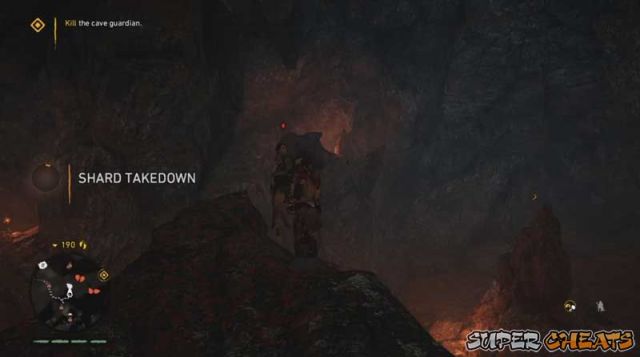
Kill the rest of the enemies and continue following the tracks to the exit to complete the mission.
You will automatically go back to Sayla and she will teach you the recipe.
Mask of Krati
Go to the Tensay map marker to continue the mission.
The cave entrance can be missed so check carefully. Enter the cave. Do not worry. The path is linear and can't lead to anywhere else.
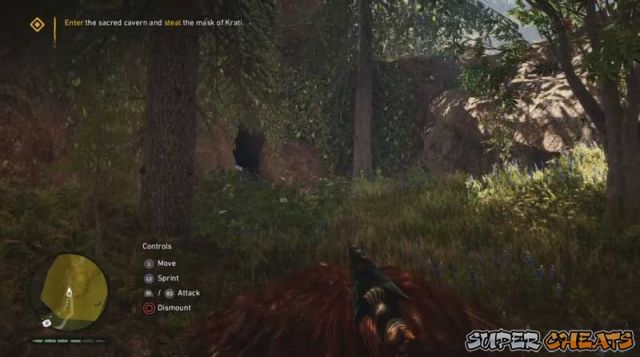
Reaching the end of the cave will bring you to a large round area in the cave where the Mask is kept.

Make your way towards the mask. Eliminate all the Izila or only select ones. When you reach the mask, interact with it to start a cutscene.
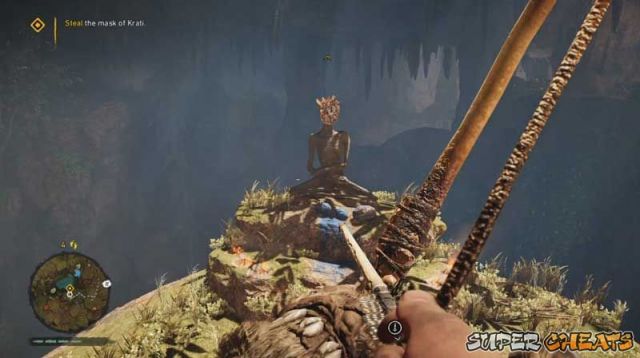
After taking the mask, Batari will come and find that the mask is gone.
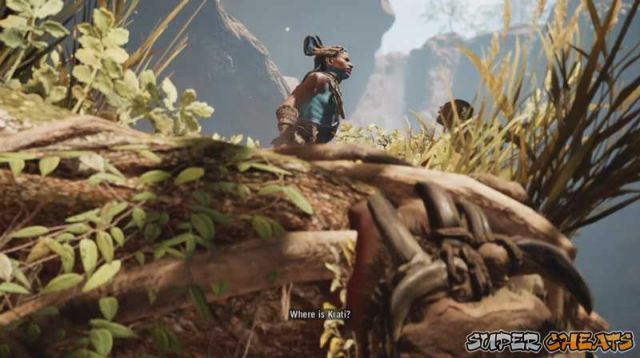
When the cutscene is over, your next objective is to exit the cave. So make your way out and killing the enemies in your way.
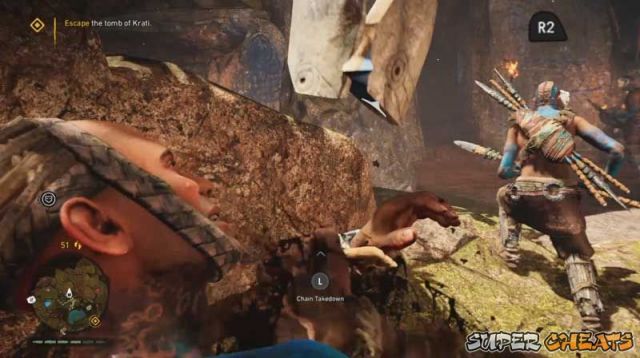
Upon reaching the exit, the mission will complete.
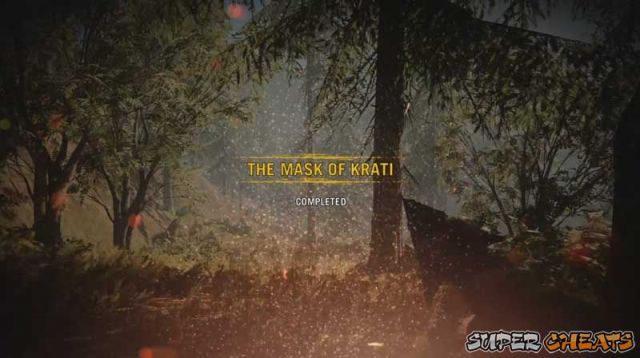 Izila Homeland
Head over to the path that leads to the Izila homeland which was previously blocked. It is the path that is just beside the Fire Screamer Fort. Get on a Mammoth to smash into the gates.
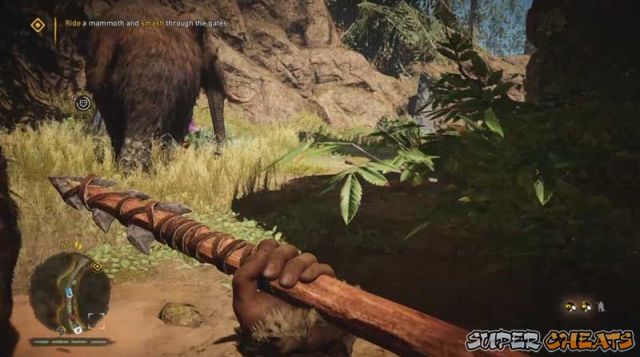
Inside the gates, you can find a captive Wenja. Set him free and he will tell you about the other Wenja captives.
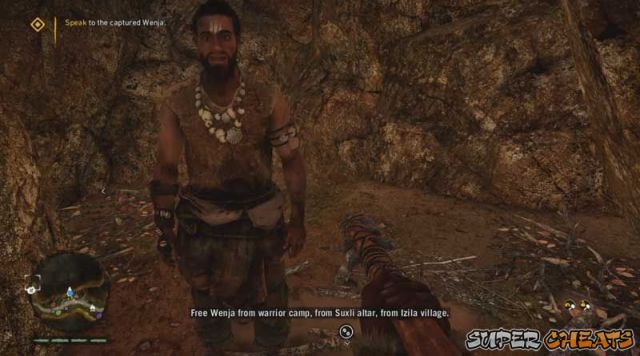
The Izilan homeland will have way more Izilan patrols than normal so keep this in mind since you will be running into a lot of the Izila.

The first and closest Izilan camp is the one in the middle. Head towards it.
Handle these sections as you would an outpost. Scout with the owl (or eliminate them if you can).
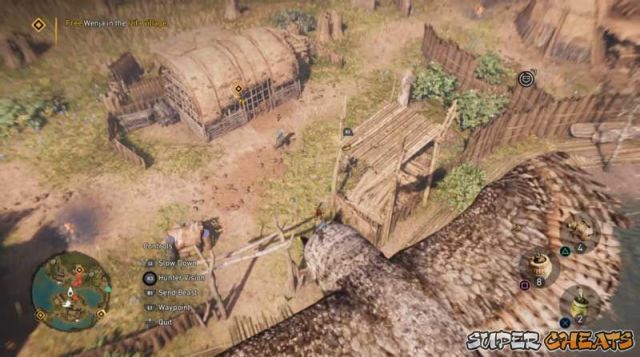
IMPORTANT!: DO NOT use fire to attack the structures especially the ones near captive wenja. You can burn them alive if the fire happens to spread to them.
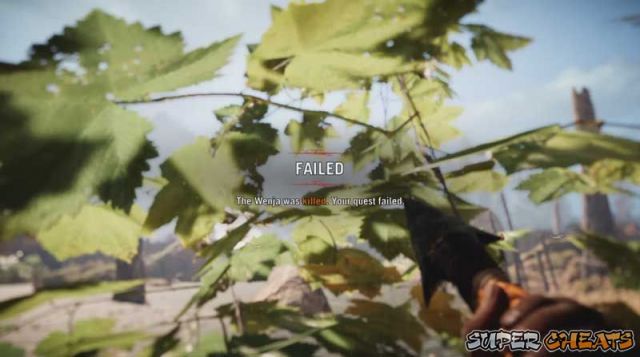
When the enemies have been dealt with, free the Wenja in the camp.
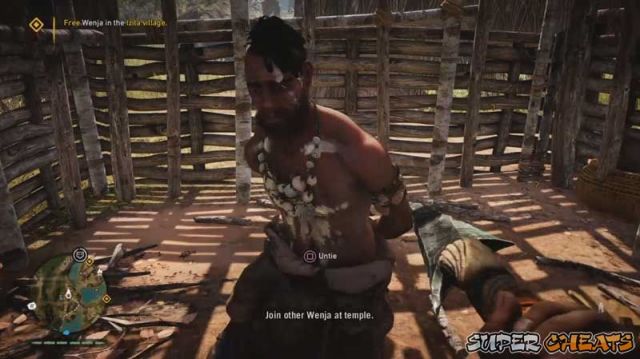
Head to the next camp. You can fast travel to the one in the lower left.
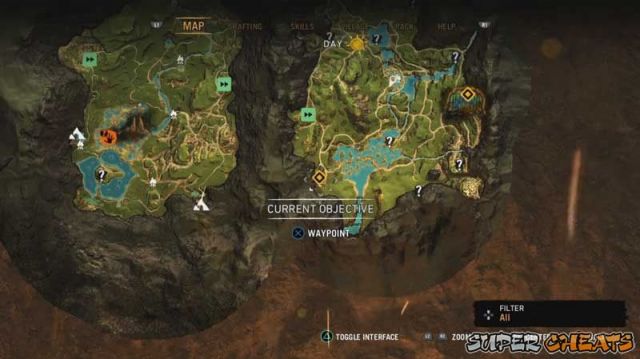
Do some recon with your owl again and eliminate the enemies.
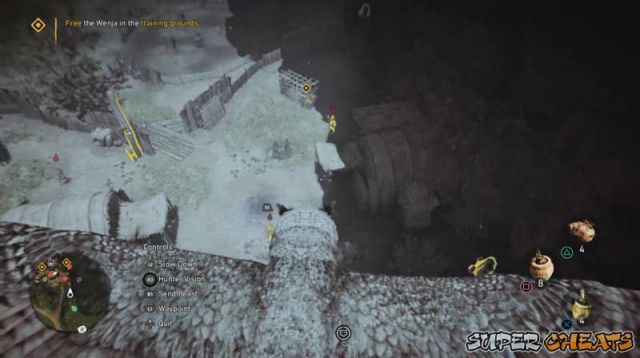
Head to the map markers to free the Wenja in this camp.
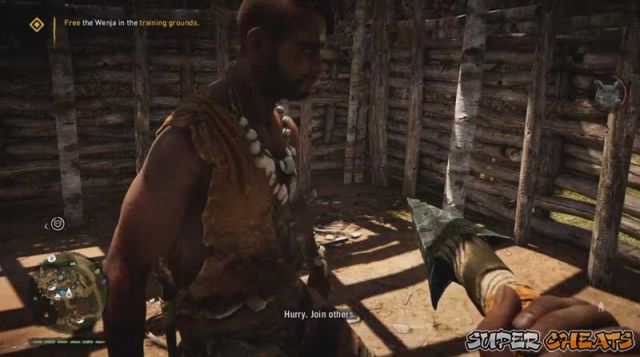
Make your way to the last camp in the upper right. It is a long way so if you can find a mammoth, do that to make it faster.
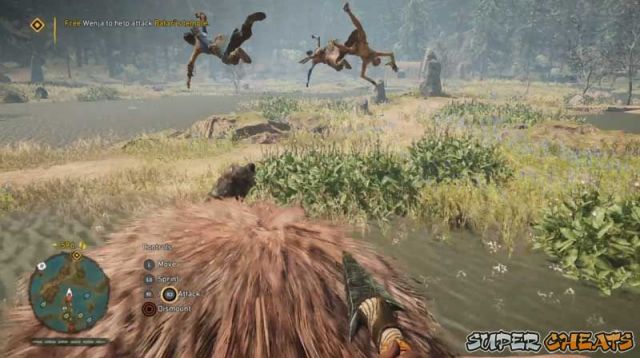
Upon arriving, do the recon thing again and eliminate all hostiles.
Free the last Wenjas that are captive in this camp.
 Batari's Temple
Go to the map marker to meet the Wenja you rescued in the previous mission.
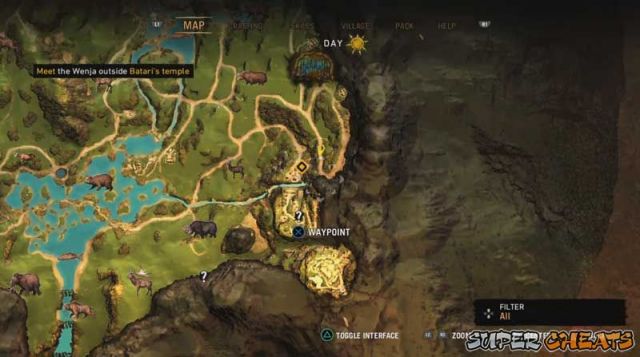
Speak to them to make them help you breach the gates into Batari's temple.
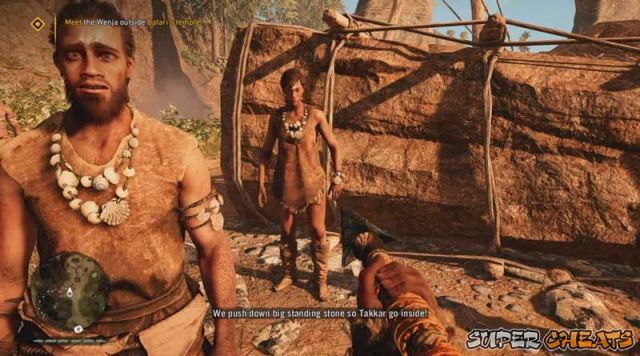
Hold off the Izila as your Wenja attempt to crash the standing stone into the gate.
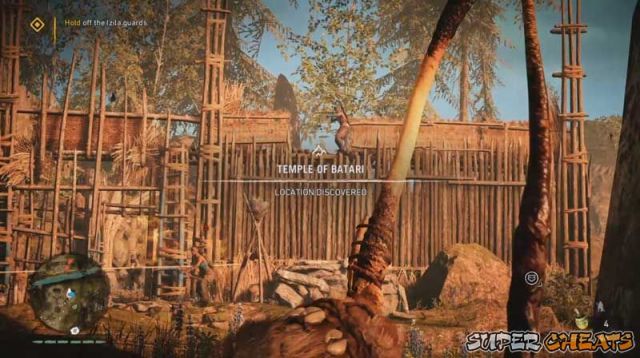
After a few seconds of holding backt he Izila, your Wenja team manage to push the standing stones into the gate, crashing the gates. Here, you also put on the Mask of Krati.
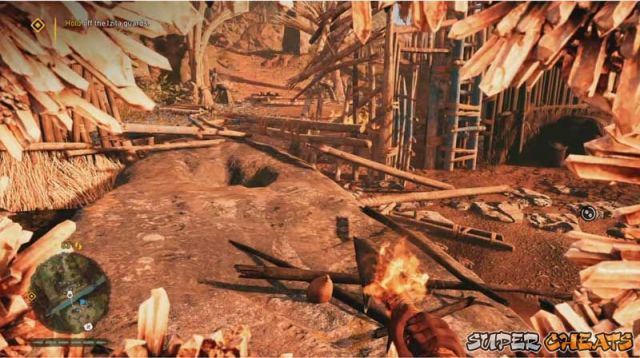
While wearing the Mask of Krati, all the Izila will flee from you in fear and are technically free kills since they can be taken down even if they are aware of your presence.
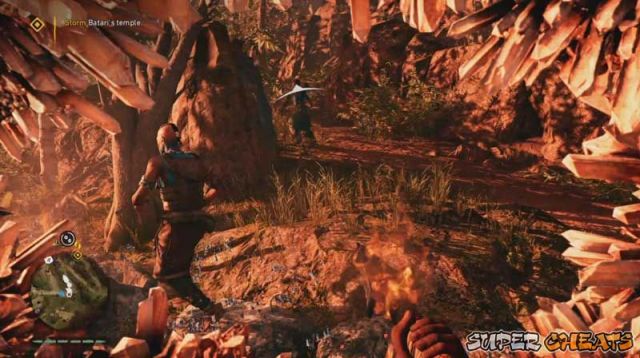
Just keep going to the map marker and you will encounter Batari. She is definitely not pleased with you wearing the mask and wrestles you and breaks the mask. She soon runs off and your fight with her begins.

Batari can be found at the very back of this stage. Using your owl, scout the region and go to Batari's area and use fire bombs to destroy the structures around her to destroy her hiding place.
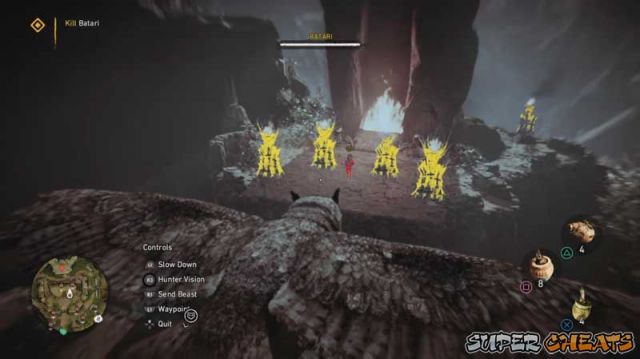
Aside from Batari, she also calls on a lot of Izila to join in on the fight. Dispose of them however you wish.
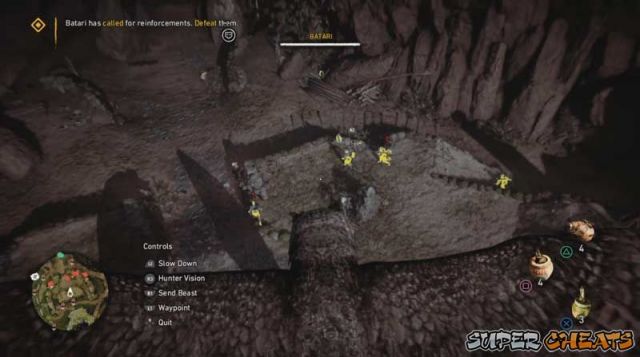
After the normal enemies have been dealt with, a bunch of armored heavies will come in.
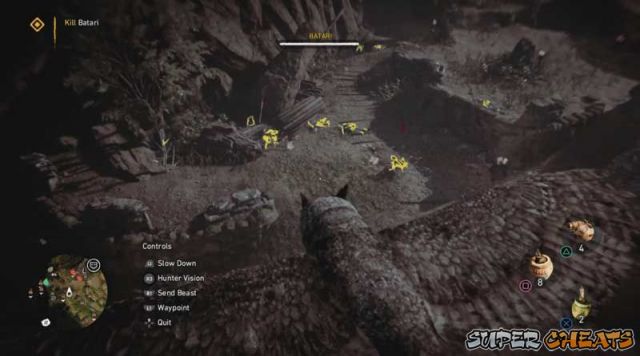
During or after dealing with the other enemies (preferably after) go ahead and attack Batari.
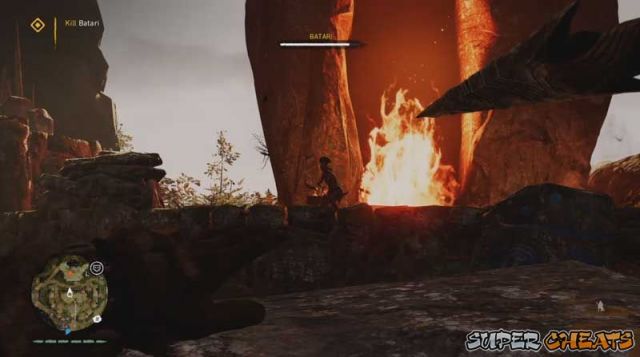
During your fight, she will call on the Izila a few more times. Just do what you have previously done and eliminate her reinforcements and continue attacking her. When she has gone down to almost no HP, she will head out of her area. When she is in the lower area, she can be defeated now.
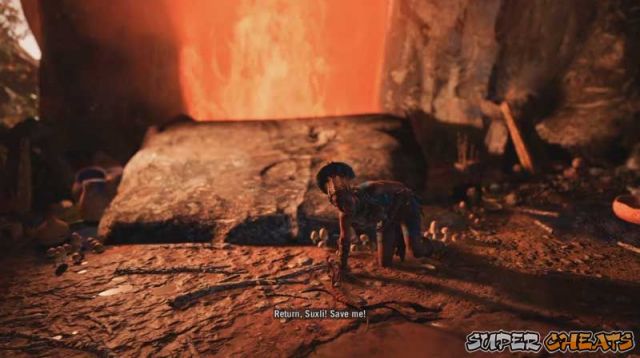
Batari is now in your hands now as your burn her in their own fire.
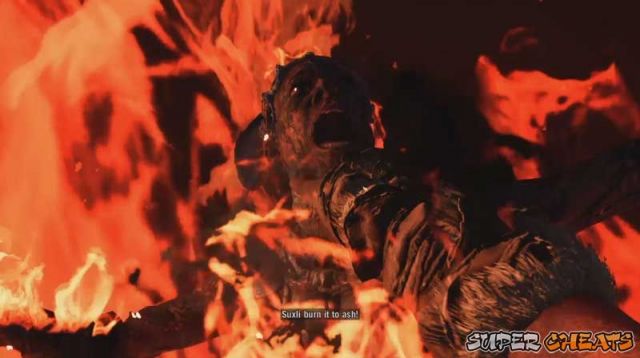
After Izila is dead, the Izila are now without a leader, you return to your village and tell them the good news of Batari's demise.
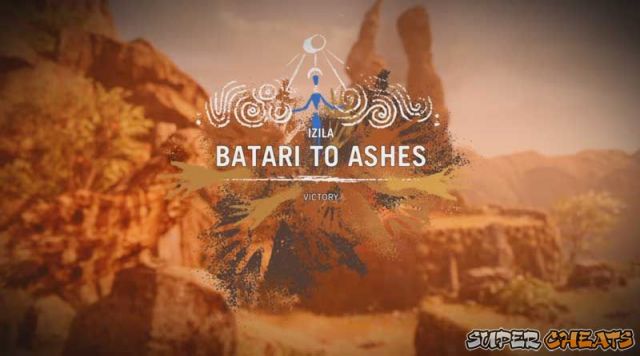
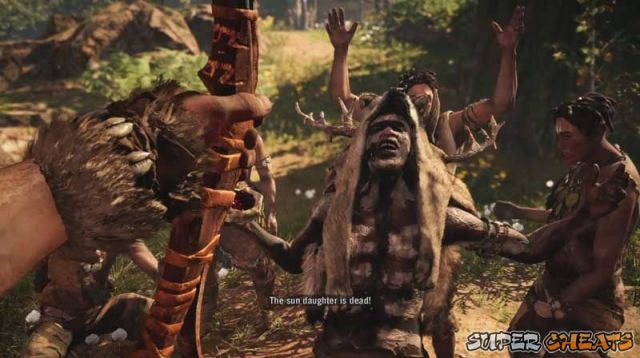 Udam Homelands
After Sayla gives you the antidote recipe, You can now craft it to get past the Rot Fumes in the entrance to the Udam land. Head to the Big Darwa Fort and follow the path that leads to the cave with the green smoke. Take an antidote by going into the food menu (D-pad Left) and selecting it. Eating it will give you a buff which removes and negates poison effects. While the buff is active, head into the cave, deeper into Udam territory.
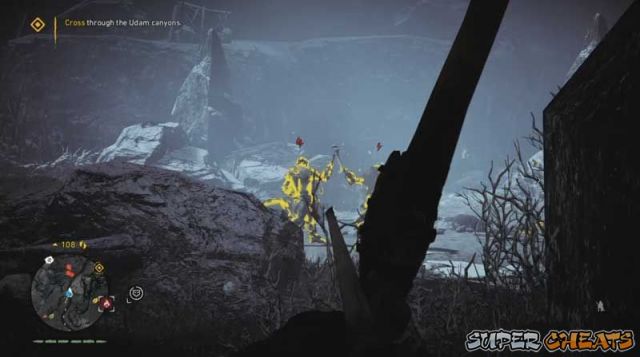
The canyon, and of course, the homeland, is littered with lots of Udam units so take care in getting spotted or you could be overwhelmed (If you have all the Skills then you can probably take all the enemies you can).
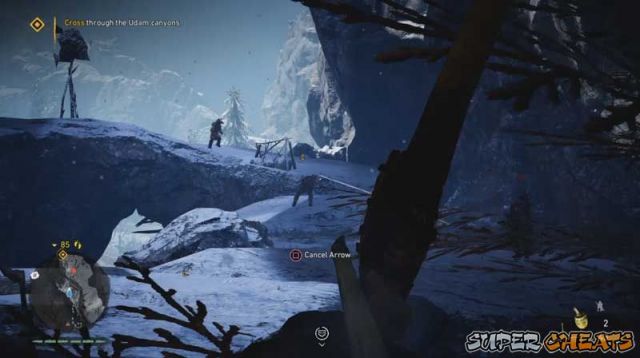
There are also a lot of heavy units around so the best way to deal with those is a fully upgraded spear which you throw at them. They usually go down easily with those. Just remember to retrieve the spears you throw.
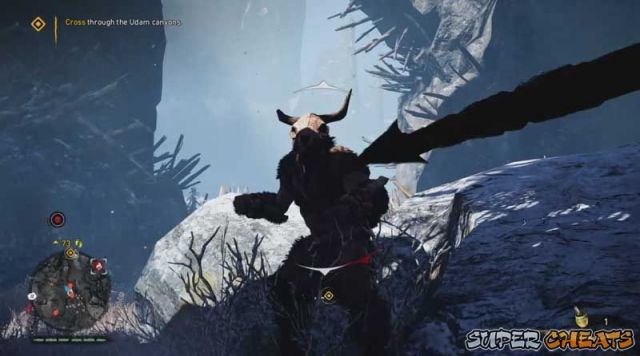
After exiting the canyon, your next task is to capture the bonfire in the middle of the homeland. Head over there and do what you normally do with Bonfires. Use your scout and clear all the enemies.
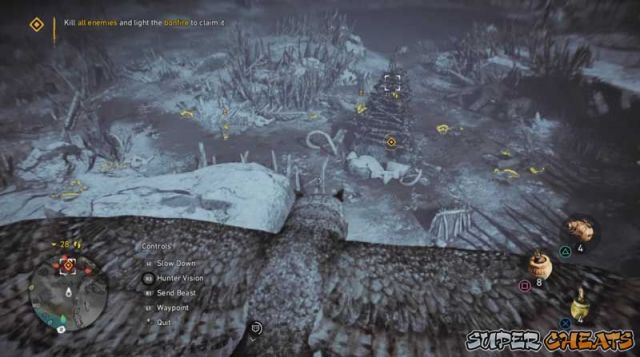
When the bonfire has been lit and captured,
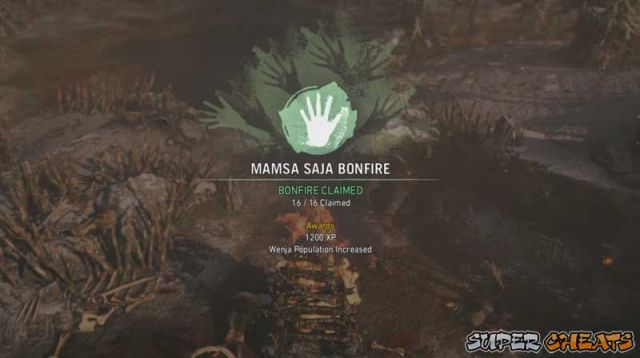
your next task is to find Ull's cave, It will be marked on the map and it is to the north.
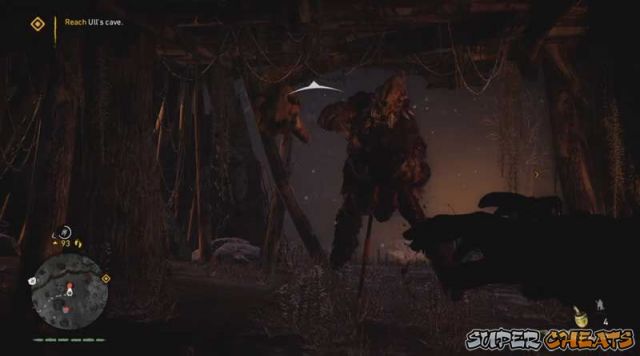 Ull's Sanctum
When you reach the map marker, you will find Ull's cave,
Enter it and search for Ull. There will be some enemies littered throughout the cave so deal with them by chucking spears at them.
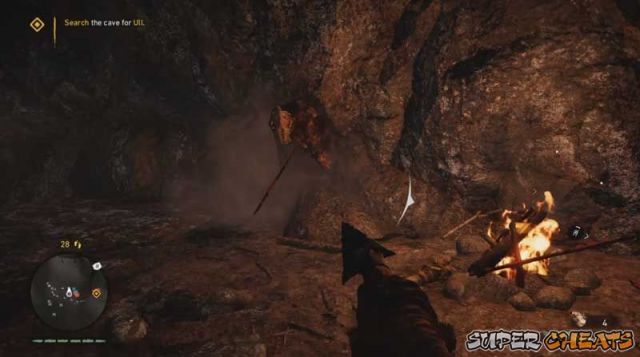
Eventually you will reach the colder parts of the cave that ice shards appear on the roof. The game tells you to shoot them. There even is a glowing area under them to show the area that will get hit. This will be useful for the boss fight later since you will use this to deal substantial amounts of damage to Ull.
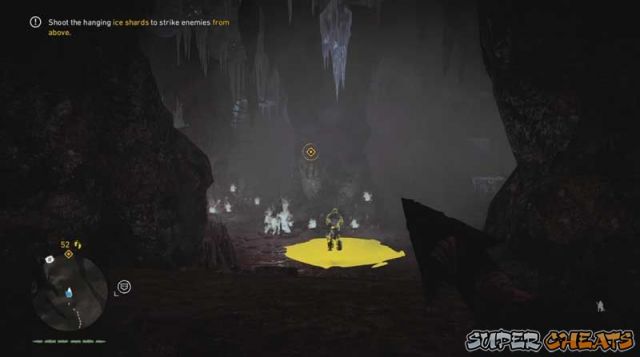
When you reach Ull's main area, you can get a quick and easy, free hit on him by dropping ice shards on him and his men. Do a takedown behind him when Ull has been stunned by the ice shards.
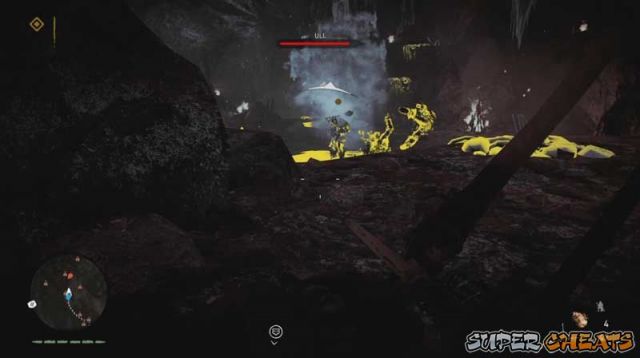
There will also be numerous amounts of Udam constantly spawning in the battle. Keep moving and they will have trouble hitting you. Continue putting the pressure on Ull.
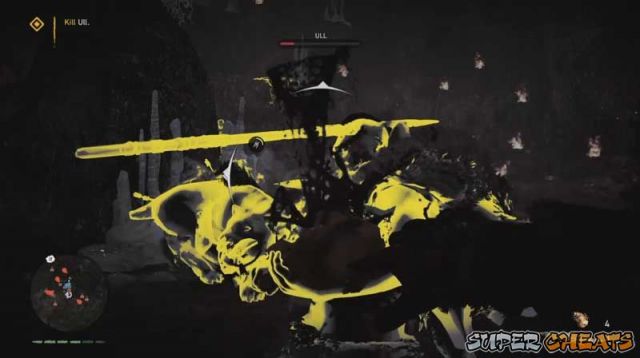
When you drop Ull's HP to none, shoot an ice shard to make it come down on him to finish him. Just as you are about the finish though, a Cry will be heard. Ull then goes towards the sound.
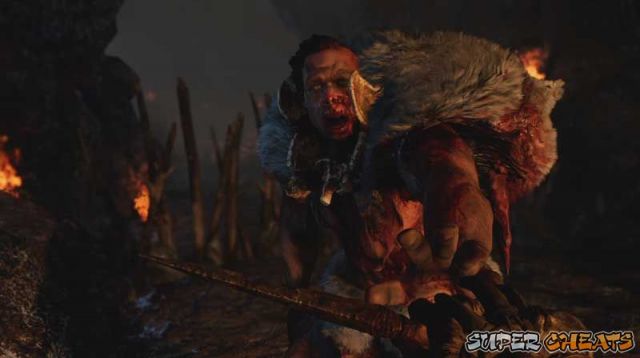
You will find Ull's children. In his desperation, he threatens to kill the baby but soon gives up. He asks you to protect his children since the Udam are slowly dying.
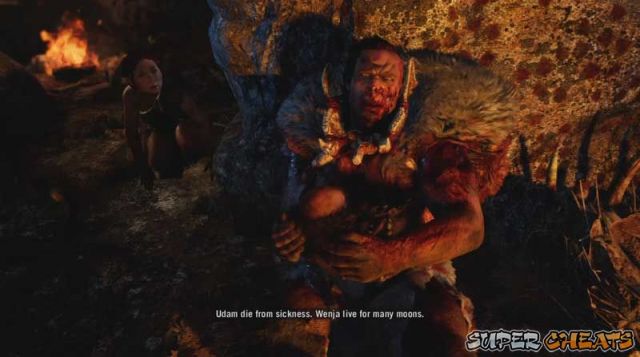
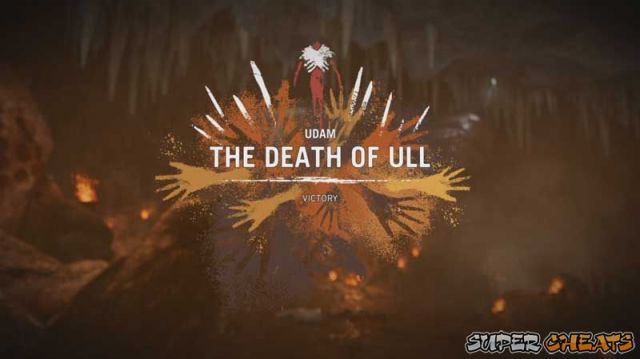
After Ull passes, the mission is now complete and you will report the success to your people.
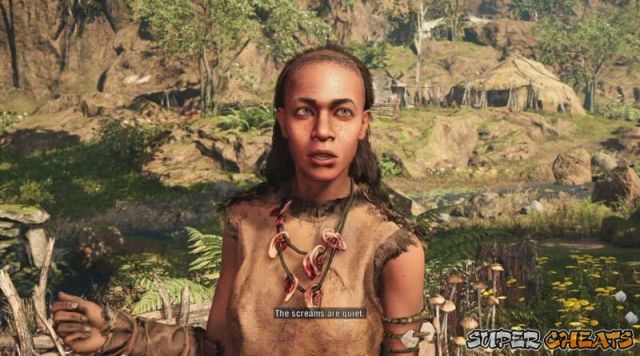
Head over to Roshani's cage to start the mission. He will tell you about an event the Izila hold and suggests you take the seeds for food.
Go to the map marker near the center of the map.
Upon arriving, look for the standing stone where the marker will be at. It is highlighted red in hunter vision.
Just a few feet from where you start the mission is the first area. If you have hunter vision on looking out the cliff, you can already see one of the bags highlighted in red. Killing the Izila here is optional.
The next area has the seed beside a boulder that is near a bee cluster.
The last seed bag is near the water, at the side facing the other side of the river.
After obtaining all three, exit the area to complete the mission. You can even swim to the other side for a quick exit.
Blood Sacrifice - Roshani Mission
After building Roshani a hut, enter it and get another mission from him. You will find him worrying about an abducted Wenja and the captors saw him in your village.
Tensay comes in and demands Roshani to tell you the reason. You find out it is for sacrifice. You must go and stop them from sacrificing your tribesman.
Head over to the map marker again, around the southern portion of the map.
As you approach the area, you will notice it looks very similar to the Stonehenge in real life.
You will find some Izila dancing around the sacrifice. There are other Izila around. Deal with them however you please.
The priestess is late so if you managed to kill all the Izila fairly quickly, she might arrive without a clue. She will be marked in red in hunter vision.
After all the reinforcements are dead, free the Wenja to finish the mission.
The Blaze - Roshani Mission
After upgrading Roshani's Hut, speak to him again and he will tell you to strike the Izila to scare them off. They are highly agricultural people and by attacking one of their main farms, you will be dealing a great blow to them. Head to the map markers and find the farm.
Once again, use your owl for recon.
You will find that there are quite the number of Izila troops stationed here. Good thing that there are some Wenja captives that will fight if you free them.
While ridding the place of enemies, burn everything you see. Most notable the ones that look like wheat farms.
Keep on burning these and the mission will be complete.
Fly Like A Bird - Urki mission
Urki is a side-character that has no impact on the story or gameplay. The character himself is an easter egg of a character named Hurk from Far Cry 4. He even speaks with a weird accent like a modern man trying to speak the Wenja language. His missions are pretty much joke missions.
Head on over to his map marker to start his first mission.
You will find him in a dilemma of wanting to fly like a bird, hence the title. You casually tell him that feathers are the reason he can't fly. He then asks you to help him gather ingredients.
Head to the map marker near Urki's hut to begin collecting. Everything you need for the mission can be found in this area.
The only one of note that is a bit tricky to hunt is the raven. You can shoot it down from the sky if you can, but the shoreline closest to the hut, has two ravens land on it to rest. You can shoot them here to collect their feathers.
After collecting the required items, head to the next marker to find Urki getting ready to launch. He then tells you to watch him fly. Head to the map marker that is close to your current location to watch him.
And here we see an Assassin's Creed easter egg. The way Urki first leaps is similar to the Assassin's Creed leap of faith. He even lands on a conveniently placed haystack just like the ones in Assassin's Creed games.
Strong Like Rock - Urki Mission
Head over to Urki's home to begin the mission. It is at the same place from before.
You will find Urki with a dead Udam. He somehow was able to survive an attack from an Udam. Not any Udam. If you notice, it is an armored Udam that looks a bit like Ull. Him surviving means he is either lucky or somewhat skilled.
With your help, he will come to the realization that he needs to have rock-like skin and asks you to gather special rocks for him (never explained whats so special about the specific rocks). Head to the map marker to find an Izila camp. The rocks are highlighted in red when hunter vision is enabled.
After gathering the three rocks, head back to Urki and give him the rocks. He will make something out of it.
He will come back out sporting what looks to be body armor. He will ask you to throw a spear at him. This obviously ends badly for him as he flies into the background and crashes the other objets. This completes this mission.
Urki's New Stink - Urki Mission
Once again, head over to Urki's home to begin his mission.
Upon entering, he will get startled and think you are a bear. Glad that you aren't he complains on how bears like to attack him. Because of your input, again, he drums up another idea to have a new scent so bears won't attack him anymore.
Head over to the marked areas on your map. Everything the mission needs can be found in these zones.
First is the Rhino Dung which can be found around the closest area. Be warned that some of the dung are placed close to the Rhinos so you MIGHT get attacked by some of them.
Move on to the next area. This area will hold the bears and some Honeycombs. Tame a bear and get the honeycombs.
After collecting all the ingredients, head over to Urki's location on the map and give him the ingredients.
After "applying" his new stink, command the bear to attack him.
This of course, like his other ideas, doesn't go so well for him and gets himself mauled.
Into Udam Land
Go into Sayla's hut to start a cutscene. She speaks about screams and wishes you could stop them but the way to the Udam land is blocked by rot fumes.
She says she knows how to make an antidote and needs some ingredients. Go to the place indicated in the map.
You will find an odd-looking stone structure that seems to be sheltering the herbs you are looking for.
Just as you are picking the roots, some Udam show up along with Ull, and knock you out.
You wake up in prison and receive some choice words from Ull.
Your next task is to escape your cell. Follow the tracks that are marked in red. Grab the conveniently placed Grappling Hook and get out of the cell.
Next, retrieve the gear they have confiscated. It is along the tracks and being tampered by an Udam. Say hi to him.
Continue following the tracks. Note that if you do not have cold protection, remember to watch your cold meter. You can also find some Udam who seem to be "shivering" it could be because of the Skull Fire or.. they are just cold. Probably the latter. So help keep them warm by setting their bed on fire. Good Takkar.
Eventually, you will reach a cavern with some enemies. Dispose of them and continue following the tracks.
You will again find another cavern with more enemies. Dispose of them again. (You can find more "cold" Udam. Warm them up ;)
Here, you will find yourself in the last cavern. You will be tasked to kill the Cave Guardian. He is up there, in the center doing some... "business".
You can take him out instantly if you have the Shard Takedown skill by sneaking up into the cheering Udam behind him and throwing a shard his way.
Kill the rest of the enemies and continue following the tracks to the exit to complete the mission.
You will automatically go back to Sayla and she will teach you the recipe.
Mask of Krati
Go to the Tensay map marker to continue the mission.
The cave entrance can be missed so check carefully. Enter the cave. Do not worry. The path is linear and can't lead to anywhere else.
Reaching the end of the cave will bring you to a large round area in the cave where the Mask is kept.
Make your way towards the mask. Eliminate all the Izila or only select ones. When you reach the mask, interact with it to start a cutscene.
After taking the mask, Batari will come and find that the mask is gone.
When the cutscene is over, your next objective is to exit the cave. So make your way out and killing the enemies in your way.
Upon reaching the exit, the mission will complete.
Izila Homeland
Head over to the path that leads to the Izila homeland which was previously blocked. It is the path that is just beside the Fire Screamer Fort. Get on a Mammoth to smash into the gates.
Inside the gates, you can find a captive Wenja. Set him free and he will tell you about the other Wenja captives.
The Izilan homeland will have way more Izilan patrols than normal so keep this in mind since you will be running into a lot of the Izila.
The first and closest Izilan camp is the one in the middle. Head towards it.
Handle these sections as you would an outpost. Scout with the owl (or eliminate them if you can).
IMPORTANT!: DO NOT use fire to attack the structures especially the ones near captive wenja. You can burn them alive if the fire happens to spread to them.
When the enemies have been dealt with, free the Wenja in the camp.
Head to the next camp. You can fast travel to the one in the lower left.
Do some recon with your owl again and eliminate the enemies.
Head to the map markers to free the Wenja in this camp.
Make your way to the last camp in the upper right. It is a long way so if you can find a mammoth, do that to make it faster.
Upon arriving, do the recon thing again and eliminate all hostiles.
Free the last Wenjas that are captive in this camp.
Batari's Temple
Go to the map marker to meet the Wenja you rescued in the previous mission.
Speak to them to make them help you breach the gates into Batari's temple.
Hold off the Izila as your Wenja attempt to crash the standing stone into the gate.
After a few seconds of holding backt he Izila, your Wenja team manage to push the standing stones into the gate, crashing the gates. Here, you also put on the Mask of Krati.
While wearing the Mask of Krati, all the Izila will flee from you in fear and are technically free kills since they can be taken down even if they are aware of your presence.
Just keep going to the map marker and you will encounter Batari. She is definitely not pleased with you wearing the mask and wrestles you and breaks the mask. She soon runs off and your fight with her begins.
Batari can be found at the very back of this stage. Using your owl, scout the region and go to Batari's area and use fire bombs to destroy the structures around her to destroy her hiding place.
Aside from Batari, she also calls on a lot of Izila to join in on the fight. Dispose of them however you wish.
After the normal enemies have been dealt with, a bunch of armored heavies will come in.
During or after dealing with the other enemies (preferably after) go ahead and attack Batari.
During your fight, she will call on the Izila a few more times. Just do what you have previously done and eliminate her reinforcements and continue attacking her. When she has gone down to almost no HP, she will head out of her area. When she is in the lower area, she can be defeated now.
Batari is now in your hands now as your burn her in their own fire.
After Izila is dead, the Izila are now without a leader, you return to your village and tell them the good news of Batari's demise.
Udam Homelands
After Sayla gives you the antidote recipe, You can now craft it to get past the Rot Fumes in the entrance to the Udam land. Head to the Big Darwa Fort and follow the path that leads to the cave with the green smoke. Take an antidote by going into the food menu (D-pad Left) and selecting it. Eating it will give you a buff which removes and negates poison effects. While the buff is active, head into the cave, deeper into Udam territory.
The canyon, and of course, the homeland, is littered with lots of Udam units so take care in getting spotted or you could be overwhelmed (If you have all the Skills then you can probably take all the enemies you can).
There are also a lot of heavy units around so the best way to deal with those is a fully upgraded spear which you throw at them. They usually go down easily with those. Just remember to retrieve the spears you throw.
After exiting the canyon, your next task is to capture the bonfire in the middle of the homeland. Head over there and do what you normally do with Bonfires. Use your scout and clear all the enemies.
When the bonfire has been lit and captured,
your next task is to find Ull's cave, It will be marked on the map and it is to the north.
Ull's Sanctum
When you reach the map marker, you will find Ull's cave,
Enter it and search for Ull. There will be some enemies littered throughout the cave so deal with them by chucking spears at them.
Eventually you will reach the colder parts of the cave that ice shards appear on the roof. The game tells you to shoot them. There even is a glowing area under them to show the area that will get hit. This will be useful for the boss fight later since you will use this to deal substantial amounts of damage to Ull.
When you reach Ull's main area, you can get a quick and easy, free hit on him by dropping ice shards on him and his men. Do a takedown behind him when Ull has been stunned by the ice shards.
There will also be numerous amounts of Udam constantly spawning in the battle. Keep moving and they will have trouble hitting you. Continue putting the pressure on Ull.
When you drop Ull's HP to none, shoot an ice shard to make it come down on him to finish him. Just as you are about the finish though, a Cry will be heard. Ull then goes towards the sound.
You will find Ull's children. In his desperation, he threatens to kill the baby but soon gives up. He asks you to protect his children since the Udam are slowly dying.
After Ull passes, the mission is now complete and you will report the success to your people.
Ending
Ending
With Ull and Batari gone, the land of Oros is now peaceful. Here we see your tribe at peace.
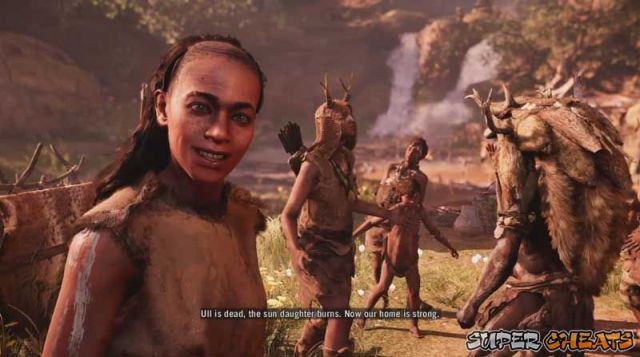
The land of Oros conquered
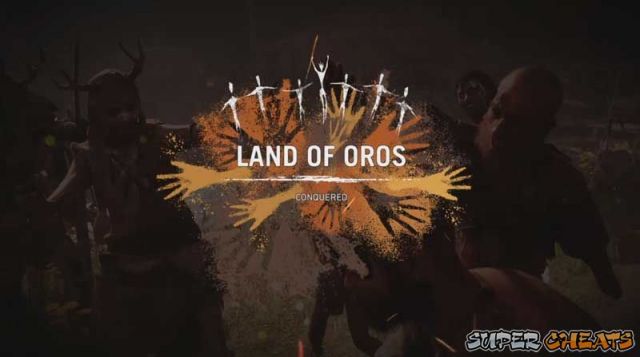
And we also see a bonus where one of Ull's children seems to be able to tame beasts as well..
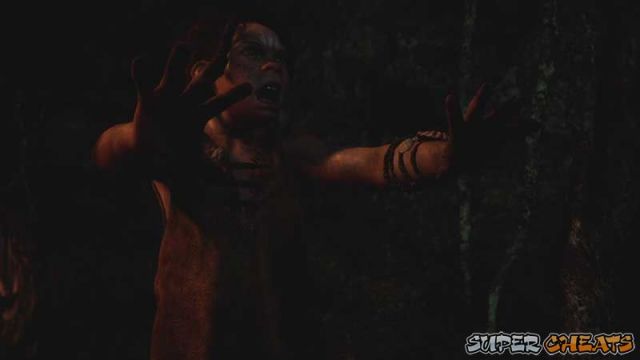
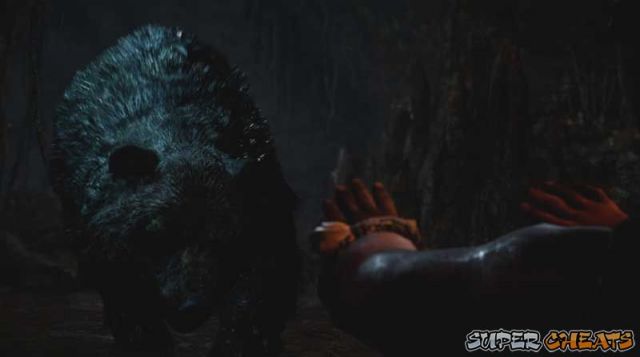
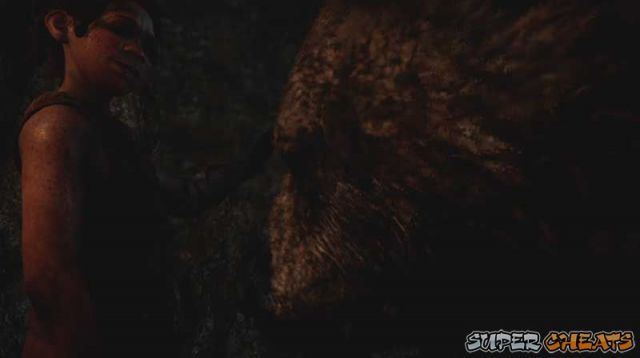
After that smirk, you will wake up in one of the best areas in the game in my opinion.
Thank you for playing Far Cry Primal! Congratulations on conquering Oros!
With Ull and Batari gone, the land of Oros is now peaceful. Here we see your tribe at peace.
The land of Oros conquered
And we also see a bonus where one of Ull's children seems to be able to tame beasts as well..
After that smirk, you will wake up in one of the best areas in the game in my opinion.
Thank you for playing Far Cry Primal! Congratulations on conquering Oros!

