Crysis 3

After starting the game, you'll have the option to enter the tutorial or skip it. There's an achievement you can easily unlock by going through the tutorial so unless you're not after Achievements, I would recommend going through the tutorial.
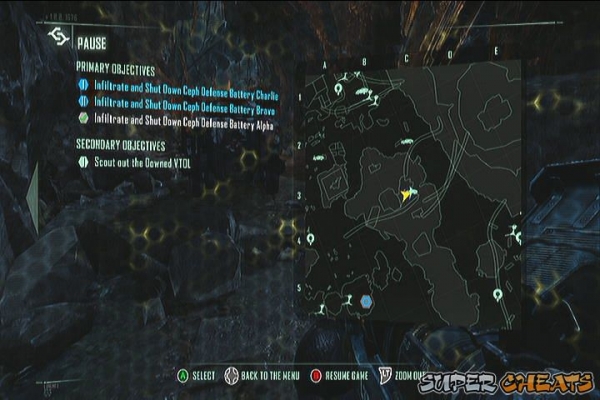
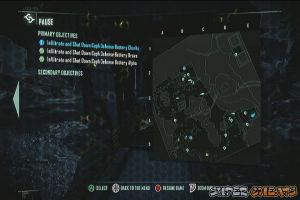
Mission 1: Post-Human
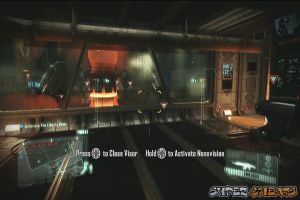
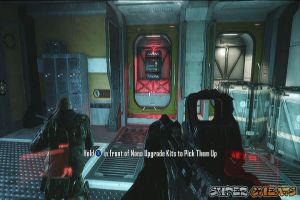
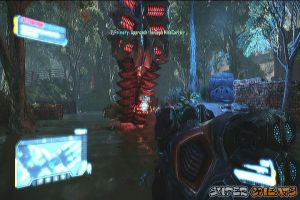
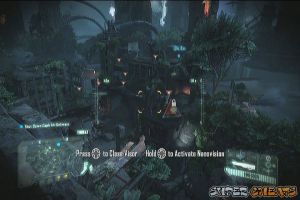
Take note that you can locate and tag Collectibles too when you're in range. As soon as the mission starts, activate your nanovisor by pressing the UP dpad once. You should find the first Blackbox beside a corpse just down the ramp.
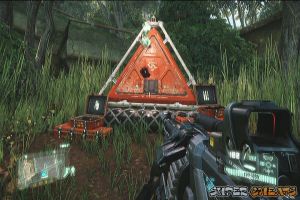
Cell Blackbox
Follow your Psycho and make your way up to the CELL platform. Once inside, he'll ask you to put your silencer on. Press the Back button then press Y to equip the silencer.

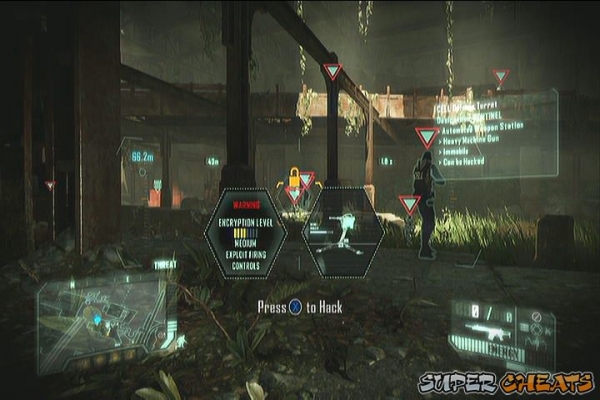
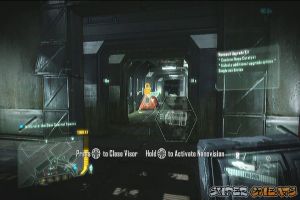
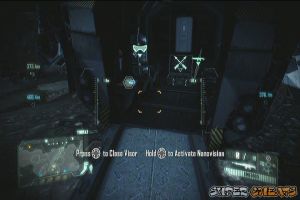
Head inside then take out the guard to your left. If you want, you can activate your nanovisor to scan the area and tag targets. Take the stairs to the right and follow the path until you reach the control room. Take the first datapad on the terminal to the right.
Cell Intel
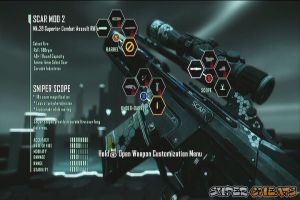
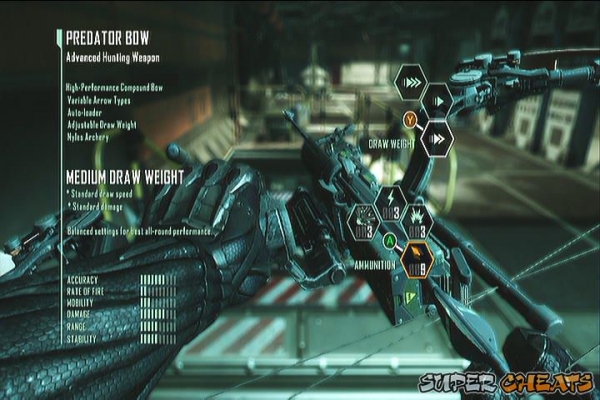
Go downstairs and open the hatch to let Psycho in. There's also an ammo cache beside it as well. Continue ahead and Psycho will give you the Predator Bow. You can press Y to equip your normal weapons and press the Down DPAD to equip the bow. Press the Back button to customize the draw strength and changing the arrow types.
After the scene, head to the stairs but don't go down yet. There's another datapad on top of the machine in the corner.
Blackbox 1
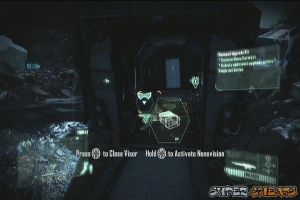
Head to the next area and dispatch the enemies in the catwalks. This is also a perfect opportunity to test your bow. After clearing the area, head to the mission marker to find Psycho. There's another datapad on the console to the right so don't forget to grab it before moving forth.
Ceph Species Overview
Open the next door and follow the catwalk, leading to a locked door. Peek over the window and use your nanovisor. You should see the next datapad there. Perform a remote hack to open the door and collect the datapad inside.
Ceph Over-Hives and Seeding Ships
Now follow Psycho to the next room where Psycho hacks a terminal. Just beside him is another datapad.
Recording: Out of Test Subjects
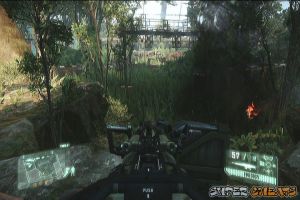
Head outside and tag the enemies before moving the catwalks. Once you're detected, a CELL Hellcat will arrive. You can take this attack chopper out using your bow's Super-Thermite tip. You need to land all three shots to destroy it. Activate your nanosuit's armor boost to withstand the Hellcat's hail of bullets, long enough for you to take aim and destroy it.
Who Needs Rockets?
Clear the remaining enemies in the area and head towards the door. There's also an arrow crate nearby to replenish your arrow stocks. Continue inside the facility until you reach the reactor area. Open your nanovisor and tag the enemies as necessary.

Follow the hallway to the right and enter the small room at the end to find a datapad beside the ammo crate. Your nanovisor can detect and tag this after reaching the first corner of the hallway.
Recording: The Liberty Dome
Take out the enemies or get past them then head to the mission marker. There are two paths leading to it but you may want to follow the path to the right so it leads you to a room with two robotic arms. You can find the datapad on the terminal.
Recording: A Cry for Help
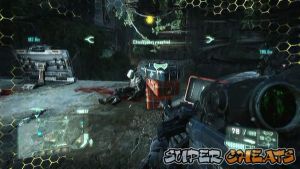
Continue forth and tag new targets if you want. Continue to the top right corner of the map and open the door. There are two guards and an auto-turret ahead. Kill the guards then hack the auto-turret. Continue past the next doors and you'll find a corpse on the floor. Pick up the second Blackbox then head to the mission marker.


Blackbox 2
Enter the elevator for a scene. mission complete.

Mission 2: Welcome to the Jungle
Datapads: 3Blackboxes: 2
Propaganda Posters: 1
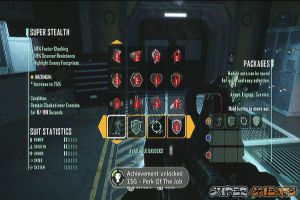
Follow Psycho as he leads you to the nanosuit upgrade terminal. Examine the terminal to get four unlock points. Spend it on whatever you prefer/ suits your gameplay. Take note that suit's abilities are even more enhanced by meeting conditions. Unlock the modules you want then store the set in any of the button assignments. This will also unlock an achievement once done. (Perk of the Job)
Follow Psycho outside. Equip your Predator Bow and arm it with the Super-Thermite tip. There's a deer ahead that you need to plant the explosive to. Enter Stealth Mode and get near enough to hit the deer. Wait for it to explode to unlock an achievement. (Bang for the Buck)
Bang for the Buck
The first collectible in this mission can be found in the dead-end straight to the south. Find the Propaganda Poster stuck on a derelict building wall to the southwest. You have to use your nanovisor to download it.
CELL Propaganda
Regroup with Psycho in front of the minefield. Use your nanosuit to hack the mines and disable them. Proceed to the abandoned train tracks to trigger a scene.

Enter stealth mode and tag the checkpoints Psycho marks for you. Make sure to stay low and cloaked as you move along. If you need to replenish your energy, stay behind any cover before moving on. Make your way to the next area where you'll find a Bolt Sniper. Pick it up and use it to destroy the three mounted high-altitude guns on the tower.


Before leaving, turn around check the hills to the northeast of the map. You'll find a datapad there.
Recording: The Skinning Trials
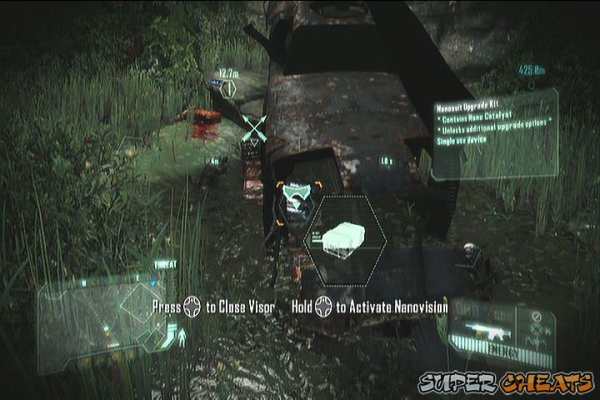
Make your way to the next marker. Be careful of the minefield ahead. Hack them to proceed. Clear the marsh of enemies then proceed to the marker. Head near the warehouse and the overpass. By then, Psycho will inform you about a CELL weapon drop nearby. Head past the overpass and continue past the pond to spot to CELL troopers and a container. Open it to get a nanosuit module upgrade and a datapad on the ground.
Recording: Ceph Stage One
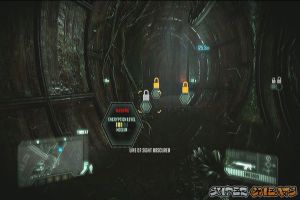
Rendezvous with Psycho and activate your Armor Boost before jumping to the sewers. Follow him through the tunnel until you encounter a CELL patrol. Tag the targets and have a clear line of sight so you can hack the auto-turret in the middle.
Once done, take the stairs to the train tracks then regroup with Psycho. Enter the next area and you'll find a decimated CELL patrol. There's also a Blackbox beside one of the corpses there.
Blackbox #02-01
Continue forth and open the door for a scene. Drop down to the ground and activate stealth mode. Slowly move and pull up your nanovisor to see the stalkers' movements. They can't be tagged so sneak up slowly behind one of them and perform a stealth kill to unlock an achievement. (Clever Girl)
Clever Girl
Open the next door and head to the tunnel. There's also trip mines ahead so hack them as well before proceeding. Follow the corridor to the right and disable a couple more trip mines. Break the next door open and use your nanovision in front of the stairs to tag a nearby Blackbox.
Continue upstairs to exit to the train station. There are several CELL troops guarding the station so proceed as you see fit. Grab the REX Charges on the top floor as well. Don't forget to grab the Blackbox on the ground level, in the corner beside a corpse. Use your nanovisor in case you haven't tagged it yet.
Blackbox #02-02
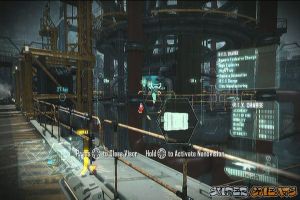
Clear the enemies and be careful of the deployed turrets. Hack them to make your job easier. There's another datapad in the middle of the station; use our nanovision again to tag it. It is found in the submerged maintenance tunnel under the tracks.
Ceph Colonization Stage One
Make your way to the upper catwalks and fight your way to the zipline. Use it to reach the next part of the station and grab the nanosuit upgrade inside the train car on the ground.

Make your way to the exit and your nanosuit hud will be disrupted. A secondary objective will be added. Open your map to find the location of the jammer. Head there and repel the stalker attacks. You'll find a platform with a small CELL transmitter. Use the panel to disable the jammer. You'll also unlock an achievement for doing so. (Can You Hear Me Now?)
Can You Hear Me Now?
Head to the mission marker and hack the container behind you to get a new weapon. Mount the AGL and repel the stalker attack until you get the mission update. Once clear, regroup and follow Psycho. Make your way to the high explosive train car and watch the scene. Mission complete.
Mission 3: The Root of All Evil
Datapads: 4Blackboxes: 3
Propaganda Posters: 1
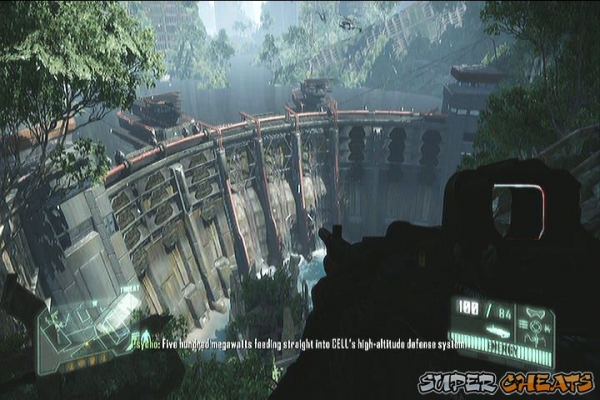
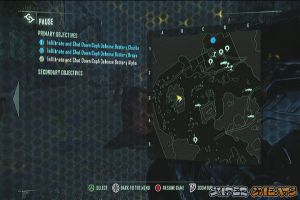
Follow Psycho as you make your way to the elevator. Jump on and the elevator will come crashing down. At ground level, tag the targets. The area is rather large but you don't need to worry about any Collectibles yet at this point. In this walkthrough, I've chosen to go to the left entry point. Hack the first turret by the stream then hack the second turret in the hallway. You'll also find a CELL container here, containing a nanosuit module upgrade. Take the elevator up to the top of the dam.
Clear the enemies and the mines before exiting the elevator. Hack the security door and clear the path. Head to the first tower to the left and hack the laser barrier to enter the building. You'll find a datapad beside a rocket launcher.
Recording: Ceph Technology
Continue downstairs and grab the nanosuit module upgrade behind the terminal. Operate the panel next to shut down the North Hydro-Electric Generator. As a secondary objective, you also have to re-program the CELL Anti-Air units on each tower so don't forget to hack the panel on behind the terminal.


Make your way to the second tower and do the same thing. After weakening the generator, exit the tower and clear the enemies along the way. Jump to the dam and swim to the outflow. Place the C4 there and watch the following scene.
After being swept by the raging waters, you'll be back on your feet again. Continue forth and you'll get a secondary mission. Check that out first. A short distance after receiving the secondary objective, activate your nanovisor to find the Propaganda Poster across the gap, in the corner wall.
cannot load player config
Evacuate NYC
From that position jump down to the stream and follow the path leading to the secondary objective marker. You'll find corpses along the way. A Blackbox is found nearby.
Blackbox #03-01
Continue towards the secondary objective until you encounter a cell patrol along the way. Take them out then head to the beacon to find a crashed chopper. Grab the nanosuit upgrade module inside the wreck and grab the mission datapad to complete this objective.
Proceed to the main mission objective. Follow the cavern until you reach the shallow river. Take the path to the right and follow. Open your nanovision to locate the second Blackbox and a nanosuit upgrade module by taking the narrow path to the right.
Blackbox #03-02 and Nanosuit upgrade
Now backtrack from where you emerged from since there's an achievement you can obtain here. Look at the ground to find a yellow floater. Hop on it and press X to use it. Stay on top of it for several seconds until an achievement appears. (White Rider)
White Rider
Follow the river until you reach the base. Tag your targets then head all the way to the left. Jump down the pit there and enter the tunnel. You'll find another Blackbox beside the corpse there.
Blackbox #03-03
Go to the upper level and make your way around to the central shaft. There's an turret drone ahead that you can't hack. Destroy it and open your nanovisor to tag the location of the ammo cache and nanosuit module upgrade in the central shaft.

After grabbing it, take any of the lifts down and open your nanovisor to tag two Datapads in the lower facility. They're both located on top of the consoles.
Recording: Liberty Beam and Ceph Energy Collection Activities
Now head to the mission markers and operate the consoles to restore pneumatic pressure to the regulation assembly. To reach the other control, operate the maintenance crane using the console in the middle. After activating the two consoles, two auto-turrets will appear. You can deactivate them by hacking the central console.


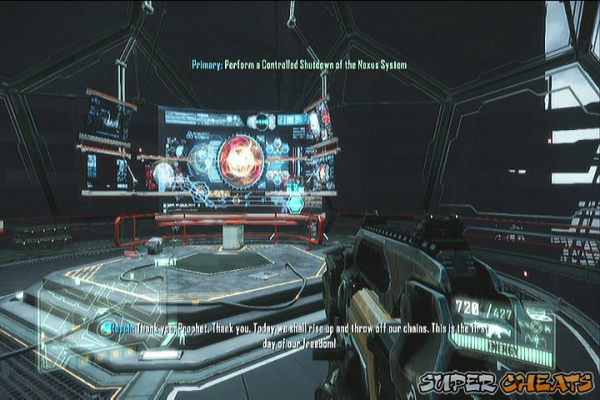
Head to the central elevator and ride it to the top of Nexus. As soon as the elevator stops, open your nanovisor and scan the area for the last datapad in the mission. It should be located on a terminal to the left of the elevator door.
Cell Aspect Data #1121
Kill the guards and head to the main control room to the top. Operate the terminal to login and commence emergency shut down. mission complete.
Mission 4: Safeties Off
Datapads: 11Blackboxes: 4
Propaganda Posters: 1
You have to avoid the searchlights and fight your way through the swamp towards the objective. Once you get near, a secondary objective will trigger. Open your map to know it's location. Head there and hack the first turret to the west so you can climb up the ledge and enter the building to find an ammo cache and nanosuit upgrade module inside.
Proceed to the secondary mission marker and disable the second turret. Kill the two guards and find several Datapads in the vicinity. Three will be near the helicopter wreck while the other three is found in the building ruins nearby. There are four datapads here, one will be needed for completing the secondary mission.
Secondary Mission Datapads
Proceed to your main objective and you'll spot a heavily defended building, beside the chinese structure/arch. There are also Collectibles inside. Proceed there and find the Propaganda Poster in the lower floor, on the wall facing the archway. If you scanned the area, you would have probably tagged and recorded it (a natural occurrence for propaganda posters if you noticed) so if it isn't highlighted in your hud, it's already recorded. Proceed to the third floor to find a nanosuit upgrade module and another datapad.
Propaganda Poster, Nanosuit Module Upgrade and Datapad
After getting the Collectibles, use the zipline nearby then follow the straightforward path until you kick a door open and encounter a close scene with System X/ Alpha Ceph. There's a downed CELL trooper ahead by the toilet. Grab the Blackbox from him.
cannot load player config
Blackbox #04-01
Jump to the ground and take out the Ceph infantry units. These are a bit tougher than your ordinary CELL foot soldier but they shouldn't be that hard to deal with. Head to the Ceph Mindcarrier while clearing the enemy forces. Ammo is scarce so make sure to pick up and use the Ceph Pinch Rifles or any weapons you can find. After making it to the Mindcarrier, open your nanovisor to tag the datapad inside the building, past the mindcarrier. Grab the datapad on a shelf inside.
cannot load player config
Mindcarrier Datapad
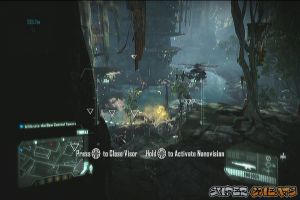
Continue to the main objective and you'll see some CELL troops getting incinerated. Pull up your nanovisor here and continue walking forth. You'll find a nanosuit upgrade inside the building to the left. Past that is a CELL weapon cache. You can pick up another datapad on the table in the building ahead, next to the ammo cache and a black box from a CELL corpse in the street, right outside that building.
CELL Ammo Cache Datapad and Blackbox #04-02
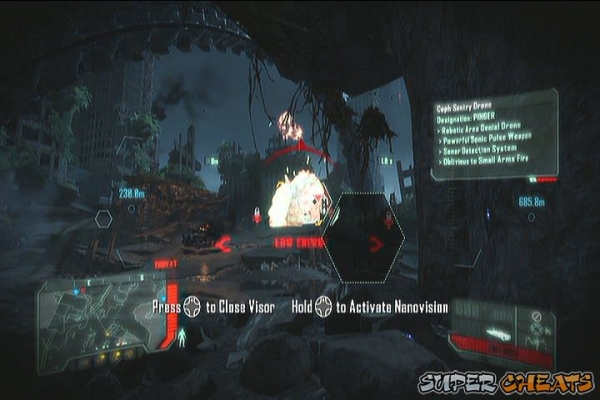
Head to the blue gate to encounter a scorcher. Kill it then continue. After going through the building, you'll be notified about a nearby Ceph Pinger as your secondary objective. Get into recommended distance and hack it to activate it. Once clear, continue to your next objective.
When you're near the pit vicinity, you'll find more Ceph targets here. Kill them all and find the controls to lower the pit gate. Head to the elevator and you should be able to pick up another Blackbox from the corpse outside the elevator. Just open your nanovisor to spot and tag this.
Blackbox #04-03
After picking up the Blackbox, ride the elevator with Psycho. After reaching the laboratory, continue to the observation window and open your nanovisor. You'll be able to locate and tag the last three remaining Collectibles. Go downstairs and find the fourth blackbox beside the doctor. Go through the curtains and move around the to the right to find another datapad. Continue downstairs and you should be able to pick up the last datapad and a nanosuit upgrade on the wall in the same room.
Blackbox #04-04 and Datapads 10 and 11
Open the next door and proceed further in the facility with Psycho until you're able to find a cradle. Watch the next scenes and the mission will be complete.
Mission 5: Red Star Rising
Datapads: 5Blackboxes: 3
Propaganda Posters: 1
As soon as the mission starts, follow the red pipe and cross it until you make it to the second building. You'll find the first datapad there and a nanosuit upgrade in the other room.
Pipe datapad
Jump to the ground and proceed to the mindcarrier's location. There are a handful of ceph infantry patrolling the area. You'll also find another nanosuit upgrade in the lower floor of the building ahead. Make sure to grab it as well before clearing the ceph infantry units. Head to the mindcarrier for a scene.
After the scene, you'll have to take out the ceph infantry units attacking you. After clearing the first wave, a heavy infantry ceph unit will appear. Take it out and proceed to the main objective. While walking along the path, open your nanovisor and check the alley to the northeast. You should find a Blackbox beside a lone corpse there.
Blackbox #05-01
Proceed to the next area where remaining CELL troops and the ceph are engaged. Be careful of the several stalkers lurking in the area. Make your way to the building to the left and climb the second floor to find another datapad and a Propaganda Poster in the next room as the datapad.
NY Strike datapad and CELL Bear
Proceed to the main building until you hear Claire's distress call. Head outside and you'll find some APCs and a buggy. Grab the datapad on a crate near the APCs.
APC datapad
Ride the buggy and make your way to the bridge. Take out the few suriving CELL troops in the blockade. Continue forth and proceed down the stairs until you exit. In the next area, jump down the series of cliffs to reach the buggy below. Make sure to activate armor mode when jumping to avoid damage. Before riding the buggy, grab the Blackbox beside the corpse near the buggy.
Blackbox #05-02
Ride the buggy until you reach a large gate. There's a Ceph pinger and a couple of heavy ceph infantry there as well. There's an APC in the western side of the map that you can commandeer and use against the enemy forces. Head to the gate and take out the enemies. There are two Collectibles in the left side of the gate. Grab the Blackbox from the corpse near the gate and a datapad to the far left, next to the container vans.
Gate datapad and Blackbox #05-03
Once done, go up the catwalk and follow it to reach the gate's control terminal. Activate it to open the gate. Grab a vehicle again and continue forth. Take out/ get past the enemies and follow the tunnel until you reach the next area. Proceed until you need to continue on foot. Grab the Sabot Gauss Gun from the crate beside the burning APC and proceed to the tower.

As you reach the command center, you'll have a secondary mission where you have to destroy the Tower Air Defense System to allow Psycho to land. Head to the northwest corner of the map and clear both CELL and Ceph enemies. Hack/destroy the turret guarding the defense system then destroy it by planting a REX charge. There should be some available from the crates nearby. Don't forget to grab the nanosuit upgrade as well.
Head to the eastern part to find the gate control for the left command center. After the gate is lowered, head to the left and make your way west to find the last datapad between some containers. Open your nanovisor to know its exact location.
Command Center datapad
Make your way to the southwest portion of the commander center and go up the catwalk to find the terminal that will lower the footbridge. Continue to the lift and watch the next scenes. mission complete.

Mission 6: Only Human
Datapads: 5Blackboxes: 2
Propaganda Posters: 1
Make your way to the first Ceph AAA battery. Take out the enemies from a distance using your long-ranged rifles or the stealth DSG-1 you came across along the way. Take the path to the left and a Citadel defense turret will land. Hack / destroy it then use the zipline to the next building. Hack the minefield ahead and destroy/hack another citadel turret along the way. Proceed to the next building and the initial wave of enemies.

Continue to the AA battery and find the power source in the building. Destroy it to disable the AAA and have Psycho deal the finishing blow. Check the upper floor of the building to the west, beside the AAA to find a Propaganda Poster.
CELL Cash ID card
You now have to head to any of the two Locations to disable the defense batteries. From your position, head to the northwest (open your map) and find another datapad inside the head of Lady Liberty. You'll find an APC past the head of Lady Liberty as well. You can use this to take out enemies easier; just don't submerge it in deep water.
cannot load player config
Breaking News
Ride to the north and leave it at the shore for a while so you can swim to the isolated building to the northwest. Here, you can help clear the Ceph forces to save your allied rebel mortar team. They should be able to provide you with mortar support now. Grab the datapad on the crate as well.

Head out and start marking targets, especially the pingers. Take out three of the pingers in the area to unlock the achievement “Ping Pong”. After the pingers are down, the mortar team won't be able to provide any more artillery support.
Proceed to Battery Bravo and take the northwestern side so you can pick up a nanosuit upgrade on the way. Hack the weapon crate if you want then disable the minefield across the bridge. Take out the citadel turret and proceed to the AAA position. More enemies will be waiting inside so tag them and take them out.

Just below the energy cell is a corpse with a Blackbox. Grab it and destroy the energy cell to disable the AAA.
Blackbox #6-01
Continue southeast of Battery Bravo to trigger another secondary objective. Here you have to clear the mines around the rebel ICV. They're inside the cavern. Just open your nanovisor to automatically hack the mines and clear the path. Head deeper inside to find a nanosuit upgrade, datapad and some ammo and arrows.

Further southeast is a downed helicopter, near the metal tentacle beside an island. Head there to grab the datapad inside the wreckage.
CELL
There's a downed allied VTOL to the southwest. Head there to scout it. Remove the barrier blocking the exit so the rebels can escape, then grab the supplies inside, including a nanosuit upgrade.
Proceed to the southeast towards defense battery charlie and take out the enemy VTOL along the way. Between the two citadel turrets deployed before the battery position lie a ceph wreckage. You can find the second Blackbox underneath it.
Blackbox #6-02
Proceed inside the defense battery and take out the ceph units around it. The resupply crate nearby contains a M.I.K.E weapon. Take it and use it to easily eliminate the ceph infantry around the AAA. After destroying the battery, more enemies will appear. Eliminate them and make your way to the upper ledges. Wait for Psycho to land and enter the VTOL.
During this sequence, just use the VTOL's gun to take out aerial targets. Keep doing this until you clear the skies and you're forced to make an emergency landing. Upon landing, you have to take out the ceph ground forces that will drop from the passing dropships. The mounted grenade launcher's ammo is limited so take your shots wisely. It should be more than enough to take out the enemies though.
Dogfight
After a short while, a new enemy called the Ceph Mastermind will appear. You have to concentrate your fire on it, destroying some of its floating options to weaken it. Once enough damage is dealt, you'll be pulled towards it. Mash the A button to force feedback the energy towards it. Move around the battlefield and take cover constantly. There are several ammo crates in the area but it is recommended that you exhaust your clips to maximize the ammo resupplies. There are ceph weapons and energy cells in the area as well which you can use to supercharge your suit. Use it to gain temporary invulnerability and infinite ceph weapon discharge. Keep doing this until the mastermind is defeated.
After defeating the mastermind, grab the last datapad in the corner, on top of some ammo crates.
Mastermind battle and last datapad acquisition
Head to the mission marker to trigger a scene and complete the mission.
Mission 7: Gods and Monsters
Datapads: 3Blackboxes: 4
Propaganda Posters: 1
As soon as the mission starts, open your nanovisor to tag the Collectibles along the way. Right in front of you is the first Blackbox of the mission, and a few steps away from it is a PropagandaPoster. Above the poster is a wreckage where a datapad and ammo crate is found. Continue forth and you'll find another blackbox beside the corpse in the bus wreck.
First few collectibles of the last mission
Continue along the path and you'll find another Blackbox, past the ledge where you need to climb up.
Underground blackbox
Continue along this straightforward path until you reach a large, bright cavern. Take the path to the left and go around the metallic platform as you make your way to the right. From there, you'll find a stash of ammo, weapon, nanosuit upgrade and a datapad.
Datapad Stash
Proceed to the next cavern and head to the objective. Take care not to get damaged too much since you can't still use the suit's armor and stealth abilities. It will help hacking the citadel turret to make your job a lot easier. Head to the mind carrier and mount it. You'll be supercharged and more enemies will appear. Take them out and proceed to the next objective.
On your way to the next objective, you'll come across another CELL weapon cache and more supplies. You'll find a Blackbox in an open empty case.
Final blackbox
There will be two paths here; the shortest one is the path to the left while the path to the right, along the stream is longer but will lead you near the game's last collectible. Follow the path until you reach a large cavern. Open your nanovisor to find this datapad on the lower ground, near the vehicle wreckage.
Final Datapad
While there, you can complete one of the secondary objectives, which is to investigate the CELL beacon. The beacon is on top of the APC. There's a pinger in the area which you can destroy using the scattered JAW anti-tank launchers or the APC's mounted cannon. You can also activate the inactive CELL drones on the ground.


Continue to the the mindcarrier to the north and mount it. You'll be supercharged again so make your way to the second mindcarrier while taking out enemies with ease. A ceph turret guards the way to the last mindcarrier. You can destroy it with powerful explosive weapons like the LTAG or X-PAC Mortar or you can complete the secondary mission which is to disable the cooling structure. The console is located in the lower path, under the turret. This turret can't be hacked as well.


Proceed to the last mindcarrier and you'll be supercharged for the duration of the mission. The best weapon in this mode is the X-PAC Mortar as it can easily take out groups of enemies. Keep killing enemies while in this mode to unlock the achievement “Post-human Warrior” and “Taste of your Own Medicine”


Head to the wormhole and face the Alpha Ceph. The battlefield has several weapons, drones and a tank that you can use for extra firepower. When dealing with the Alpha Ceph, it will be easier using the X-Pac Mortar on it. Just stay close to a ceph energy cell to supercharge yourself and have infinite ammo for a short duration. After dealing considerable damage, the Alpha Ceph will draw you in. Mash the A button to break free and repel the energy.
Facing the Alpha Ceph
After damaging the Alpha Ceph, more enemies will appear. Take them out and the Alpha Ceph will appear once again. Repeat the same process until you deal the finishing blow.
cannot load player config
Finishing the Alpha Ceph
Once you've commandeered Archangel, use the right analog stick to carefully and steady your aim. Once you get a steady lock, press and hold the fire button to release Archangel's remaining stored energy and destroy the massive ceph warship. Game completed.

