Dying Light
Dying Light
Developed by Polish games studio Techland (Call of Juarez, Dead Island) and published by Warner Brothers in 2015, Dying Light falls neatly into the new-wave survival-horror and action-adventure genres, with versions on PC for Microsoft Windows and Linux, and on console for PlayStation 4 and Xbox One.
The game story is set in a fictional city called Harran, in ancient Turkey. Harran is situated inside a declared quarantine zone, where a mysterious viral outbreak has turned most of the inhabaants into hyper-active zombie-like beings,
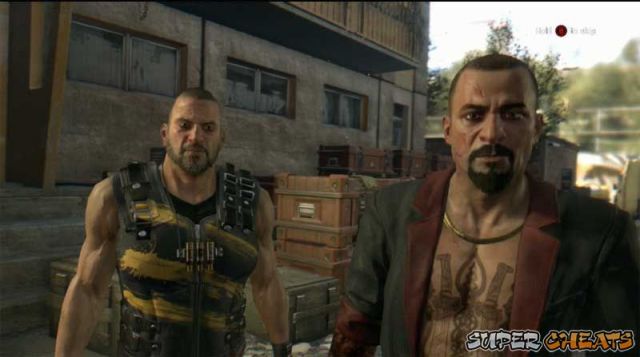
Taking on the role of Kyle Crane (the protagonist), an undercover operative with the Global Relief Effort (GRE) who has been sent to infiltrate the quarantine zone and locate Kadir “Rais” Suleiman, a political terrorist who possesses a file that has the potential of destroying the GRE.
When Kyle reaches the scene he is confronted with a moral dilemma - complete his mission, or provide aid to the uninfected (and thus still human) survivors, who are being led by a man called Harris Brecken.
The quarantine zone was created by the national defense minister, with the city of Harran basically cut-off from the rest of the world. Its only support is air-dropped supplies from GRE.
Structured as an open-world game play environment, the metropolis that is Harran, the game features day and night modes as well as dynamically-generated weather that includes fog, rain, and wind.
While the zombified residents of the city are the primary enemy, also present in Harran are gangs of bandits who threaten the player, and the constant threat of being infected by the virus itself, which may happen when an infected zombie bites or scratches an uninfected person.
The game is mostly melee-based, with a limited crafting scheme.
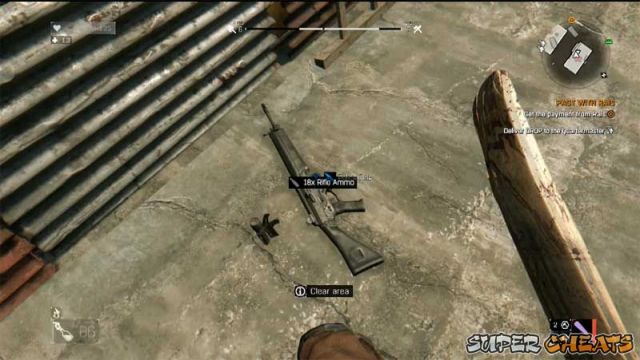
While firearms do exist in the game, the scarcity of ammunition is such that the player will spend more effort obtaining - and custom crafting - melee weapons - and keeping them repaired (though typically each weapon can only be repaired a limited number of times).
There are over 100 different melee weapons in the game, but use of them causes them to degrade and wear out. Crafted weapons require the player to obtain resources and Blueprints - which can be scavenged or purchased from the Quartermaster.
Firearms enter into the game in its later stages but with ammunition being scarce they generally end up playing a strategic - rather than tactical - role in game play.
Game play includes classic single-player story, and companion multi-player modes. The focus for game play leans strongly towards a free-running parkour-like style.
The game play formula - and the game play world - is neatly divided between the day and night cycles with the player using the daylight hours (daytime lasts roughly 64 minutes) to scrounge resources and complete quests, while the night (nighttime lasts roughly 7-minutes) is a period of horror in which the infected transform into very fast and dangerous opponents.
The primary goal is to survive each night and make it to the next sunrise.
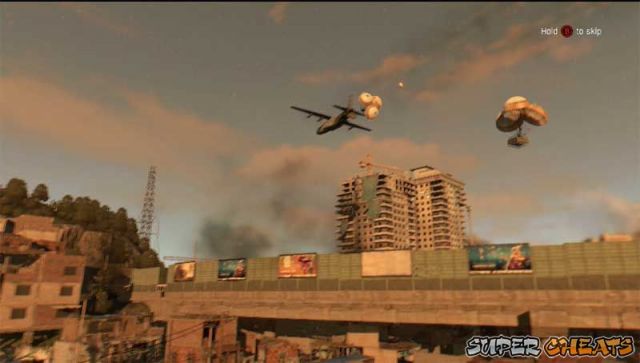
Insertion of the GRE Operative via HALO
If Dying Light is starting to sound like any one of a dozen other zombie games - and in particular the Dead Island series which also happens to be one of Techland's games - you've missed some important points.
In addition to being created to present a more realistic take on the zombie-survival type of play, the bigger difference is the way that the protagonist (and his personality and values) have been carefully fused into the game and story. A choice that makes all the difference in the world!
Kyle Crane is a complex person. Mentally and emotionally stable, he has a sure sense of who and what he is, so how Kyle reacts to the dangerous environment and his situation - having ended up in a zombie--rich environment - ends up flavoring the game and story in both big ways and small.
Ultimately his interpretation of the events is part of what sets the game apart from the typical zombie survival-horror adventure, thrusting Dying Light head-and-shoulders above the rest in the genre and creating a game that, based upon its ready acceptance and rapidly growing popularity in the gamer community, has struck just the right chord.
Mission 01: Awakening
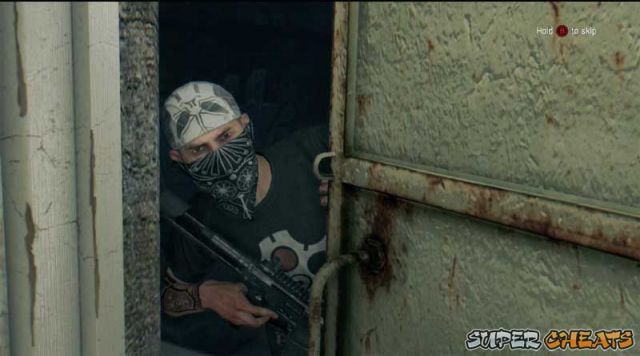
Jumping from a cargo plane flying over the city of Harran you parachute down but in the midst of a rather rough landing end up being temporarily accosted by Bandits.
While the Bandits are deciding what to do with you a group of infected attack - scattering them and biting you - but you are rescued by a different group of survivors (the good guys) and thus are not killed or crippled by the Bandits or the infested.
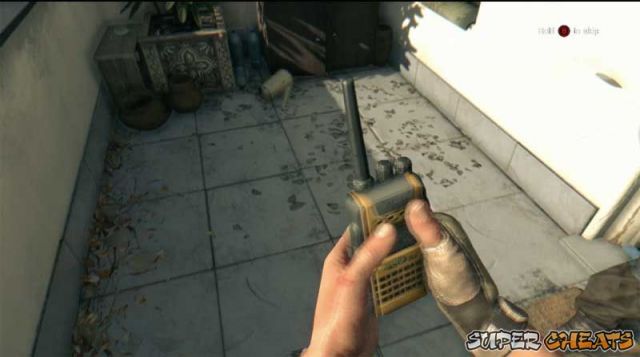
Recovering your radio and contact with the GRE is the first crucial step
You awaken in the relative safety of the Safe House of the Survivors, which is called The Tower, and you begin meeting your saviors.
To all appearances you seem to be something of a screw-up, at least to their point-of-view, however after you get your radio back it becomes evident that you are right where you wanted to be. In other words you are not as big a screw-up as you are appearing to be.
As you explore The Tower you learn about Survivor Vision, gathering resources, and when you encounter an injured Survivor, basic first-aid for injuries.
On The Roof - Parkour Training
Once you settle into your assigned quarters and change clothes you are called to the roof of The Tower by Rahim, who appears to be one of the junior leaders. He explains that he wants to see what your abilities are, and then proceeds to goad you into making a long jump off of the edge of The Tower onto a pile of trash - which teaches you that you can do that and survive without injury (if you do it right).
After the jump you end up in an adjacent tower, as Rahim begins what amounts to Basic Survival Training in the Quarantine Zone.
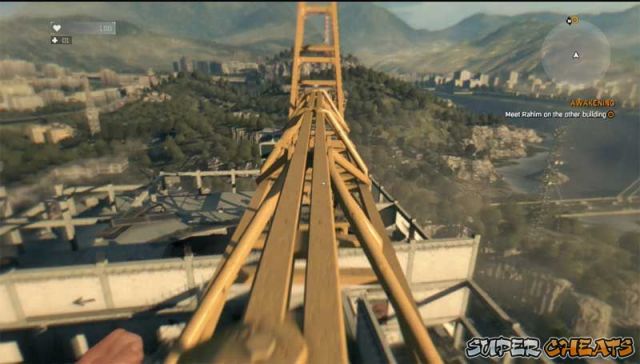
Attending basic training in Parkour on the roof of the Towers
You learn basic Parkour - running, jumping, crawling, climbing, and the like. As he guides you through the course via your radio, you learn the basic commands and controls.
Basic Commands and Controls
- Right Joystick = Look Left/Right/Up/Down
- Left Joystick = Move Forward/Backward Strafe Left/Right
- Press Right Joystick = Aim
- Press Left Joystick = Sprint
- RT = Attack
- LT = Use Equipment
- RB = Jump
- LB = Kick
- A = Survivor Sense
- X = Use/Reload
- Y = Repair / Look BackpackerB = Crouch
- D-Pad Right = Primary Weapon
- D-Pad Left = Secondary Weapon
- D-Pad Up = Flashlight On/Off
- D-Pad Down = Heal
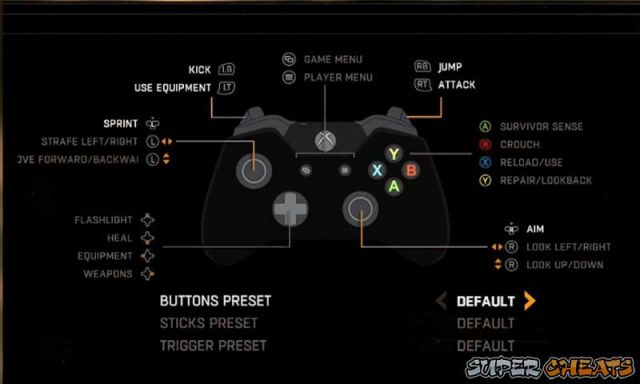 The game control scheme is intuitive and easily mastered.
 - Climbing = Left Joystick Up + RB
- Grab Ledge = Hold RB while Jumping
- Traverse Ledge = Left Joystick
- Jumping from Ledge-to-Ledge = Look with Right Joystick, hold Left Joystick Up and RB.
- Pole Climbing = Left Joystick Up and Down to move up or down.
- Lockpicking = Move pin with Left Joystick and rotate screwdriver with Right Joystick.
As you make your way to the other side of the course Rahim ends up being very impressed by your progress and skills - especially when you tell him you have no previous Parkour training!
As you approach the end of the course something goes wonky with your vision and you start to freak out - but Rahim is not too worried, and tells you to head back to the base to get a shot. He doesn't think you are turning, you are just showing symptoms is all. Well, that may not seem like a big deal to him, but it gets you pretty upset!
As you make your way back to The Tower you enter the Slums, and during the CS your monologue sets up this first mission...
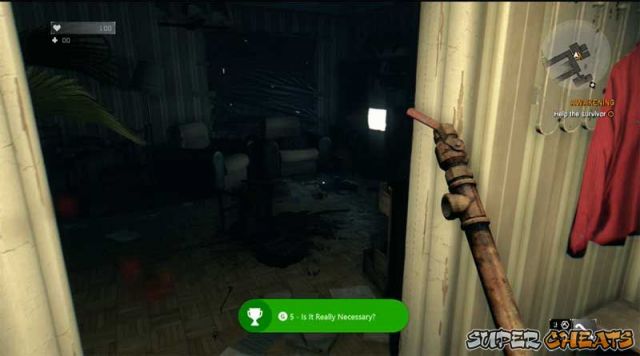
While helping out in the Tower you kill your first Infected and get your first Achievement
Collectibles
As you proceeded to this point when you were searching for resources earlier you should have found the following Collections Items:
1. Note #05 - On the Bulletin Board.
2. Marvin Zucker's Battle Journal Entry #0 - On the Shelves near the Quartermaster.
Achievements
At this point you should have unlocked the following Achievements:
Is It Really Necessary? (5g) Kill your first infected.
Little Craftsman (10g) Craft your first item.
Flight of the Crane (10g) Jump from the Crane.
Mission 02: First Assignment
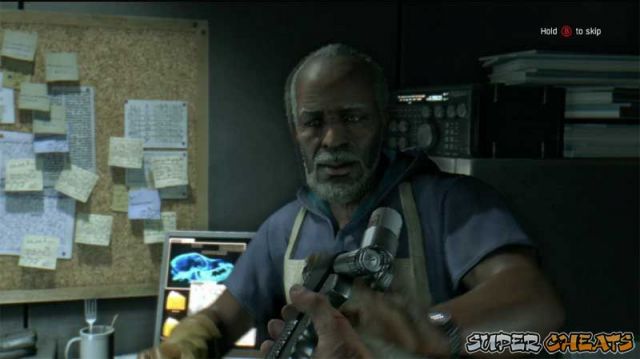
Your first task as you leave The Tower is to get to the Doc and get a shot of Antizen. TO do that you will make your way past a number of infected crossing several city blocks to the first relatively sage outpost - where there is a tractor trailer and the Doc.
When you arrive he sets you strait about what he is giving you - and what its limitations are - explaining that there is no cure, just a means of suppressing the infection.
After you get the shot you get kicked out, and chat with Rahim - who tells you to go talk to Spike to get your first real job...
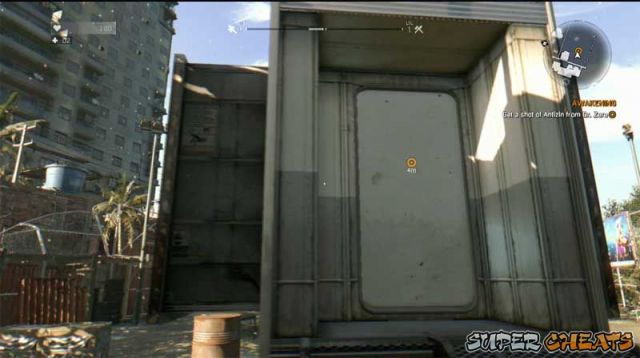
Your first important quest is to get to this trailer and get an Antizen Shot
First Assignment: Get a Job from Spike
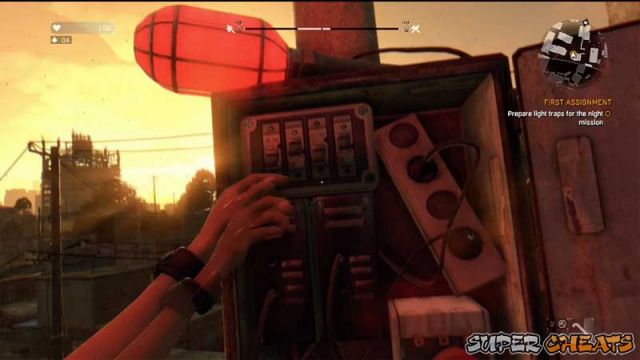
Follow the marker to the nearby hut where Spike will give you instructions - and fill you in about the enemy and how they compete for the relief air drops.
Spike tells you about the Safe Zones and Traps that are out there - and explains your task, which is to arm the Traps in order to help Brecken. On your way out you grab some Firecrackers - which are useful as a diversion with certain infected - you should read the Enemy Section to learn more.
You are then shown some tutorial information about looting and survival -
Basically you are just following the instructions that Spike gives you paying particular attention to finding and arming the different traps...
In the midst of that you get a radio call for urgent help - one of the runners is surrounded by zombies - and she wants you to help free and rescue them. This is your first trapped survivor task, just so you know... Bear in mind you want to not waste too much time - you have a lot to do and only so many minutes before the sun goes down - and you do NOT want to be on the outside when that happens!
While you are doing that you will kill some infected - and you will encounter an Ambulance. Two important elements to this - one, you WANT to search any and every Zombie you kill because they will have valuable goods on them that can be sold to merchants and/or used for crafting.
The Ambulance will be locked - you can craft lockpicks to open it - and you should because there is often valuable resources inside Ambulances, Police Vans, and the like. Something to bear in mind mates!
Your First Safe Zone
After the Ambulance you will approach your first Inactive Safe Zone - and be prompted to secure it. That is a very good idea - because every Safe Zone you secure is another place you can retreat for the night AND it is worth mondo points.
From the Doctor you learn more about the virus and the threat it poses.
To secure this area you will need to kill the infected inside the fenced area, and then open the door - to discover that you are too late to save the runner... Sigh.
To secure this Safe Zone you will need to get the power turned back on...
Collectibles
1. Marvin Zucker's Battle Journal Entry #1 - Inside the hut.
2. 230v Blueprint - Inside the hut.
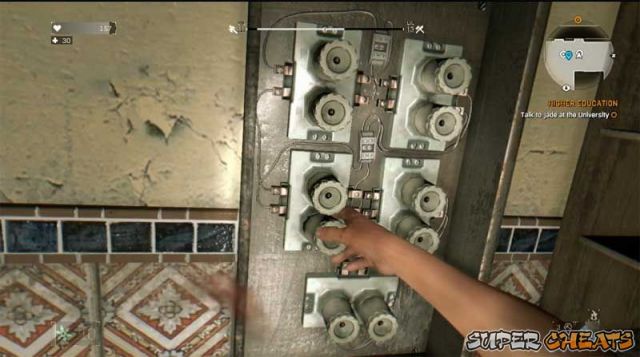
To get the power back on you need to use the breakers inside the hut - then you need to climb to the roof to contact the GRE on your radio.
Your GRE controller adds a new objective to your mission - they want any research that the Doc may have managed.
Once you do that you can also use the storage inside if you feel the need.
Back to Traps
Now that you have dealt with the emergency it is time to get back in touch with Spike and get back on the whole Trap Arming Task.
The car where the next trap is located is surrounded by infected - so you will need to use diversions - throwing things works - to get them away so you can arm it.
You'll need to keep moving the infected down the street with distractions to get to the next car - and bear in mind that the building near you has resources you can loot too. At this early stage in the game it cannot be stressed enough that you should try to loot as much in terms of resources as you can manage because resources are literally life for you!
The more you get and the more diverse they are, the wider the variety of items you can craft.
After you do the Car Traps there will be three or four Light Traps, and then you will need to reset the power at the Substation - which has a heavy mob that will burst out at you!
The best tactic is to lure him away from the door he ripped open, and then run in there (avoiding the infected in there) and reset the breaker, then run as fast as you can manage to the Safe Zone - it is likely already dark now so that will be more dangerous than usual.
Once you get there you will have the option of sleeping - which will checkpoint you and that is the recommended action.

Blueprints can be found practically anywhere, including inside Safe Zones.
Water Current Blueprint
As you progress through the mission you picked up the Water Current Blueprint - your first elemental mod print - which allows you to electrify a pipe.
Post-Mission Brief
When you meet up with Spike you learn that things did not go well last night - and are ordered back to the Tower. You then check in with your GRE contact to update the situation as you head for the Tower to meet the leader.
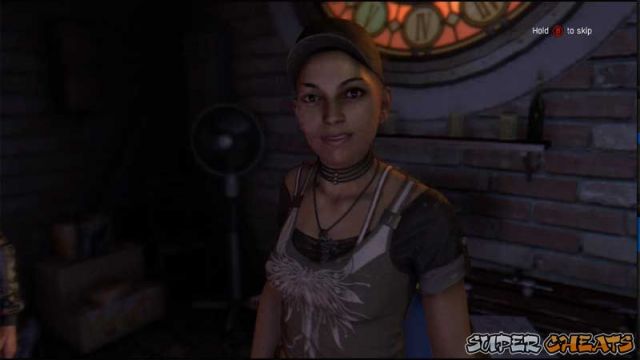
Arriving at the Tower you finally get your chance to meet with Brecken - but as you are going in Jade asks you to help her convince him not to take chances... and yeah, Brecken looks pretty bad...
Side Quest: Mother's Day
When you exit the meeting Lena the medic fills you in on something that you are not really supposed to know - and enlists your aid in obtaining meds that Brecken actually needs.
Side Quest: Goodnight Mr. Bahir
On your way down you hear about Bahir being locked in his room and that something is wrong. Flagging the quest starts with you picking an easy lock.
Side Quest: Gunslinger
As you make your way through the Tower following the meeting with Brecken and Jade you see a bloke hanging out in a doorway in the hall named Dawud - he wants you to find him a gun. Specfically a pistol.
Out and About
As you head outside of the Safe Zone you should know that for once you do not have to pay attention to the time - because at least for now and until you do the Air Drop Mission in the next section time is not progressing -and that means this is the ideal time to go out on side quests and for exploring. Think of it as an opportunity to get lots of free points?.
The Drug Store is not the far from the Tower. As you get outside you hear from Lena - who has found two more vials of fake Antizen.
When you get to the Store you discover that Yusuf has already been there and ratted you out - a battle then ensues - and you have to deal with ALL of the Bandits there!
After you take out the Bandits you can strip the lab of resources and then you report to Lena and she confirms that Yusuf did indeed slip away earlier.
Defeating the Bandits activates the Drug Store as a Safe Zone.

While you can keep an eye out for collectibles as you play you can also use our collections guide to fill in any gaps.
Collectibles
Inside the Lab you will find Collectibles.
- Note #01
- Pocket Lighter Blueprint.
There is still plenty of time to do the Mother's Day quest - so hitting that marker next may be the way to go...
You can get the particulars for that quest in its section in the Side Quests area of the guide.
On the way back from doing the Mother's Day quest you have a random encounter with an enforcer and you can gather some plants for boosters as well as do some more scrounging.
Other Activities
There ARE some Safe Zones that can be restored between that location and the Mother's Day quest - so why not?
That said you may want to do some exploring first - scavenge some kit items, and unlock more Safe Zones. Just an idea but a good one since it allows you to XP up.
Each new Safe Zone you secure adds points as well as a safe place to wait out the night and store and retrieve your kit. Not counting the Tower and the Safe Zone at the next mission location there are a total of 13 Safe Zones plus the map to explore.
After you complete the Mother's Day quest you can resume the main story line...
Collectible
Zombie Statue - on the train platform near the Safe Haven.
Zombie Statue - on the Radio Tower in the Safe Zone
Note #03 - on the table inside the Safe Zone you discover pas the tunnel entrance..
Assassin's Creed Flag - at the very top of the Microwave Tower.
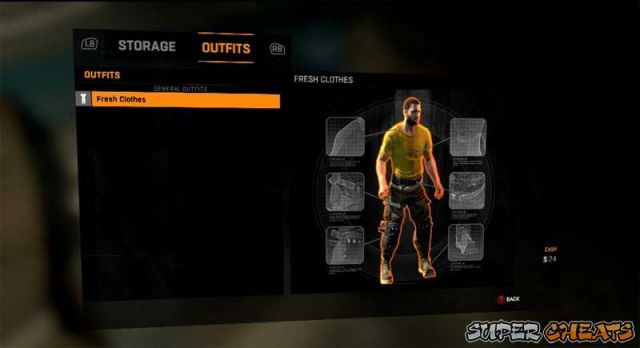
After your first mission you have the opportunity to change to custom clothes.
Achievements
Assuming you have been picking each of the locks you had the option to pick you should unlock:
Open Sesame (10g) Perform 10 Successful Lock Picks.
Return to Base
After you make it back to the Tower, having completed both side-quests, it would be an idea to hit the Quartermaster and merchants to trade, then head up to see the Doc, to deliver the pills from the Mother’s Day quest.
Dr. Lena praises you - and rewards you -
GRE Airdrop
You are next prompted to contact the GRE for an Air Drop - and to report in. Your controller praises you and you then head for the next section!
Mission 03: Air Drop
While they are not core missions the recovery of Disaster Relief Supply Drops are a critical task...
Now that we have completed the first few side-quests and done some basic exploration, clearing some Safe Houses, ranking up some skills, and taking full advantage of the stopped clock, eventually we will reach the point where it just makes sense to head to the next mission - which is this one: Air Drop.
The GRE is sending in a typical air drop of supplies right around dusk - the problem is of course that in addition to its intended recipients - the good survivors - there is the issue of Rais men - who also want the valuable supplies - and Antizen - that is contained in the drops.
Our job is to beat them to it and collect them if at all possible.
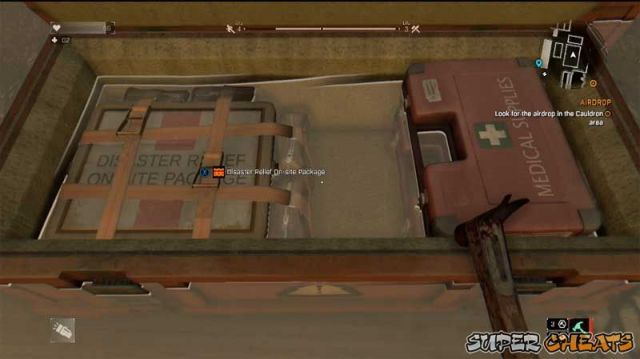
While they are invariably empty if you fail to beat Rais' men to the drop site, when you get there first this is what you find!
After you secure the Safe Zone at the target site you can head for the smoke flare to find the crate - which it turns out has already been emptied. Fortunately as you are discovering that you see a supply plane pass over and make two MORE drops! Excellent!
Now it is a race to those drops between you and the Bandits!
So you seriously haul butt but, on the way you should try to loot any convenient containers and buildings - there may be Blueprints as well as other stuff to be had don't forget.
Before you leave the first location - the Safe Zone - check the supply crates behind the van. While Rais Bandits have already been there and have emptied most of the drop, in the boxes behind the truck are some Grenades (always nice), and Pistol Ammo.
Keeping the many traps armed and available is an important effort for safety.
Now it is time to head to the second drop - which as you approach it you get a message from Jade telling you that it is too close to sunset and you need to turn back. You tell her you think you can still make it.
When you reach the drop you call into GRE and let them know you are about to obtain Antizen. GRE Control then tells you to destroy the drop - the idea being to get you close to Rais...
As the CS plays out you destroy all but one of the Antizen. You call in to Jade and report that there is no Antizen - unfortunately some bad *** infected know you are there! And it is now NIGHT.
You need to run buddy. Fast. And jump and climb and basically get the hell to a Safe Zone - right?
When you evade the infected and make it to the Safe Zone you will unlock an Achievement: Prom Night (25g) Survive Night Pursuit of Level 2 or Higher.
The bad news though is that when you reach the Safe Zone you discover that you cannot rest here - the goal is actually the Tower, not just any old Safe Zone!
Ambulances have medical supplies and there is a good chance that Police Vans will have firearms and ammo!
Oddly enough when you make it back to the Tower the first thing you do is reassure yourself that you have acted for the greater good. Feeling guilty? Well you should!
At the Tower you attend the meeting and end up volunteering for the visit to Rais - Brecken asks you if you are sure that you are up for this? Well yeah, of course you are!
He shows you on the map how to get to Rais and well, that is it, right?
Picking the lock on the back of a Police Van will result in this sort of find often enough to make the risk worth it!
Before you head off on this mission you should probably visit the Quartermaster and merchants, sell any excess stuff, buy any resources you think you may want or need, you know, just generally get ready.
Next check the map for “!” symbols as there are some new side-quests - and to start with go talk with Alfie.
Side-Quest: Voltage
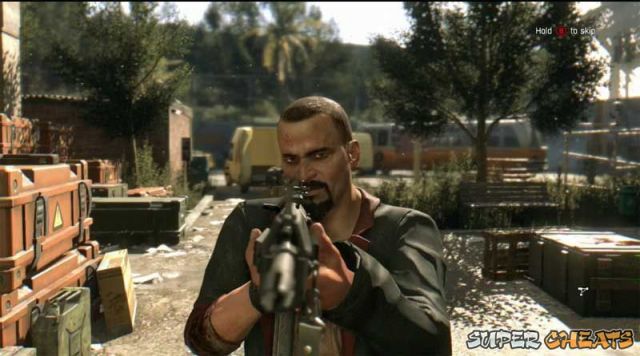
When you reach the location on the map - Rais HQ - you announce yourself and then talk to the guards. You get admitted to speak with Rais - and when you get inside you discover a pretty extensive setup. As you are entering you see a miscreant being punished, and then Rais has a chat with you...
Basically he does not really think you have much to offer him - so he tells you to do a task and then you can talk.
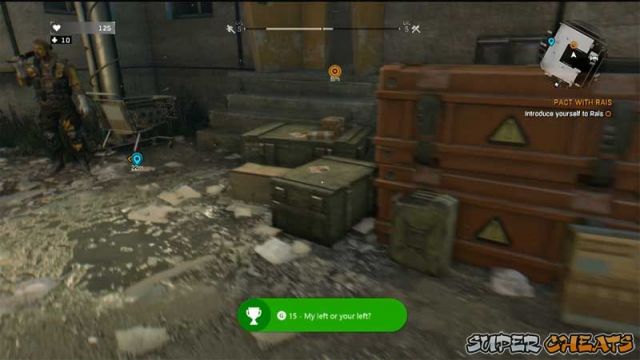
At this point you unlock the Achievement: My left or your left (15g) Meet with Rais.
You now need to talk to Karim to get the tasks - as you know that the only way to progress your mission for the GRE is to make this deal work.
After your chat with Karim - who wants you to turn on some microwave relay towers for him - you can take a look around this new Safe Zone that is Rais HQ.
After you leave the HQ and as you progress you check in with your GRE Controller - in the background you see another Air Drop - and hey, it is on the way!
Karim calls you on the radio and starts giving directions... So you head to the Antenna Tower only to learn that someone has scavenged the parts from the electric box there. Karim tells you to head for the next Tower - which is the one in the Safe Zone that you should already have visited before to secure.
When you get to the Antenna you'll meet some minor resistance. Loot the area of the Safe Zone to grab Collectible Nite #23 - then talk to the guys here before you work your way up the Tower.
On your way back to Rais HQ you get a radio call from another group of survivors who tell you how happy that they are for you restoring the communications.
When you talk to Rais he is not satisfied with what you have done so far - he wants more. But on the plus side he is offering two crates of Antizen. Rais tells you to go talk to Karim.
Back to Karim
Karim tells you to go and do some pickups for the crew... See to any maintenance and trading you need to do then head outside to get the marker on the map. Of course when he says Pickups what he really means is to get protection money from the other survivors!
On the way you call in to your GRE Controller - and they instruct you to cooperate and keep your mind on the goal.
When you reach the wheel station you unlock a new Safe Zone, and then you need to persuade Jaffar to pay up... Which you do in a brief CS.
At this point you have unrestricted access to the beds in Safe Zones - so if it is getting close on to night you can rest to night then rest through the night, and start out in the morning.
Next you need to head to the Tunnel Entrance to speak with the messenger from the Fisherman's Village. On the way you get a call from Brecken - he remind you to get Antizen...
The Courier is not at the Tunnel so you end up having to go inside - where you encounter your first Bomber. Eww!
Karim tells you to head through the Tunnel and meet the peeps at the Village - so through the Tunnel you go!
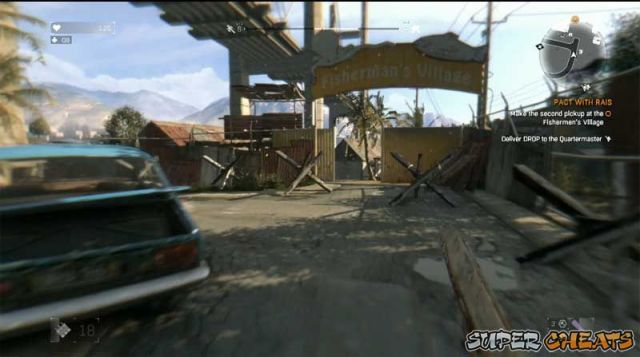
The Fisherman's Village
It seems that among other things the reason that these people pay Rais is for protection - so you protect them by clearing away the infected - and closing the gate to secure another Safe Zone.
You need to knock on a few doors to get the money - then you call in and, on the way out you have a chat with one of the survivors. He tells you that a crazy man living outside is who caused their gate to get opened and thus the infected to invade!
Side-Quest: Gas Mask Man
After you complete the side quest Gas Mask Man there is a “!” on the Notice Board at the camp for another side quest.
Side-Quest: Midnight Bride
To continue the main mission make the third pickup at the Ferry Terminal.
When you get to the Terminal you have another strong-arm conversation - as you reluctantly force them to pay up!
Karim then instructs you to return to claim your prize.
Nearby you see an “!” that leads to a journalist named Neal - you chat him up, and he tells you his story. He is convinced that he needs to get out but he has lost all of his Notes and work in a satchel at an Internet Cafe - and his camera is in a random car. He wants you to recover them for him, which Flags the Side-Quest.
Side-Quest: A Survivor's Guide to Zombieland.
Midway back to the HQ you get a call from Brecken - telling you that the need for Antizen is growin desperate. You tell him that Rais has promised two crates and he tells you to hurry. Nothing like a little pressure, right?
Shortly after that Karim calls and tells you to go look for a missing patrol - do it or no reward! *******!
As you divert to the location, dodging loads of nasty infected, you find the bodies of the patrol - and Karim tells you not to damage the bodies... Odd. Evidently they have an envelope that you need to recover.
A group of Bandits is below - they are likely who took out the patrol. But be careful - they have rifles AND grenades and they WILL kill you with them! You have to take them out carefully, then take the envelope and haul butt back to the HQ!
After you grab the envelope the guy on the Antennae who would not talk to you before starts yelling for you to come help him.
When you get there he tells you that he needs your help finding his son Christoph. He fills you in on what he wants you to do.
Side-Quest: The Prodigal Son
On the way back you will see yet another Supply Drop - this time pretty close to where you are. If you go directly there you will find BOTH of the chests full - so go ahead and grab the contents, which you can deliver to the Quartermaster back at the Tower.
When you finally return you give Karim the Blueprints and then talk to Rais, and once again instead of delivering on his promises, he tells you not. Instead of two crates he gives you five vials. Jesus!
He then tells you that if you want more you have to lure one of the Survivors from the Tower to the HQ so that they can be made to fight in the pits.
Your goal now changes to deliver Antizen to the Survivors.
On your way back you get pinged from the GRE Controller - whose attitude is that you should do whatever Rais wants. Kyle is starting to have doubts about the GRE - well yeah!
On the way back to the Tower you hear from Alfie - that they just lost gas at the Tower - and it seems the rest of the city as well.
Side-Quest: Gassed Up
When you get back to the Tower there are plenty of people to talk to...
You ask about Chrstioph from the Prodigal Son Side-Quest - he is actually well known here it seems.
When you meet with Jade - and deliver the Antizen - and it seems that the outbreak cost the entire 18th Floor.
You can hit the Quartermaster to drop the supplies and pick up your daily quota then hit the merchants on your way to talk with Brecken.
Brecken goes nuts - but it turns out that his guilt stems from his origin and lack of pride. You on the other hand are starting to discover your humanity.
After the chat with Brecken you need to head to the roof to contact the GRE. On the way you run into Rahim and he tries once again to sell his plan to you.
Once you find a safe place to contact the GRE you learn that things are not going well outside either. The GRE is having political troubles. Still they will not resume air drops of Antizen.
Jade then calls you on the radio, and tells you about a plan she has to steal Antizen from Rais. She tells you to look for her at one of the train cars.
That wraps up this mission and starts the next one!
Mission 04: Pact with Rais
About 1 in 10 drops is a shipment of Antizen rather than the survival food and supplies packaging...
Next check the map for “!” symbols as there are some new side-quests - and to start with go talk with Alfie.
Side-Quest: Voltage
When you reach the location on the map - Rais HQ - you announce yourself and then talk to the guards. You get admitted to speak with Rais - and when you get inside you discover a pretty extensive setup. As you are entering you see a miscreant being punished, and then Rais has a chat with you...
Basically he does not really think you have much to offer him - so he tells you to do a task and then you can talk.
At this point you unlock the Achievement: My left or your left (15g) Meet with Rais.
You now need to talk to Karim to get the tasks - as you know that the only way to progress your mission for the GRE is to make this deal work.
Crane has to make a tough call after the GRE presents its alternative strategy for getting close to Rais...
After your chat with Karim - who wants you to turn on some microwave relay towers for him - you can take a look around this new Safe Zone that is Rais HQ.
After you leave the HQ and as you progress you check in with your GRE Controller - in the background you see another Air Drop - and hey, it is on the way!
Karim calls you on the radio and starts giving directions... So you head to the Antenna Tower only to learn that someone has scavenged the parts from the electric box there. Karim tells you to head for the next Tower - which is the one in the Safe Zone that you should already have visited before to secure.
When you get to the Antenna you'll meet some minor resistance. Loot the area of the Safe Zone to grab Collectible Nite #23 - then talk to the guys here before you work your way up the Tower.
On your way back to Rais HQ you get a radio call from another group of survivors who tell you how happy that they are for you restoring the communications.
When you talk to Rais he is not satisfied with what you have done so far - he wants more. But on the plus side he is offering two crates of Antizen. Rais tells you to go talk to Karim.
Back to Karim
Karim tells you to go and do some pickups for the crew... See to any maintenance and trading you need to do then head outside to get the marker on the map. Of course when he says Pickups what he really means is to get protection money from the other survivors!
On the way you call in to your GRE Controller - and they instruct you to cooperate and keep your mind on the goal.
When you reach the wheel station you unlock a new Safe Zone, and then you need to persuade Jaffar to pay up... Which you do in a brief CS.
At this point you have unrestricted access to the beds in Safe Zones - so if it is getting close on to night you can rest to night then rest through the night, and start out in the morning.
When you finally reach Rais' HQ you discover that the man is something of a douche...
Next you need to head to the Tunnel Entrance to speak with the messenger from the Fisherman's Village. On the way you get a call from Brecken - he remind you to get Antizen...
The Courier is not at the Tunnel so you end up having to go inside - where you encounter your first Bomber. Eww!
Karim tells you to head through the Tunnel and meet the peeps at the Village - so through the Tunnel you go!
The Fisherman's Village
It seems that among other things the reason that these people pay Rais is for protection - so you protect them by clearing away the infected - and closing the gate to secure another Safe Zone.
You need to knock on a few doors to get the money - then you call in and, on the way out you have a chat with one of the survivors. He tells you that a crazy man living outside is who caused their gate to get opened and thus the infected to invade!
Side-Quest: Gas Mask Man
After you complete the side quest Gas Mask Man there is a “!” on the Notice Board at the camp for another side quest.
Side-Quest: Midnight Bride
To continue the main mission make the third pickup at the Ferry Terminal.
When you get to the Terminal you have another strong-arm conversation - as you reluctantly force them to pay up!
Karim then instructs you to return to claim your prize.
Nearby you see an “!” that leads to a journalist named Neal - you chat him up, and he tells you his story. He is convinced that he needs to get out but he has lost all of his Notes and work in a satchel at an Internet Cafe - and his camera is in a random car. He wants you to recover them for him, which Flags the Side-Quest.
Side-Quest: A Survivor's Guide to Zombieland.
Midway back to the HQ you get a call from Brecken - telling you that the need for Antizen is growin desperate. You tell him that Rais has promised two crates and he tells you to hurry. Nothing like a little pressure, right?
Shortly after that Karim calls and tells you to go look for a missing patrol - do it or no reward! *******!
As you divert to the location, dodging loads of nasty infected, you find the bodies of the patrol - and Karim tells you not to damage the bodies... Odd. Evidently they have an envelope that you need to recover.
Completing the initial meeting with Rais results in the award of an Achievement
A group of Bandits is below - they are likely who took out the patrol. But be careful - they have rifles AND grenades and they WILL kill you with them! You have to take them out carefully, then take the envelope and haul butt back to the HQ!
After you grab the envelope the guy on the Antennae who would not talk to you before starts yelling for you to come help him.
When you get there he tells you that he needs your help finding his son Christoph. He fills you in on what he wants you to do.
Side-Quest: The Prodigal Son
On the way back you will see yet another Supply Drop - this time pretty close to where you are. If you go directly there you will find BOTH of the chests full - so go ahead and grab the contents, which you can deliver to the Quartermaster back at the Tower.
When you finally return you give Karim the Blueprints and then talk to Rais, and once again instead of delivering on his promises, he tells you not. Instead of two crates he gives you five vials. Jesus!
He then tells you that if you want more you have to lure one of the Survivors from the Tower to the HQ so that they can be made to fight in the pits.
Your goal now changes to deliver Antizen to the Survivors.
On your way back you get pinged from the GRE Controller - whose attitude is that you should do whatever Rais wants. Kyle is starting to have doubts about the GRE - well yeah!
On the way back to the Tower you hear from Alfie - that they just lost gas at the Tower - and it seems the rest of the city as well.
Side-Quest: Gassed Up
When you get back to the Tower there are plenty of people to talk to...
You ask about Chrstioph from the Prodigal Son Side-Quest - he is actually well known here it seems.
The story takes you to the Fishing Village but the gates are open and the Village has been overrun by Infected!
When you meet with Jade - and deliver the Antizen - and it seems that the outbreak cost the entire 18th Floor.
You can hit the Quartermaster to drop the supplies and pick up your daily quota then hit the merchants on your way to talk with Brecken.
Brecken goes nuts - but it turns out that his guilt stems from his origin and lack of pride. You on the other hand are starting to discover your humanity.
After the chat with Brecken you need to head to the roof to contact the GRE. On the way you run into Rahim and he tries once again to sell his plan to you.
Once you find a safe place to contact the GRE you learn that things are not going well outside either. The GRE is having political troubles. Still they will not resume air drops of Antizen.
Jade then calls you on the radio, and tells you about a plan she has to steal Antizen from Rais. She tells you to look for her at one of the train cars.
That wraps up this mission and starts the next one!
When you try to collect the reward you earned you discover that Rais prefers Machine Gun Diplomacy - and screwing you over on the reward!
After your return to the Tower and chat with the different peeps there you talk to a bloke who relates the circumstances behind the next mission - or rather foreshadows it but don't worry about that for now, instead worry about Jade, who calls you on the radio with a plan to steal Antizen from Rais.
On your way to meet her at the railroad car you get a call from a pair of strangers which Flags a Side-Quest.
Side-Quest: On the Hooks
When you arrive that triggers an extensive CS in which you basically follow Jade after she briefs you, and then as you watch Tahir kills all of his workers. Jade heads to the school and you need to find your own entrance.
When you get to the roof at the very top there are two Toads so take them out quickly, then clear out any extra Toads and infected you find on the roof proper. Beware the Bombers mates - outside AND in.
Once you get inside Jade asks you to check the classrooms, but it is pretty clear that whatever has been going on here it involves more than simply storing resources.
As you clear the school room by room you will end up taking on a squad of Rais men - and stopping an alarm. There are some loners you may encounter but what you are not doing is finding lots of Antizen.
You find the Basement Keys on a shelf in a cabinet and then as you loot your way down, hook up with Jade to discover the final stash. Which is not Antizens - but it IS a whole bunch of C4!
You send Jade to take the C4 back to the Tower while you deal with the final patrol - then you have to make your way back to safety - unfortunately when you emerge from the school no matter what time it was when you went in - or how long you spent inside - it is still NIGHT out here!
Jade calls you on the radio and asks what you wanted to talk about before - now all you need to do is sneak around and survive without being noticed until the Night ends.
Back at the Tower head up to the roof to chat with Rahim - who is very disappointed with your plan to do the blow up yourself. With that squared away you need to talk to Dr. Zere about his research and that odd infected.
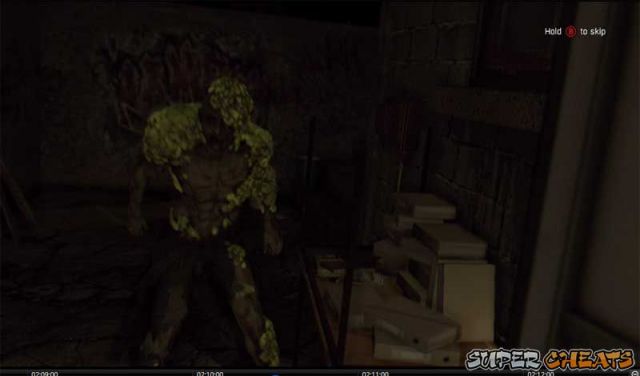
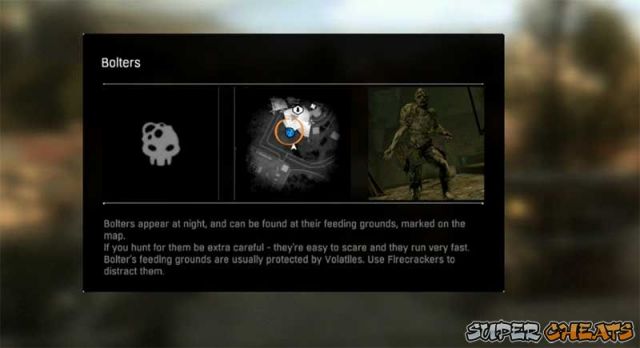
The Doc wants you to obtain a sample of a Bolter - a FRESH sample mind you. Now bear in mind that they only come out at night... We can either wait for dark or rest until dark but either way we have to get it to be night.
Bearing in mind that in addition to the world being a more dangerous place at night, it can also be more rewarding since you get more XP at night than in the daytime.
Heading Out at Night
Chances are that this is the first time you head out in full night when the game is not slanted towards helping you survive the process. To make this easier check the marker and you will see that there is a Safe House right next to the Bolter Feeding Gorounds.
By moving to that Safe House during the day and then sleeping there to make it night you remove a major obstacle to surviving this mission - and we highly recommend it.
Another point that needs making: you already know that sound draws in infected - but at night it is doubly so. So you want to try to be as quiet as you can.
When you emerge you are prompted to use Firecrackers to lure Volatiles away from the Bolters - you could do that - or you could sneak up in the nearby feeding Bolter and then quickly kill it. Use the Firecrackers to lure the regular infected and the Volatiles away and get the sample.
Heading back at night would not be a good idea - it would be an easy way to die. Instead you should sleep at the nearby Safe Zone and then head back to the daylight.
When you reach the trailer and the Doc with the samples it turns out that the original experiment that the Doc used with the meat actually worked!
Unfortunately making use of the data that it reveals requires someone - you - to hand carry the data to the other Doc. You will have to wait while the Doc gets the files in order though.

Rahim's Peril
When you leave the trailer you get a radio call from Rahim - he and Omar tried to do the explosive mission on their own and are now in trouble. You tell Rahim to hole up in the Train Yard and then call Brecken to let him know what is going on.
Brecken is understandably ****** at you about the explosives - Jade is probably not going to be all that happy either - after all Rahim is her little brother and last living relative...
You need to rush to the marker and try to save the little idiot - which means a fast Parkour run to the last known location for Rahim - and no Rahim!
You search the dead bodies - and find Omar's body - but Rahim does not appear to be here. You contact Brecken to fill him in, and then head for the Train Yard to see if Rahim actually made it there?
When you get to the Train Yard and climb down inside the building you will find part of a Supply Drop - grab that - and a squad of Bandits. You will need to eliminate them, then search the boxcars. When you don't find him in the first building you have to check the second. Use the power box at the end to open the doors in order to leave easier.
Demolition Zone
The next building is an instanced zone - you use the door to load it and, once inside, you hear Rahim yelling at the infected who are trying to get at him!
Eliminate the zombie threat and then open the boxcar... But no! A Toad drops in! Deal with the Toad and then open the boxcar to find Rahim - but this is NOT ideal.... He thought he was going to die so he armed the bomb timer! You have to get the bomb to the site as fast as you can because the timer is ticking!
Use the sewers to get out of the Train Yard building, then run into the tower, avoiding the infected because you do not have the time it would take to deal with them. You need to get the bomb to the support column and place them, then you need to get out.
Here is the thing - under normal circumstances it is really a bad idea to use guns - but here you are inside a building with a lot of infected. You do nto have a lot of time so you may want to pull out your trusty shotgun and use it to deal with the bigger threats while quickly heading to the columns.
Using that technique you should be easily able to get the bombs placed and get out - just remember you do not have to kill ALL of the infected - just enough so you can move around without being grabbed.
As you depart the bombs blow and bring the tower down! Hey - the plan worked! Excellent!
Sadly when you return to the boxcar all enthusiastic you find that Rahim has turned... and you have no choice but to kill him. Then you go a little nuts.
You report that Rahim is dead to Brecken - and he orders you to return to base - and NOT tell Jade anything...
Heading out the door to the Train Yards exits the instanced zone.
When you reach the Tower you meet a woman who is basically bitching about her situation... After you hear her ***** you head to the marker and talk to Brecken, who is not happy about this. But as you are talking Jade overhears you and freaks running out. That ends this mission.
Achievements
At some point during this mission you should unlock the following Achievements:
Pheidippides (25g) Run (move or sprint) at least 42,195m.
Just as Jade starts to run there is an explosion and an attack - it is night and you need to find Dr. Zere - when you arrive you find that the Doc has been kidnapped and his trailer set on fire. You have to rescue Zere but, since the timer is now stopped it would be an idea to head to the Tower and sleep till morning so you do not have to do this at night.
Brecken tells you that some spotters saw the group that probably took the Doc. Once you have slept and it is morning, before you set off on this mission you should hit the Quartermaster and the merchants, use any Skill Points you have and craft the supplies you think you will need for this.
We recommend Medkits, some Molotov Cocktails, and perhaps some Firecrackers if you do not already have a supply made.
Rais' HQ
When you get outside set your marker for the HQ and head there. When you arrive you discover that the HQ has been locked up - the doors secured, and no obvious way in!
Actually if you think about it that can only be a good thing - after all it is not like they are going to welcome you with open arms right? They are going to want to kill you! On sight! So sneak your way around the HQ looking for a way in - and that means looking for an obvious entry point - you know, like that burning red van?
Climb up on the van and make your way along the path it gives access to, going higher and higher, Eventually you reach a window you can go in - and inside is an enemy so kill him! Loot the room, then head out the door onto the roof, and eliminate the other armed guard at the far end. There will be a few more guards to take down and, once you do you can access the hatch to get inside which is in one of the other roof hutches.
Rais's Garrison
Going through the trap door enters an instanced zone - and as you get in you call your GRE contact only to discover that the military has taken over and they plan to carpet bomb the city... You try to persuade them - and you manage to get them to delay the bombing so you can get the cure data. They give you 48 hours. Easy-Peasy!
To proceed you go down the rope in the lift shaft - looting along the way - and hey there is a LOT to loot!
Eventually you take out one guy in the room with the computer, and then two more come to you so that you can introduce them to their own personal Jesus. That done, you continue down and take out any of the enemy you encounter until you reach the end of the “0” Level you radio Brecken and he suggests you check the basement. Well duh!
When you get downstairs though the game is changed the enemy have guns - so you ma want to just sneak past these guys - or not. Your call. But it appears that the game wants you to be all stealthy here and ninja-like. Because you can.
IF you get discovered remember you are INSIDE a building - so using firearms here is OK!
Eventually you battle your way down to the room that the Doc is in - as you try to get him on board with a rescue he tries to tell you about his research. He explains that he gave the packages to Jade - and that he needs you to help deliver them. Then the lights go out!
When they come back on you are surrounded, Rais knows who has the research, and you two? Yeah you are dead! Well, the Doc is dead - YOU are on your way to the Pitt!
The Pit
Considering the name of the mission and what Rais said before this is really not a surprise, right? Right! When you wake up you find yourself again surrounded - and Rais is talking to you. He fills you in on his perspective of the situation - and then you are again temp incapped only to wake up on your back in the Pitt as darkness falls.
You need to gather resources - you can find some on top of the containers here so go get it!
Once you have a weapon you can start to work on the infected in here. You should know that thrown knives WILL detonate propane canisters. So using the Firecrackers to lure the infected near it and then throwing the knife will allow you to take out a number of them very quickly.
Continue to scrounge kit - yeah it sucks that you lost all those firearms but still there are plenty of weapons and crafting resources laying about, so make use of them. Work your way through the infected as best you can.
Bear in mind you do not have any Medkits - so you need to NOT get damaged badly. That means playing a strategic game here. Remember the point to this is to survive the Arena not become Mad Max...
The best strategy here seems to be to get up high and lure all the Virals in one at a time and kill them - that gives you more freedom to move below when all that are left are the slower infected.
The Demolisher
After you take out the first wave, Rais preaches to you again, and then more infected are lowered in via crane and container - specifically a Heavy.
This Heavy likes to pick up and throw heavy chunks of rubble and concrete - you want to avoid being hit by them. His throw attacks are actually pretty fast so the best strategy in dealing with him is to attack from above and then run away before he can hit you.
You can use the smoke machine for strategic cover - but remember this guy is very fast on the attack so you want to hit and run quickly. Eventually you will whittle away at his health - but you have to watch out for the regular infected who are also here as they can sneak up on you too!
You can use the propane canister but remember that when you do it will call in any Virals who are in the area!

Once you take out The Demolisher Rais gives another preaching session - and then drops a Medkit for you - and then reveals that he knows you are a GRE Operative!
The next wave is... Rais! He comes down and has a more personal conversation with you in which he again imparts his wisdom to you - by ordering that the file be published.
Here is where you find out that the GRE was not working on a cure at all - they were working on a Virus Weapon. Then he orders them to kill you!
A CS triggers in which Crane does a pretty good job at being Mad Max - killing the enemy and cutting Rais's hand off! You then escape the Pitt and get outside - running away from the enemy and having you an escape. At night. In the Quarantine Zone.
But all hope is not lost - the sun is rising!
The trick here is avoiding bullets and bombs until you can get into one of the buildings and the relative safety that its cover provides.
Follow the markers down the lift shaft and head through the building and you really will have you an escape - hitting the door to exit its instance.
Finally outside you can now RTB - and unlock the Achievement: Snake in the Grass (15g) Escape the Arena. You will also have unlocked Everyone Knows Kyle (10g) Reach Survivor Rank Level 12. You should also have unlocked the Achievement: String (25G) Reach Power Prof. Level 10.
Your current goal is to RTB and report to Brecken. You need to pass on the information you have learned to him and it might be nice to know what is up with Jade?
When you reach the first Safe Zone head inside and grab all of the stuff from your Stash that you need - all of the kit you had was put there by the game when you went into the Pitt - and if you plan to continue crafting and doing quests you need to get it all back!
As you make your way back to the Tower you start having the Viral Seizures and that wipes out your Agility - so you can not run! Be careful not to let yourself get in a position where you need to run because like I said, you can't.
Eventually you wake up in a Safe Zone - and Brecken is there.
He fills you in during the CS explaining what has happened. You tell Brecken that you are going after Jade and the other Doc - and Brecken explains the route in. You learn that the air drops have ceased, and Brecken explains that the endgame is approaching.
He returns your radio and your gear - so if you did not restore your gear earlier you can do it now.
That wraps up the mission.
When you reach the marker and bang on the door a guy answers and, after first denying pretty much everything eventually comes around when he finds out who you are. After that he makes a call, then gives you instructions on how to proceed in order to get passed into Sector Zero.
He warns you though that going to Sector Zero is not going to make you immune to Rais...
When you reach the Collapsed Tunnel you will need to avoid the infected - or kill them - then make your way inside to the sewers at which point your guide will meet you. Simply follow the guide through the sewer tunnels and he will lead you to an underground community.
When you get there you run into that guy you got the gun for and who kidnapped his kid. Check out the toy sword that the kid is playing with - that is Link's Master Sword!
After that brief interaction the guide shows you the door - and you swim through the ****-rich sewer to the other end, climb out and follow the path.
As you emerge from the sewer you will need to deal with any odd infected who are on the path - simply follow the markers and you will eventually going back into the sewers and into an area where there is a lot of ammunition on the floor (if you need it).
There is some climbing ahead of you - and infected. Bear in mind that as you are indoors you can use your firearms here if you like.
Mid-way through the sewers you get a call from the guide who confesses that he is sorry but he had no choice but to rat you out to Rais! Oh man - you are gong to have to deal with Rais or his men ahead!
The trick is to swim underwater through the pipes t avoid being shot - the problem is you cannot go slow you have to immediately begin swimming to the far end of the chamber so that you can get air and breath. Once you get there and climb out you will basically be able to position yourself from cover to deal with Rais' men!

Now is when you will want to use your firearms for sure. The Shotgun works very well at close range here otherwise the Assault Rifle is your best friend. Your goal is simply to survive the ambush, and then continue into Sector Zero.
When you merge from the industrial area you run into another ambush of Rais' men - take them out quickly with Molotovs. You contact Brecken and warn him that Rais and The Saviors are in league together - and so The Saviors can NOT be trusted!
After tha tmake your way up through the villa and exit through the marked door - that will take you in to Old Town - which is basically Sector Zero!
That wraps up the mission.
When you enter the Sector you call Troy on the radio - she gives you directions to reach her - and that unlocks the Achievement: Sightseeing (25g) Reach the Old Town.
You call the other Doc and he fills you in on the strategic difficulties - you explain that you need to find Jade and recover Zere's research - and he agrees to stay hunkered down.
As you loot your way along, head for the marker on the map - and note the military jets overhead. That is NOT a good omen.
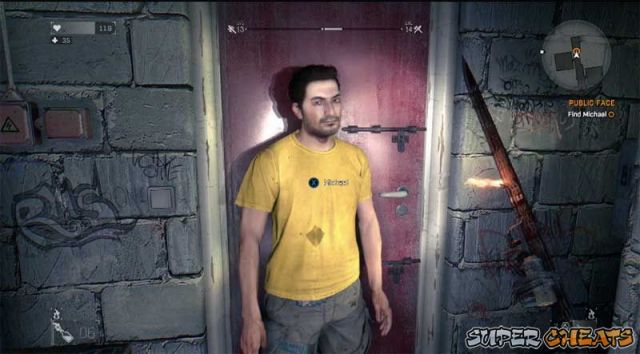
Reaching the marker - which is the Tower for this area - unlocks it as a Safe Zone. Head up and look around to meet Michael - then go inside and talk to Troy.
You get a CS here - you get to talk to Jade and man is she angry at you! After that this mission is completed, you get your reward, and begin the next mission.
You have delivered the word to Jade and Troy has told you where she is. Not only that but see the map on the wall? You can now fast-travel between the zones using that. Just so you know.
Talk to Savvy before you leave to flag the side-quest Radio Station.
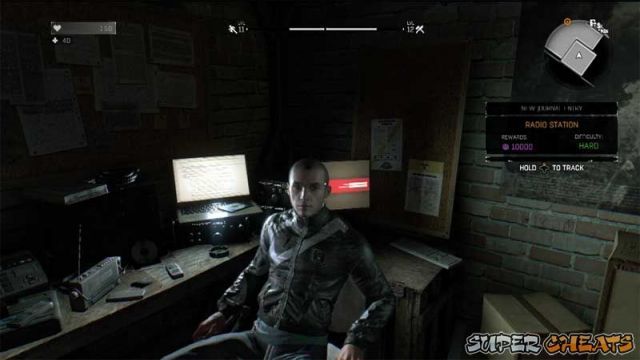
Side-Quest: Radio Station
As you are moving around in the Tower you will get a radio call from a man who is about to turn asking you to rescue his sone.
Side-Quest: Lost in Space
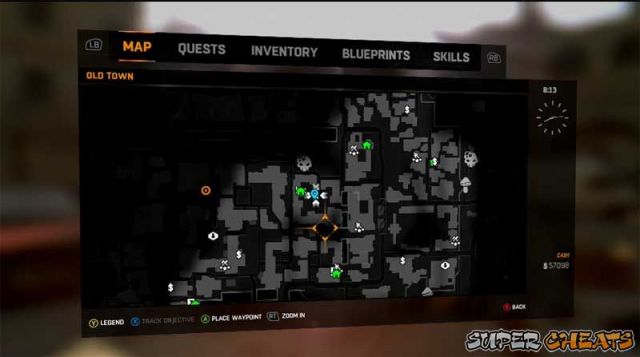
We have reached a sort of cusp event here - just like when we first started playing... We are in what is, for all practical purposes, a brand new zone to us. That being the case just like when we first started playing we should make a diversion here and explore the zone, clear the Safe Zones, and flag side-quests as well as reveal any resources - and loot - that we can.
So first thing first, we should explore the map to get rid of the fog of war - something we can easily do during daylight and from roof to roof with very little risk. At each of the Safe Zones we should go ahead and clear and secure them. It may be an idea to avoid the Outposts for the moment.
For some of the Save Zones clearing the area will mean not just killing the regular infected inside but heading up to the top and killing a heavy in order to both clear the area and access the power. That can be tricky - the one thing you need to be sure of is you don't get thrown over the edge!
Air Drops - There are Air Drops in this zone - they are not marked by smoke and they are not always completely intact versions of what we found previously. That said they are TOTALLY worth getting. Most will have a small squad of Rais' Bandits at them so you will have to take them over but it is well worth it.
With all of that support activity completed we have gained another jump in levels and resources, and are now well set to continue! Heading for the University and the marker there is the first step, and when we arrive there is a guard we can talk to for a hint at where Jade is.
Inside you talk to whatshisname and learn that you missed her by not too much time. Unfortunately she did not say where she was going - though she did leave you a clue. A mirror. Man she really IS ****** at you!
After you finish talking to Fidan the first time you will notice that a bunch of Side-Quest markers have appeared on the map. Talk to him again to flag the Side-Quest Rupert the Gunsmith.
Side-Quest: Rupert the Gunsmith
When Crane mentioned the silencer I nearly choked. Not that I have not been thinking the very same thing myself because hey, I HAVE... But unlike Crane I know how to make a cheap and effective one with just an oil filter and a threading bit. Oh well.
Side-Quest: Do You Believe?
A bloke called Mufid is standing by the stacks and he tells you about the loud music - which Flags this quest for us.
The objective now changes to returning to the Old Town Tower - which also has a “!” at it by the way... As we exit the University Troy calls and tells us that we need to get back to the Tower ASAP - there is something we have to see...
When we get back there talk to Noah to have a dicussion and flag a Side-Quest...
Side-Quest: Fan Zone
Noah asks you to check out the distress messages coming from the Fan Zone.
When we get to Troy she shows us a net broadcast that they finally obtained access to and it seems that the GRE has now been outed. Unfortunately it seems that the government has decided to decontaminate the Quarantine Zone - which means you and the other survivors.
Troy tells you her plan to communicate with the outside - but they are having trouble with making it happen. She is coming to you for your help - and you freak a little - but agree in the end.
That nicely wraps up this mission!
As you depart the Tower to head for the marker you get a radio message for a new Side-Quest:
Side-Quest: Legless Spider
When we arrive at the marker things go really wonky really fast - between the tank-exploding fireman types and the spitting Toads you got your survival work cut out for you!
Be an idea to clear this area carefully - then you need to swim down into the Sewers and make your way to the next marker which is a door to an Instance Zone - The Sewers.
Inside there are plenty of infected to take out and then, well, I have to admit that swimming in the **** water is sorta gross... But remember you are inside here so you can safely use your firearms!
When you reach Michael you have a chat with him and he tells you about his crush on Troy - go figure... He explains the plan to you - make a pattern that the government cannot explain away by blowing stuff up. Got it!
Sadly the lift does not even get halfway before it jams and you have to find an alternate rout up... I was actually surprised that the lift worked at all...
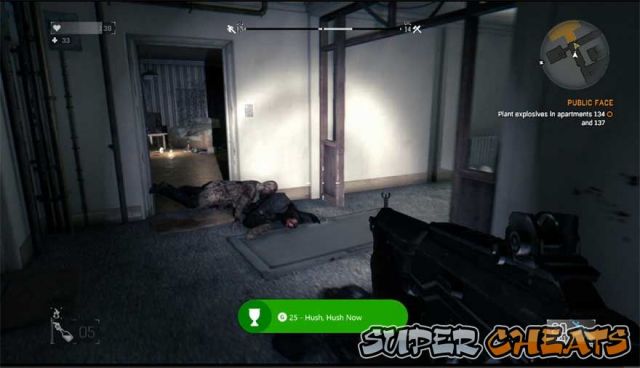
Things are looking pretty grim here but Michael feeds us the list of flats we are supposed to rig - and hey did you notice that there is a LOT of pistol ammunition in this place? I think that MEANS something!
As you progress from flat to flat you encounter what is probably your first Screamer - man those kids are LOUD! Wasting it gets you the Achievement: Hush Now (25g) Quiet a Screamer.
Well done you! You blew a little kids brains all over the floor! Too Right!
After you place the last of the charges you have to make your way back down - which is a lot easier said than done - because the infested REALLY come out now and it is a literal battle all the way down!
But hey that is what shotguns were MADE for, right? The phrase “Pink Mist” takes on new meaning here...
When you finally reach the bottom you grab the detonator that Michael left for you - and the task changes to Leave the Building and Detonate the Charges! Excellent! We get to do the Boom!

Now leaving the building is a bit of a Parkour trick but that is OK because we are actually getting pretty good at that now. Once outside you set off the bombs and - whoa! Cool! A frowning face! Sweet!
Not only that but you get to talk to Jade - and THEN the Air Force destroys the building!
The consensus is that there is a way to break through the jamming with your help - you set up a meet and now your problem is to get to a Save Zone as fast as you can!
You unlocked the Achievement: Making Faces (25g) Show the outside world that you're still alive.
And that nicely ends the mission!
Mission 05: Siblings
On your way to meet her at the railroad car you get a call from a pair of strangers which Flags a Side-Quest.
During this mission you will encounter several groups of well-armed bandits - and killing them with Molotovs can earn you this prize!
Side-Quest: On the Hooks
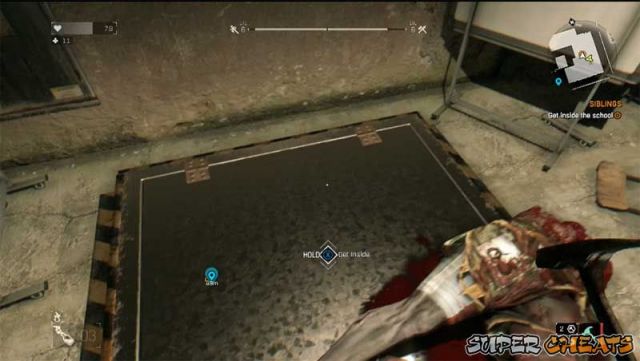
When you arrive that triggers an extensive CS in which you basically follow Jade after she briefs you, and then as you watch Tahir kills all of his workers. Jade heads to the school and you need to find your own entrance.
When you get to the roof at the very top there are two Toads so take them out quickly, then clear out any extra Toads and infected you find on the roof proper. Beware the Bombers mates - outside AND in.
Once you get inside Jade asks you to check the classrooms, but it is pretty clear that whatever has been going on here it involves more than simply storing resources.
As you clear the school room by room you will end up taking on a squad of Rais men - and stopping an alarm. There are some loners you may encounter but what you are not doing is finding lots of Antizen.
You find the Basement Keys on a shelf in a cabinet and then as you loot your way down, hook up with Jade to discover the final stash. Which is not Antizens - but it IS a whole bunch of C4!
You send Jade to take the C4 back to the Tower while you deal with the final patrol - then you have to make your way back to safety - unfortunately when you emerge from the school no matter what time it was when you went in - or how long you spent inside - it is still NIGHT out here!
In addition to providing a Safe House to rest in at night Safe Zones ALSO provide access to your global Storage Bag!
Jade calls you on the radio and asks what you wanted to talk about before - now all you need to do is sneak around and survive without being noticed until the Night ends.
Back at the Tower head up to the roof to chat with Rahim - who is very disappointed with your plan to do the blow up yourself. With that squared away you need to talk to Dr. Zere about his research and that odd infected.
The Doc wants you to obtain a sample of a Bolter - a FRESH sample mind you. Now bear in mind that they only come out at night... We can either wait for dark or rest until dark but either way we have to get it to be night.
Bearing in mind that in addition to the world being a more dangerous place at night, it can also be more rewarding since you get more XP at night than in the daytime.
Thanks to this girl you learn some things about Jade you would not otherwise have discovered!
Heading Out at Night
Chances are that this is the first time you head out in full night when the game is not slanted towards helping you survive the process. To make this easier check the marker and you will see that there is a Safe House right next to the Bolter Feeding Gorounds.
By moving to that Safe House during the day and then sleeping there to make it night you remove a major obstacle to surviving this mission - and we highly recommend it.
Another point that needs making: you already know that sound draws in infected - but at night it is doubly so. So you want to try to be as quiet as you can.
When you emerge you are prompted to use Firecrackers to lure Volatiles away from the Bolters - you could do that - or you could sneak up in the nearby feeding Bolter and then quickly kill it. Use the Firecrackers to lure the regular infected and the Volatiles away and get the sample.
Heading back at night would not be a good idea - it would be an easy way to die. Instead you should sleep at the nearby Safe Zone and then head back to the daylight.
When you reach the trailer and the Doc with the samples it turns out that the original experiment that the Doc used with the meat actually worked!
Unfortunately making use of the data that it reveals requires someone - you - to hand carry the data to the other Doc. You will have to wait while the Doc gets the files in order though.
Rahim hatches a wild plan to take down the largest nest of Infected inside the Zone...
Rahim's Peril
When you leave the trailer you get a radio call from Rahim - he and Omar tried to do the explosive mission on their own and are now in trouble. You tell Rahim to hole up in the Train Yard and then call Brecken to let him know what is going on.
Brecken is understandably ****** at you about the explosives - Jade is probably not going to be all that happy either - after all Rahim is her little brother and last living relative...
You need to rush to the marker and try to save the little idiot - which means a fast Parkour run to the last known location for Rahim - and no Rahim!
You search the dead bodies - and find Omar's body - but Rahim does not appear to be here. You contact Brecken to fill him in, and then head for the Train Yard to see if Rahim actually made it there?
When you get to the Train Yard and climb down inside the building you will find part of a Supply Drop - grab that - and a squad of Bandits. You will need to eliminate them, then search the boxcars. When you don't find him in the first building you have to check the second. Use the power box at the end to open the doors in order to leave easier.
Hooking up with Jade to make a stab at raiding the Antizen stores Rais has stashed in the School House...
Demolition Zone
The next building is an instanced zone - you use the door to load it and, once inside, you hear Rahim yelling at the infected who are trying to get at him!
Eliminate the zombie threat and then open the boxcar... But no! A Toad drops in! Deal with the Toad and then open the boxcar to find Rahim - but this is NOT ideal.... He thought he was going to die so he armed the bomb timer! You have to get the bomb to the site as fast as you can because the timer is ticking!
Use the sewers to get out of the Train Yard building, then run into the tower, avoiding the infected because you do not have the time it would take to deal with them. You need to get the bomb to the support column and place them, then you need to get out.
Here is the thing - under normal circumstances it is really a bad idea to use guns - but here you are inside a building with a lot of infected. You do nto have a lot of time so you may want to pull out your trusty shotgun and use it to deal with the bigger threats while quickly heading to the columns.
Using that technique you should be easily able to get the bombs placed and get out - just remember you do not have to kill ALL of the infected - just enough so you can move around without being grabbed.
As you depart the bombs blow and bring the tower down! Hey - the plan worked! Excellent!
The entrance you need is the trap door accessed via the hutch on the roof
Sadly when you return to the boxcar all enthusiastic you find that Rahim has turned... and you have no choice but to kill him. Then you go a little nuts.
You report that Rahim is dead to Brecken - and he orders you to return to base - and NOT tell Jade anything...
Heading out the door to the Train Yards exits the instanced zone.
When you reach the Tower you meet a woman who is basically bitching about her situation... After you hear her ***** you head to the marker and talk to Brecken, who is not happy about this. But as you are talking Jade overhears you and freaks running out. That ends this mission.
Achievements
At some point during this mission you should unlock the following Achievements:
Pheidippides (25g) Run (move or sprint) at least 42,195m.
Mission 06: The Pit
Brecken tells you that some spotters saw the group that probably took the Doc. Once you have slept and it is morning, before you set off on this mission you should hit the Quartermaster and the merchants, use any Skill Points you have and craft the supplies you think you will need for this.
We recommend Medkits, some Molotov Cocktails, and perhaps some Firecrackers if you do not already have a supply made.
Rais' HQ
When you get outside set your marker for the HQ and head there. When you arrive you discover that the HQ has been locked up - the doors secured, and no obvious way in!
Actually if you think about it that can only be a good thing - after all it is not like they are going to welcome you with open arms right? They are going to want to kill you! On sight! So sneak your way around the HQ looking for a way in - and that means looking for an obvious entry point - you know, like that burning red van?
Climb up on the van and make your way along the path it gives access to, going higher and higher, Eventually you reach a window you can go in - and inside is an enemy so kill him! Loot the room, then head out the door onto the roof, and eliminate the other armed guard at the far end. There will be a few more guards to take down and, once you do you can access the hatch to get inside which is in one of the other roof hutches.
Say hello to your first Bolter! Ugly right?
Rais's Garrison
Going through the trap door enters an instanced zone - and as you get in you call your GRE contact only to discover that the military has taken over and they plan to carpet bomb the city... You try to persuade them - and you manage to get them to delay the bombing so you can get the cure data. They give you 48 hours. Easy-Peasy!
To proceed you go down the rope in the lift shaft - looting along the way - and hey there is a LOT to loot!
Eventually you take out one guy in the room with the computer, and then two more come to you so that you can introduce them to their own personal Jesus. That done, you continue down and take out any of the enemy you encounter until you reach the end of the “0” Level you radio Brecken and he suggests you check the basement. Well duh!
When you get downstairs though the game is changed the enemy have guns - so you ma want to just sneak past these guys - or not. Your call. But it appears that the game wants you to be all stealthy here and ninja-like. Because you can.
IF you get discovered remember you are INSIDE a building - so using firearms here is OK!
Eventually you battle your way down to the room that the Doc is in - as you try to get him on board with a rescue he tries to tell you about his research. He explains that he gave the packages to Jade - and that he needs you to help deliver them. Then the lights go out!
It is not obvious right now but later the Bolter type of Infected becomes very important to you - and it has its own Achievement too!
When they come back on you are surrounded, Rais knows who has the research, and you two? Yeah you are dead! Well, the Doc is dead - YOU are on your way to the Pitt!
The Pit
Considering the name of the mission and what Rais said before this is really not a surprise, right? Right! When you wake up you find yourself again surrounded - and Rais is talking to you. He fills you in on his perspective of the situation - and then you are again temp incapped only to wake up on your back in the Pitt as darkness falls.
You need to gather resources - you can find some on top of the containers here so go get it!
Once you have a weapon you can start to work on the infected in here. You should know that thrown knives WILL detonate propane canisters. So using the Firecrackers to lure the infected near it and then throwing the knife will allow you to take out a number of them very quickly.
Continue to scrounge kit - yeah it sucks that you lost all those firearms but still there are plenty of weapons and crafting resources laying about, so make use of them. Work your way through the infected as best you can.
Bear in mind you do not have any Medkits - so you need to NOT get damaged badly. That means playing a strategic game here. Remember the point to this is to survive the Arena not become Mad Max...
The best strategy here seems to be to get up high and lure all the Virals in one at a time and kill them - that gives you more freedom to move below when all that are left are the slower infected.
The Demolisher
After you take out the first wave, Rais preaches to you again, and then more infected are lowered in via crane and container - specifically a Heavy.
This Heavy likes to pick up and throw heavy chunks of rubble and concrete - you want to avoid being hit by them. His throw attacks are actually pretty fast so the best strategy in dealing with him is to attack from above and then run away before he can hit you.
You can use the smoke machine for strategic cover - but remember this guy is very fast on the attack so you want to hit and run quickly. Eventually you will whittle away at his health - but you have to watch out for the regular infected who are also here as they can sneak up on you too!
You can use the propane canister but remember that when you do it will call in any Virals who are in the area!
Have you noticed that Kyle Crane is the zombie-game equivalent of MacGyver? Except way better looking hair!
Once you take out The Demolisher Rais gives another preaching session - and then drops a Medkit for you - and then reveals that he knows you are a GRE Operative!
The next wave is... Rais! He comes down and has a more personal conversation with you in which he again imparts his wisdom to you - by ordering that the file be published.
Here is where you find out that the GRE was not working on a cure at all - they were working on a Virus Weapon. Then he orders them to kill you!
A CS triggers in which Crane does a pretty good job at being Mad Max - killing the enemy and cutting Rais's hand off! You then escape the Pitt and get outside - running away from the enemy and having you an escape. At night. In the Quarantine Zone.
But all hope is not lost - the sun is rising!
The trick here is avoiding bullets and bombs until you can get into one of the buildings and the relative safety that its cover provides.
Follow the markers down the lift shaft and head through the building and you really will have you an escape - hitting the door to exit its instance.
Finally outside you can now RTB - and unlock the Achievement: Snake in the Grass (15g) Escape the Arena. You will also have unlocked Everyone Knows Kyle (10g) Reach Survivor Rank Level 12. You should also have unlocked the Achievement: String (25G) Reach Power Prof. Level 10.
Your current goal is to RTB and report to Brecken. You need to pass on the information you have learned to him and it might be nice to know what is up with Jade?
When you reach the first Safe Zone head inside and grab all of the stuff from your Stash that you need - all of the kit you had was put there by the game when you went into the Pitt - and if you plan to continue crafting and doing quests you need to get it all back!
As you make your way back to the Tower you start having the Viral Seizures and that wipes out your Agility - so you can not run! Be careful not to let yourself get in a position where you need to run because like I said, you can't.
Eventually you wake up in a Safe Zone - and Brecken is there.
He fills you in during the CS explaining what has happened. You tell Brecken that you are going after Jade and the other Doc - and Brecken explains the route in. You learn that the air drops have ceased, and Brecken explains that the endgame is approaching.
He returns your radio and your gear - so if you did not restore your gear earlier you can do it now.
That wraps up the mission.
Mission 07: The Saviors
He warns you though that going to Sector Zero is not going to make you immune to Rais...
The first step is to make contact with the Gatekeeper for The Saviors...
When you reach the Collapsed Tunnel you will need to avoid the infected - or kill them - then make your way inside to the sewers at which point your guide will meet you. Simply follow the guide through the sewer tunnels and he will lead you to an underground community.
When you get there you run into that guy you got the gun for and who kidnapped his kid. Check out the toy sword that the kid is playing with - that is Link's Master Sword!
After that brief interaction the guide shows you the door - and you swim through the ****-rich sewer to the other end, climb out and follow the path.
Next you follow the marker to the Guide in the Sewers...
As you emerge from the sewer you will need to deal with any odd infected who are on the path - simply follow the markers and you will eventually going back into the sewers and into an area where there is a lot of ammunition on the floor (if you need it).
There is some climbing ahead of you - and infected. Bear in mind that as you are indoors you can use your firearms here if you like.
Mid-way through the sewers you get a call from the guide who confesses that he is sorry but he had no choice but to rat you out to Rais! Oh man - you are gong to have to deal with Rais or his men ahead!
The trick is to swim underwater through the pipes t avoid being shot - the problem is you cannot go slow you have to immediately begin swimming to the far end of the chamber so that you can get air and breath. Once you get there and climb out you will basically be able to position yourself from cover to deal with Rais' men!
When you finally reach the other end of the path through the Sewers you unlock a spiffy Achievement to celebrate surviving the betrayal of The Saviors!
Now is when you will want to use your firearms for sure. The Shotgun works very well at close range here otherwise the Assault Rifle is your best friend. Your goal is simply to survive the ambush, and then continue into Sector Zero.
When you merge from the industrial area you run into another ambush of Rais' men - take them out quickly with Molotovs. You contact Brecken and warn him that Rais and The Saviors are in league together - and so The Saviors can NOT be trusted!
After tha tmake your way up through the villa and exit through the marked door - that will take you in to Old Town - which is basically Sector Zero!
That wraps up the mission.
Mission 08: The Embers / Troy
You call the other Doc and he fills you in on the strategic difficulties - you explain that you need to find Jade and recover Zere's research - and he agrees to stay hunkered down.
Finally meeting up with Troy and the Embers Crew!
As you loot your way along, head for the marker on the map - and note the military jets overhead. That is NOT a good omen.
Reaching the marker - which is the Tower for this area - unlocks it as a Safe Zone. Head up and look around to meet Michael - then go inside and talk to Troy.
You get a CS here - you get to talk to Jade and man is she angry at you! After that this mission is completed, you get your reward, and begin the next mission.
Mission 09: Higher Education
Talk to Savvy before you leave to flag the side-quest Radio Station.
You learn about Rais' Outposts in Old Town from one of the Ember Crew
Side-Quest: Radio Station
As you are moving around in the Tower you will get a radio call from a man who is about to turn asking you to rescue his sone.
Side-Quest: Lost in Space
We have reached a sort of cusp event here - just like when we first started playing... We are in what is, for all practical purposes, a brand new zone to us. That being the case just like when we first started playing we should make a diversion here and explore the zone, clear the Safe Zones, and flag side-quests as well as reveal any resources - and loot - that we can.
Restoring the power in all of the Old Town Safe Zones is your first priority!
The Diversion
So first thing first, we should explore the map to get rid of the fog of war - something we can easily do during daylight and from roof to roof with very little risk. At each of the Safe Zones we should go ahead and clear and secure them. It may be an idea to avoid the Outposts for the moment.
For some of the Save Zones clearing the area will mean not just killing the regular infected inside but heading up to the top and killing a heavy in order to both clear the area and access the power. That can be tricky - the one thing you need to be sure of is you don't get thrown over the edge!
Air Drops - There are Air Drops in this zone - they are not marked by smoke and they are not always completely intact versions of what we found previously. That said they are TOTALLY worth getting. Most will have a small squad of Rais' Bandits at them so you will have to take them over but it is well worth it.
Heading for Jade
With all of that support activity completed we have gained another jump in levels and resources, and are now well set to continue! Heading for the University and the marker there is the first step, and when we arrive there is a guard we can talk to for a hint at where Jade is.
Inside you talk to whatshisname and learn that you missed her by not too much time. Unfortunately she did not say where she was going - though she did leave you a clue. A mirror. Man she really IS ****** at you!
Removing the Fog of War from the Old Town Map is your second priority!
Quest Markers
After you finish talking to Fidan the first time you will notice that a bunch of Side-Quest markers have appeared on the map. Talk to him again to flag the Side-Quest Rupert the Gunsmith.
Side-Quest: Rupert the Gunsmith
When Crane mentioned the silencer I nearly choked. Not that I have not been thinking the very same thing myself because hey, I HAVE... But unlike Crane I know how to make a cheap and effective one with just an oil filter and a threading bit. Oh well.
Side-Quest: Do You Believe?
A bloke called Mufid is standing by the stacks and he tells you about the loud music - which Flags this quest for us.
The objective now changes to returning to the Old Town Tower - which also has a “!” at it by the way... As we exit the University Troy calls and tells us that we need to get back to the Tower ASAP - there is something we have to see...
When we get back there talk to Noah to have a dicussion and flag a Side-Quest...
Side-Quest: Fan Zone
Noah asks you to check out the distress messages coming from the Fan Zone.
When we get to Troy she shows us a net broadcast that they finally obtained access to and it seems that the GRE has now been outed. Unfortunately it seems that the government has decided to decontaminate the Quarantine Zone - which means you and the other survivors.
Troy tells you her plan to communicate with the outside - but they are having trouble with making it happen. She is coming to you for your help - and you freak a little - but agree in the end.
That nicely wraps up this mission!
Mission 10: Public Face
Side-Quest: Legless Spider
When we arrive at the marker things go really wonky really fast - between the tank-exploding fireman types and the spitting Toads you got your survival work cut out for you!
Be an idea to clear this area carefully - then you need to swim down into the Sewers and make your way to the next marker which is a door to an Instance Zone - The Sewers.
Meet up with Michael to help with his mission...
Inside there are plenty of infected to take out and then, well, I have to admit that swimming in the **** water is sorta gross... But remember you are inside here so you can safely use your firearms!
When you reach Michael you have a chat with him and he tells you about his crush on Troy - go figure... He explains the plan to you - make a pattern that the government cannot explain away by blowing stuff up. Got it!
Sadly the lift does not even get halfway before it jams and you have to find an alternate rout up... I was actually surprised that the lift worked at all...
Things are looking pretty grim here but Michael feeds us the list of flats we are supposed to rig - and hey did you notice that there is a LOT of pistol ammunition in this place? I think that MEANS something!
As you progress from flat to flat you encounter what is probably your first Screamer - man those kids are LOUD! Wasting it gets you the Achievement: Hush Now (25g) Quiet a Screamer.
Well done you! You blew a little kids brains all over the floor! Too Right!
Killing your first Screamer unlocks this Achievement...
After you place the last of the charges you have to make your way back down - which is a lot easier said than done - because the infested REALLY come out now and it is a literal battle all the way down!
But hey that is what shotguns were MADE for, right? The phrase “Pink Mist” takes on new meaning here...
When you finally reach the bottom you grab the detonator that Michael left for you - and the task changes to Leave the Building and Detonate the Charges! Excellent! We get to do the Boom!
The bombs create a display that can only be man-made
Now leaving the building is a bit of a Parkour trick but that is OK because we are actually getting pretty good at that now. Once outside you set off the bombs and - whoa! Cool! A frowning face! Sweet!
Not only that but you get to talk to Jade - and THEN the Air Force destroys the building!
The consensus is that there is a way to break through the jamming with your help - you set up a meet and now your problem is to get to a Save Zone as fast as you can!
You unlocked the Achievement: Making Faces (25g) Show the outside world that you're still alive.
And that nicely ends the mission!
Mission 11: Rendezvous
With the Frowning Face building now destroyed the only option that you guys have is to find a way to break the jamming and get the message out that there are still survivors in the city... A message that the government does not want sent out. Obviously.
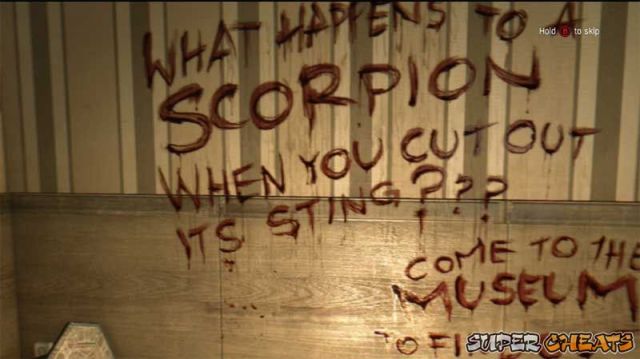
Before you do that - before you head out on this next mission - you should take a good look at both your weapons and supplies. Craft any replacements you need, and craft any resources you need, with particular emphasis upon Medkits and Molotovs. Another point - you should hit a merchant and replace your ammunition.
Now that those minor issues have been dealt with - and you slept until morning - it is time to meet with Jade.
When you get to the meeting site you find that Jade is gone and Rais has left a message for you: “What happens to a Scorpion when you cut out its sting??? Come to the Museum to find out.”
You call Troy and she fills you in on some details you did not previously know - and that wraps up this mission!
So Rais has finally been heard from... He really does have more than a small reason for being angry with you, though to be honest since his entire life appears to be motivated by revenge that is not saying much...
When you reach the Safe Zone and marker you talk to Fariq and he fills you in on his needs - you do a deal with him - he tells you how to get in, and you will help him with the kid.
After you talk with him that will generate some new Side-Quest Flags for you to hit.

Side-Quest: Chasing Past
There is another marker at the Old Town Tower but that turns out to just be Michael and a chance to talk to him and learn that he survived the blast project.
Gaining entrance to the Museum means swimming in underwater - and once inside remember to collect the reward for the Side-Quest Chasing Past.
Using the door you go into this Instance Zone - reminding yourself that you are there to rescue Jade - well that and kill as many of Rais' men as you can!
Man that was a long swim - was not sure if I would make it to the first air pocket! Then I almost didn't make it to the second one...
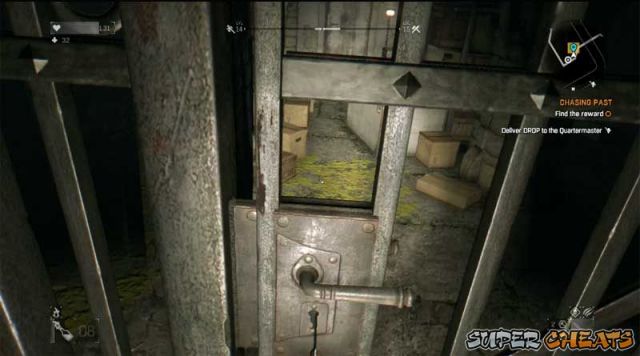
Climbing up and in gets you a seizure - but hey, you are there! Break the barrier and head inside and you can then call Troy on the radio. Getting in is like a maze but, once you are in, you have no trouble spotting Rais' men - and they spot you!
As you enter the main area you are confronted by Rais - and he shows you Jade sort of... The goal changes to Eliminate Rais' Guards - well we were going to do that anyway so why not?
Mind you they throw bombs at you so you have to be aware of that at all times - but they also die really well to shotgun blasts - just saying.
After some witty trash-talk with Rais he sends in some more guards - but that group is on the walkways above you.
After you take out the last of the guards above Rais' taunts you again with Jade and invites you to come rescue her. Make your way up using the stone things and then follow the marker to find a few more guards defending the route. Nothing you cannot handle though.
Once you get inside there are more guards using the corners as cover - but as you get past them the seizure happens again - they seem to be coming quicker now.
After getting outside you survive yet another ambush and then you find the path blocked by an entire army of the undead! Time to start burning them up right? Hope you brought lots of Molotov's!
After you get the XP from killing a bunch you can then use the upper walkway to get across - though bear in mind there is a sniper. At the end of this hall there are more infected to deal with then you just drop down and head through the door there, and you will survive yet another seizure.
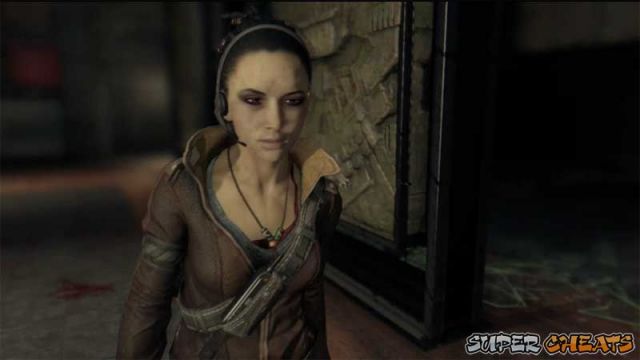
You finally reach Jade and she is woozy but she seems okay... Rais then starts talking trash again - then he releases another army of infected against you. Call this Arena 2.0 right? Fortunately this time around you are better equipped.
After you help Jade kill all of the infected you need to escape the Museum - but Jade seems to be doing very badly - Rais tells you that she was bitten - and infected - hours ago!
Rais drops an Antizen to you but tells you that you have to make a choice - Jade or you - you are noth about to turn. Jade asks you to take the Antizen and then promise to kill her when she turns. She then runs away and you start hearing her on your radio...
The infection is getting worse - as you wander around half-stunned looking for the way out. Now you start to hallucinate - clearly you should listen to Jade and use the Antizen on yourself. You continue to make your way through the messed up reality as Jade talks you into taking the Antizen yourself.
You follow the Jades through the nightmare world and then eventually you confront her and she injects you with the Antizen herself.
Rais mocks you yet again - then sends the remaining men to kill you both. Jade takes out the bad guys but then turns and you have no choice but to end her. Yeah, it sucks, but it is what it is.
Rais still wants you dead though - and he sends his last man down to do it. You have to battle Tahir melee - the whole time he is taunting you and then more guards attack.
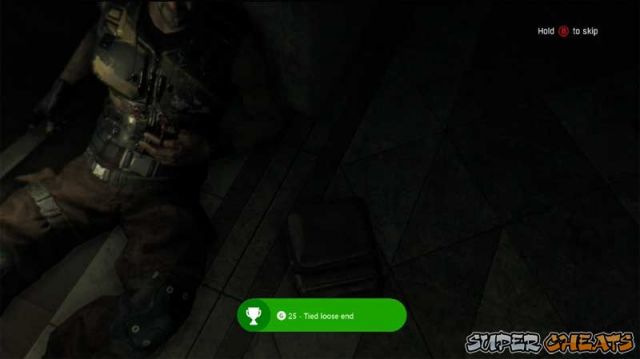
This battle is a variation on the Arena - all your kit has been taken and so you need to try not to get hurt as you deal with the enemy.
When you complete the battle you unlock the Achievement: Tied Loose End (25g) Deal with Tahir.
Your goal now changes to Leave the Museum. On the way you radio Troy and report what happened.
She fills you in on the details for what you need to do next - which is meet her. So head to the marker and kill the guards, then get your stuff back. Unfortunately now you need to sort through all your crap again to restore what you need - so do not forget your crafting kit right?
When you are ready zone out and that will cause you to contact the Doc. Your next task is to meet with Troy - she tells you that you need to install the Amplifier at the highest point that you can - and then set it up so it can broadcast.
And with that we complete the mission!
Getting to the highest point in the area appears to start in the lowest point - the Sewers. Well go figure, as nothing else has made much sense in this adventure so far... I mean what motivates a guy like Crane to DO this sort of thing??
Follow the marker to the underground bathrooms and through the hall there into the Sewers - where you will find an instance zone door to use. Follow that and you will reach a point where you hear a kid crying - this thing is a Super Screamer - you need to back off and shoot it
After you take out the Super Screamer a Brute will break through the wall at which point you have to deal with it and a never-ending supply of runners and regular infected. Basically you want to make as short a work of it as you can as quickly as you can - and the best way seems to be with a sword that has the flame ability built into it. Just saying that was what we used and it went down pretty quick as a result.
Once the Bruiser is out of the way you head down that tunnel to the gate, open it, and go through the pipe to the next area. In here you will come to a large room where you drop down the ledge and take out all the Toads inside, then go back up and through an open door to the deck above, and work your way to the other side using the pipes

Jump to the deck on the side of the room then walk over the blue pipe to climb on to the center deck. Use the yellow pipe to cross the room and drop down on the far deck then make your way to the ladder and use the blue pipes above to move across - jump and grab the next blue pipes and make your way to the deck on the other side and drop down, then jump across and go through the door.
Here is the thing - you may not have noticed this but the clock has been locked onto midnight since you entered the Sewers - basically the game intends for you to exit in the middle of the night - it really does not matter WHEN you went in - that is just the way that this mission is meant to play out...
When you emerge from the Sewers however night officially ends - but as it is raining you cannot tell that very well. You need to tun and jump and dive into the water and then climb out at the foot of the dam.
You will talk to Savvi who will give you some bad news - and then you will go in search of the keycard!
The first area does not yield a keycard, When we reach second area there is a pair of Brutes and a bunch of infected here as well as a Toad. Basically you want to shoot the Toad as quick as you can to minimize the damage it can do to you with its ranged attack, then take out the Brutes with headshots and the other infected however you please.
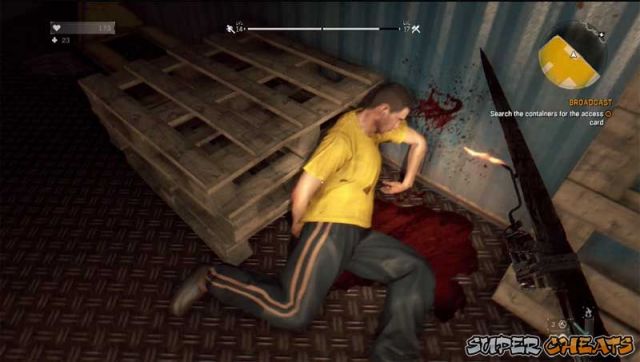
Once you do that you can search the containers until you find the one with the keycard (and the runner's body) and voila! You are good to go!
Head for the marker and make your way up the mountain pass, then over the fence. There are Bombers inside and Toads on the area above so avoid the bombers till they blow and then kill the Toads fast.
After that you can either avoid the rest of the infected (including a Hammer Brute) or kill them. Either way make your way to the door to the power substation and open it with the keycard and then go in - Savvi will tell you what to do.
You reach the antennae and you use the power box to call the lift - and as you wait for the lift to arrive everything goes all pear-shaped as the cable snaps, the lift falls and runners and Virals attack! Really?!
Look if you die a few times here do not get upset - it appears that this blitz attack was designed to have just that happen. To cause you to die and maybe die again. If you did not, well good on ya but considering where we were standing when the lift fell, that is not all that likely.
Right so when you get to the gap in the stairs you probably will think you are supposed to jump across. Well you are not. What you are meant to do is to jump out onto the strut here and climb that then jump to the next deck level. Look for the looped rope to see where you are supposed to jump at.
Now here is where it gets tricky - once you get to the top as far as you can go, you are expected to jump out at the antennae mounts that are hanging on the side. This is tricky and do not be upset if you die - I know I did.
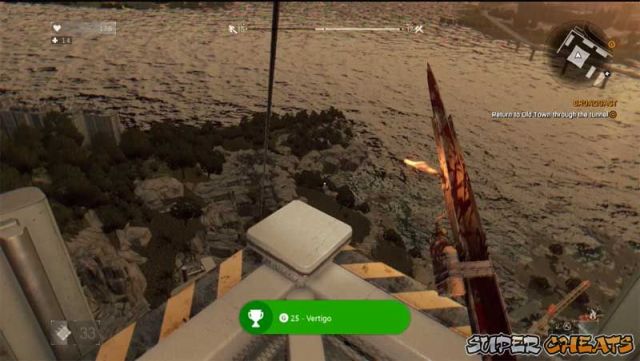
Use the antennae mounts and the yellow and black striped bars to climb to the top and then install the amplifier. That kicks in the CS in which you call off the bombs - then GRE contacts you and offers you a way out.
They want you to come out with the Doctor's research - and they will send a chopper for you.
After that you talk to Savvi again and then you get a call from a stranger who asks you to meet them at the Vehicle Manufacturing Facility.
Side-Quest: The Launch
After that you unlock the Achievement: Vertigo (25g) Activate the Amplifier.
Now it is time to slide down the zipline then enter the tunnel and if you are like us you pretty much ran past the heavies and into the smaller hallway. About midway through that you get attacked by a pair of Volatiles. Now chances are if you have been avoiding the night these will be the first ones you actually HAVE to kill!
Killing them unlocks the Achievement: Mouths Wide Open (25g) Kill a Volatile.
With them dead and hopefully not you - heal up then continue through the hall to the marker, making your way past all the infected, up and over the semi trick and through the door. Jump down into the Sewer and swim to the other entrance and then climb out.
From here you just need to exit through the door to Old Town.
That wraps up this mission.
Now that the attack has been called off you called Dr. Camden and he is waiting for you to deliver Dr. Zere's research - so get to it!
The first step is to return to the original Tower. Head upstairs and talk to Selma who will thank you for saving her son - remember that? After you wrap up that conversation you remove the “!” so head back down the lift and Fast Travel back to Old Town.
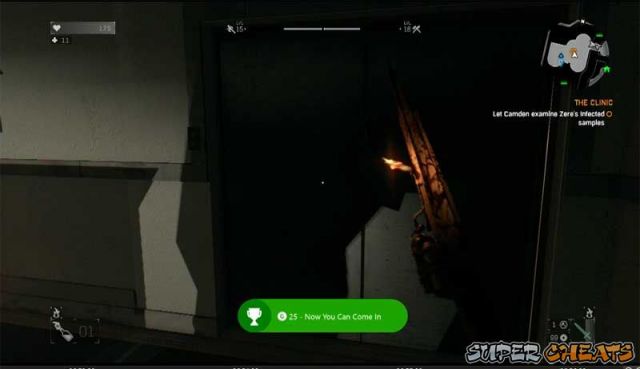
Re-supply, see to your weapons, then head towards the marker on the map - when you reach the building use Firecrackers and Molotovs to clear away most of the infected from the entrance and then drop down and head in. There may be some infected inside but there will only be a few.
You then unlock the Achievement: Now You Can Come In (25g) Find Camden.
Follow his instructions with the lift and you zone into the Instance. Dr. Camden explains what you need to do - and while he is doing THAT he reveals a LOT of information. For example both he AND Dr. Zere were working for the GRE. That Rais was supposed to protect them, and if you keep listening you may be getting a bad feeling - I was.
In the woman’s locker room is the entrance to the duct that gets you into the Security Room. Grab the keycard there and open the door with the computer.
To get to the power room and turn the generators on you need to work your way through the ducts from the lab into the chemical storage rooms and use the forklifts to clear the path - the first you lower, the second you raise. Once that is done you start the two generators that still work and then head back to decontamination.
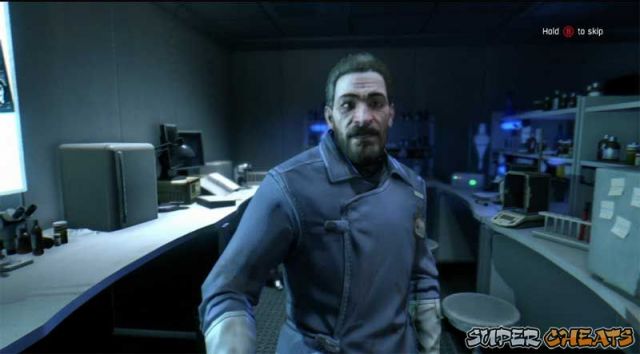
When you finally get to Dr. Camden he takes the samples and starts working on them. You learn that Amir was a GRE operative - strange. He warns you to be careful with the GRE - well it seems that he is not totally in their employ!
When you emerge it will be deep night - so carefully sneak your way to the Safe Zone at the University via the rooftops, then sleep till morning and then go out and contact the GRE.
You have a conversion with - Rais! Well that was a surprise.
This completes the mission.
As you likely noticed we have now reached the final mission in which not only will the story be wrapped up but, with any luck - and if there is justice in the world - we will have our final and deciding confrontation with Rais, who has turned out to be quite the monster!
To summarize the situation - after indulging pretty much the entire range of his sick fantasies and after either torturing survivors or having them tortured (and worse) at his orders, Rais has finally come to the conclusion that there is no future to be had, seized, or stolen here inside the Quarantined City of Harran - so he has decided that it is time for him to leave.
When he says “Time for him to leave” what he means is time for him to take the research Notes, tissue samples, and the hard work of two doctors (now both dead) and hop an evac chopper that has been dispatched by GRE in a deal that Rais worked out with them.
GRE wants the research results and samples - and they are willing to grant Rais a free ride out of town AND a massive pay-off to get them!
As for us well, we not only want to stop that from happening, we need to stop it from happening, because once the GRE has that data there will no longer be any good reason for them to bribe the powers that be NOT to bomb Haraan back to the stone age. Just saying. Vested interest and all that...

When you reach the tower you will receive the following sincere warning:
Okay so to repeat this in plain English - once you enter this Instance Zone you are committed to completing the story. Until you complete the story you can NOT access any of the other maps. That means The Slums, Old Town, or the Antennae Area.
But once you DO finish this - and the story - you can then use Last Save to return to Harran and complete any of the stuff you have yet to complete. That includes both single and multi-player mode play.
Considering how badly he has done in facing us up to this point - I mean we cut off his hand! - you would think that the last thing Rais would want is to get anywhere near us. Well think again!
Unfortunately as we enter Rais' HQ the Harran Virus kicks in once again and we spend the first minute or so with our agility crippled.
When we walk through the door Rais starts talking crap again - and it appears that the outer defenses here is something like the Arena from before!
Now we need to deal with lots of Infected - since we are technically inside there is no good reason not to use firearms, though try to remember that unless you can find supplies inside the HQ we only have what we arrived with.
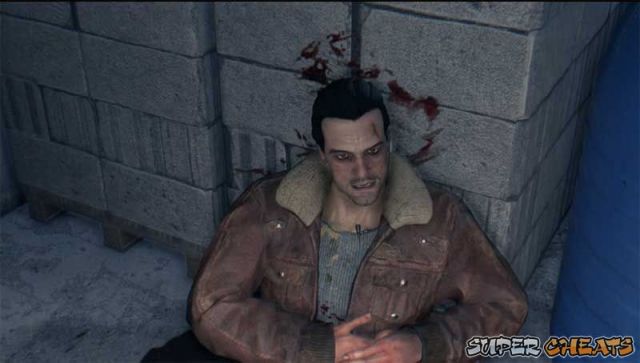
If you are low on Medkits or other supplies you may want to take a moment to craft them before you commit yourself.
Also bear in mind that when you are exhausted by the Virus you can not use the Grapple Hook...
The first order of business as you make your way tot he sewer entrance to the HQ is to fight off the army of runners - and once you are inside the sewers be on the look-out for Volatiles as there are some in there.
If you get trapped use Zaid's Flare as that pretty much creates an instant Safe Zone from Volatiles - but ONLY from Volatiles, as the standard Infected will not be as affected by them.
Using Zaid's Flares make your way through the sewer tunnel path until you reach the gap with the ladder on the other side. Once you get past that you should be relatively sage until you emerge into the Arena area.
When you arrive in the Arena this time things are different. For one thing you still have your kit - for another you are not really trapped there like before.
Rais taunts you via the radio/PA as you work your way up the side of the Arena. This is basic Parkour 101 here - use the edges and pipes to reach the lift level then jump into the red lift and hit the button.
As it climbs you get more Rais' taunts and some ethnic music, followed by more Infected once the lift reaches the top floor. As you make your way along the path you run into Karim - I thought he was already dead but no, we get to watch him die here. But not before he warns you that the next two floors are mined!
Jump off the edge to the trash pile on the crane below then make your way across and into the other building. Rais remarks that Karim must have warned you - he did - so we get to avoid dealing with the mines in the first building by Parkouring our way up the floors of the second one!
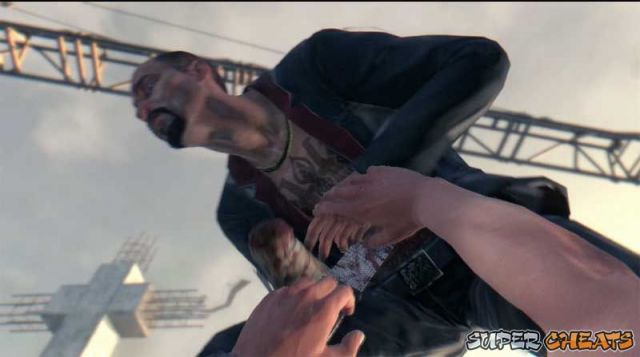
Once you reach the lift shaft you have to climbe up it - while suffering random ranged attacks from the Infected that surround it on the floors outside. At the top of the lift shaft is the Crane - and now you have to climb THAT. Mind the gaps you do not want to fall here.
Once you reach the top of the crane you will be attacked by a bloke with a missile launcher. RUN to the end of the crane and jump to the far building, then climb using the yellow tiles on the outside, making your way to the concrete ledge then follow the yellow beam and make your way across to the concrete ledge on the far side.
From here you do some more Parkour jumps and climbing, until you reach the end of the next long beam and, finally, you head inside the building going up ramps and ladders until you reach the very roof, where Rais is waiting for you!
When you reach the roof Rais threatens to throw the research over the side - and then throws it AT you, which triggers a Quick-Time Boss Battle!
Here is the deal - you cannot survive any hits from him - at least not any direct hits - so what you need to do is make sure you hit the correct buttons and on time!
As long as you make the correct button presses you get to listen to Rais tell his final story as he attacks you.
I don't know about you mate but that was not how I saw him going out... Not going to ruin it for you, you should experience this for yourself.
As the helicopter arrives Crane picks up the external disc drive - and Rais attacks! Yeah, he was not as hurt as he had you believe!
So there you are, holding on to the building with one hand, and the external drive with the other. Rais orders you to hand over the disc so he can use it to secure his trip out of Haraan - and you help him to make an even faster trip because hey, you are a nice guy!
The chopper circles the building and Kyle talks to the GRE - delivering his ultimatum - they want the cure, he has it! And as long as he has it AND he is inside Harran they cannot bomb it.
As the chopper departs you get a call from Dr. Camden with good news - hey, good news for once!
As the screen fades to black you get the warning message from the operator warning you that the sun is about to go down - and it is time to find a Safe House - and then the credits roll!
If you allow the credits to run through after they finish you will receive the following notice:
The message is simple - Rais has Jade and has challenged you to come get her!
Before you do that - before you head out on this next mission - you should take a good look at both your weapons and supplies. Craft any replacements you need, and craft any resources you need, with particular emphasis upon Medkits and Molotovs. Another point - you should hit a merchant and replace your ammunition.
Now that those minor issues have been dealt with - and you slept until morning - it is time to meet with Jade.
When you get to the meeting site you find that Jade is gone and Rais has left a message for you: “What happens to a Scorpion when you cut out its sting??? Come to the Museum to find out.”
You call Troy and she fills you in on some details you did not previously know - and that wraps up this mission!
Mission 12: The Museum
When you reach the Safe Zone and marker you talk to Fariq and he fills you in on his needs - you do a deal with him - he tells you how to get in, and you will help him with the kid.
After you talk with him that will generate some new Side-Quest Flags for you to hit.
Entering the Museum via the hidden underwater entrance...
Side-Quest: Chasing Past
There is another marker at the Old Town Tower but that turns out to just be Michael and a chance to talk to him and learn that he survived the blast project.
Gaining entrance to the Museum means swimming in underwater - and once inside remember to collect the reward for the Side-Quest Chasing Past.
Rais' Garrison
Using the door you go into this Instance Zone - reminding yourself that you are there to rescue Jade - well that and kill as many of Rais' men as you can!
Man that was a long swim - was not sure if I would make it to the first air pocket! Then I almost didn't make it to the second one...
Collecting on the reward for learning about the boy's dog...
Climbing up and in gets you a seizure - but hey, you are there! Break the barrier and head inside and you can then call Troy on the radio. Getting in is like a maze but, once you are in, you have no trouble spotting Rais' men - and they spot you!
As you enter the main area you are confronted by Rais - and he shows you Jade sort of... The goal changes to Eliminate Rais' Guards - well we were going to do that anyway so why not?
Mind you they throw bombs at you so you have to be aware of that at all times - but they also die really well to shotgun blasts - just saying.
After some witty trash-talk with Rais he sends in some more guards - but that group is on the walkways above you.
After you take out the last of the guards above Rais' taunts you again with Jade and invites you to come rescue her. Make your way up using the stone things and then follow the marker to find a few more guards defending the route. Nothing you cannot handle though.
Once you get inside there are more guards using the corners as cover - but as you get past them the seizure happens again - they seem to be coming quicker now.
After getting outside you survive yet another ambush and then you find the path blocked by an entire army of the undead! Time to start burning them up right? Hope you brought lots of Molotov's!
After you get the XP from killing a bunch you can then use the upper walkway to get across - though bear in mind there is a sniper. At the end of this hall there are more infected to deal with then you just drop down and head through the door there, and you will survive yet another seizure.
The reunion with Jade turns bittersweet...
Jade
You finally reach Jade and she is woozy but she seems okay... Rais then starts talking trash again - then he releases another army of infected against you. Call this Arena 2.0 right? Fortunately this time around you are better equipped.
After you help Jade kill all of the infected you need to escape the Museum - but Jade seems to be doing very badly - Rais tells you that she was bitten - and infected - hours ago!
Rais drops an Antizen to you but tells you that you have to make a choice - Jade or you - you are noth about to turn. Jade asks you to take the Antizen and then promise to kill her when she turns. She then runs away and you start hearing her on your radio...
The infection is getting worse - as you wander around half-stunned looking for the way out. Now you start to hallucinate - clearly you should listen to Jade and use the Antizen on yourself. You continue to make your way through the messed up reality as Jade talks you into taking the Antizen yourself.
You follow the Jades through the nightmare world and then eventually you confront her and she injects you with the Antizen herself.
Rais mocks you yet again - then sends the remaining men to kill you both. Jade takes out the bad guys but then turns and you have no choice but to end her. Yeah, it sucks, but it is what it is.
Rais still wants you dead though - and he sends his last man down to do it. You have to battle Tahir melee - the whole time he is taunting you and then more guards attack.
Completing the boss battle unlocks another Achievement - but at what cost?
This battle is a variation on the Arena - all your kit has been taken and so you need to try not to get hurt as you deal with the enemy.
When you complete the battle you unlock the Achievement: Tied Loose End (25g) Deal with Tahir.
Your goal now changes to Leave the Museum. On the way you radio Troy and report what happened.
She fills you in on the details for what you need to do next - which is meet her. So head to the marker and kill the guards, then get your stuff back. Unfortunately now you need to sort through all your crap again to restore what you need - so do not forget your crafting kit right?
When you are ready zone out and that will cause you to contact the Doc. Your next task is to meet with Troy - she tells you that you need to install the Amplifier at the highest point that you can - and then set it up so it can broadcast.
And with that we complete the mission!
Mission 13: Broadcast
Follow the marker to the underground bathrooms and through the hall there into the Sewers - where you will find an instance zone door to use. Follow that and you will reach a point where you hear a kid crying - this thing is a Super Screamer - you need to back off and shoot it
After you take out the Super Screamer a Brute will break through the wall at which point you have to deal with it and a never-ending supply of runners and regular infected. Basically you want to make as short a work of it as you can as quickly as you can - and the best way seems to be with a sword that has the flame ability built into it. Just saying that was what we used and it went down pretty quick as a result.
Once the Bruiser is out of the way you head down that tunnel to the gate, open it, and go through the pipe to the next area. In here you will come to a large room where you drop down the ledge and take out all the Toads inside, then go back up and through an open door to the deck above, and work your way to the other side using the pipes
Troy has worked out a plan but you have to get the gear to the highest point in the region...
Jump to the deck on the side of the room then walk over the blue pipe to climb on to the center deck. Use the yellow pipe to cross the room and drop down on the far deck then make your way to the ladder and use the blue pipes above to move across - jump and grab the next blue pipes and make your way to the deck on the other side and drop down, then jump across and go through the door.
Emerging from the Sewers
Here is the thing - you may not have noticed this but the clock has been locked onto midnight since you entered the Sewers - basically the game intends for you to exit in the middle of the night - it really does not matter WHEN you went in - that is just the way that this mission is meant to play out...
When you emerge from the Sewers however night officially ends - but as it is raining you cannot tell that very well. You need to tun and jump and dive into the water and then climb out at the foot of the dam.
You will talk to Savvi who will give you some bad news - and then you will go in search of the keycard!
The first area does not yield a keycard, When we reach second area there is a pair of Brutes and a bunch of infected here as well as a Toad. Basically you want to shoot the Toad as quick as you can to minimize the damage it can do to you with its ranged attack, then take out the Brutes with headshots and the other infected however you please.
Obtaining the Keycard from the body of the previous runner who attempted this mission is not reassuring...
Once you do that you can search the containers until you find the one with the keycard (and the runner's body) and voila! You are good to go!
The Antennae
Head for the marker and make your way up the mountain pass, then over the fence. There are Bombers inside and Toads on the area above so avoid the bombers till they blow and then kill the Toads fast.
After that you can either avoid the rest of the infected (including a Hammer Brute) or kill them. Either way make your way to the door to the power substation and open it with the keycard and then go in - Savvi will tell you what to do.
Calling the Lift
You reach the antennae and you use the power box to call the lift - and as you wait for the lift to arrive everything goes all pear-shaped as the cable snaps, the lift falls and runners and Virals attack! Really?!
Look if you die a few times here do not get upset - it appears that this blitz attack was designed to have just that happen. To cause you to die and maybe die again. If you did not, well good on ya but considering where we were standing when the lift fell, that is not all that likely.
Right so when you get to the gap in the stairs you probably will think you are supposed to jump across. Well you are not. What you are meant to do is to jump out onto the strut here and climb that then jump to the next deck level. Look for the looped rope to see where you are supposed to jump at.
Now here is where it gets tricky - once you get to the top as far as you can go, you are expected to jump out at the antennae mounts that are hanging on the side. This is tricky and do not be upset if you die - I know I did.
Success means calling off the attack and unlocking the Achievement Vertigo - so well done!
Use the antennae mounts and the yellow and black striped bars to climb to the top and then install the amplifier. That kicks in the CS in which you call off the bombs - then GRE contacts you and offers you a way out.
They want you to come out with the Doctor's research - and they will send a chopper for you.
After that you talk to Savvi again and then you get a call from a stranger who asks you to meet them at the Vehicle Manufacturing Facility.
Side-Quest: The Launch
After that you unlock the Achievement: Vertigo (25g) Activate the Amplifier.
Now it is time to slide down the zipline then enter the tunnel and if you are like us you pretty much ran past the heavies and into the smaller hallway. About midway through that you get attacked by a pair of Volatiles. Now chances are if you have been avoiding the night these will be the first ones you actually HAVE to kill!
Killing them unlocks the Achievement: Mouths Wide Open (25g) Kill a Volatile.
With them dead and hopefully not you - heal up then continue through the hall to the marker, making your way past all the infected, up and over the semi trick and through the door. Jump down into the Sewer and swim to the other entrance and then climb out.
From here you just need to exit through the door to Old Town.
That wraps up this mission.
Mission 14: The Clinic
The first step is to return to the original Tower. Head upstairs and talk to Selma who will thank you for saving her son - remember that? After you wrap up that conversation you remove the “!” so head back down the lift and Fast Travel back to Old Town.
While we knew going in that the lab was surrounded by Infected, the number that were inside was something of a shock...
Re-supply, see to your weapons, then head towards the marker on the map - when you reach the building use Firecrackers and Molotovs to clear away most of the infected from the entrance and then drop down and head in. There may be some infected inside but there will only be a few.
You then unlock the Achievement: Now You Can Come In (25g) Find Camden.
Follow his instructions with the lift and you zone into the Instance. Dr. Camden explains what you need to do - and while he is doing THAT he reveals a LOT of information. For example both he AND Dr. Zere were working for the GRE. That Rais was supposed to protect them, and if you keep listening you may be getting a bad feeling - I was.
In the woman’s locker room is the entrance to the duct that gets you into the Security Room. Grab the keycard there and open the door with the computer.
To get to the power room and turn the generators on you need to work your way through the ducts from the lab into the chemical storage rooms and use the forklifts to clear the path - the first you lower, the second you raise. Once that is done you start the two generators that still work and then head back to decontamination.
We finally get to put a face to the voice we have been talking with on the radio for so long!
When you finally get to Dr. Camden he takes the samples and starts working on them. You learn that Amir was a GRE operative - strange. He warns you to be careful with the GRE - well it seems that he is not totally in their employ!
When you emerge it will be deep night - so carefully sneak your way to the Safe Zone at the University via the rooftops, then sleep till morning and then go out and contact the GRE.
You have a conversion with - Rais! Well that was a surprise.
This completes the mission.
Mission 15: Extraction
To summarize the situation - after indulging pretty much the entire range of his sick fantasies and after either torturing survivors or having them tortured (and worse) at his orders, Rais has finally come to the conclusion that there is no future to be had, seized, or stolen here inside the Quarantined City of Harran - so he has decided that it is time for him to leave.
When he says “Time for him to leave” what he means is time for him to take the research Notes, tissue samples, and the hard work of two doctors (now both dead) and hop an evac chopper that has been dispatched by GRE in a deal that Rais worked out with them.
GRE wants the research results and samples - and they are willing to grant Rais a free ride out of town AND a massive pay-off to get them!
As for us well, we not only want to stop that from happening, we need to stop it from happening, because once the GRE has that data there will no longer be any good reason for them to bribe the powers that be NOT to bomb Haraan back to the stone age. Just saying. Vested interest and all that...
You get fair warning that past this point you have no choice but to finish what you have started - and what you have started is your final showdown with Rais!
The Final Battle
When you reach the tower you will receive the following sincere warning:
GAME FINALE
You are about to enter the game finale.
This part of the game is played in
singleplayer and you cannot return to other
maps. You will be able to come back to
exploring Harran after finishing the game and
loading the last save.
Do you want to continue?
You are about to enter the game finale.
This part of the game is played in
singleplayer and you cannot return to other
maps. You will be able to come back to
exploring Harran after finishing the game and
loading the last save.
Do you want to continue?
Okay so to repeat this in plain English - once you enter this Instance Zone you are committed to completing the story. Until you complete the story you can NOT access any of the other maps. That means The Slums, Old Town, or the Antennae Area.
But once you DO finish this - and the story - you can then use Last Save to return to Harran and complete any of the stuff you have yet to complete. That includes both single and multi-player mode play.
The Final Instance
Considering how badly he has done in facing us up to this point - I mean we cut off his hand! - you would think that the last thing Rais would want is to get anywhere near us. Well think again!
Unfortunately as we enter Rais' HQ the Harran Virus kicks in once again and we spend the first minute or so with our agility crippled.
When we walk through the door Rais starts talking crap again - and it appears that the outer defenses here is something like the Arena from before!
Now we need to deal with lots of Infected - since we are technically inside there is no good reason not to use firearms, though try to remember that unless you can find supplies inside the HQ we only have what we arrived with.
As you work your way up you get a surprise meeting - and a chance to make final peace - with yoru one real Frenemy in the world - and he warns you about the mines! how cool is that?
If you are low on Medkits or other supplies you may want to take a moment to craft them before you commit yourself.
Also bear in mind that when you are exhausted by the Virus you can not use the Grapple Hook...
The first order of business as you make your way tot he sewer entrance to the HQ is to fight off the army of runners - and once you are inside the sewers be on the look-out for Volatiles as there are some in there.
If you get trapped use Zaid's Flare as that pretty much creates an instant Safe Zone from Volatiles - but ONLY from Volatiles, as the standard Infected will not be as affected by them.
Using Zaid's Flares make your way through the sewer tunnel path until you reach the gap with the ladder on the other side. Once you get past that you should be relatively sage until you emerge into the Arena area.
The Arena
When you arrive in the Arena this time things are different. For one thing you still have your kit - for another you are not really trapped there like before.
Rais taunts you via the radio/PA as you work your way up the side of the Arena. This is basic Parkour 101 here - use the edges and pipes to reach the lift level then jump into the red lift and hit the button.
As it climbs you get more Rais' taunts and some ethnic music, followed by more Infected once the lift reaches the top floor. As you make your way along the path you run into Karim - I thought he was already dead but no, we get to watch him die here. But not before he warns you that the next two floors are mined!
Jump off the edge to the trash pile on the crane below then make your way across and into the other building. Rais remarks that Karim must have warned you - he did - so we get to avoid dealing with the mines in the first building by Parkouring our way up the floors of the second one!
When it comes right down to it, Rais is a bloke who just needed killing. No court in the land would convict you of any sort of crime let alone apply a penalty for the doing of it because it is natural justice!
Once you reach the lift shaft you have to climbe up it - while suffering random ranged attacks from the Infected that surround it on the floors outside. At the top of the lift shaft is the Crane - and now you have to climb THAT. Mind the gaps you do not want to fall here.
Once you reach the top of the crane you will be attacked by a bloke with a missile launcher. RUN to the end of the crane and jump to the far building, then climb using the yellow tiles on the outside, making your way to the concrete ledge then follow the yellow beam and make your way across to the concrete ledge on the far side.
From here you do some more Parkour jumps and climbing, until you reach the end of the next long beam and, finally, you head inside the building going up ramps and ladders until you reach the very roof, where Rais is waiting for you!
Ultimately what you hold in your hands - an extermal hard disc drive - is what all of the struggle and suffering was about. The GRE will pay anything to get that priceless data out and, until they do, they will do anything to prevent it being destroyed!
The Rais Boss Battle
When you reach the roof Rais threatens to throw the research over the side - and then throws it AT you, which triggers a Quick-Time Boss Battle!
Here is the deal - you cannot survive any hits from him - at least not any direct hits - so what you need to do is make sure you hit the correct buttons and on time!
As long as you make the correct button presses you get to listen to Rais tell his final story as he attacks you.
I don't know about you mate but that was not how I saw him going out... Not going to ruin it for you, you should experience this for yourself.
As the helicopter arrives Crane picks up the external disc drive - and Rais attacks! Yeah, he was not as hurt as he had you believe!
So there you are, holding on to the building with one hand, and the external drive with the other. Rais orders you to hand over the disc so he can use it to secure his trip out of Haraan - and you help him to make an even faster trip because hey, you are a nice guy!
The chopper circles the building and Kyle talks to the GRE - delivering his ultimatum - they want the cure, he has it! And as long as he has it AND he is inside Harran they cannot bomb it.
As the chopper departs you get a call from Dr. Camden with good news - hey, good news for once!
As the screen fades to black you get the warning message from the operator warning you that the sun is about to go down - and it is time to find a Safe House - and then the credits roll!
If you allow the credits to run through after they finish you will receive the following notice:
Congratulations! You've defeated Rais and finished the campaign. Special
outfits unlocked! Check your Player Stash
outfits unlocked! Check your Player Stash

