Batman: Arkham Knight

Set a year after the events of Batman: Arkham City. With the death of the Joker, the crime rates in Gotham City has significantly declined. However, this also allowed Batman's other enemies to unite against him. Main villains like the Scarecrow, Penguin, Two-Face, Harley Quinn, Riddler, Firefly, and Poison Ivy will join forces with the ultimate goal to kill Batman. Furthermore, he gets a new arch-nemesis, the titular Arkham Knight. Take control of the Batmobile, and traverse the larger, open-air location of Gotham City.
Welcome to SuperCheats' Unofficial guide for the game. Please use the menu on the right to navigate. The game is scheduled to be released on June 2 for the PC, PS4, and Xbox One.
You can get notified of updates to this guide by placing your email address in the 'Guides Updates' box - just hover or click on the Guide Updates section to the right.
Interrogation
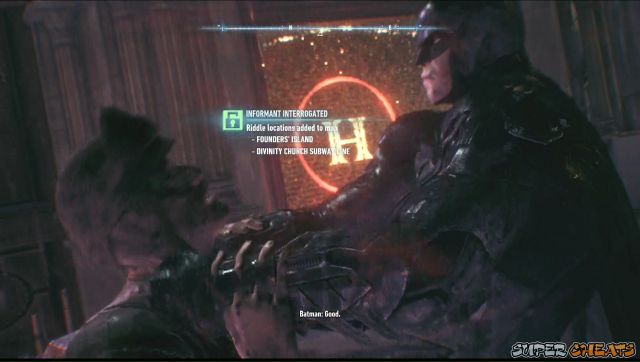
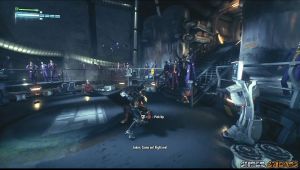
Riddler has over 200 collectibles scattered in the city and finding them one by one can be an arduous task. Fortunately, while exploring the city, you'll encounter Riddler informants. They'll be easy to spot since they'll be glowing green - on foot or the vehicle they're in. Basically, you need to punch them into submission until they reveal a Riddler puzzle/trophy/object location. If the informant is accompanied by other thugs, you have to knock out the other thugs first before you can interrogate the informant. Sometimes, the informant will attempt to attack you while you're interrogating him so press the counter button to smash him on the ground and break him to submission.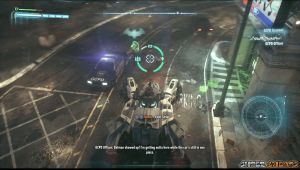
Move List
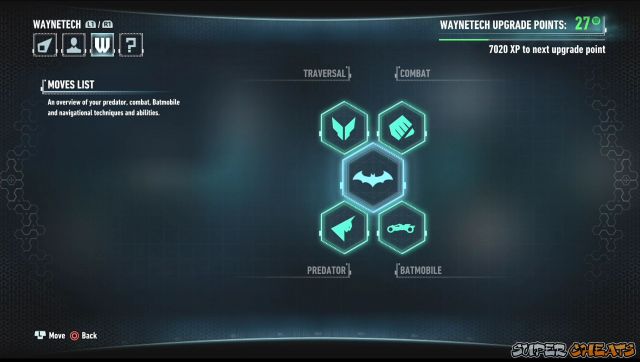
The game offers in-game tutorial but if you want to review Batman's moveset and abilities, you can review them from the Wayne Tech option in the game. These abilities are innate and naturally unlocked so you won't need to spend anything to do them.They're divided to 4 categories:
- Traversal
- Combat
- Predator
- Batmobile
Move List - Predator
Stalk armed foes and strike from the darkness. These skills are imperative when you want to eliminate enemies one by one in the shadows.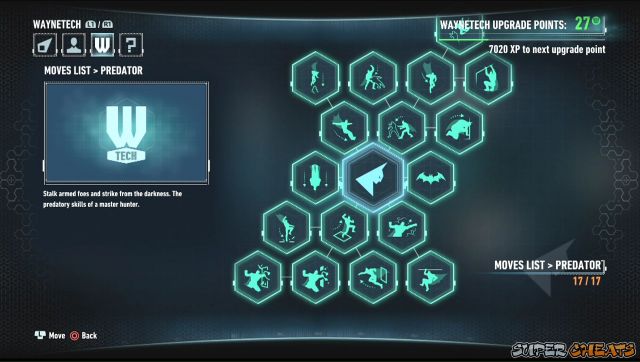
Smoke Pellet
Target a group of enemies with the Smoke Pellet and take them down silently during the confusion. When used in combat, enemies will panic and attack wildly, often hitting each other. Can also be used defensively under fire. Requires time to recharge after use.
- L2 + R2 Throw
- Press Triangle upon dropping (while under fire)
- Press Triangle while in smoke to perform a Silent Takedown
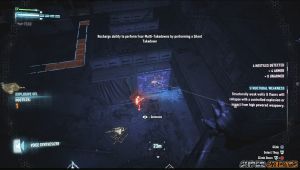
Fear Multi-takedown
Approach enemies undetected and neutralize multiple unaware targets in quick succession as they panic. Fear Takedowns also destroy the weapons currently held by an enemy so choose your targets wisely; you should consider taking down important targets such as medics, shielded, or armed enemies. You cannot perform Fear Multi-takedown against brute-type enemies. You can also "recharge" the ability to use this when facing several enemies by performing a Silent Takedown.
- Press Square to initiate the Fear Multi-takedown and use the R stick to highlight your next target quickly.
Line Launcher Takedown
While using the Line Launcher, target unaware combatants and drop down to perform a powerful takedown. Nearby enemies will be alerted so plan your attack carefully.
- Press Triangle while on zip line
Wall Grate Takedown
When behind a vent cover, smash through and knock your target unconscious. This move is not silent and will attract the attention of nearby enemies. This will only work on closed grates. If you opened a grate already, the prompt to trigger the takedown won't appear.
- Press Triangle behind a vent cover
Wooden Wall Takedown
Smash through a wooden wall then grab the unsuspecting target to pacify him. This move makes a lot of noise so prepare to relocate immediately.
- Press Triangle when behind a wooden wall
Window Takedown
Smash through a window to take out the target on the other side. This will attract nearby enemies so evaluating their positions is important before triggering this move.
- Press Triangle when behind a breakable glass window
Ceiling Takedown
Target your enemy from above and smash down through a ceiling directly to a Takedown. This is a very noisy move and will alert nearby enemies. Do this only when you want to make a flashy entrance.
- Press Triangle when standing above a glass roof
Inverted Takedown
While on a Vantage Point, drop down and grab an enemy directly below you, leaving them suspended from your porch. The screaming victim will grab the attention of nearby enemies. If the suspended victim is found, his comrades will shoot the rope which will knock out the victim as he falls down to the ground.
- Press Triangle when on a Vantage Point
Silent Takedown
This is one of the basic stealth moves which can knock out enemies without making a fuss. Sneak up behind unsuspecting enemies to trigger a silent takedown. This is also used to recharge the Fear meter to perform Fear multi-takedowns.
- Press Triangle when sneaking behind an enemy
Glide Kick
When gliding, you can target any enemy within range for a glide kick. This move will knock most enemies on the ground, making it an effective way to initiate combat against a group of enemies. Hold the Dive Bomb button after locking on for more damage.
- Press Square while gliding
Glide Attack
When perched on high ground, you can launch a surprise attack directly down the enemy below. Combo directly from this attack if there are other enemies nearby, or launch immediately into a Ground Takedown.
- Press Square when high above the target
Knockout Smash
When performing a Silent Takedown, use Knockout Smash to instantly render the target unconscious. This move will alert nearby enemies to your location but can also be used to strategically manipulate your prey.
- Press Square while the victim is struggling in a Silent Takedown
Drop Down Takedown
When positioned at the right distance above an enemy, you can drop down seamlessly into a Silent Takedown
- Press Triangle when high above the target
Ledge Takedown
While hanging from a ledge, reach up and grab an enemy on the walkway to silently knock them unconscious before dropping back down.
- Press Triangle while hanging from a ledge
Corner Cover Takedown
While crouched at a corner, you can take out any approaching, unaware enemy when they move into close proximity. This move will quickly grab your target and silently choke them into unconsciousness while leaving you undetected.
- Press Triangle while hiding in a corner
Swing Down Takedown
When perched on a ledge, target an enemy directly below you to swing down and perform a long range Silent Takedown
- Press Triangle while sitting on a ledge
Move List - Combat
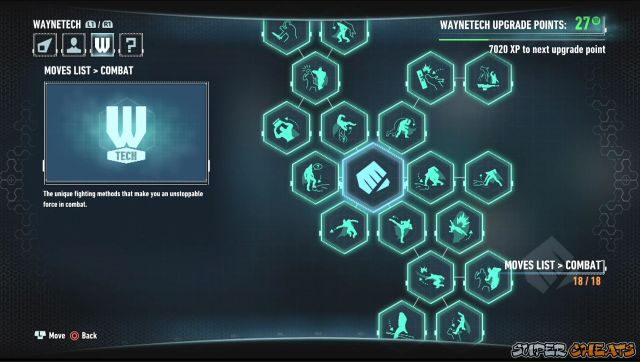
Strike
This is Batman's basic melee attack. Once you landed three consecutive blows in a fight, you'll enter FreeFlow. During FreeFlow, you'll cover much greater distance with your attacks and your strikes will increase in power, knocking most enemies on the ground. In order to maintain FreeFlow, you must continue land blows on enemies without getting hit. - Press Square to strike
Batclaw Slam
Quickfire the Batclaw at an enemy during combat and follow up immediately with a Strike to slam them on the ground. This inflicts double damage of a normal Strike but takes longer to perform, leaving you vulnerable to attack.
- Press L2 + Triangle to fire the Bat Claw then quickly press Square
Cape Stun
Use the weighted tips of your cape to disorientate attacking enemies and temporarily stun them. This move will affect all enemies standing immediately in front of you.
- Press Circle
Super Stun
Use 3 Cape Stuns in quick successions on one target to perform a Super Stun. This move knocks down most enemies for an extended period of time, leaving them vulnerable to attack.
- Press Circle three times in quick succession
Beatdown
Unleash a flurry of rapid, focused focus on a single enemy and finish them off in one attack. The Beat Down is effective against large Brute opponents but leaves you vulnerable so it's better to do this when the Brute is the last one remaining on the field.
- Press Circle to stun the target then press Strike three times in quick succession
Aerial Attack
Stun an enemy then attack from above to come crushing down on them. This is especially useful against shielded enemies. This move can be redirected to attack another enemy by striking towards another target while airborne.
- Press Circle to stun the target then press X twice in quick succession
Weapon Steal
Steal melee weapons from stunned opponents or retrieved dropped weapons from the floor during combat. Using weapons will increase the damage inflicted by your attacks and allow you to hit through the defenses of enemies who can block normal Strikes.
- Press X + Square
Interrogation
Refer to this link.
Combat Pick Up
Pick up a downed opponent and initiate a double-damage Critical Beat Down while they're stunned. This is an extremely effective maneuver but one that may leave you vulnerable to enemy attacks.
- Press X + Square
Ground Takedown
This powerful move knocks out a downed enemy in one attack and is very effective in both combat or predator situations. While performing a Ground Takedown, you are vulnerable to attack, so ensure that there's enough time for the move to complete successfully before committing to it.
- Press R2 + Triangle
Environment Takedown
Use environmental objects to instantly incapacitate enemies in creative ways. Environmental objects which can be used in a takedown will be highlighted in blue. Enemies will be highlighted in blue when they're in range of the environmental object you can use.
- Press X + Square
Batmobile Takedown
The Batmobile Assisted Takedown move knocks an enemy into the path of an auto-targeted Batmobile Slam Round, rendering them unconscious.
- Press X + Square
Special Combo Takedown
Immediately incapacitate enemies in a single move, regardless of their health or current weapon. Only the very toughest enemies will be left standing after this takedown. The Combo meter will flash when Special Combo Moves are available.
- Press Circle + Triangle
Redirect
This move flips you over the head of an enemy. This is quite effective when surrounded, giving you the time and space to evade an attack and launch your counterattack. This can also be used against charging enemies.
- Tilt your left stick towards the enemy + press X, X
Counter
Counter is one of the most important moves in your arsenal and mastery over this effective move is critical to your survival and success in combat. This move instantly turns an opponent's attack back against him and keeps you on the offensive. When multiple enemies strike at once, tap the Counter button once for each attacker to fend them off.
- Press Triangle when the counterattack indicator appears over an enemy's head
- Press Triangle two or three times to perform a multi-counter against several opponents
Projectile Counter
Use the Counter move to catch projectiles and throw them back at the attacker. A thrown object can be redirected towards a different enemy by pushing in their direction.
- Press Triangle just before a thrown projectile hits you
Throw Counter
Time your Counter to perfection to double the damage on an opponent with a Throw Counter. Wait until the last possible moment to counter and press in the direction of the attacking enemy to perform this move. Can be used against multiple enemies attacking at the same time.
- Tilt the left stick towards the enemy then press Triangle just before the attack lands on you
Blade Dodge
Enemies armed with knives and other sharp objects will attack with multiple swipes in quick succession. To avoid these attacks, you must perform a number of dodges in a row by moving away from the assailant while the Counter button is held.
- Tilt the left stick away from the slashing enemy while holding Triangle
Move - Traversal
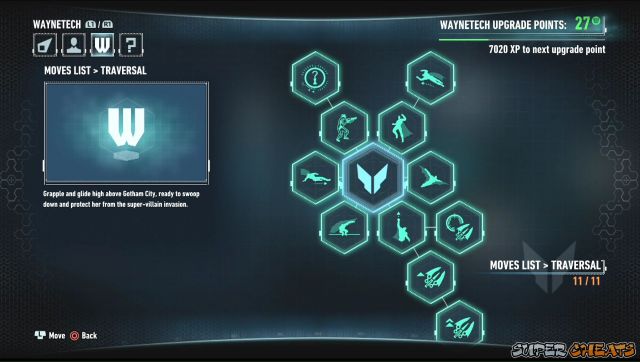
Move
While running you can automatically climb over obstacles, jump between structures, and launch into a glide. When crouched, movement is quick and silent, making this a very useful tactic when employing stealth. - L stick to move
- L stick + X (Hold) to run/climb/glide
- Hold R2 to crouch
Evade
Use Evade to dodge incoming melee attacks and minimize damage while escaping from gunfire. You can also evade through glass or over railings.
- Tilt left stick then press X, X
Detective Mode
Gain an immediate tactical analysis of the current location, identifying potential threats, even through solid walls. Enemies carrying firearms are highlighted in orange. All other personnel in the vicinity are highlighted in blue. This scan mode also highlights items of interest in the environment, providing information via a direct connection to the Batcomputer.
- Press the Up button in DPAD
Environmental Analysis
This is used to scan the solutions to riddles as well as additing the location of discovered Riddler trophies in the map. This is useful for marking down the trophies you can't collect or solve for the moment and come back for them later.
- Press and hold the Up button in DPAD
Slide
Slide to navigate through narrow gaps near the floor. It can also be used to kick straight through vent covers, saving time removing them by hand but at the cost of making more noise and alerting nearby threats. Also, a slide can be used to initiate combat as the first strike of a combo attack.
- Tap R2 while running
Line Launcher Tightrope
Instantly deploy the Line Launcher zip line as a tightrope. This can be used to create new positions to observe and attack enemies, or even collect certain Riddler trophies. While on the cable, you can move above the enemy to perform a Drop Attack, Glide Kick, or Takedown. Take note that for the Line Launcher to deploy, there should be two solid surfaces on both sides it should attach on.
- Hold L3 while gliding
Grapnel
This is an essential part of your navigation equipment. Look at any ledge and the Grapnel will lock on to the nearest ledge within its range. When traversing large structures, you can chain grapple moves. While running or gliding, the Grapnel will target the nearest valid ledge, allowing you to use this move at any given time.
- Press R1
Grapnel Targeting
Study the rooftops while gliding to manually select your next grapple target. Skill use of this targeting override will provide the effective movement throughout the Gotham Skyline.
- Hold L2 while gliding
Grapnel Boost
When grappling over medium to long distances, this gadget boosts the speed of the grapple, launching you high into the air above the target point. Combine this move with the Dive and Glide maneuvers to cover long distances without ever touching the ground.
- Press R1 then press X, hold X, while grappling
Grapnel Boost Mk II
This upgrade boosts the speed of the grapple, launching you higher and further into the air above the target point. When combined with the Dive and Glide maneuvers, vast distances can be covered swiftly, greatly reducing travel times.
- Press R1 then press X, hold X, while grappling
Move List - Batmobile
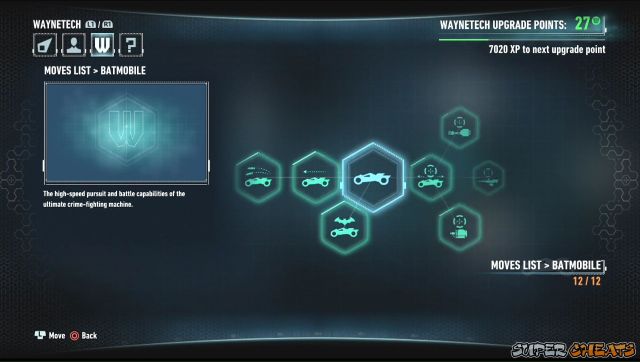
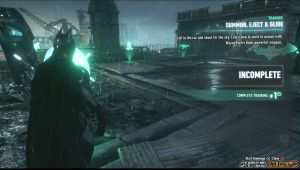
Summon and Eject
Utilize your suit and the car's synchronized subsystems to signal and enter the Batmobile at will. Eject while driving to be catapulted high in the air and transition seamlessly into a glide, or use your cape as a chute to slow your motion and bring you safely to the ground. - L1 Call Batmobile
- X, X (Hold) Slingshot Eject (while in Pursuit Mode)
- L1 Parachute Eject (while in Pursuit Mode)
Pursuit Mode
Whether in transit or during enemy pursuit, engage and utilize any number of the Batmobile's high performance capabilities to your advantage.
- R2 - Accelerate
- Square - Brake/ Reverse
- Triangle - Afterburner
- R2 + Square - Wheel Spin
- R2 + Square + Left stick - Donut
Pursuit Immobilizer
After tagging an enemy vehicle with the Vehicle Tracker, you will be able to track its movement and immobilize the target with a small infrared homing missile. Heavy armored transports require multiple strikes to take down.
- Press Circle to track vehicle (while in Pursuit Mode)
- Fire Immobilizer (when the vehicle is tracker locked.
Battle Mode
Transform the Batmobile from Pursuit Mode to Battle Mode to engage drones or enemies on foot. The multidirectional movement of Battle Mode enables controlled traversal over difficult terrain and in confined areas.
- L2 (Hold) Enter Battle Mode
- L stick to move
- L stick + X to use Dodge Thrusters
60mm Cannon
This high powered cannon delivers Kinetic Energy Penetrator shells specifically designed to combat heavily armored vehicles. Target enemy turrets for increased damage on impact.
- L2 (Hold) + R2 to fire main cannon
Vulcan Gun
This rapid fire weapon is ideal for precision-targeting drone weak spots, neutralizing incoming missiles, and engaging fast-moving aerial drones.
- L2 (Hold) + R1 to fire vulcan gun
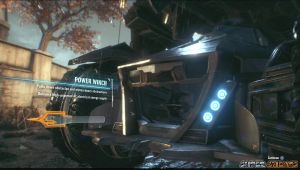
Power Winch
This multipurpose gadget is an essential component of the Batmobile's armory. Attach to Winch Points to move heavy objects, pull down walls, or deliver high powered electrical charges.
- L2 (Hold) + R1 to fire Power Winch (while targeting a Winch Point)
Riot Supressor
Heat signature recognition automatically disengages live rounds and engages the Riot Supressor during combat. The weapon fires non-lethal Slam Rounds that immobilize combatants with minimal long-term trauma.
- L2 (Hold) + R2 to fire Slam rounds (while targeting people)
Missile Barrage
With simultaneous targeting capabilities, you can unleash a barrage of guided missiles that will neutralize multiple targets on ipact. The maximum number of enemies targeted depends on the current Secondary Weapon energy level. Charg up Secondary Weapon energy by destroying militia drone units (or usng Immobilizer rounds against vehicles in Pursuit Mode)
- Press Square (Barrage LV1). Press multiple times to activate Barrage LV2 when enough energy is stored.
Drone Virus
This virus infiltrates drone systems and overrides targeting protocols, causing an infected drone to target other militia vehicles instead of the Batmobile. Infect multiple targets at once by charging up Secondary Weapon energy to cause disarray among the enemy forces. Drone Virus is also effective against Cobra units but these will require LV2 Secondary Weapon energy to override.
- Triangle (Hold) while in tank mode
EMP
Emits an Electro-Magnetic Pulse designed to scramble incoming missiles and briefly immobilize nearby drones. Charge up Secondary Weapon Energy to immobilize drones in close proximity for a significantly longer time. A must-have in addition to the armory when overwhelmed by drone units.
- Press Circle
Forensic Scanner
This device emits sonar pulse that can scan the immediate topography of an environment and detect forensic anomalies. Drone targets will also be identified, providing a tactical advantage in combat. Forensic Scanning is automatically disengaged when a battle commences.
- Press Up in the DPAD
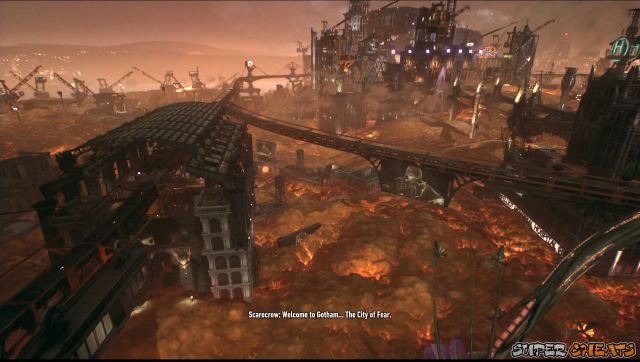
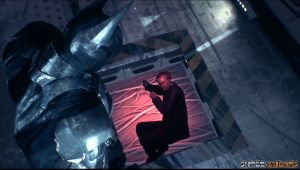
City of Fear
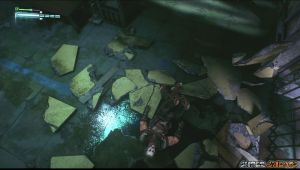
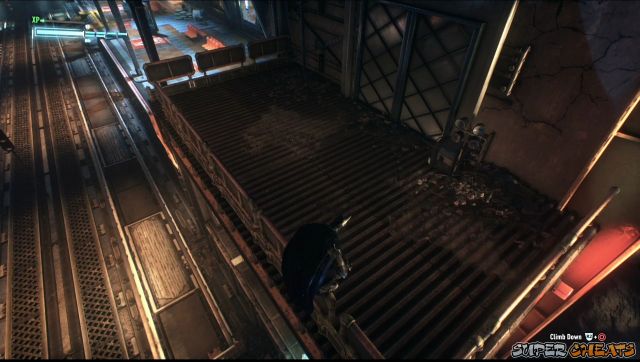
For the first part, you have to keep pressing X or just tilt the left stick to incinerate Joker's corpse. (Or if you're curious, you can pause the inciderantion and check out his partially burned face.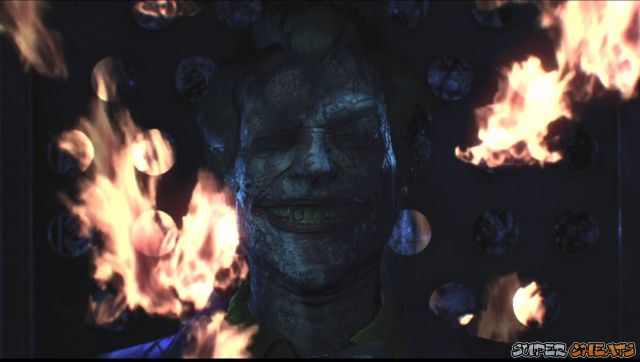
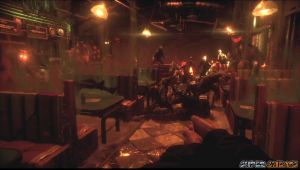
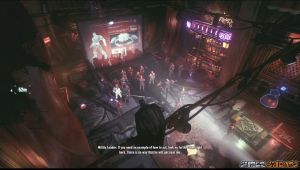
After a few scenes, you'll be in control of Officer Owen. Walk towards the corner booth and talk to the smoking customer. During this nightmare sequence, just pull the trigger and the cutscene will end.
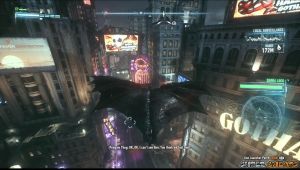
You'll now be able to control Batman. You have to meet Commissioner Gordon on the rooftop of the GCPD. You can glide towards the target and use your grappling hook to gain height again and glide once more. Continue doing this until you reach the rooftop.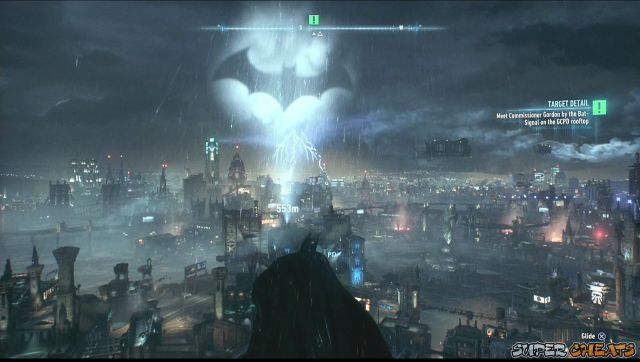
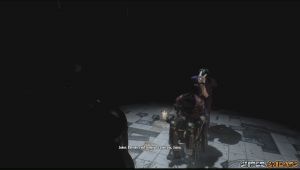
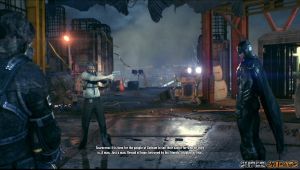
After the cutscene, Batman will contact Oracle and ask for the location of the missing officer. Once you've reached the area, engage the thugs and defeat them. Talk to the police officer to rescue him.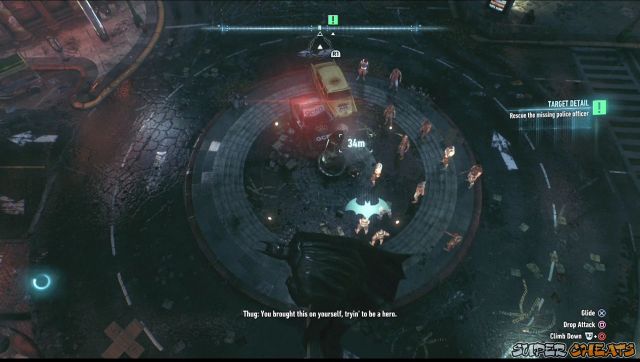
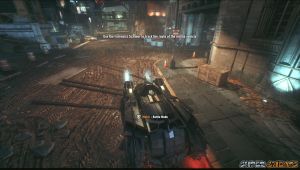
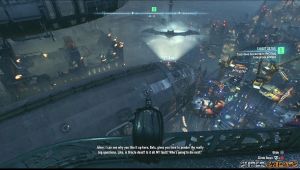
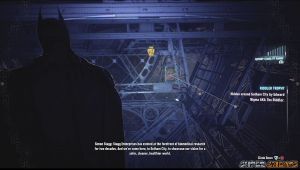
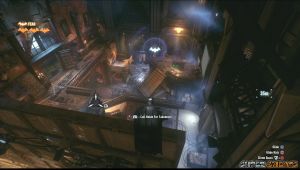
After the scene, press L1 to "even the odds". Once you're inside the Batmobile, pursue the military vehicle. One of the thugs will be firing RPGs on you but you don't have to worry about it. Keep following the vehicle and fire your immobilizer rounds until you're able to shut them down. Once the vehicle is totaled, exit the Batmobile and interrogate the driver.Scarecrow's Safehouse
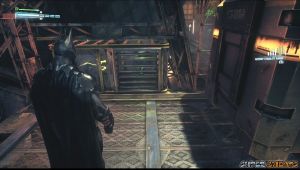
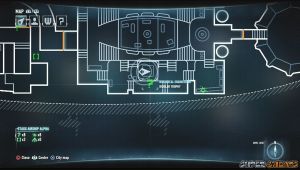
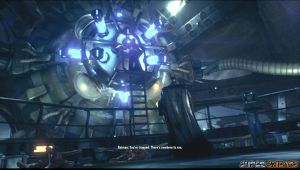
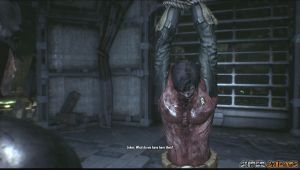
Once you've uploaded the toxin sample for Oracle to check, you now need to investigate Scarecrow's safehouse. Make your way to the rooftop and take down the guards outside. Continue to the glass roof and position yourself for a takedown. After taking out all the guards, approach the gas chamber for a scene.
 annot load player config
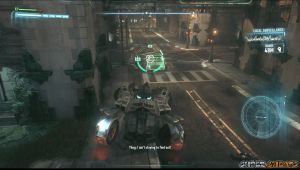
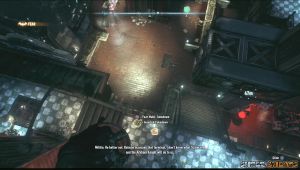
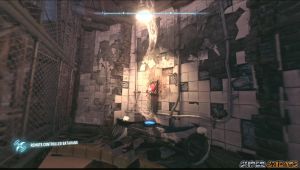
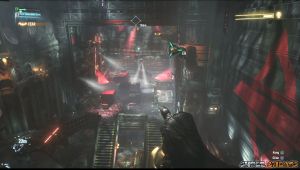
After the scene, you'll be cornered by the militia outside the building. Press the down DPAD to remote control the Batmobile in battle mode. Six unmanned tanks will arrive in the area. You have to engage these and destroy them using the Batmobile's weapons. You'll know when they're about to fire so make sure to stay away from their line of sight. After destroying all of them, position the Batmobile in the highlighted spot to continue with the story.
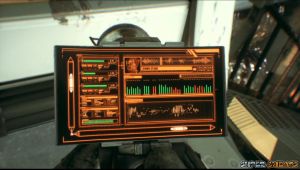
Drive to the marked location and touch the icon to start the Weapon Energy Diagnostics. Follow the Batcomputer's instructions to complete the diagnostics and Batmobile weapons Training.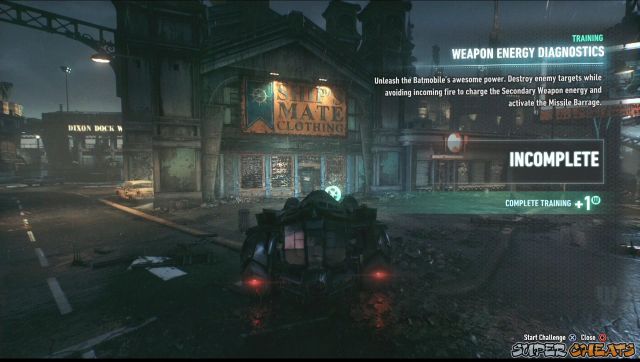
Once you're done with the Training, head to the next location and engage the unmanned tanks. Use what you learned in the previous weapons diagnostics to take them out. After all tanks are dealt with, the objective will be complete and the next one will be given. AR Challenges will also become available afterward.GCPD
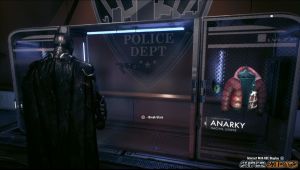
Drive to GCPD to deliver Poison Ivy to detention. You can talk to the officers in the precinct or check out the evidence archive from various Batman villains.
To continue with the story, head to the front desk to talk to Gordon and Cash. Mission Select will be available from hereon. If you want to continue hunting down Scarecrow, select the green exclamation point in the Mission Select screen.
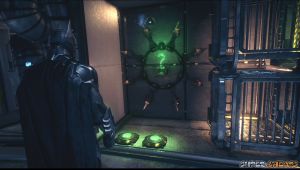
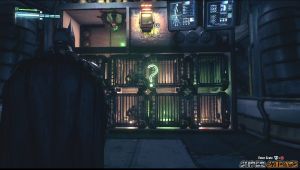
After tackling the currently available missions in the city, you can now select the main mission. Head to the clocktower and enter the through the rooftop. Now press Up in the DPAD then interact with the statue in the bookshelf. Interact with the computer afterward.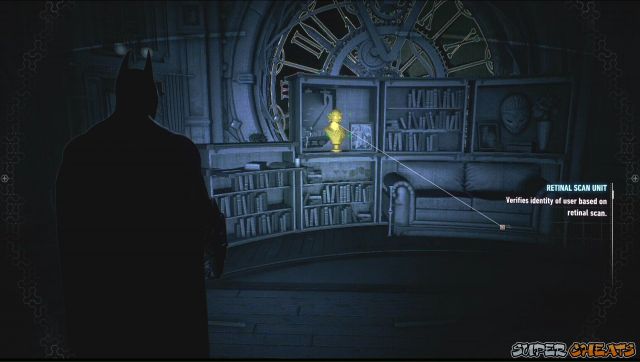
Tower Activations
Once the cutscene is finished, leave the Clocktower from the rooftop again and head towards the movie studio. Find the marked spot then interact with it.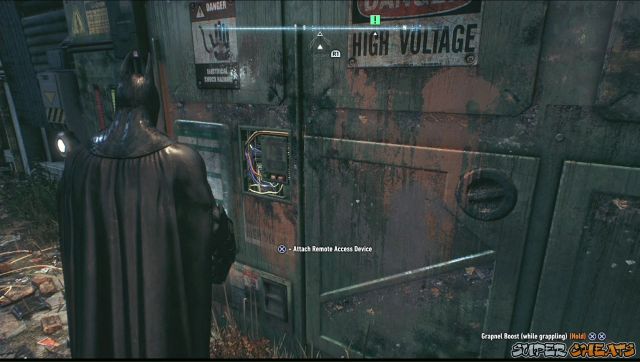
Now head to the marked location and call in the Batmobile there. The Batwing will deliver the Power Winch and install it on the car. Now you can use it to pull obstacles out of the way of the Batmobile.
Now get near the edge of the road where you're at and fire the Power Winch to get rid of the station sigh. Once clear, reverse a bit then hit the afterburner to jump over to the rooftop.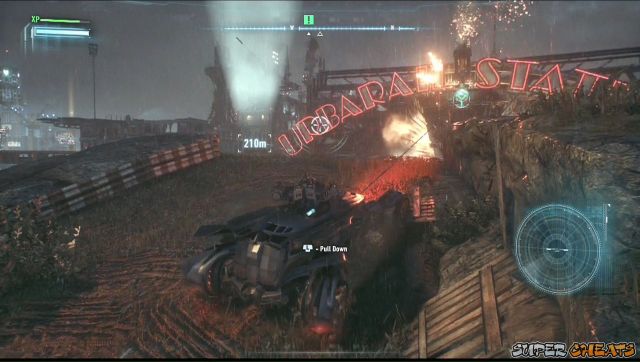
Now find the protruding metal on the rooftop and pull it again using the Power Winch. Back up then hit the afterburner again to use the raised roof as a ramp. Now navigate through the next part of the roof while on Battle Mode and blow up the obstacles along the way.
Work your way around the roof until you find another spot where you can fire the Power Winch. Once secured, deliberately drive the Batmobile off the roof and climb on the wall on the next rooftop. Detact the winch and head to the generator.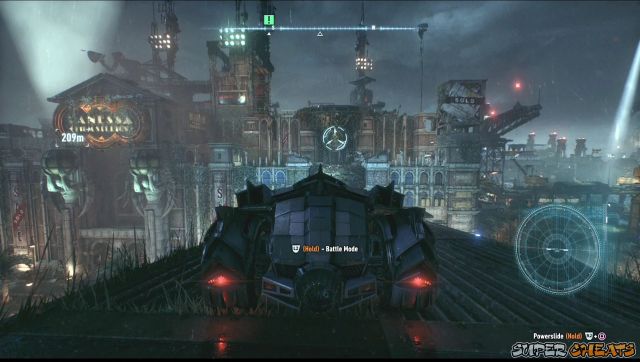
Attach the Batmobile to the generator using the winch and carefully rev the engine so that the needle in the lower right is within the orange bar. Once done, your objective will be updated. You can't use the Batmobile for now so you have to head to the next location through the roofs.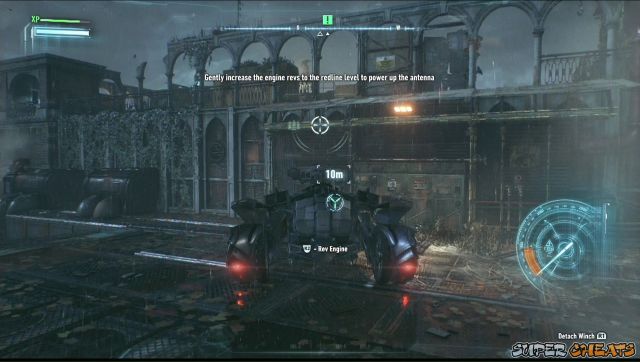
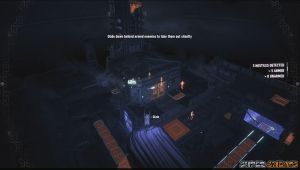
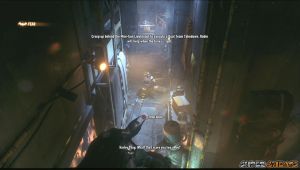
Once you're in the location, step on the rooftop and enter Detective Mode to evaluate the threats and the hostage below. Find a vantage point to stalk your prey from above. Grapple on the nearby ledge then swing to the other one right across so you can see the entrance. Select the Batarang from your equipment and hit the target to draw the enemies out. Once they're out, you can take them out silently one by one.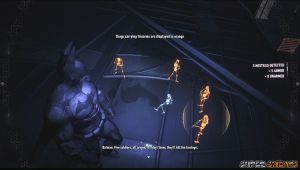
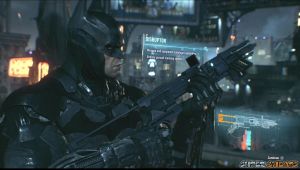
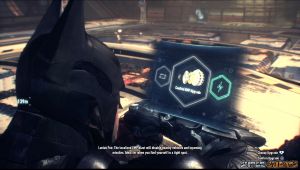
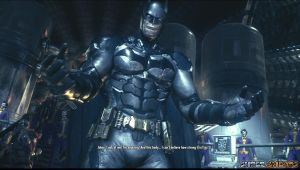
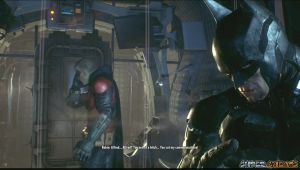
After clearing the guards outside, Batman will call in his new Batsuit. Head to the marked location and open the capsule to get it. Lucious will walk you through the new Batsuit's features. Lucius will also enable five Training AR challenges. Complete all of them to earn Tech Points you can use to upgrade your arsenal. Follow this link for the videos of these challenges.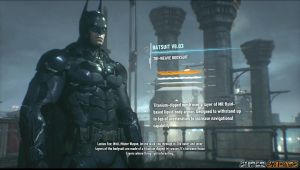
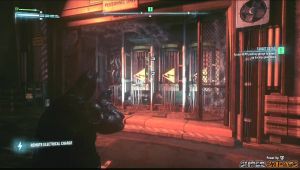
Once you're done with all the simulations, use the tech points you earned to upgrade your gear, weapons, gadgets, Batmobile and more. Now you have to defeat the three gunmen inside the building. Enter one of the grates, get into position under the floor then use the Multi-Fear Takedown you just practiced. After taking them out, rescue the captured detective and interact with the console inside.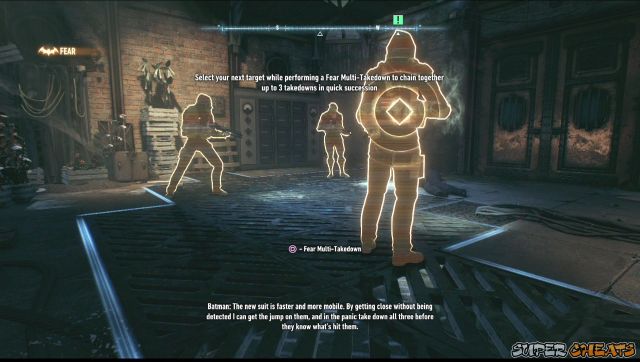
After the scene, leave the building and Batman will throw the Batscanner in the air. Now you have to triangulate the location of Scarecrow's toxin factory. Move the tower pointers to Ace Chemical located in the upper right corner of the screen and let the towers sit on there until your objective is updated.
Ace Chemicals 1
Head to the location and talk to Gordon. After the cutscene, find your way inside the facility. Enter Detective Mode once you're able and scan the area of threats. The security terminal you have to access will be highlighted in your screen. You have to make your way there but first, it will be better to take out the guards silently to make your job easier. After knocking out the guards, access the terminal.
You have to make your way to the highest vantage point in the area – the top of the Ace Chemicals building. While the batscanner is airborne, move the cursor until you feel that the controller is vibrating. Now press and hold X to scan the spot. You need to locate all five workers to complete this section.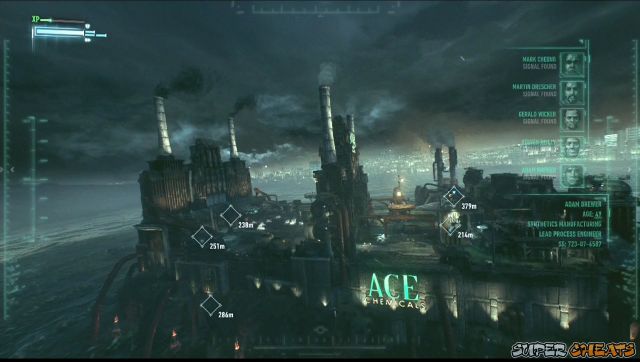
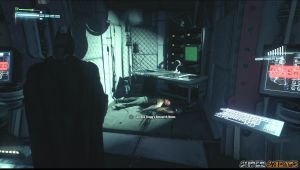
First things first; you have to bring the Batmobile inside to help you rescue the workers. First, you need to lower the gate. Find the Security Office near the gate and clear the room of unarmed guards. Unfortunately, the worker you'll find inside is already deceased. Pull the gate release lever and take control of your Batmobile.
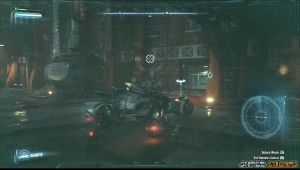
While controlling the Batmobile, use the power winch to pull the destroyed part of the bridge and boost it over the improvised ramp. Destroy all the tanks inside then clear the path. Now you can rescue one of the nearby hostages.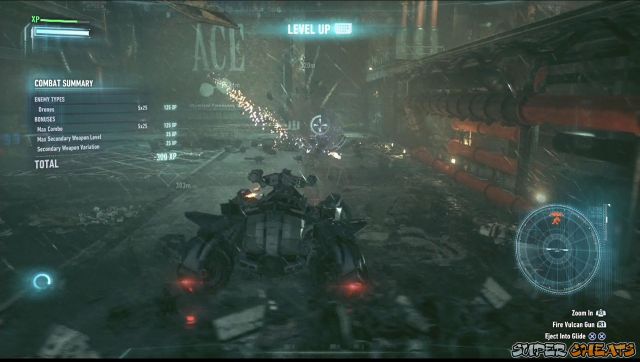
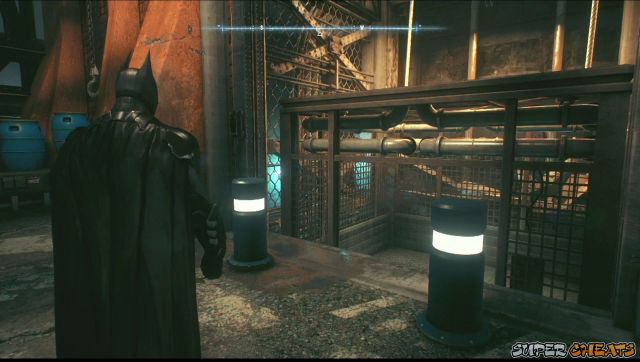
This guy is located in the room in the separate platform in the corner of the compound. Guide your Batmobile in Battle Mode across the pipes and use the power winch to take down the door. Neutralize the guards and enter the room where the hostage is located to trigger a scene.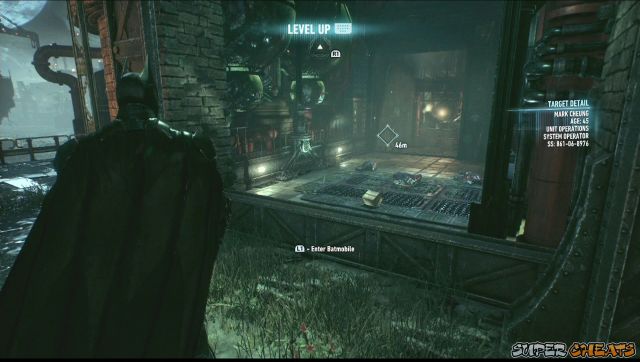
Now after Arkham Knight's entrance and while he's talking on the phone, select the Remote Control for your Batmobile and fire the riot suppressor rounds to encapacitate the soldiers. Use your cursor to designate targets. If a soldier flies through the glass, you have to finish off the remaining soldiers by melee combat. Now free off the second hostage. Enter the Batmobile and bring the hostage back to Commissioner Gordon.
Ace Chemicals 2
Now head back inside. You need to make a path for the Batmobile so you have to clear the platform above the crane to access the controls. After clearing the initial wave of guards, you have to deal with some sort of elite melee soldiers. Defeat them and control the crane. Position the crane so you can use it as a ramp. Cross the gap to reach the next area with the Batmobile.

Now you have to clear the next courtyard of enemy tank drones. Aim for their turrets and use the thrust-evade to quickly get out of their line of sight. Once the courtyard is cleared, find the gas valve under the Loading Dock room and pull it using the power winch.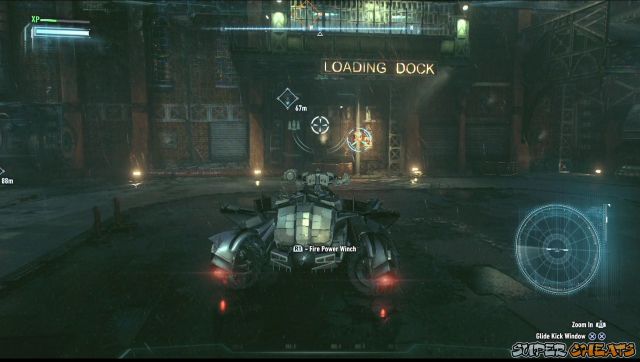
Clear the Loading Dock room and place some explosive gel on the wall beside the pipe. Continue forth and find the next deceased hostage. Continue forth and use the explosive gel on the floor. Get to a safe distance and blow it up.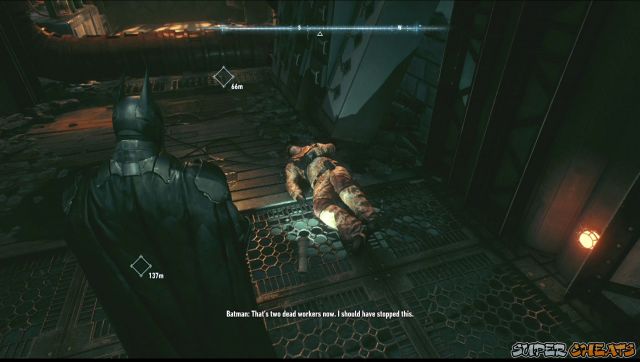
Now drop down and rewire the electric box nearby. This will open a window which will allow your Batmobile to fire its power winch. Now blow the next wall and pull the valve on the pipe.
Once done, turn to the left and you'll find one of the workers again. Continue forth and rewire the electric box again near the hatch to open it. Control the Batmobile once again and blow up the cracked wall. Attach the power winch and pull the elevator as far as the Batmobile can. Release the remote control, have Batman crawl inside the elevator through the opening in front of the Batmobile. Control the Batmobile again and have it lower the elevator to the very bottom.

You'll find the hostage inside and a lot of unarmed guards. Use your grappling hook to access the vent on the ceiling and make your way through until you find another grate that you can remove. Head further inside until you can get into a vantage point where you can trigger a Fear Multi-takedown. By default, you can only take out three of them via Fear and the remaining guards, you have to dispatch them using conventional melee combat.
After taking out the guards, free the hostage. Head back to the elevator and take control of the Batmobile again to pull it up. Exit the elevator and another scene will trigger. Now you'll have to deal with another wave of tank drones and an attack helicopter.
Take out the drones first then deal with the chopper. Use the thrust-evade to avoid its missile volley then make sure to fire the vulcan fire whenever your main gun is reloading. Later on the chopper will fire homing missiles. Use your vulcan fire to destroy them before they completely lock on to the Batmobile.
After defeating chopper, park the Batmobile on the lift and disembark. Activate the elevator controls nearby to raise the lift and allow the Batmobile to cross. Now deliver the hostage to the police and head back inside the compound once more.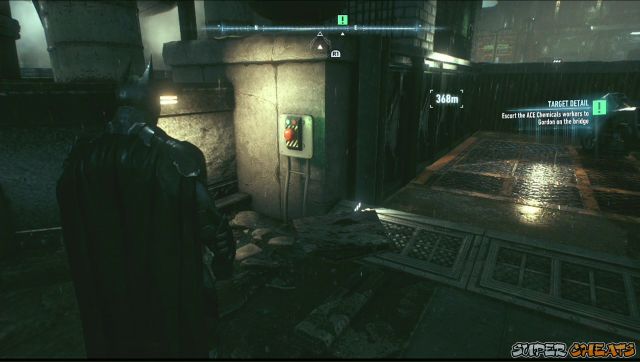
Ace Chemicals 3
Blow up the wall of the main building then exit the Batmobile. Get on top of the crane controls above and position the crane so the Batmobile can use it as a ramp again. Once inside, follow the road and take out the bots along the way.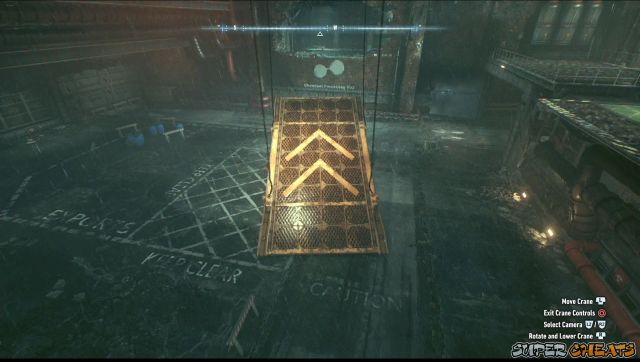
Once you've reached another gate, exit the Batmobile and use the grapple hook to reach the ledge above. The best way to quickly take out these two guards is via Fear Multi-takedown. Swing to the pipe above the sentry then you can enter through one of the vents on both sides of the room. This will take you under the floor where you can get beneath the guards and take them out. Quickly use your grappling hook to get out of the sentry's detection range and get near the sentry until you get a prompt to destroy it. Rewire the electric box to open the gate and ride your tank again.

When you reach another gate, climb up the ledge and drop down near the electric box below without making a scene. After rewiring and opening the gate, the enemies will be alerted to ride your vehicle again and start shooting at the spooked enemies. Disembark the Batmobile and finish off the remaining enemies on foot. Make use of the Batmobile and environment takedown options in this area.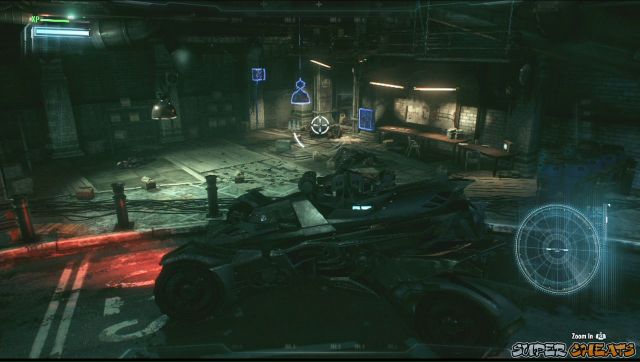
Once clear, enter the batmobile again and use the eject-glide function to get over the gate of the mixing chamber. Silently take down one of the guards and destroy the sentries if you want. Now you have to clear the mixing chamber and take down all the guards to prevent them from loading the chemicals.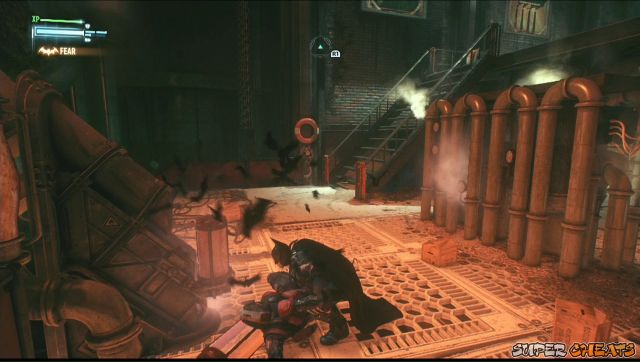
Once cleared, enter the main chamber to find Scarecrow. After the scene, access the terminal to prepare the neutralizing agent. The four tubes containing the neutralizing agents must be carried to the other holes where you can insert them. Take note that these chemicals are highly volatile so you have to keep an eye on the color indicators while moving it. You also have to be very careful when inserting them in to the holes. After getting the fourth tube, a cutscene will trigger.

You'll now be controlling Commissioner Gordon. Head inside the elevator and operate it. Speak to all the prisoners until a cutscene triggers.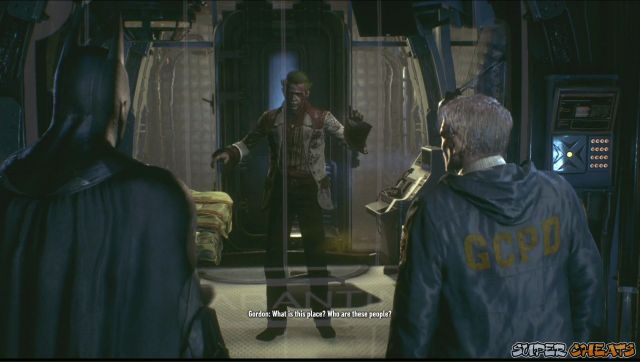
After the scene, switch control to your Batmobile and use the power winch to pull the side of the chamber. Ride the Batmobile and escape the place.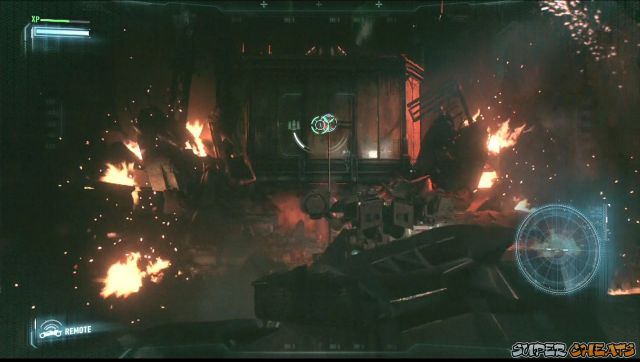
Tracing Oracle
Head to the GCPD and talk to Gordon. You now have to escort his vehicle to the Clock Tower. Shortly after leaving the GCPD, militia vehicles will pursue Gordon. Follow them and take out the pursuers.
Once done, Gordon will enter your Batmobile. Now head to the Clocktower and defeat all the tank drones guarding the roads. After reaching the Clock Tower, get to the rooftop. However, you need to defeat the guards there first before you can safely enter it.
Stalk the guards and defeat them all. Once done, enter the Clock Tower. Watch the scene and just look around as the hallucination remains strong. Look around until you can see the wheelchair on the floor. Pick it up to start the cutscene.

After the scene, access the Batcomputer's interface. Review the CCTV videos. Select the video in the upper right-hand corner and rewind it. You should see the Arkham Knight and Barbara being carried by one of the militia soldiers. Select that cell to scan it. Then forward the footage and scan the vehicle where Barbara was taken to update your objective.
Shutdown the Batcomputer and leave the Clocktower. Enter the Batmobile and park it on the highlighted space. Use the vehicle's Forensics Scanner to track the route of the militia vehicle. Keep following the tracks and you'll eventually see a militia aircraft plant a bomb on the road. Leave the Batmobile and investigate it on foot.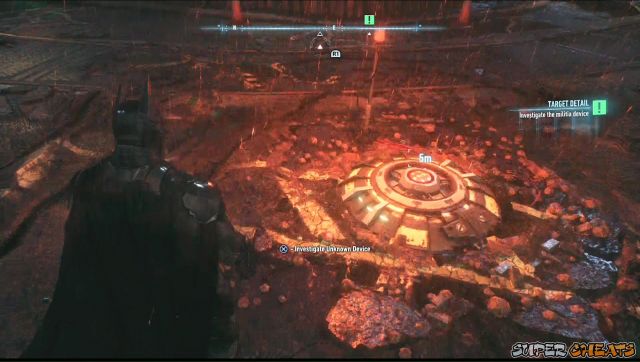
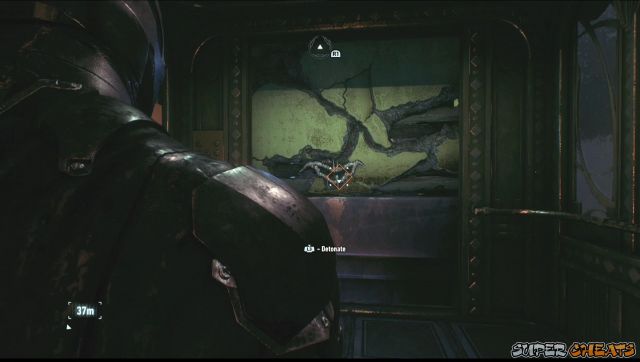
After talking to Alfred, you'll learn about the tank drones sent to stop you. You have to defend the spot until the virus is successfully uploaded. Once done, use the Batmobile's power winch to pull the bomb and trigger a controlled explosion. This will unlock the "Campaign for Disarmament" mission.cannot load player config
Continue following the tracks until you reach the bridge. Now you have to explore the next island on foot to find the militia access point. Once there, you have to take out all the guards and access their computer. Once done, head back to the bridge and get in the Batmobile.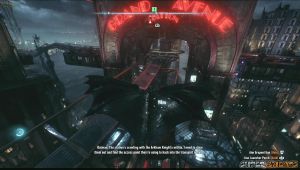
There's a large drone force on the bridge, including ones that fires homing missiles. Take out the smaller ones first then destory the missiles fired towards you with your vulcan cannon. Once done, resume following the tracks using the Batmobile's forensic scanner.Crash Site Investigation
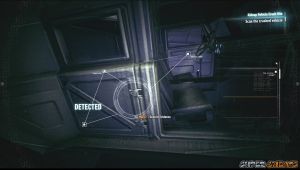
You may encounter more drones in this area so destroy them as you encounter them. Keep following the tracks until you find the crashed vehicle. Get close to it on foot and examine it using the Evidence Scanner. Examine the door handle to reconstruct the scene about the crash.
Next, you have to find the body of the driver who was thrown out of the windshield. Examine the body then go back to the vehicle and examine the passenger seat next. During the reconstruction, you'll see the door flying off a distance. Find it near the river and scan it once more.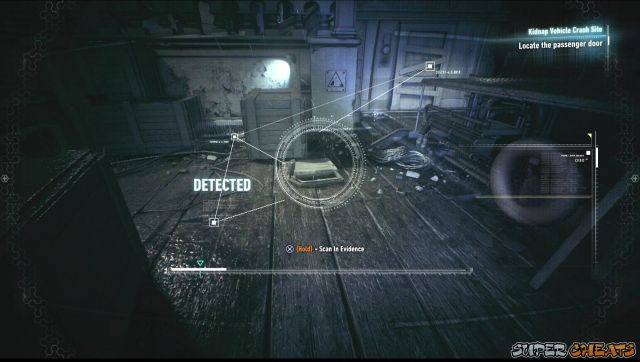
Backtrack to the crash site and playback the reconstruction and see where Oracle landed. Scan the broken wooden pallets there. More scenes will be added to the reconstruction. Now scan where the bullet landed on the ground. With the reconstruction almost complete, it's quite evident that the Arkham Knight carrier her away.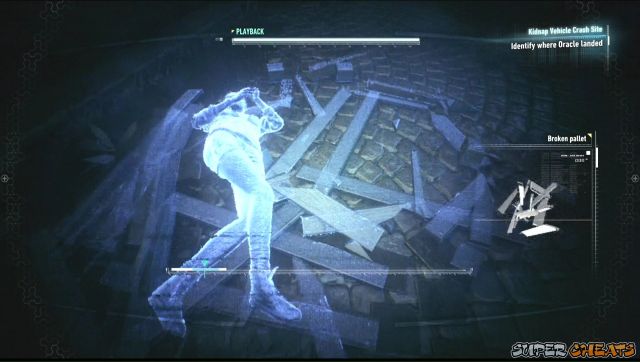
Rewind the reconstruction and you'll see her throwing something to the side near the wooden crates while she's crawling away. Scan that evidence to update your objective. This will add two more side missions in your list. (Gotham on Fire and Heir to the Cowl) You can check out these missions and continue with the main objective once ready.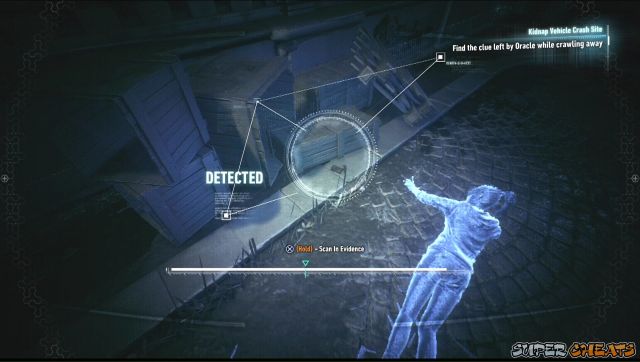
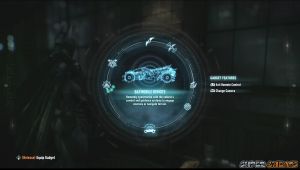
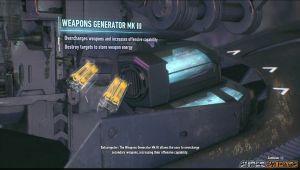
Head to the top ledge of the Wayne Tower and enter it. You can check out some of Lucius's prototypes. Use the computer to track down the location of the Arkham Knight. Lucius will also offer you an upgrade for your Batmobile. Choose the upgrade you want then head to the Miagani Tunnel Network.

Stirring the Drone Nest
Head to the Grand Avenue area and take out all 12 militia drone tanks. Once done, head to the tunnel entrance and wait for Alfred to lower the door. Continue forth to find another closed gate. Use the power winch to pull the large ventilation fan above. Eject-glide to the hole and enter it.
Place the explosive gels on the boarded doorways and blast them. Remove the vent cover and go through the vent. Once you reach the other side, fire the Line Launcher to reach the other end of the room. Enter Detective Mode to see the button. Select your Remote Batarang and use it to push the power button in the enclosed room.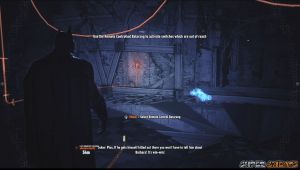
Once the gate to the right opens, use the Line Launcher again to conveniently get to the next ledge. Continue forth. Use the Line launcher once again to reach the ledge across the vent fan, then throw your Remote Batarang to the hole and steer it to hit the power button. Once the gate is opened, go through it once again using the Line Launcher.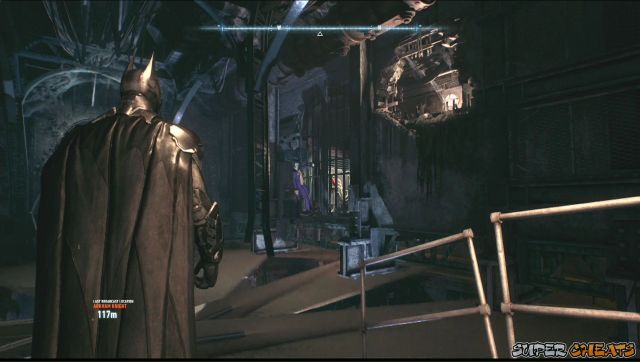
Continue forth, turn to the right and you'll find a Riddler Trophy in the rubble.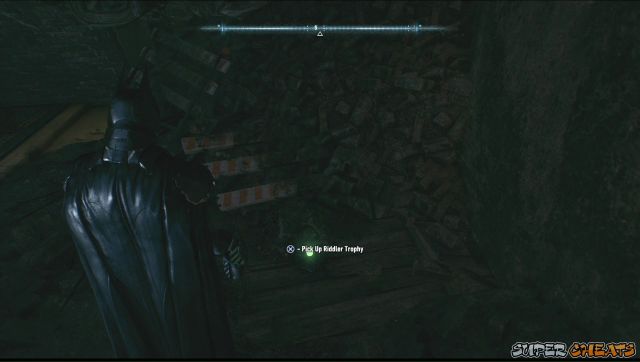
Swing to the metal beam in the tunnel then continue hopping from beam to beam until you see a vent where you can enter near the locked gate. Continue to the control room and exit the grate. After the cutscene, you have to defeat a brute. Use beatdowns to take these large guys down.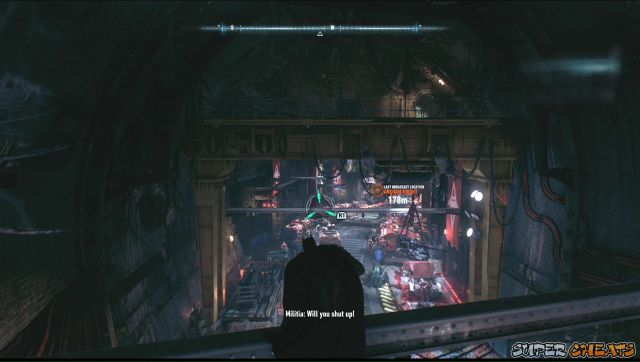
More enemies will pour in. Use the environment takedowns, counterattacks, and any special combos/weapons you have to survive. Once you defeated most enemies, a drone tank will block the doorway and will start shooting inside. Go to its blind side to the right and finish off all enemies.
Now rewire the electric box to lower the Gate. Bring in the Batmobile and start destroying the tanks. Once done, continue to the next closed gate and open it. The enemies will attempt to escape, pursue them and eliminate the convoy's escorts using Immobilizer rounds. Continue chasing the APC then interrogate the driver of the APC. While interrogating him, press R2 to intimidate the poor ******* and make him spill his beans.
Head to the marked location in Grand Avenue to receive the Batmobile upgrade you selected from Lucius a while ago. You'll get the chance to try this new upgrade since the militia will send a bunch of tanks towards you.
After destroying all the tanks, Alfred will give you an update. You'll also get a new Mission (Armored and Dangerous)Hunting the Penguin
Head to the Ferry Terminal and go to the rooftop to meet with Nightwing. You'll also receive the Disruptor. Shoot the weapons crate and sabotage the ammo of the two thugs below. After doing so, go down and knock them all out.
Next, fire the Disruptor's tracker ammo on the van and knock on back to spook the guys. Now you can go to the rooftops and follow the vehicle. Continue stalking them until they lead you to Penguin's base. Once there, clear the roof of enemies and sentry guns. Head inside and find a hatch on the floor that you can go through. You'll find Penguin there and his thugs.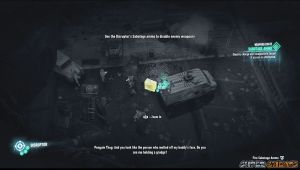
Find a vent on either side and slide down under the floor. Get behind Penguin and grab him. Counter any attempts of his goons to attack you from behind. After the Interrogation, Nightwing will appear to your rescue. Beat all the thugs out with his help.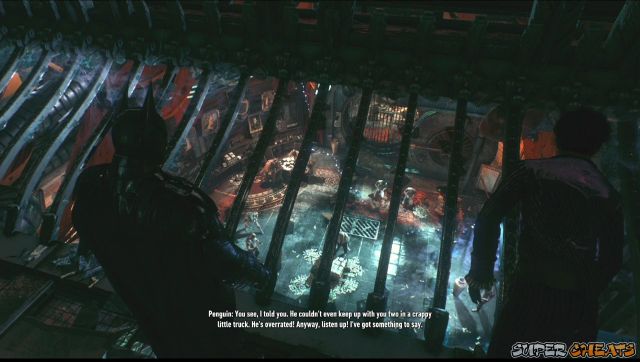
Once the room is cleared, enter the vault and place some explosive gel on the explosives then shut the vault door. Detonate the blast gel to complete the objective. This will also unlock the Gunrunner missions.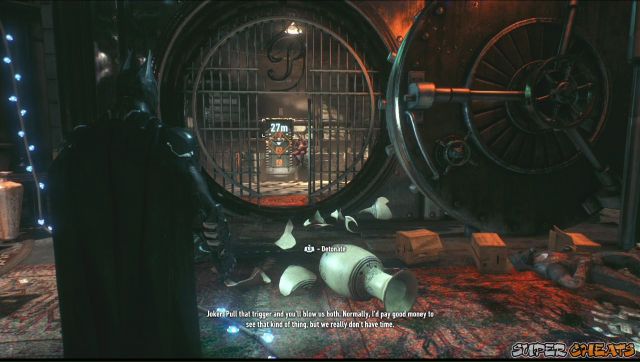
Leave the hideout from the roof only to find more goons waiting outside with sentries deployed. Stay up in the metal beams then take control of your Batmobile. Conveniently, there's a parking building in front of the hideout. Drive your vehicle to the top floor to have a clear shot at the militia. Destroy the sentries and take out all militia soldiers.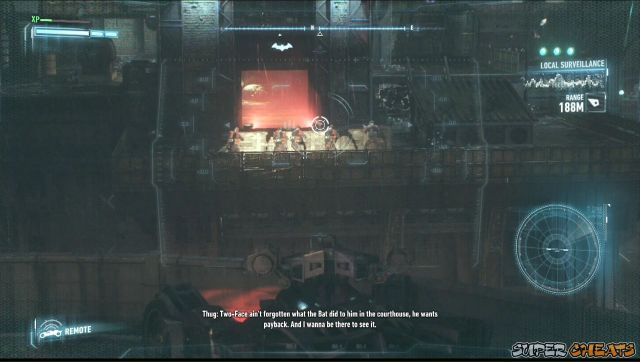
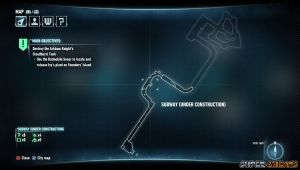
Stagg Airship Alpha
When you're ready, head to Founder's Island and go to the tower where the airship is moored. Be careful of the enemy choppers flying around since they'll shoot you if they spot you. Once you reached the location, you'll have to clear out the guards to access the terminal and disable the AA guns pointed at the airship. Your priority also is to take out the guard with the specialized equipment that can detect your Detective Mode. Once the militia's taking care of, access the terminal and put some explosive gel to disable the watchtower.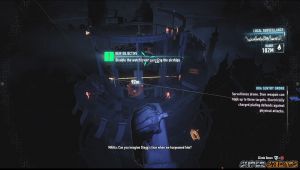
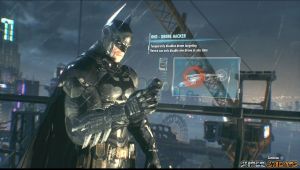
Next, head to the nearby Wayne International Plaza's rooftop to get the Remote Hacking Device. From the tower glide to the top of the airship and enter it through the service hatch on the top. Enter Detective Mode and find the control panel. Use the RHD to manipulate it and open the hatch.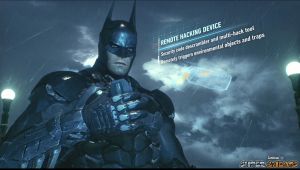
Once inside, drop down a level below then open the grate. Crawl inside and you'll find a Riddler Trophy. Hack the security console with your RHD to remove the gate and access the Trophy.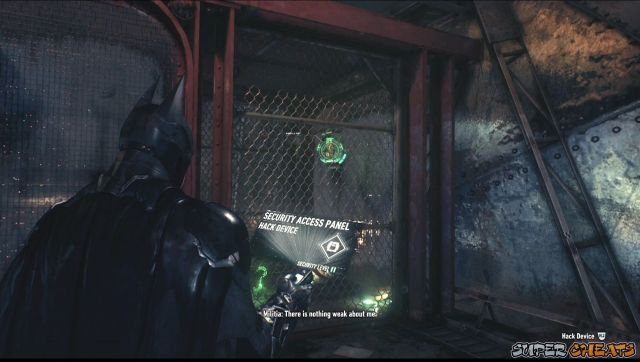
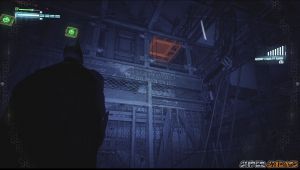
Get to the lower level and near the guards. Use the RHD to download the codes from the soldier's handheld so you can hijack the controls of the drone. Incapacitate the guards.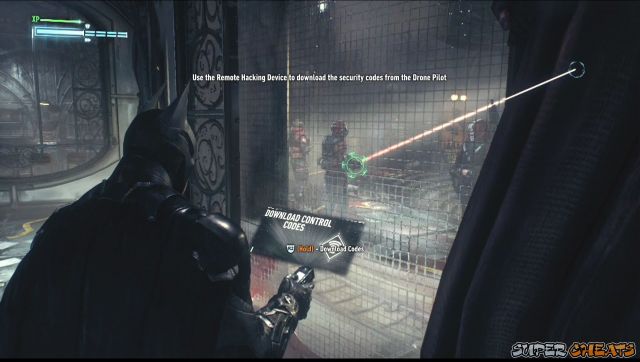
Next, find the security panel beside the airship stability controls. Hack it to open the gate. Head to the stability controls and override it. Tilt the airship forward to force the large metal crate to move and clear the hatch where you need to next.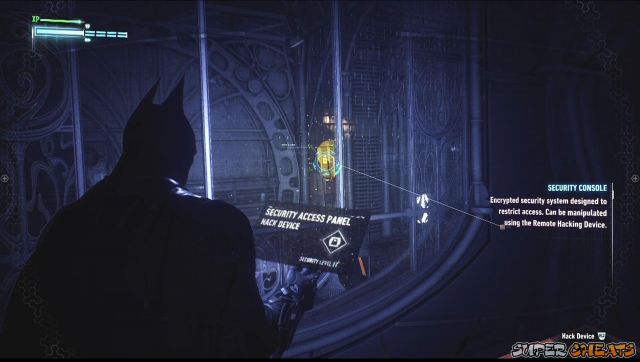
After going down the hatch, tilt the ship again to the left to clear the path for you. There's another Riddler Trophy you can get here as well. Hack the Riddler Terminal nearby to release the ball containing the trophy. Now you have to access the stability controls again and guide the ball through the series of tubes and openings below.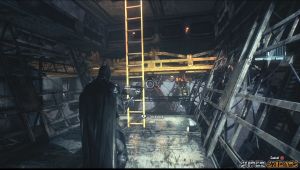
Drop down, collect the trophy then remote control the magnetic crate using your RHD. Deactivate the magnet, tilt the ship to the right. Disconnect from the stability controls so you can remove the grate to the left of the doorway containing yet another Riddler Trophy.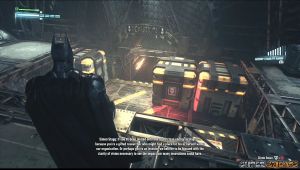
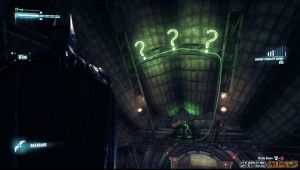
Rreactivate the magnet then tilt the airship again to the left. This should clear a path for you. Continue inside and you'll find yet another Riddler Trophy. Stand on the pressure plate to light up the green question mark then throw your remote batarang. Go through the opening in the metal mesh and hit the dot on the question mark so you can get the trophy.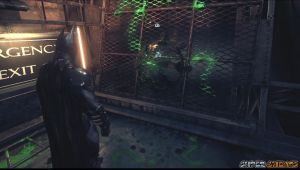

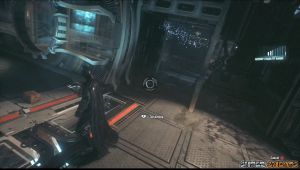
When ready, press R1 to pull yourself up but a dual-blade wielding militia will be waiting for you there. Evade his strikes then perform a beatdown to take him out. After that, hack the door controls using the RHD.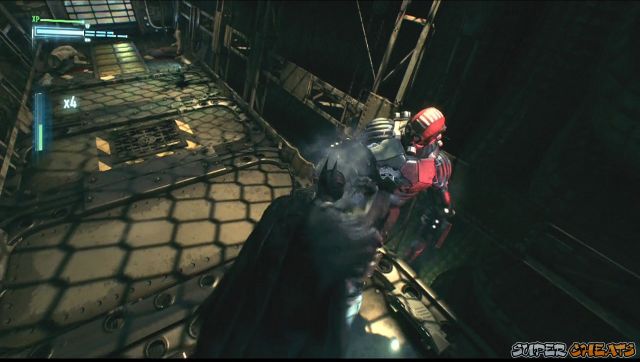
You'll find Stagg in the large hall below. There's a lot of soldiers there though they don't have weapons, they have a dual-blade brute with them. Keep an eye to your surrounding build combos, counterattack, and use your environment beatdowns. Keep an eye against charging opponents. Save the brute for last since you can't concentrate taking it down with all the enemies surrounding you.
Talk to Stagg to continue with the scene. You'll hallucinate once more so just keep fighting off the entities and struggle until you snap out of it. Override the stability controls then you have to tilt and reactivate/deactivate the magnetic locks of the metal crates below to clear you a path.
First get near the grate beside the stability control pedestal. Activate the first crate to the left then tilt the ship so the grate to the right clears the way. Activate its magnetic lock afterward.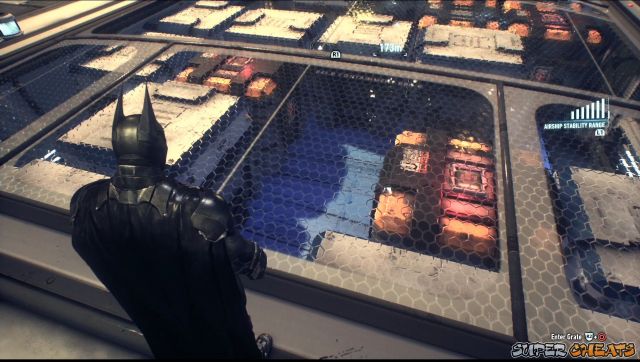
Enter the grate then continue along the path. Now deactivate the lock of the next crate blocking your way then tilt the ship to the left. Next, place some explosive gel on the wall to the right and blast it. Now tilt the ship again to the right so the crates will go through the space behind the newly opened doorway. Turn to the left then enter the grate there. Follow it to reach a Riddler Trophy.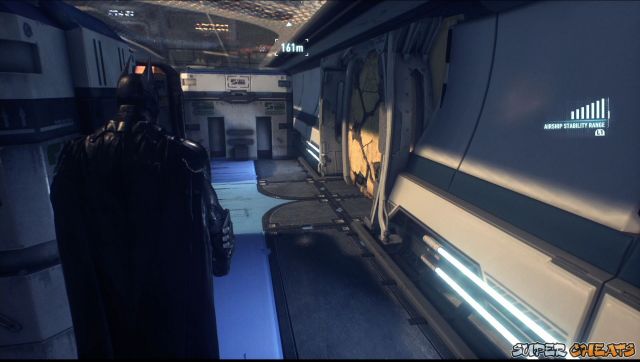
Leave the grate then move out of the way then tilt the ship to the left first, lock the next crate, then tilt the ship to the right again. This should clear your path past that doorway.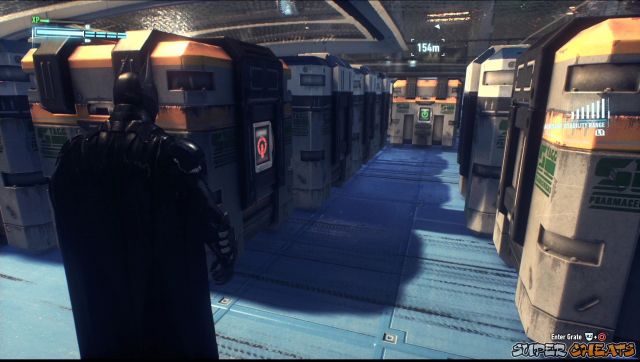
Continue forth and lock the next crate to the right. Tilt the ship to the left to clear the path. Continue to the end of the path and exit the grate.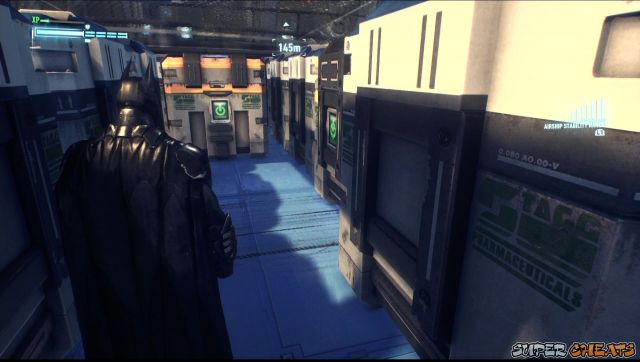
There's another riddler trophy inside the airlock chamber. Don't mind it for now since we're going to retrieve it in a short while. Continue upstairs and unlock the door ahead by hacking the console using the RHD. Pull yourself up to the hatch above then continue to the right.
Go up the ledge before the large hatch then turn around to find another Riddler Trophy. You need the three Batarang skill before you can target all three question marks and hit them at the same time.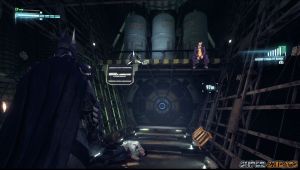
Moving on, you can't go through the biometric locked main hatch. Instead, on the same ledge facing the Riddler Trophy, look up to find a vent where you can go through to reach the Research Lab.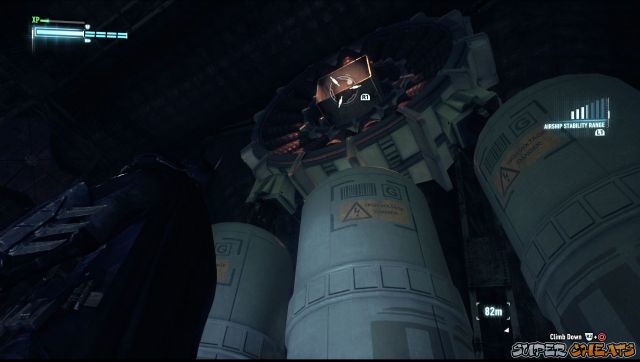
Now you have to clear the whole area first of guards. Once again, there's another specialist soldier that can detect you if you stay in Detective Mode for a long time. Not to mention a drone. Swing to the metal beam so you can get in range and hack the flying drone.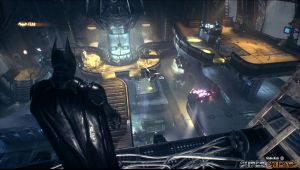
Once you alert the enemies, they'll be smart enough to throw mines on vantage points. Fortunately, you can also use your RHD to trigger some objects in the area to create distractions. Separate the guys and take them out as you please to clear the area.
Once cleared, access the computer and you have to replay the CCTV footage to check any surface Stagg probably touched so Batman can reconstruct the prints. First look in the top left video and replay it. Pause the footage when he touched the floor in the 11:57 mark and select that cell to scan it. Next, play the top right video and review the footage to the 23:03 mark then scan him touching the floor again.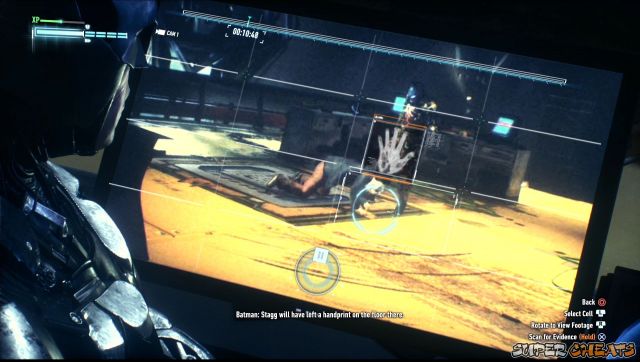
Next, review the lower left video and go to the 37:44 mark to find him touching the wall. Finally, check the last video and play it to the 46.99 mark and scan it.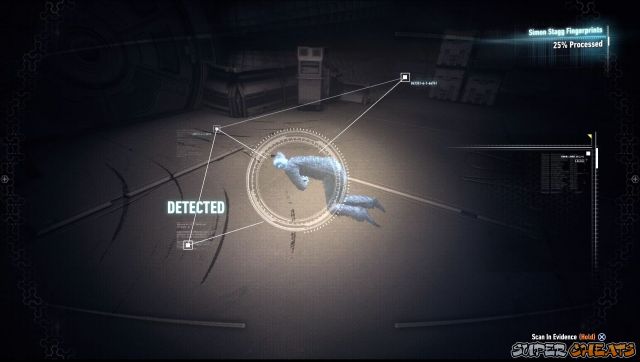
Once done, you have to find the four locations to scan his fingerprints. Enter detective mode on the locations to use the Evidence Scanner. All of them are found near your position, on the floor behind you, on the stairs, at the base of the stairs and the large door to the left. After getting the full set of fingerprints, you can now take control of Stagg's computer. Once the second airship's auto-turrets are dealt with, you can now freely go through the main door.
One of cages holding a monkey in the far side of the research lab has a riddler mark. Hack the console with your RHD to remove the cover and reveal the monkey. Take note that the monkey will go towards your direction so stand near the pressure pad, hit the dot to remove the barricade and let the monkey go to the pressure pad on the other side of the cage. This will remove the cover of the Riddler Trophy on the ceiling. Use the Bat Claw to get it.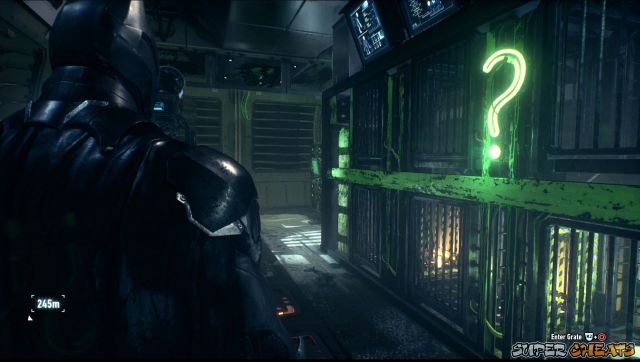
You can find another Riddler Trophy under the deck where you accessed Stagg's computer. Hack the console with your RHD to remove the cover. Like the other monkey, you have to guide the monkey on the two pressure pads within 5 seconds of each other. Keep hitting the question mark's dot to raise the grates and clear the path to the pressure pads. After making the monkey step on the pressure pads quickly, the trophy is yours.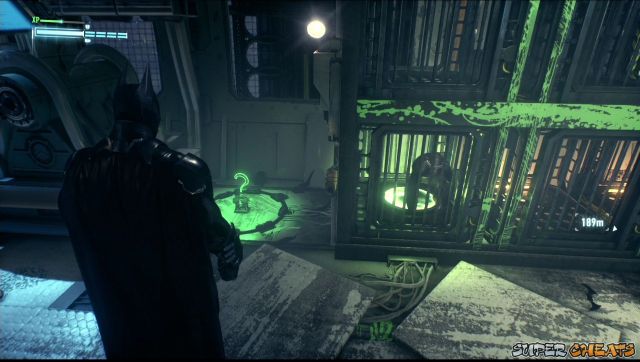
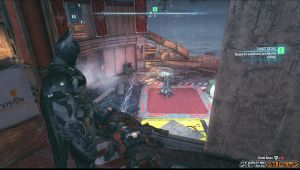
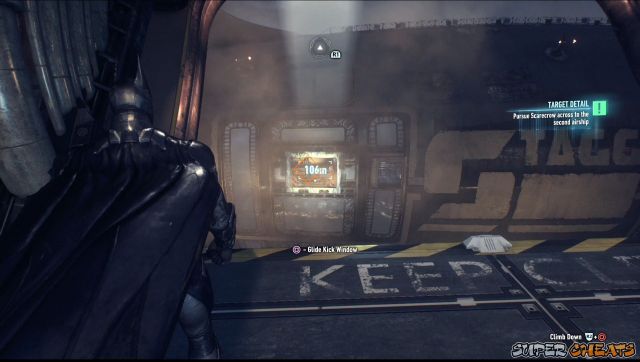
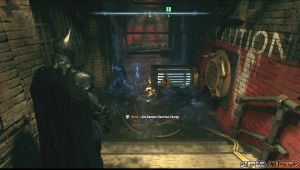
Backtrack to the cargo hold and you'll find more enemies waiting there, including one that can carry an electrical charge and medics. Make the latter your priority target and avoid confronting the electrical guy for now. After defeating them, Lucius will call again and will ask you to pick another upgrade for your car. When ready, hack the console on the cargo hold to open the loading hatch. Press square to glide kick the window of the second airship.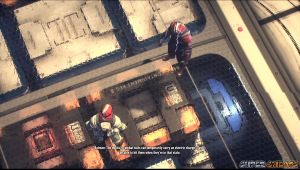
Stagg Airship Beta
Defeat all enemies then blast the boarded wall near the glass window. Activate the airship stability controls in the end of the room. Tilt the ship fully to the left then tilt it fully to the right until you hear a large crate breaking a glass door. Do it one more time to create a pathway for you.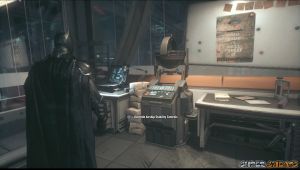
Go through the broken doorway and turn left. There's a riddler trophy here behind the locked crate but just press and hold the UP DPAD to take note of its location and add it to your map.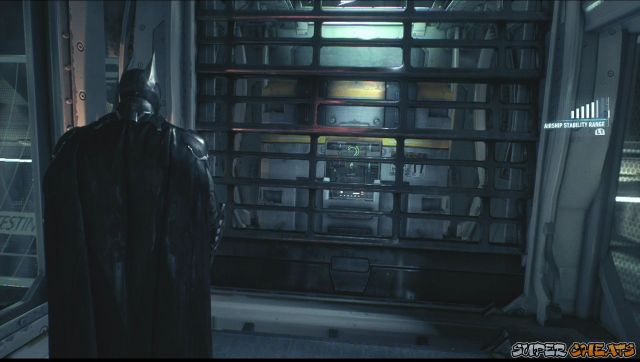
Continue further to left where you can blast another wall. You'll find yet another Riddler Puzzle you need to solve to get the trophy.First, move all crates to the left. Get inside one of the open cages then grapple through the grate above.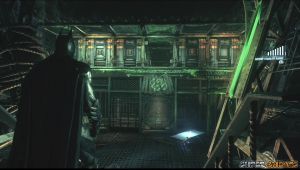
Now move all the crates to the left and lock the rightmost crate. Tilt the ship to the right this time to remove the crate obstructing the way. Enter the grate and collect the trophy in the bottom.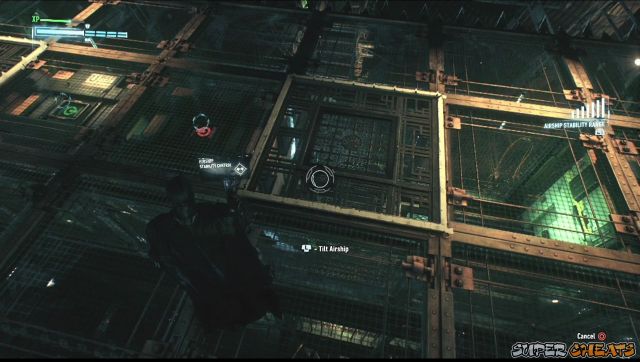
Backtrack to the main path and continue forth. You can access Stagg's research notes from the computer terminals along the way. There's another Riddler Trophy behind a cell along the way. Ignore it for now and continue forth. In the end of the corridor, you'll find yet another access terminal. Use Stagg's handprint to gain access and open the cell behind you containing the Riddler Trophy. Backtrack and collect it.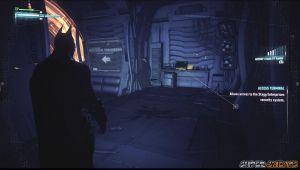
Now continue to the next large room. There's a lot of guards in this place, including a mini-gunner Brute. Batman will advise to save the brute for last since taking him down will attract a lot of attention. Get up in a vantage point and plan your approaches. It will be helpful to lay down some explosive gels on the main pathways and also taking out the guards out of sight. Take note that if the enemies notice that their numbers are dropping, they'll be more alert and will search in pairs. Use your RHD to trigger some the hackable gadgets.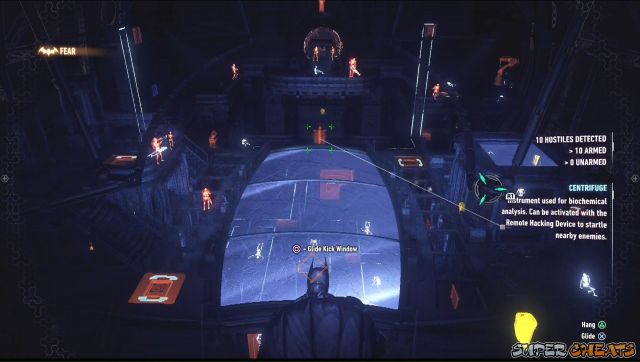
Better yet, use your Disruptor to disable their guns, especially the mini-gun. It will help you'll put the explosive gels near the bodies so you can detonate them and disable whoever checks them out. Prioritize taking out the roving guards as well especially if you want to keep a low profile.
Once you have left the mini-gunner alone, keep striking him and use counter-attacks to evade his attacks. Keep pummeling him until you knock him out. Once done, you're free to explore the area. There are more Riddler Trophies here that we can collect.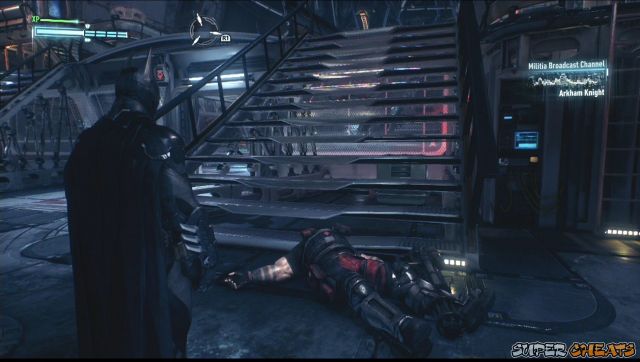
One of the trophies is placed near your starting point. Hack the console with your RHD to reveal the monkey cages inside. Now hit the dot on the question mark again with your batarang to operate the pressure pads and guide the monkeys there to get the trophy.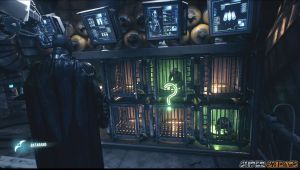
Another trophy requires placing two more chimps on the pressure pads. This is located under the cell where Stagg is hidden. Use the Batclaw to retrieve it.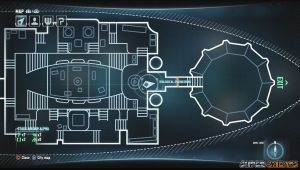
There's another one on the lower deck that's located behind a voice-locked room. Press and Hold the UP DPAD to mark its location and leave it for now. Also, there's another trophy located in a boarded up room with three unpowered generators. Just mark their locations for now.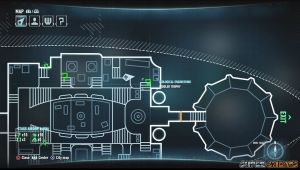
Once you're done, head to Stagg and talk to him. Head through the door and takedown one of the Scarecrows. When you have control, beatdown all the guards and keep beating them until you trigger another cutscene. Now you have to leave the airship and save Oracle. Head to the Scarecrow's hideout in Chinatown and go down to the chamber to watch a cutscene.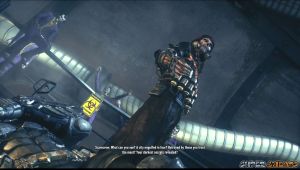
Counter-toxin
After the scene, head to the QCPD lockup. You'll find the militia and thugs you sent there while you're completing some of the missions. Continue inside and talk to Ivy. You now need to head to the Botanical Gardens as instructed by Ivy. Also, Bleake Island will have another threats like airborne quadcopters, a militia watchtower, and explosive devices you haven't disarmed yet.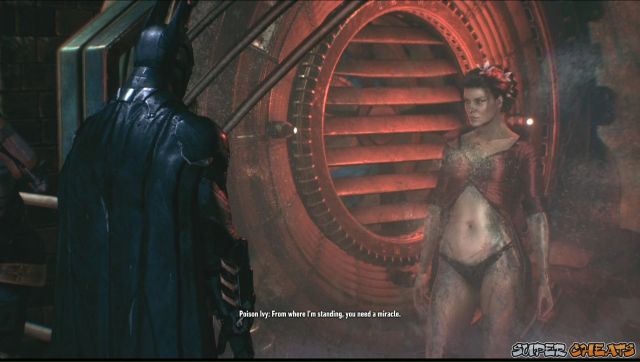
On your way out, Cash wil stop you because of the new tank the militia has deployed. Exit the QCPD on foot and stalk the Cobra drone up close to find a weakness. Once examined, call in the Batmobile and engage the tank. You have to target the exhaust port behind the main turret. Get out of the tank's range and call in the Batmobile. Sneak behind the tank and destroy its rear exhaust to instantly destroy it.
After destroying the Cobra, you have to head to the clocktower facility to get the Batmobile's second upgrade. Follow the marked location and park the Batmobile on the hidden garage to receive the upgrade. Once done, bring Ivy to the Botanical Gardens in Miagani Islands.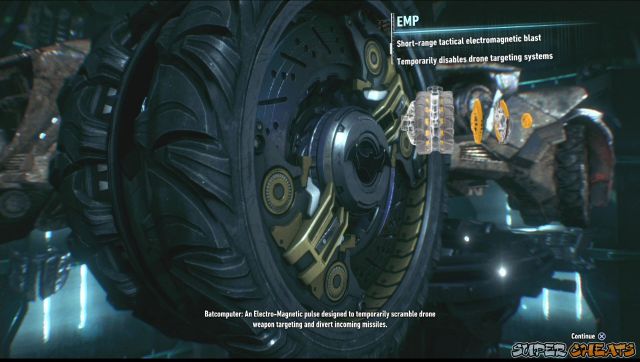
You'll encounter three more Cobra tanks on your way. You have to sneak on them and destroy them all before you can continue. Use the Radar on the lower right hand corner of your screen to know their heading and location. Just sneak on them and when you get detected, use your speed to leave their range.
Once cleared, continue forth to the Botanical Gardens. After the scene, your mission list will be updated, including a new one. (Two-Faced Bandit)
When you're ready to continue with the main story, head to the parking garage of Wayne Tower. Park the Batmobile on the marked spot but you'll have to deal with the drones that breached the area first. After destroying all drones, park on the spot to get the Batmobile's Sonar upgrade. An army of drones will be deployed in the area again.
Use the Sonar pulse to track down the Ancient Root system. Take out the enemy drones as you make your way towards the center of the roots. When you find the center of the root, press and hold your Sonar pulse to wake up the plant. The militia will send a unit to shoot the plant. You have to deal with them to protect the plant. Fortunately, none of them are armed though they have a specialist that can give their allies temporary electric charges outside their armor. Use the Batclaw to short these charges. After eliminating all the guards, the objective will be complete and new intel about your ongoing missions will be available.
Defense Grid
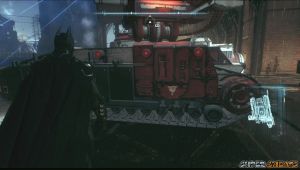
When ready, head back to Bleake Island and go to the movie studios to scout Arkham Knight's forces. Enter the elevator in the Wayne Movie Studios and go to the Quarantine Cells. Interact with the Batcomputer to update your mission objective. Now head to Founders' Island to find the relay drone.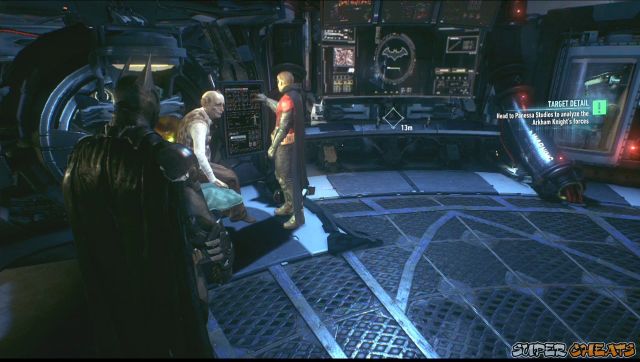
Once you found the drone, glide towards it and land on top of it to get the piece that you can use to upgrade your RHD. Equip your RHD and hack the nearby helicopter drone. Now head to the first radar and destroy it using your Explosive Gel before the drone regains its original function.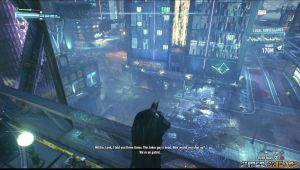
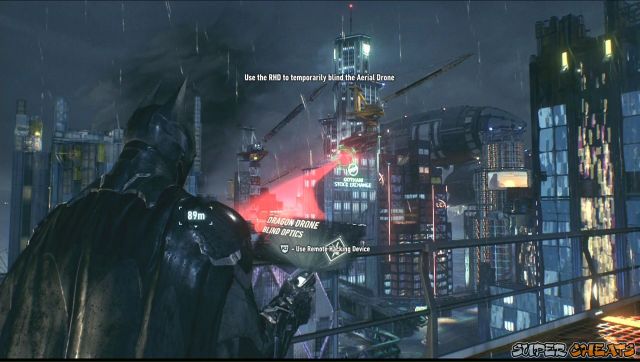
Now head to the next radar on top of Lex Corp. You have to defeat all the guards on the surface first before you can head inside where the radar's console is kept. After defeating all militia guards, rewire the console nearby and open the door downstairs. The room has sentry guns as well. Use your RHD to temporarily blind them. Destroy both of them then destroy the radar controls. Now you have to destroy the long-range missile launcher.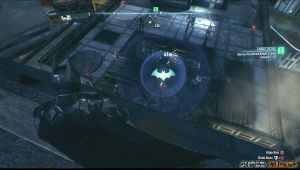
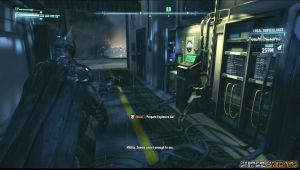
Head there are clear all the guards. You can't destroy the missile launcher as is so you have to lower its shields first from the control room. Enter the room and access the computer. Now you have to remotely control the Batmobile and take out all the cobra tanks standing in your way. You have to carefully sneak around the patrolling Cobras and wait until you get a full lock-on before firing.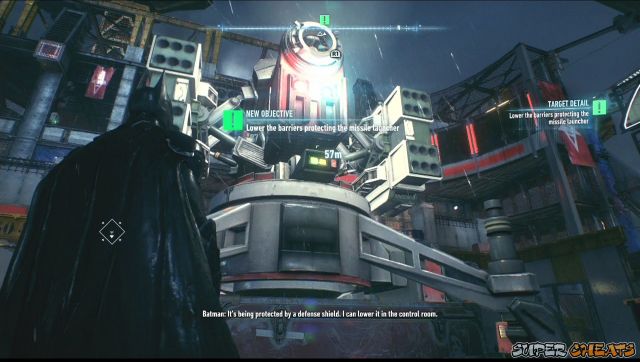
Once you destroyed all Cobra tanks, follow the GPS line to reach a ramp. Use the Power Winch to pull it up. Just in time, Arkham Knight and his strike force will arrive in the control room. Once you're in control, use the Fear Multi-takedown to defeat several targets immediately. After the cutscene, defeat all enemies in the control room afterward. Access the computer again then the control will switch to the Batmobile.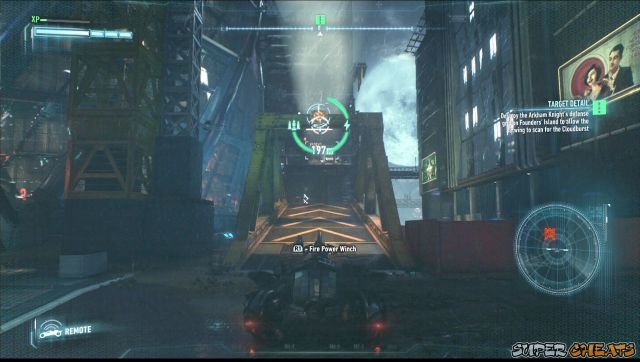
Pull the ramp as far as you can to lift it up. Back up a bit then use your afterburner to gain more speed for the ramp. Once you've reached the ramp, go up and destroy the missile launcher. Take note that the launcher will still fire missiles towards you so use your main and secondary guns to destroy the homing missiles and keep firing at the launcher until it is destroyed. Once done, you're free to call in the Batmobile in the district. New mission intel will become available as well.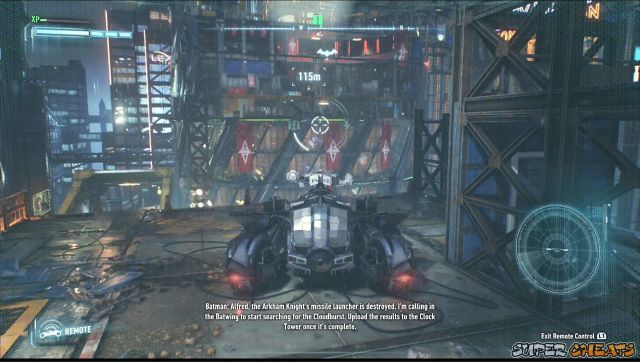
Harley Quinn's Jokers
When you're ready to move on to the story, head to the Clocktower and use the batcomputer. Once the objective is updated, exit the clocktower and head to the movie studio. The entrance is guarded by Harley Quinn's thugs. Eliminate them and attempt to open the elevator.
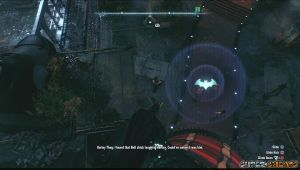
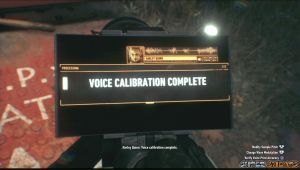
Since Harley changed the voiceprint access, Batman will employ the Voice Synthesizer. You have to manually adjust the modulation and pitch to mimic Harley Quinn's voice. Once completed, verify the accuracy to save the sample. Now open the door using the synthesizer.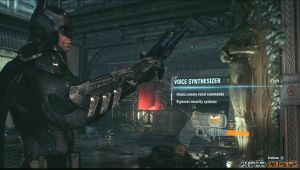
Harley's men will secure the rooftop once more. You have to clear the rooftop once again but this time, you can manipulate Harley's men to go to the direction you want using the synthesizer. You can deliberately lure them to explosive traps then trigger them remotely using the RHD.There's a mini-gunner among the enemies so make sure you use the Disruptor to disable the mini-gun. Like the last time, you have to save the mini-gunner for last since you have to make a series of successful counterattacks to disable him. Once you got rid of the enemies on the roof, enter the elevator.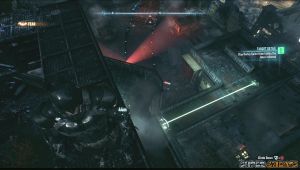
After exiting the elevator, take out the enemy with the riot shield then use the voice synthesizer to open the gate. Join Robin and take out the thugs. After beating them all up, one of the thugs will remain conscious. Get near him and interrogate him.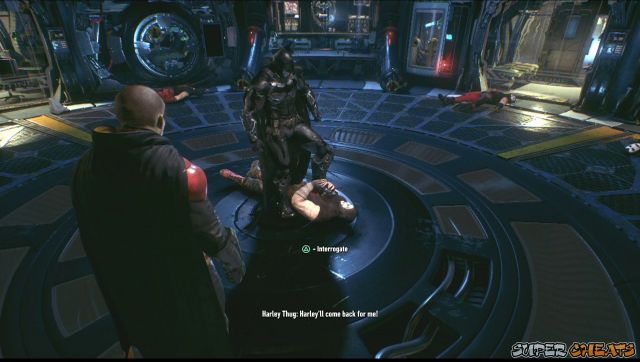
After checking out the batcomputer, you'll learn the locations of the infected inside the movie studio. You have three sets to visit. Robin will check these locations out with you. Walk straight to Stage B first since it's the one unlocked at the moment. Open the door and take out all the thugs. Head to the next door and continue until you get blocked by a mini-gunner. Get to a vantage point and swing behind him. Then, creep up behind the mini-gunner to execute a double-team takedown. Continue to the next room to reach the horror set. Work with Robin to effectively take out opponents and faster. You can also take advantage ofd the dual team takedown to instantly incapacitate mini-gunners. Just sneak behind one and call in Robin to execute it.
After clearing all the goons inside the set, head to the room where Christina Bell is hiding then kick it open. Christina will be clawing off Robin's face so press the Counter button to stop her assault. After knocking her out, leave the set and Robin will take Christina back to the quarantine cell.
Go to Stage A first. Use the voice synthesizer to convince one of the thugs to open the gate for you. Beat them up then continue forth. Open the security gate and "rescue" Jason Todd to trigger a cutscene. After the scene, Robin will arrive.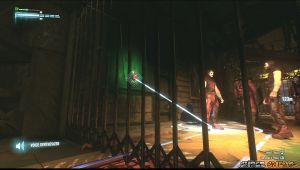
Continue forth and you'll have to fight Albert King. He's no ordinary brute; he hits fast and hard. Avoid him if you see him releasing punches like crazy. What you need to do is to build your combo meter, perform a special dual team attack against him. During the dual team takedown sequence, you have to strike fast and press the counter button to continue the combo. This is the only way to deal heavy damage against him. No need to save him for last; use the abundant enemies to build your meter and execute as many dual team takedowns as needed.
After taking him down, Batman will call Alfred to request for another car upgrade. Finally, head to Stage C to look for Johnny Charisma. There's a mini-gunner guarding the gate so don't go there. Find an opening to a vent and follow it until it leads you to an empty room with a worn wall. Place and explosive gel there, get back to the vent and use the voice synthesizer to order the mini-gunner to check out the wall. Once he's near, detonate it to instantly knock him down.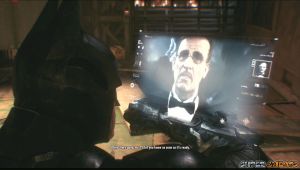
Open the security gate and continue forth. The wall across the main door hides a Riddler Trophy. Ignore it for now and open the next door. Remove the sheet from the body to trigger another cutscene. Robin will regroup with you afterward.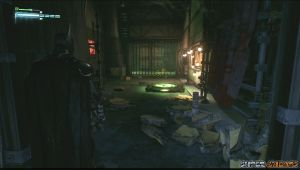
Continue inside Stage C and examine the keypad. After receiving the camera feed from Henry, you have to review the footage to learn the passcode. Concentrate on the cell with Johnny's reflection on the mirror and zoom there. Or just simply enter the code 0539.
Enter the room and approach Johnny. You'll be controlling Robin to disarm the bomb. Make sure that Johnny doesn't see you doing it or he'll blow himself up with you. Move Robin when Johnny/Joker is facing away. After disarming all the bombs, you have to sneak behind Johnny and perform a takedown.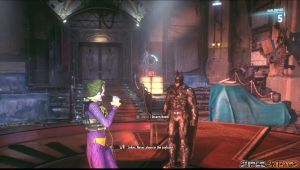

Attempt to leave the stage to receive a call from Henry. Head back to the cells and you'll find Harley Quinn's men gathered behind the locked gate. Find a grate and use the Voice Synthesizer from under the floor and order one of the men to open the gate. Harley will appear, unfoiling your trick but Robin will arrive and trigger a cutscene.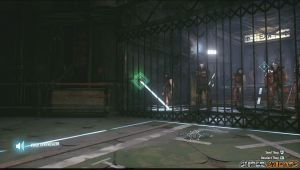

While Harley is having a monologue while walking around Robin, wait for her to walk right in front of the opening on the floor then perform a dual team takedown. Eliminate the remaining thugs.
Pick up Harley Quinn and bring her back to the cells. A cutscene will trigger. After that, head to the cell and enter it. Just look away and again through the window to trigger Joker's appearance. Once you're out, approach the Jason Todd for yet another cutscene from the Joker. After Joker lets you out again, look away and Robin will reappear and call you to enter the cell. Get near him and press the Counter button to shove him inside instead.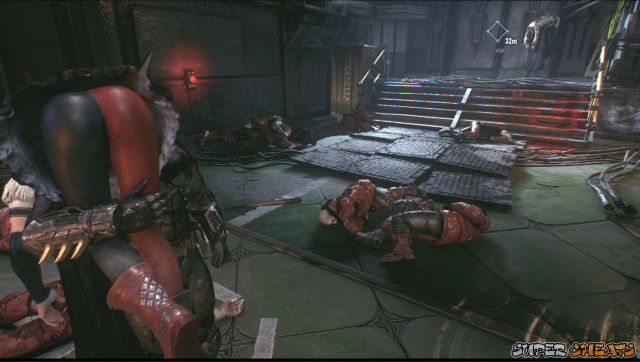

Once done, you'll be able to pick up the new upgrade for your Batmobile. Exit the movie studio and you'll discover that the Arkham Knight has re-established the threat level in all districts, adding more drones, watchtowers, checkpoints, and explosive devices. But first, head to the objective point to pick up the Batmobile's new upgrade. Also, a new mission will be available (Friend in Need). New intels will also be available for Heir to the Cowl and Gunrunner missions.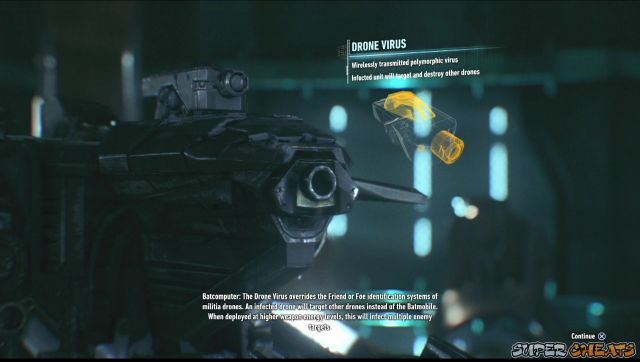
Sea of Fear
When you're ready, head to the source of the seismic activity. After the cutscene, help Poison Ivy repel the militia forces deployed to destroy her. Eliminate the first wave of enemies and the Arkham Knight will send a battalion of Cobra Tanks. Like before, you have to sneak behind these until you get a lock-on and destroy them instantly.
Once clear, go to Poison Ivy's location and talk to her. After the cutscene, you'll have to find Stagg in the airship and find question him about a way to defeat the Cloudburst Tank.

After reaching the airship, defeat the militia guards posted in the destroyed tip of the airship. After clearing them up, you have to manually synthesize his voice print in order to access the locked up doors in the airship.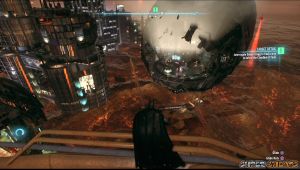
After successfully synthesizing his voice, continue inside the airship. You have to deal the militia inside too before moving forth. Once you cleared the lab, head to Stagg's cage and enter Detective Mode to follow his fingerprint trail. Once you find him under the floor, pull him out to get a Nimbus Cell.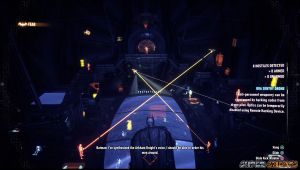
Now you can leave the airship and find a way to repair the Batmobile. Head back to the marked location and press to dive to the toxic cloud. You have to carefully remove the Batmobile's power core and replace one of its cells with the Nimbus. A rioter will attack you so you have to counter it quickly. Now carefully return the power drive back to the Batmobile and wait until Batman crawls inside the Batmobile. Now, head to Founder's Island and trace the root which is located under the Divinity Church.
Since the Batmobile's sonar is can't reach the root's core, you have to head to Port Adams next to find an alternate way to go underground. Defeat the militia drones here to continue with your objective.Ancient Root
Find a ramp and use it to get inside the port yard. More drones are waiting for you inside so take them all out as well. Find the freight elevator and remove the cover using the power winch. Power up the controls by revving your engine.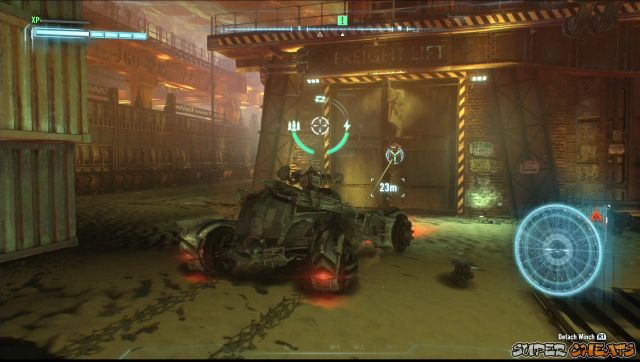
Once you've reached the lower ground, run along the tunnel walls to get past the obstacles. Continue forth until you reach a closed gate. Leave the Batmobile and enter the grate. Go through it and use your RHD to temporarily blind the drone. There's a stationary drone on the right side alcove and a roving one nearby. If you have bought the Disruptor upgrade that will destroy any drones that detects you, it will be useful here as well. Behind the drone in the right is a Riddler Trophy you can pick up easily.
Continue forth, and destroy/blind the roving drone and continue until you see the control room. Grapple on the overhead metal beams and find a way inside the room to open the gate. You'll be remotely controlling the Batmobile. Use it to destroy the drones along the way. Once clear, unlock the second security gate and continue forth.

Lower the cargo ramp on foot and use that as a ramp for the Batmobile to run on. You'll encounter yet another gate. Back up a bit then speed up to run on the tunnel wall past the gate and the broken part of the road. Once you see the cargo loading bay of the tunnel, position the Batmobile on the other end of the ramp. Exit the vehicle and find another control room where you can lock the cargo ramp. Also, on top of that control room is another riddler's trophy.
Now use the cargo ramp to get past the flooded part of the tunnel. Continue along the path and use your sonar blasts to track the root. Upon reaching the core, hold your sonar blast to wake it up.
Cloudburst
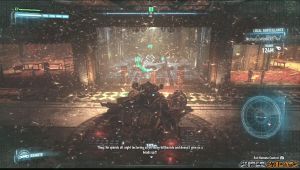
Once the giant tree has been woken up, you have to defend it against an army of drones. Ivy will help you but she can only target enemies in the church's courtyard. Try to bring the fight there but remember to move around to avoid getting surrounded. Once done, you have to face off Arkham Knight and his Cloudburst tank.
The cloudburst tank is surrounded by Cobra Tanks. If you haven't purchased some of the high-tier Batmobile weapon upgrades, it's a good idea to do so now. First, take out the Cobra Tank escorts.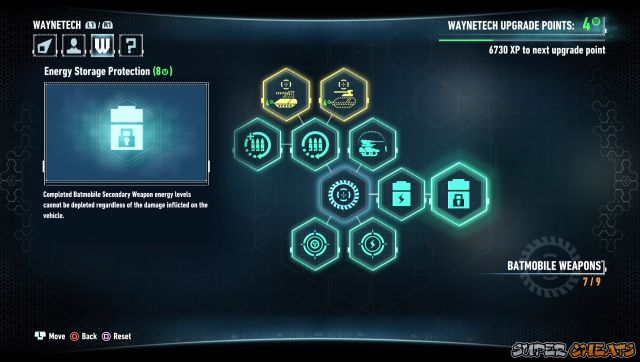 cannot load player config
Next, you have to do a hit-and-run to disable coolants first in the four sides of the tank. Don't get too close or the tank will detect you. Like the cobra tanks, you have to get near and get a clean lock-on to successfully destroy the coolant. Everytime the tank detects you, you have to exit Battle Mode and do your best to lose the tank's detection, even if it means going through tight alleys and corners. Repeat the
process until the tank overheats after destroying all marked targets.
Now the weakpoint of the tank will be revealed. You can go head-to-head against the tank now but you have to strike on the weakpoint in order to deal damage. You also have to keep firing your vulcan cannon to get rid of the homing missiles and you have to be careful of the area damage the tank can cause from its main armament.
After the cutscene and pummeling the Knight, you have to check on Ivy next. Head to her location to investigate. Once the cutscene is over, the city will be cleared of the toxin and more AR Challenges will become available. You also have to head to GCPD to continue with the story. If you have more unfinished missions, new intel will be available for them.
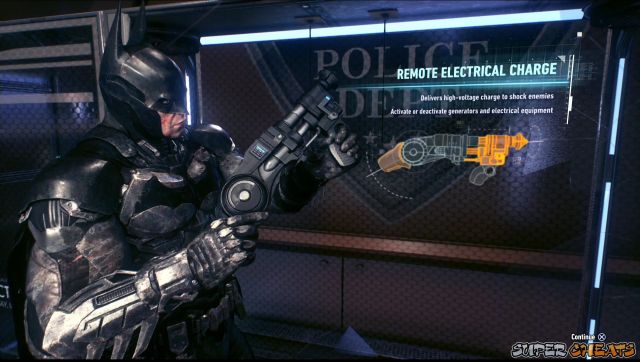
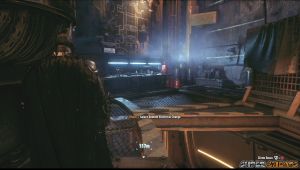
When you're ready, return to GCPD and talk to Sgt McAllister in the Communications room. Next, head to the evidence room to get another gadget: the REC (Remote Electrical Charge) device. Leave GCPD and head to the marked location.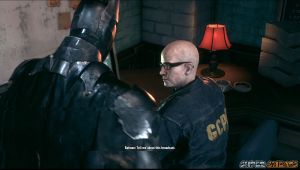
The Shaft
Once you've reached the location, find a manhole nearby and enter it. Use the REC to disable the generator and allow you to get past the flooded corridor. Once you're out of the water, reactivate the generator to lower the gate and allow you to continue forth.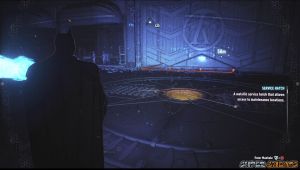
Grapple to the vent and you'll be under the floor with a lot of armed militia. Switch to your voice synthesizer and order one of the militia personnel to open the gate. Switch control to your Batmobile and incapacitate all the guards. Switch to Batman once cleared and rewire the fuse box to open the gate.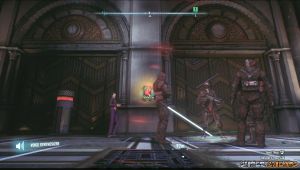
Switch to the Batmobile again and target the weak wall in front. Use Batman again this time and grapple on the metal beam in the middle of the ventilation shaft and swing again to the next ledge to activate the lever and lower the barricade that will allow the Batmobile to get in.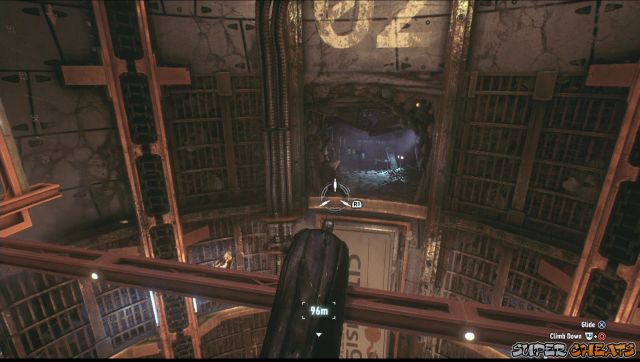
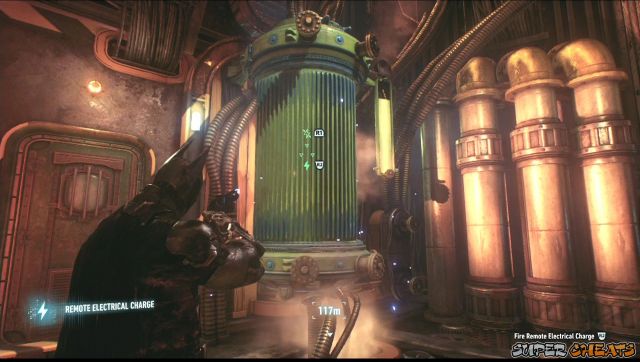
Attach the power winch and slow lower the Batmobile down the wall. Look up and you'll find another damaged wall. Destroy it with a blast. As Batman, grapple in the middle beam again and grapple to the newly opened hole. Turn around and you'll see a Riddler Trophy on the workbench. Equip the REC again and start shooting electrical charges on the generator to power down the fan.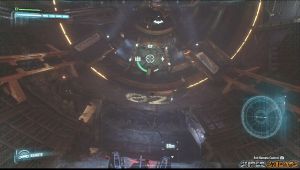
Now enter the Batmobile and lower it further. Shoot the next cracked wall across the shaft and shoot the militia guards. Eject-glide to it and find a vent to the elevator shaft. Grapple to it and stand on top of the unpowered elevator. Use your REC to power it up. Shoot it twice so it goes down two levels. Now blast the cracked wall with your explosive gel.

Two guards with stun sticks are waiting for you. Quickfire your REC (L2 + circle) to temporarily stun them and remove their sticks. Finish them off and pull down the lever to open the gate. You'll find the next generator but it's behind a thick glass wall. Ignore it for now and make your way to the next corridor.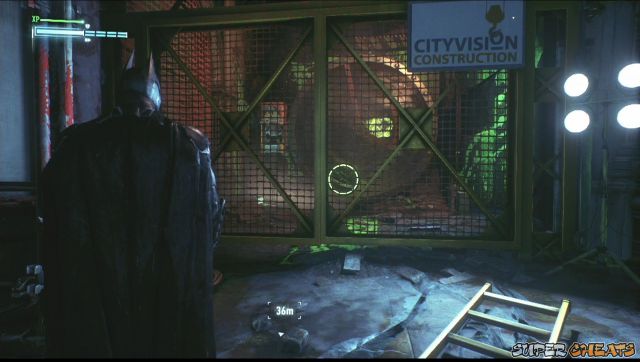
There's another riddler trophy behind the gate. Take note of its location for now then grapple on the next ledge and use your REC to power up the generator and electrocute the militia guards standing on the puddle. Pull the lever down in the end of the corridor then enter the next elevator.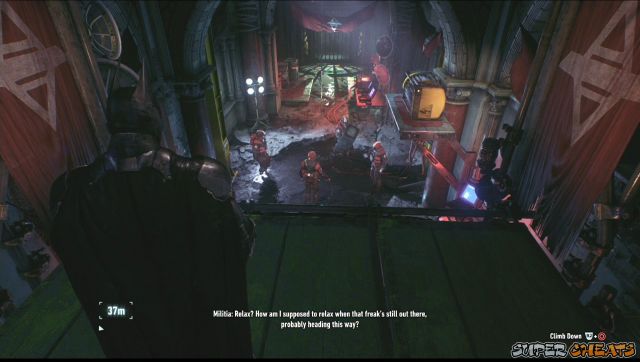
Press R1 while using your REC to make the elevator go up. Blast the next wall to reveal another Riddler Trophy.
Now make the elevator gown as far as it goes. Climb out and enter the alcove beside it then make the elevator go up so you can go down the shaft. Grapple the next ledge and enter the grate. There's a bunch of militias there so before diving in, make the proper preparations like sabotaging the medics' resuscitating packs and the ammo crates. The militia leader is also wearing an explosive vest so make your way behind him and disarm the vest from behind the sheets. You have to engage the remaining militia on hand-to-hand combat.
 cannot load player config
After defeating them, use the fusebox nearby and continue to the shaft again. Drop down to the ground below and enter the opening. This path is guarded by a sentry drone. Use your RHD to temporarily blind it then quickly get on the elevator shaft across it. Grapple on ledge above and you'll reach the next generator. Overload it with REC and you should be able to lower the Batmobile.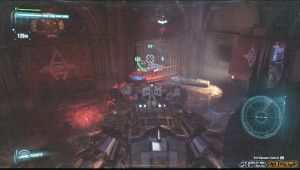

Attach the power winch to any of the four available hooks and pull it to the left so that the drill platform goes down. After reaching the bottom, destroy the cracked wall and destroy the sentry gun in front of the elevator shaft so Batman can go down safely.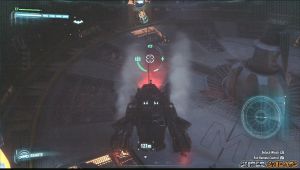

Tunnel Bat
Enter the Batmobile and this time, raise the drilling platform again so that the Batmobile can reach the elevated tunnel. Use the fuse on foot to lower the gate and continue forth in the Batmobile. After a short while, the Arkham Knight will appear with a drilling tank. You don't have any way of facing him head-on so escape further into the tunnels.
You'll eventually reach a tunnel maze. What you need to do is lure the Arkham Knight in the dead-end tunnels with red markers. You need to drive fast and carefully as you go through these tunnels. This is the only way to damage the Knight's vehicle. The Arkham's Knight vehicle doesn't appear on radar so you have to gauge the distance as displayed in your screen. You can also lure him in by shoot at him when you're already facing the tunnel you'll lure him to.cannot load player config
After depleting his tank's HP, Alfred will be able to disable the lock on the door. Head there and use the power winch to remove the ventilation shaft's cover. Get under The Shaft and eject-glide yourself, watching in mute horror as your precious Batmobile gets shredded to pieces.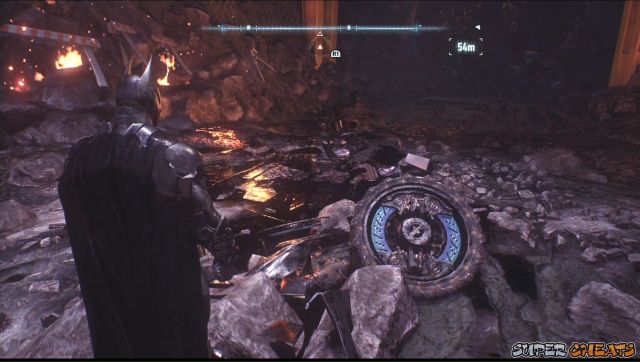
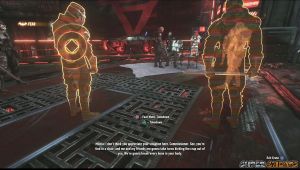
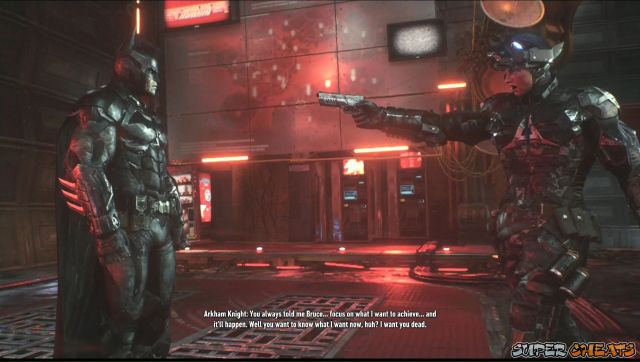
Arkham Knight
Grapple to the next ledge to find another Riddler Trophy across the ledge. Just take note of its location for now then continue forth until you reach Gordon's location. Position yourself under the grate so you can perform an optimal Fear Multi-takedown. Eliminate the other guards to attempt and Gordon to trigger a cutscene.
The Arkham Knight has taken position on a vantage point so you can't grapple out of his view. You have to carefully sneak towards him and take him by surprise.

After catching him, he'll change positions and will call in reinforcements. You have to take them out one by one or by Fear Multi-takedown if needed. There's a riddler trophy under the middle table in the bar area as well.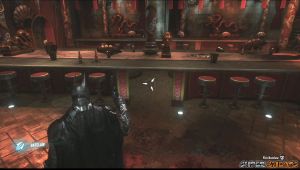

The Arkham Knight will be controlling the drone so you have to sabotage it with your Disruptor. After eliminating the guards, get near the Arkham Knight using the grates on the floor. There's also another free Riddler Trophy located directly under where he is positioned. Grapple on the vantage point where he is at to lower his HP. After that, he'll lock you up. You need to escape the enclosed area or you'll get smothered with gas. There's an opening on the gate itself. Use it to escape.
In the third phase of this battle, you have to face another wave of his militia guards. These guards have optic deflection armor, meaning your Detective Mode won't be able to see them and you have to rely on your eyes. Once done, sneak up to Arkham Knight once again to lower his HP.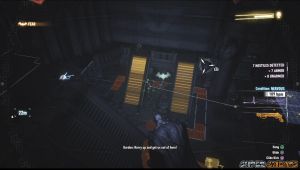

Finally, you'll have to deal with him, his drone, and his sentry guns. Use your RHD to blind and get behind them, just make sure Arkham Knight's not aiming on you. There's also another Riddler Trophy right under his vantage point as well. This is quite easy compared to the other phases of this battle so you shouldn't have problems sneaking past the turrets and the drone.
After getting him off guard, a cutscene will trigger. Once done, free Gordon. Another cutscene will take place and you have to deal with more militia guards once more. After defeating them, join with Gordon and take the elevator. Watch the next cutscenes.
Oracle's Rescue
After the cutscene, you'll be surrounded by tank drones. Don't worry, you can call in the all-new Batmobile and take out these wave of drones.
Once cleared, bring Barbara to the Batmobile and bring her to GCPD. Once done, you have to head to the Clock Tower to stop the militia from completely messing up the server room. Also, more outposts and will become available on each island. Head to the clocktower and get to a vantage point a distance away from the building. You'll find the militia guarding the premises with snipers overlooking from the nearby buildings. Systematically eliminate them as you go, starting from the unguarded snipers.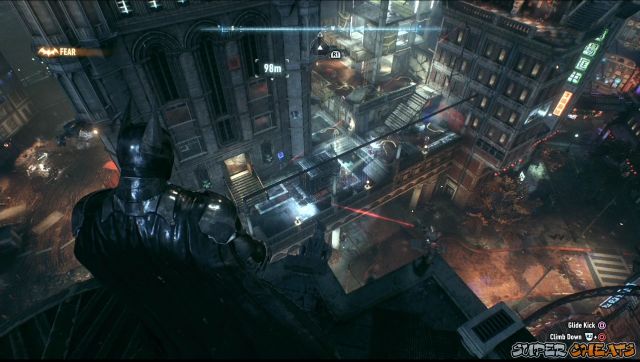
Once you're done cleaning up, access the control console and use it to reconnect Oracle to the mainframe. After that, you'll get a new mission. (Lamb to the Slaughter)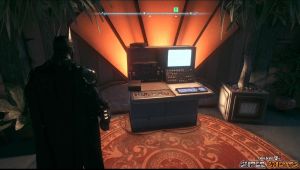

GCPD Assault
Head back to GCPD and talk to Oracle. After that, exit to the garage and you'll find two militia APCs coming right in. You can actually enter your Batmobile and easily take out the enemies easily by running them over or shooting them with the non-lethal rounds. Otherwise, you can just give them the old fashioned beating.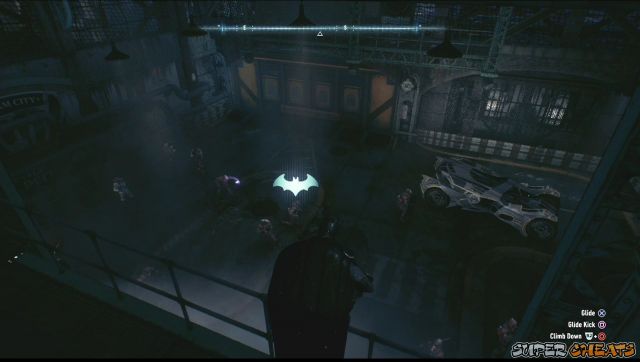
Once cleared, use the Batmobile and use the winch to remove the ventilation fan. Grapple there and make your way out. You'll see a large enemy force surrounding the building. Head to the generator outside but you'll discover that it is destroyed. Make your way to the garage door entrance and squeeze inside. Do it fast or the drones outside will detect and attack you.
On the road leading to the garage, you'll find more militia along the way. Defeat them then power up the generators. Now you can call in your Batmobile and engage the drones outside.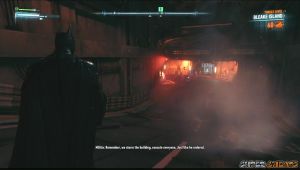
Oracle will be able to help by hijacking some of the drones as well. Shoot the targets that will be highlighted to trigger explosions and EMP blasts. Later on, Cobra drones will join the battle. Prioritize them and Mamba missile launchers to give you much needed breathing space.
After destroying all drones, Scarecrow's militia will drop foot soldiers on the rooftop. Head there and engage them to battle. You can use Oracle-assisted environment takedowns but it's better if you'll be able to use them against hardened targets like Brutes. After defeating the first wave, another wave of militia soldiers will arrive, including two brutes equipped with different weapons. Use Oracle's assisted takedowns as well and take note that your REC can give you much needed space by stunning enemies for a few seconds.
After getting rid of the threats in GCPD, you have to go to the movie studio next. Also, all the remaining explosive devices and outposts will become available in all islands in the city.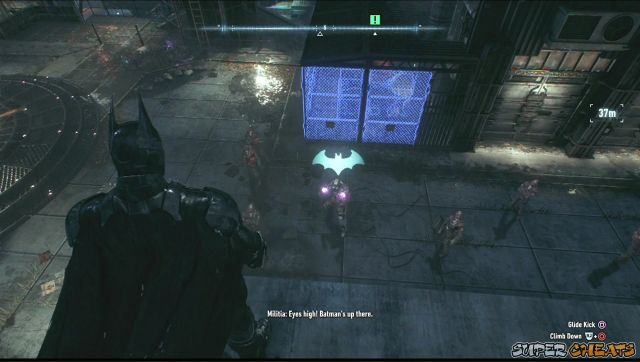
The Dark Knight's Fall
Once you're ready, head to the movie studio. Use the elevator from the rooftop and check up the quaratine cell. After Joker stops his monologue, Scarecrow will call you. Leave the building using the elevator and head to the next location afterward.
Enter the building and surrender your utility belt and gadgets. Enter the back of the truck next. After the cutscene, climb over the fence, check out the doors, and pay respects to the bodies on the ground. You'll have to beat up the Jokers afterward. Finish him off and continue with the cutscene.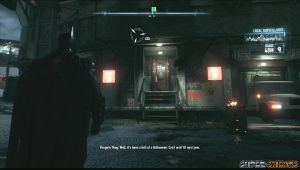

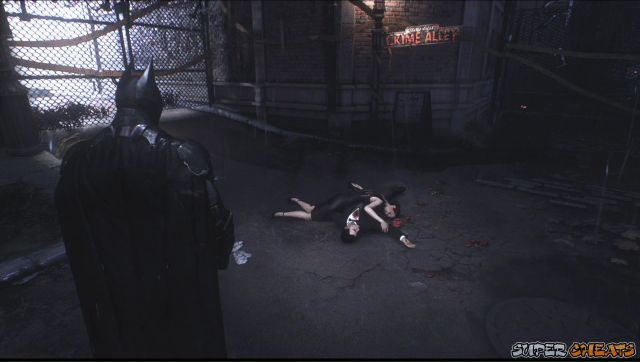
Now you have to control Joker in the (Joker)mobile(?) and kill all enemies. Once you've built enough energy, unleash your barrage of missiles to kill everyone in the room. Leave the car and kill everyone you meet along the way. Continue forth until you reach the last door.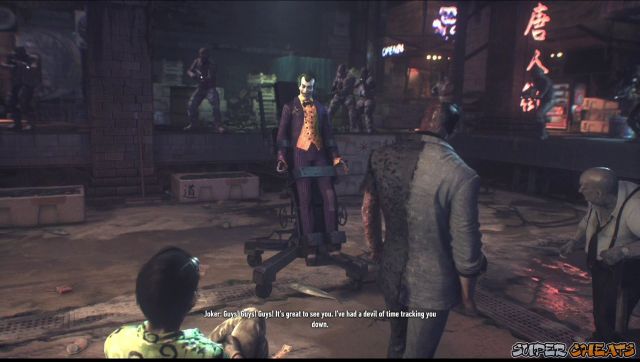
After several cutscenes, you'll be in control of the Joker again. Activate the flashlight and continue along the corridor. Continue moving along until you reach a chapel. Talk to Harley and turn around to find a new doorway. Blast your way through and keep destroying the items in the enclosed room to continue.

Once you reached a yard, keep destroying the batman statues until the "real" batman kicks you down. Destroy the wall to reveal the light, then pull the exit lever in the end of the walkway. Once you've gained control of the Batman, pummel Joker and perform a takedown to force him to the cage. Land a lot of strikes on him to kick him inside and seal him completely.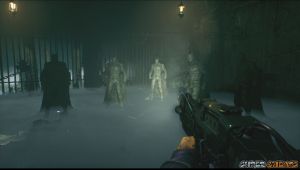

After more cutscenes, the story mission will be complete. Scarecrow will be delivered to the GCPD. To activate the Knightfall protocol, you have to capture all of Gotham's most wanted. The longest and most daunting task to finish is Riddler's since he has a lot of trophies to collect and riddles to solve.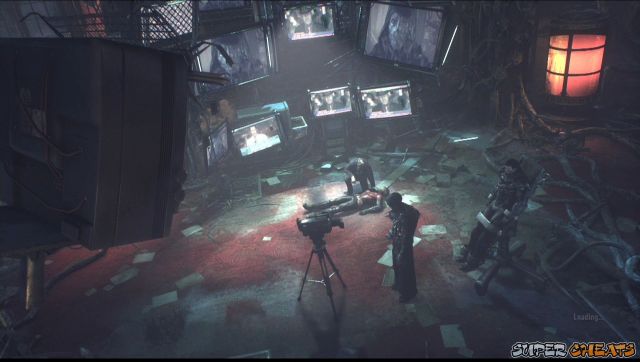
Knightfall
After completing all Most Wanted Missions, the Knightfall Protocol will be activated. Head to the rooftop of GCPD and press X to start the cutscenes.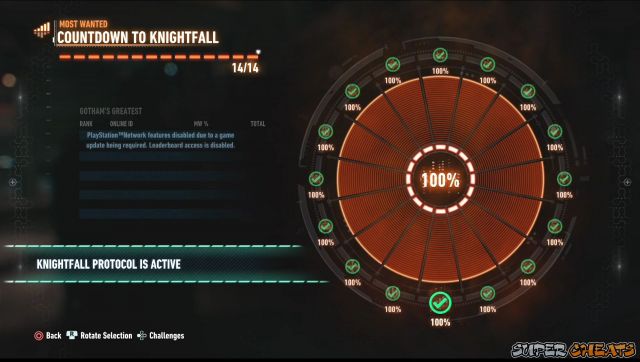
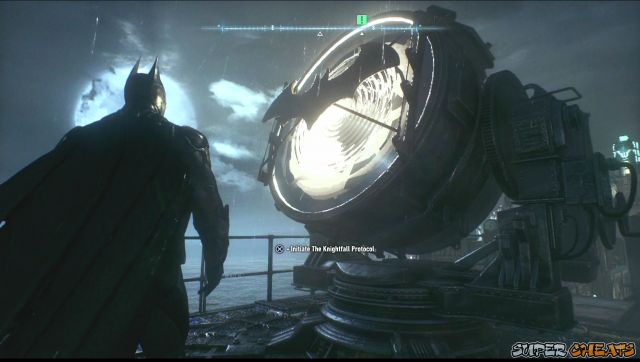
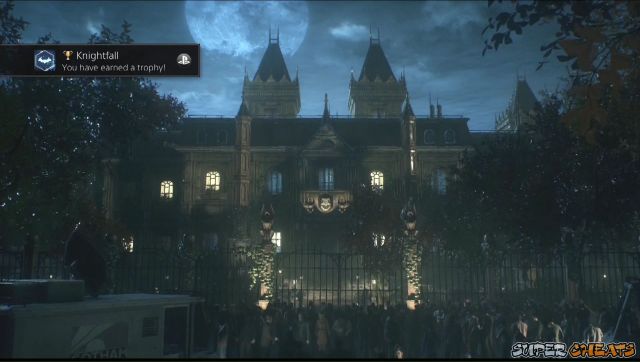
The Line of Duty
Locate and rescue the missing members of Station 17 Fire Crew. The other firefighters aren't marked in the map. You can try finding them by going up in vantage points while in detective mode. Look for a close group of people surrounding a struggling victim. Thugs who kidnapped the fire crew can be easily identified this way. You can also listen to the radio chatter either by the police choppers or the thugs themselves.
Bleake Island- This is the very first firefighter you'll rescue once the mission becomes available. Follow the marker which will lead you to Panessa Studios. The firema is inside the building under a crane. You can use your grappling hook to reach that crane and dive attack the thugs inside from the rooftop glass. Defeat them all and free the fireman.
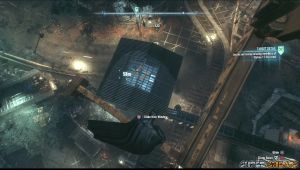
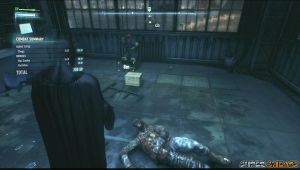
- This firefighter is located in the northwest corner of Chinatown, in the back alley.
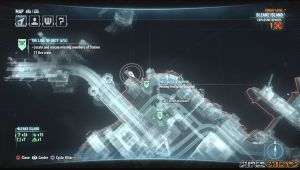
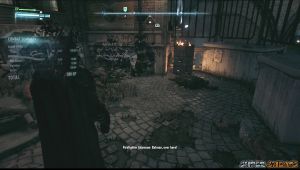
- This firefighter is located in Chinatown, at the back of the building NW of GCPD.
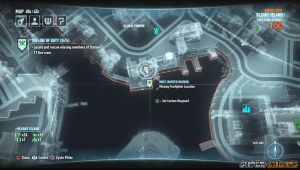
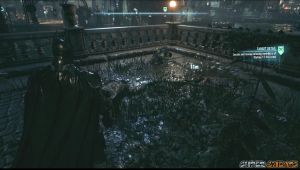
- This firefighter is located in Chinatown, in the middle of the district.

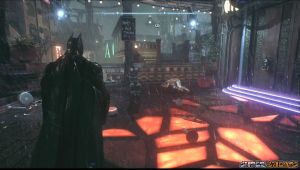
- This one is located in the NE corner backyard of the Falcone Shipping Antenna.
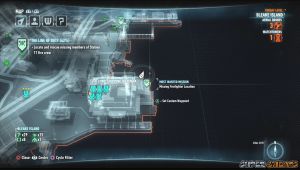
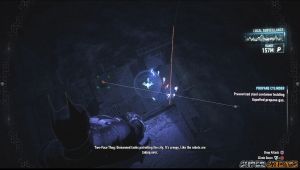
- This fireman is located on top of the crane with some armed guards.
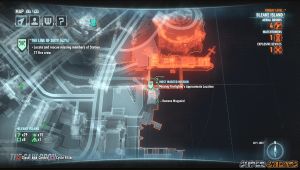
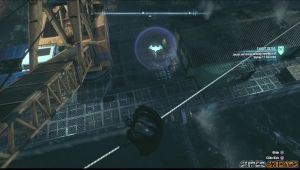
Miagani Island- You'll find him under the bridge connecting Miagani Island and Bleake Island. (Warning: These guys are armed)
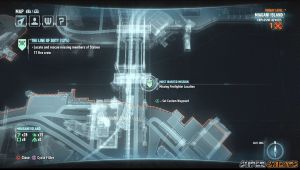
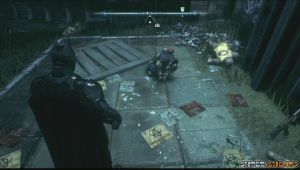
- He is located near Grand Avenue, on upper ledges of the Gotham Herald building. You need to get to an vantage point in a right angle to spot them since structure is covering them.
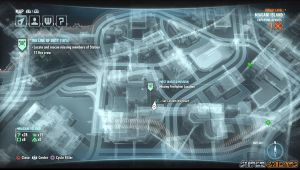
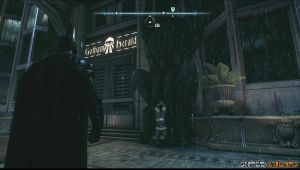
- Located in the Grand Avenue train station. He's surrounded by turrets. There's no shortcut or vent you can hide to take out the thugs one by one. You need to fight on foot but on the turret's blind side. None of them have any weapon so as long as you stay out of the turrets' range, you'll be fine. Also, you can use smoke pellets to disorient the guards as you disable some of the turrets, especially the middle ones. This is a lot easier if you have the RHD upgrade that will allow you to temporarily disable the optics of an auto-turret, giving you enough time to sneak behind and destroy it.
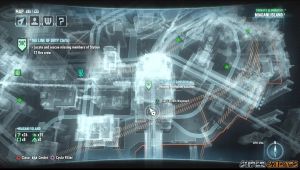
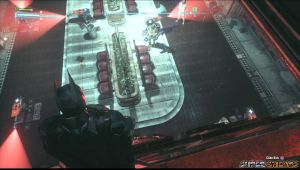
- This firefighter is located in the SE corner of the Wayne Tower.
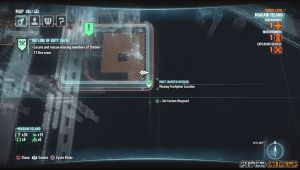
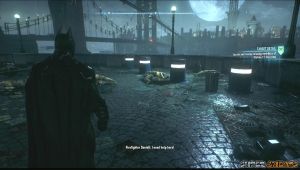
Founders' Island- Located inside the building in the middle of Port Adams.
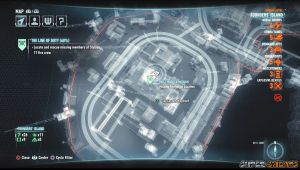
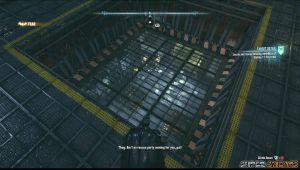
- Urbarail Station in Ryker Heights. There are three brutes in the area as well a weapon cache where they'll get their weapons from. Disable their weapons first with the Disruptor before diving in.
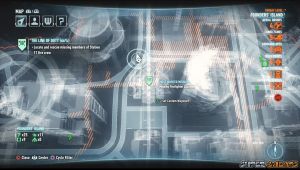
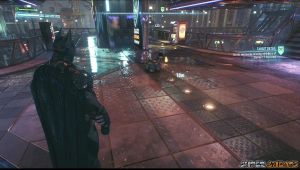
- This firefighter is found on the elevated walkway NW of the Wayne International Plaza. (South of the airships) There's also a weapon cache nearby. Consider sabotaging it first before engaging the thugs.
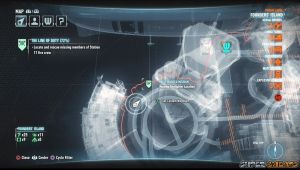
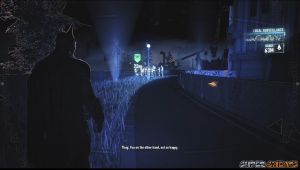
- Found in the lighthouse NE of the airships. Detective Mode is jammed in this area and there's also a sniper in the lighthouse. Take out the sniper first then eliminate the thugs.

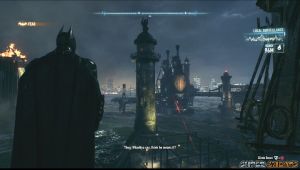
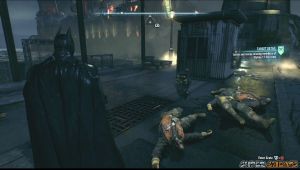
- This last fireman is the hardest to find. First, you have to take the lower road find a Killinger Dept Store establishment. In front of it is a wall that you can pull using the Power Winch. Refer to the map below to know the exact location of the wall.
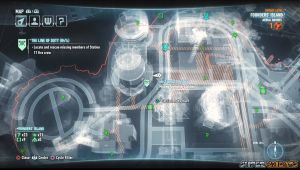
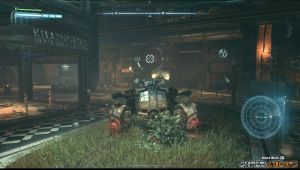
Get into a vantage point and sabotage the weapons of the two armed thugs, and their weapon crate. If you have upgraded your Fear Multi-takedown skill, you'll be able to take out at least five of them immediately. If possible, try to target one of the guys with the riot shields since you can easily take them out and reduce your problems later.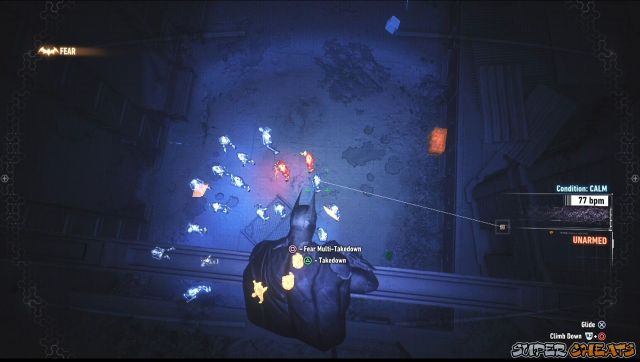
After rescuing the last firefighter available, you have to rescue their chief. His location will be marked in the map. Head to Cityvision Construction site. The area is filled with thugs but there are a lot of options and objects for you to play with. Once you took out all the thugs, find the Chief and free him. Next, you have to drive the chief to GCPD to close the case and complete the mission.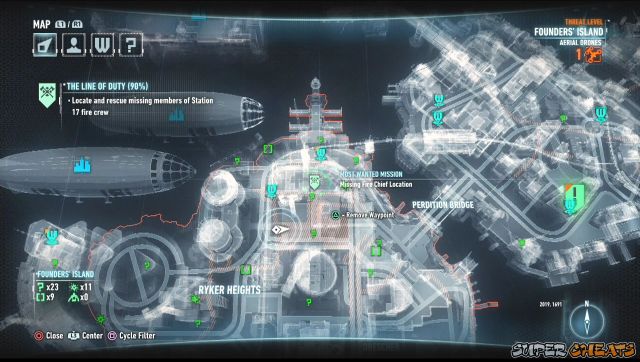
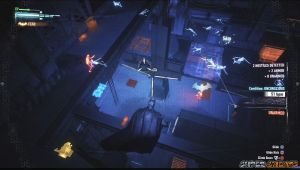

The Perfect Crime
- This is the first victim you'll find after getting the mission. Head to Merchant Bridge and examine the body. After analyzing the blood of the victim, you have to use the Deep Tissue Scanner. Scan the victim's skin first then press and hold X to get it as evidence. Next, change the Scan Level to “Muscle” and check the victim's small intestine to find a ring. Scan it again.

Finally, change the Scan level to “Bone” and check the victim's left hip to find the victim's hip replacement. This will complete the crime scene. The next part of this mission will become available once you unlock the next district of Gotham.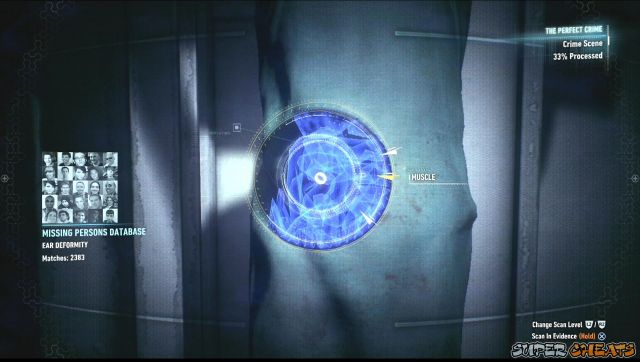
- One of the bodies is located on top of the Gotham Herald, on the lower rooftop below the tower. Like before, you have to use the Deep Tissue Scanner to find notable markings on the body.
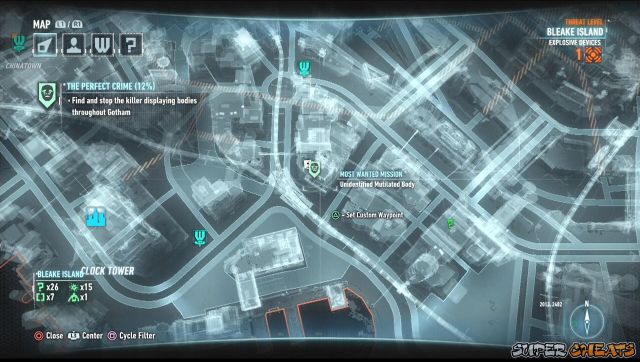
- Skin level – Scar issue on the left arm
- Muscle – pacemaker remains on the left chest
- Bone - Bone deformation on left knee.
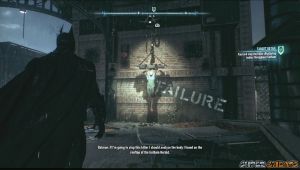
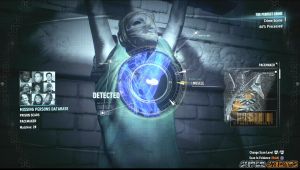
- This body is located on the rooftop the Heavenly building in Miagani Island. Use the Deep Tissue Scanner on the indicated portions below of the victim's body.
- Skin – Birthmark on the chest
- Muscle – Bullet on the right bicep
- Bone – Missing toes on the left foot.
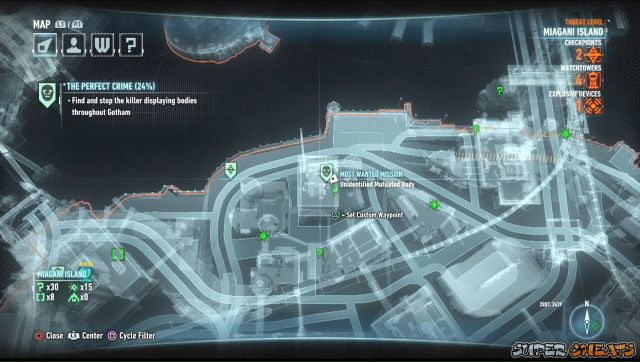
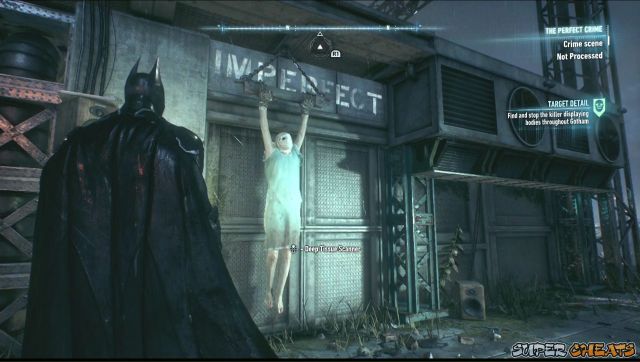
- The next intel will become available after helping Ivy grow her plant to help neutralize Scarecrow's toxin. It's located on top of a small building NW of the orphanage, right under the railway. Scan the following:
- Skin – Bite mark scar on the left side of the victim
- Muscle – False right eye prosthetic
- Bone – Fractured right arm.

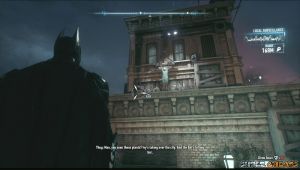
- This body is located in the lower streets a bit to the SE of Stagg Airship Beta. Scan the following:
- Skin – Chemical burn on the left thigh
- Muscle – Voice box on the throat
- Bone – Six fingers on her left hand
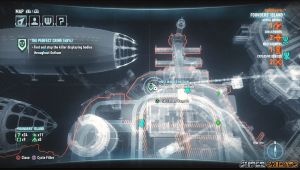
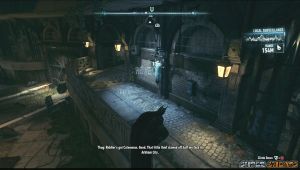
- This corpse is found on the wall beside the ramp, near the divinity church. Scan the following parts to get the clues needed to identify the victim.
- Skin – tattoo removal wound on the right thigh
- Muscle – Missing kidney to the right
- Head – Tantalum plate on the victim's skull.
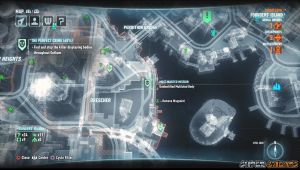
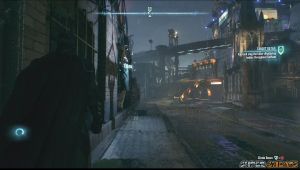
After investigating the last victim, Alfred will be able to give you the location of the suspect. Head to the Pretty Dolls Salon marked in your map. Enter the Salon. You'll also find a Riddler Trophy inside. You can access it by entering the floor grate and blasting away the cracked wall.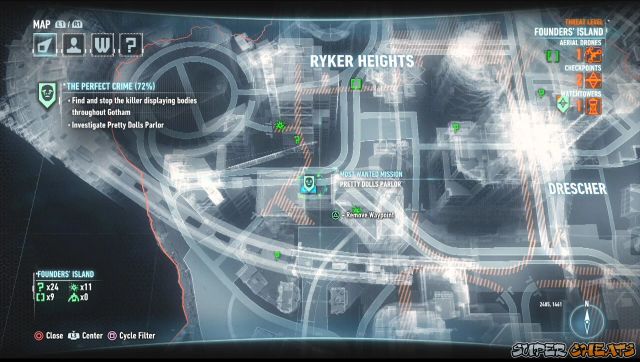
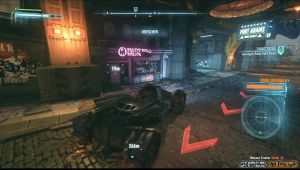

Backtrack and enter the main door to the operating theater. Continue forth and you'll find the weirdo in the middle of operation. Approach him to trigger a cutscene. His minions are immune to pain so you have to make them stay down by performing takedowns and environment takedowns. Use normal combo takedowns for the first few minions. Once Pyg calls in all his minions, he'll stay in the operating table. Don't bother approaching him since he'll just run around the corner. You have to eliminate all his minions. You also have to look out for the cleavers he'll throw. You can deflect the two and catch and throw back the third to stun him. It will be hard to perform a combo takedown with the last minion so you'll have to use environment takedown against him. Finally, approach Pyg and perform a takedown on his operating table.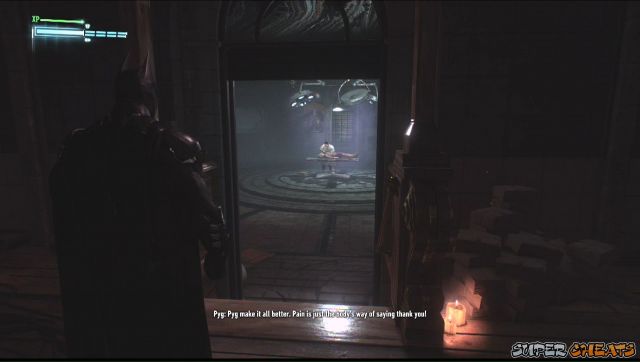
After knocking out Pyg, destroy the electric box nearby to lower the cages containing civilians. Talk to them then pick up Pyg to load him up in the Batmobile. Drive all the way back to GCPD to lock this sick b*stard up and close the case.
Riddler's Revenge
This is probably the longest and most tedious missions in the game. This involves several mini-missions where you complete various challenges and puzzles by the Riddler in order to win the keys to disarm Catwoman's explosive necklace.- Head to the Cauldron to track Riddler's last known location. You have to enter the garage with the Batmobile. Remove the blockade and you'll be in Riddler's racetrack. You have to complete three laps before the timer expires.
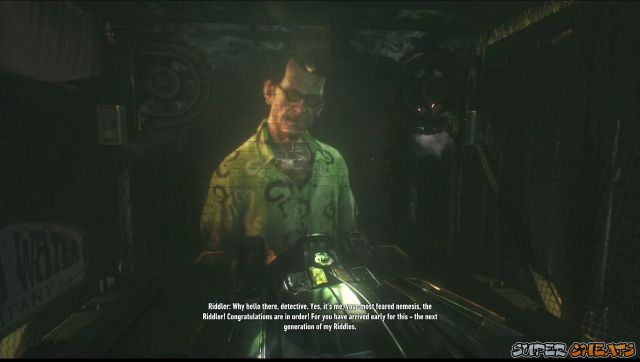
In addition to the time attack mode, you also have to press Circle to deactivate/reactivate Riddler's blockades. Since you have to manually activate/deactivate them, you may take a few tries to remember all the moving blockades to avoid getting caught if you close it or forgot to bring reactivate the floor.
Also, the obstacles will change after every lap, making it quite difficult to remember them all. The timer resets after you reach the lap so concentrate on not making too many mistakes and you'll be able to clear this course in no time. - Once you've reached Magani Island during the story mission where you have to find the access point used by the militia to lock down Mercy Bridge, wait until Riddler calls out for you. Head to the abandoned orphanage to meet with the Riddler. Continue inside and you'll find Catwoman tied up on a seat. Rescue her and you'll have to team up against Riddler's army of robots. You can execute tandem combos and takedowns and you can also switch characters.
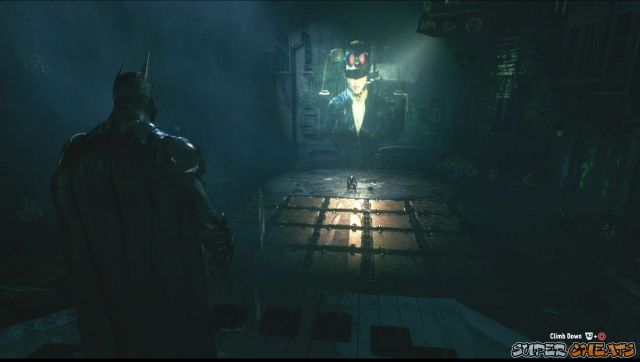
Riddler will reveal that you have to clear his tasks in order to remove the explosive necklace Riddler placed on her. After finishing up the robots, leave the orphanage. - After leaving the orphanage, continue to the Riddler's designated trial location in Blake Island. The Batmobile is still required for this challenge.
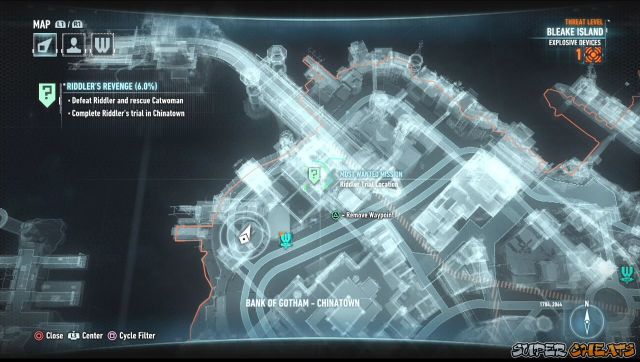
Once inside, drive to the wooden ramp with the small green pressure pad. Disembark, have Batman stand on that pad then remote control the Batmobile. Place the vehicle in the back of the tilting wooden plank, then press circle to activate the small green bar to block it underneath.
Make the Batmobile go up the ramp, activate the green floor, move to the center platform, then activate the green floor. Fall down in the next ramp, and tilt it so you can use it as ramp. Press circle use to lodge the red bar under the ramp then floor it while using afterburners. Now while the Batmobile is in mid-air, press circle again to activate the green floor. After successfully landing on the next ledge, move around and find a spot where you can use the power winch.cannot load player config
Switch control to Batman and have him stand on the green pressure pad in front of the bulbs. From here, you can switch to Catwoman and have her open the cabinet containing the correct key. The lighted bulbs in front of Batman represents the layout of the cabinets in the orphanage. The correct cabinet is the one in front of the Numeracy 101 door, in the corner. After selecting the correct key, the door will turn green.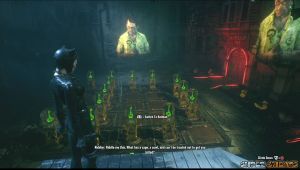
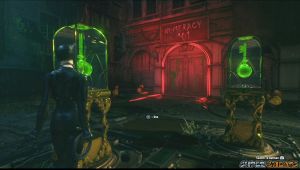
- Now you have to head back to the orphanage. As soon as you get in, the Riddler will have another puzzle for you. You need to use your batarang to arrange the floor pieces to a question mark. Notice the mirror outer ring? Step back a bit until the green light above can be seen as the “dot” and complete the question mark, as seen in the image below.
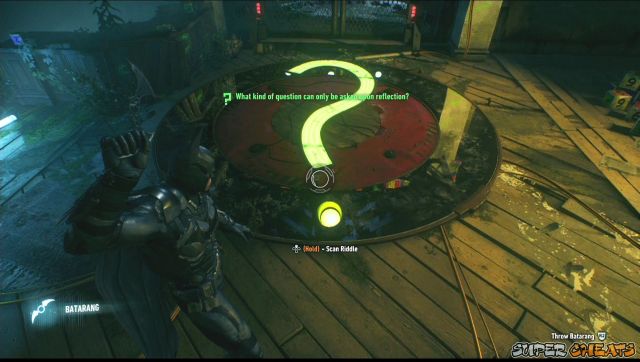
- Meet up with Catwoman and head to the green door. (Numeracy 101) Have Batman and Catwoman step on the pressure plates. There will be flashing numbers and you have to hit the lit question marks in the correct order to complete the puzzle. While using Batman, use your Batarang to hit the question marks in this sequence: 31452. Switch to Catwoman and have her hit the question marks in this order: 13524. After solving the puzzle, you have to defeat the Riddler bots. Do so and you'll get another collar key.
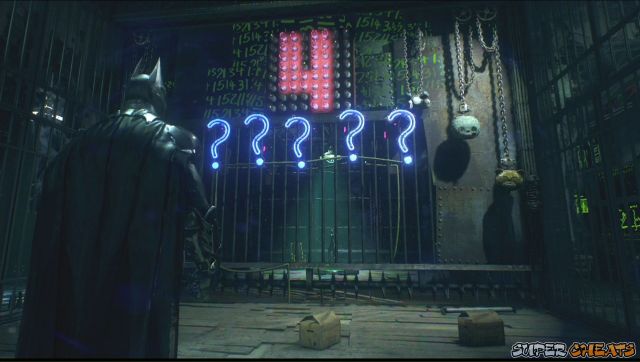
- The next trial is located under the Elliott Memorial Hospital. You need the Batmobile for this so you'll only be able to do this once you lowered the bridge to this island. This is another race where cornering and drifting is the key to win. Don't worry about getting crushed once in the while during the course; as long as you drive carefully and drift, you'll be able to earn bonus time as well.
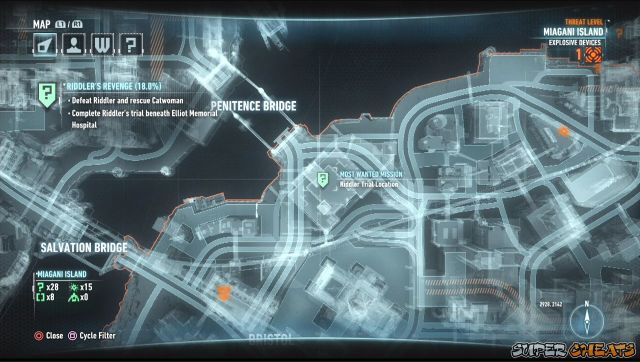
After completing the three laps, step on the pressure pad at the start of the course to reveal the next key. Take note of the location and switch to Catwoman to open the correct cabinet. The Crushinator AR Challenge will be also unlocked after completing this objective.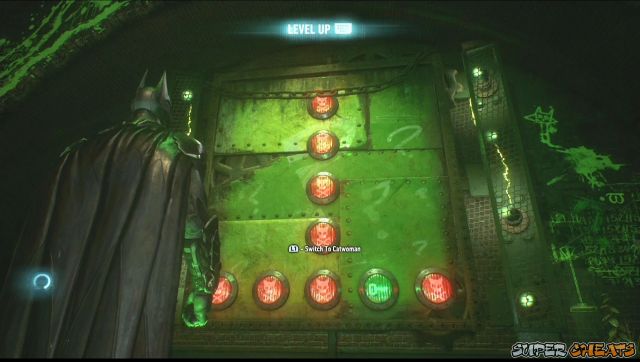
- Head to Kingston with the Batmobile again. Enter the garage and wait for the elevator to take you to yet another underground cavern. Once you see the large green pressure pad on the wall, back the Batmobile a bit, floor it, then eject yourself so you can glide towards the green button. This will open yet another one across the sewer. Like before, you also need to reach it by gliding.
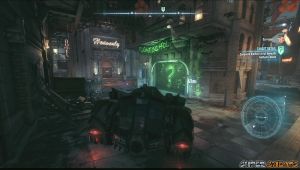

After tapping the button, you can go back to the Batmobile and eject-glide yourself again. This time, you have to go through the tube with spinning blades. It's okay to touch the walls then glide again until you reach the last pressure pad on the wall. Now step on the pressure pad near the elevator to reveal the next key. Switch to Catwoman and select the correct cabinet.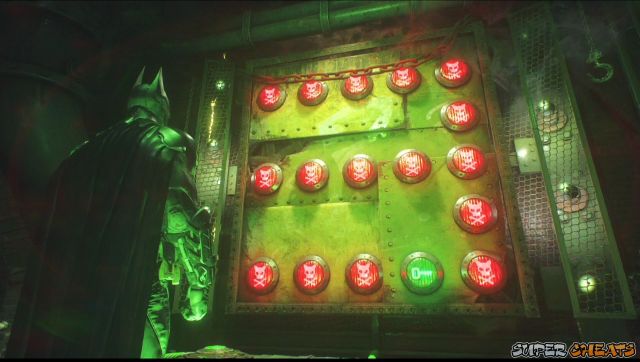
- Go back to the Orphanage and join with Catwoman. Now head to the Intro to Physics door. Climb up the ledge and have Batman stand on the first pad to the left. Switch to Catwoman and place her on the second pad. Now hit the dot on the question mark on the wall to release the charge and let it travel on the tube. Once the charge travels, you have to quickly change positions to modify the positions of the tubes so the charge can pass through.
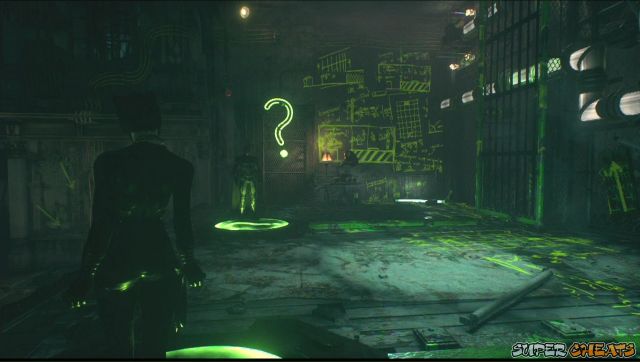
Take note that even if the camera view changes, you're free to move around and switch between your characters. To make it easier, you can follow the instructions below:
1. After charge travels past the lower first tube, move Batman to (pad) 3. (Be careful not to step on Pad 2)
2. After charge travels past the lower second, move Catwoman to 3
3. After charge travels past the upper third tube, move Batman to 2
4. After charge travels past the lower third tube, move Catwoman to 1
5. After charge travels past the upper second tube, move Batman to 1
After completing this, the cabinet will be unlocked. Have anyone step on the green pad and battle the Riddler bots. Only Catwoman can damage red bots while Batman can take care of the blue ones. Defeat them all and collect the key. - Head to the next trial location. The entrance is located on the lower road. To start off, fire the winch on the overhead bar then have the Batmobile go on reverse towards the hole. The winch will hold the Batmobile on the wall. Move the Batmobile to the right so that the metal ring inside the hole moves and until the spot that says “reserved” is placed underneath the car.
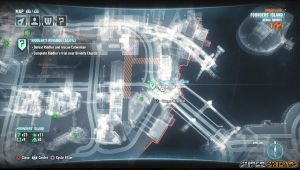

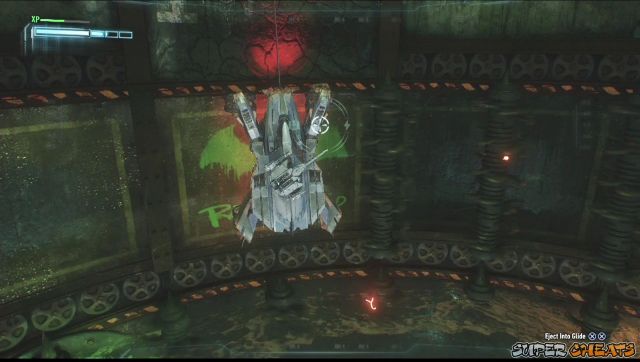
Now eject-glide yourself to reach the opened hole with the pressure switch. Step on it then return to the Batmobile. Pull it up and head to the second overhead winch. Attach your power winch there and lower the Batmobile again to the second ring this time. Move again to the left to reach the “reserved” spot.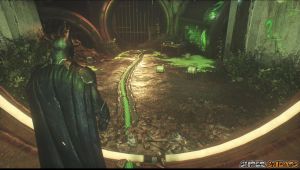
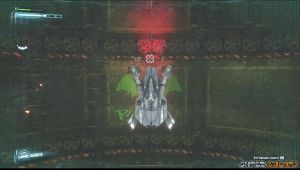
Eject-glide to the next hole and blast it open with an explosive gel. Run through the electrified floor and step on the pressure switch. Blue riddler bots will appear. Take them all out then return to the Batmobile.
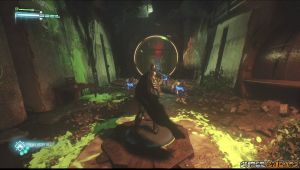
Pull it up then lower the car again using the #1 ledge. Go down the second ring and move it to the right until the “reserved” spot in the second is rested underneath the car. This will make a clear path when you lower the car later from ledge #3 all the way to the third ring.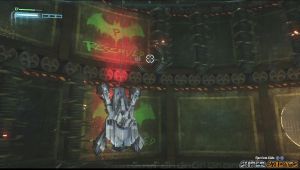
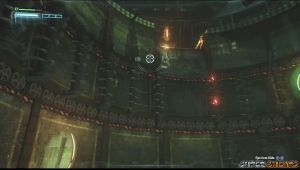
Pull up then lower the Batmobile in the third and last ledge. Go down to the bottom ring and move it to the right until you park in the third “reserved” spot. Eject-glide to the next hole and step on the pressure pad. On your way out, two sentry guns will be deployed. Remote control the Batmobile and pull it up. Use it to snipe the sentry guns and clear your path.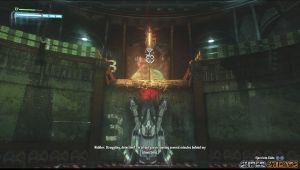
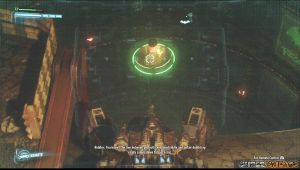
Now jump on the central platform in the middle of the well where the last pressure pad is located. The key's location is displayed overhead. Switch to Catwoman and select the correct cabinet to get the key. Now switch to Batman and head back to the orphanage to regroup with Catwoman.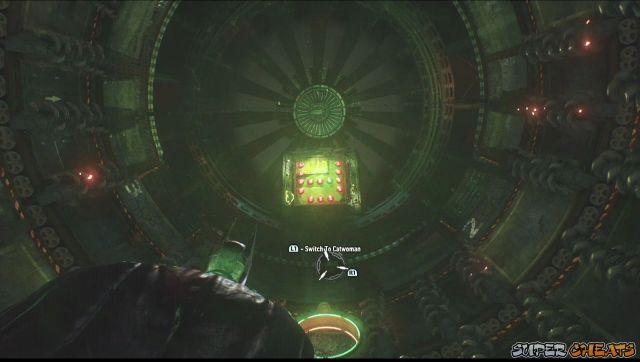
- After regrouping with Catwoman, head to the Advanced Deathtraps door. Have Batman stand on the pressure plate in the corner of the room then switch to Catwoman. Press R1 for her to claw her way on the ceiling and make her way to the next room. Have her step on the pressure plate in that room too.
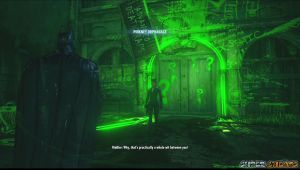
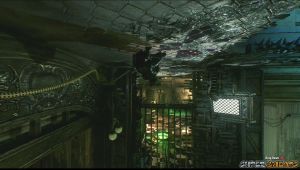
Now the floors will be electrified. Now take a lot ahead, in the large question mark symbol. The bulb lighting up in the sign designates which floor is not electrified. The solution in Batman's side of the room is found in the symbol in Catwoman's room and vice versa. You have to switch controls between characters whenever they step in the safe floor panels so that the other bulbs lights up.
After the two of them reaches the floor pressure pads, they'll have to fight red and blue riddler bots. Like before, only Catwoman can damage red bots while Batman can take care of blue ones. Get the key afterward.
- Riddler's next trial is located under the Ranelagh Ferry Station. This is the hardest track so far. The first lap is easy, the second lap is a bit harder and finally, the last lap is hell since you can't control any of the obstacles. Each lap, a smaller time limit will be given to you so you can't afford to make anything more than one or two mistakes in the last lap. There's no quick way to win this aside from practice and repeat as much as you needed to memorize the deathtraps. Upon clearing the track, step on the pressure pad to reveal the correct key. Switch to Catwoman and select the correct key.
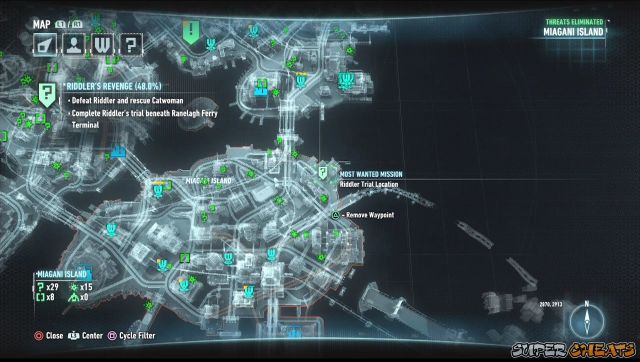
- One important note in Riddler's final exam is that you need the Remote Electrical Charge device that you'll get automatically in the story. Head back to the Orphanage for the final Riddler test once you have it.
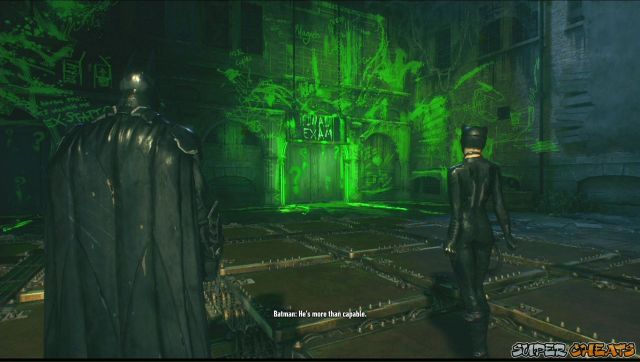
Once you have the REC, enter the final exam door. Switch to Catwoman and have her crawl on the ceiling. Let her drop down the puzzle area next. See that beam of light? You need to manipulate the blocks so that the block underneath it is removed. Take a look at the surrounding generator. Using your REC will make them go forward or back.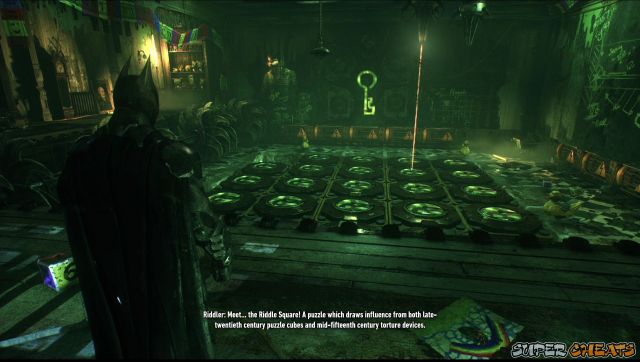
Have Catwoman stand on the block that you don't want to move and continue manipulating the blocks with your REC to get the necessary block out of the way. There are several ways to approach this and this phase of the test is quite easy enough. After solving the first phase, giant sawblades will start spinning. Just have Catwoman evade between the gaps.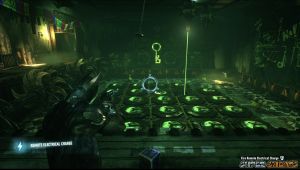
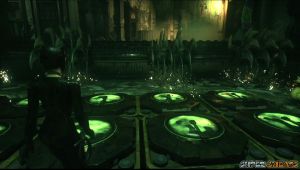
The second phase will start, now with the two beams of light on different locations. After solving it, the sawblades will move again. You have to mind the gaps since the sawblades will change their positions for every movement.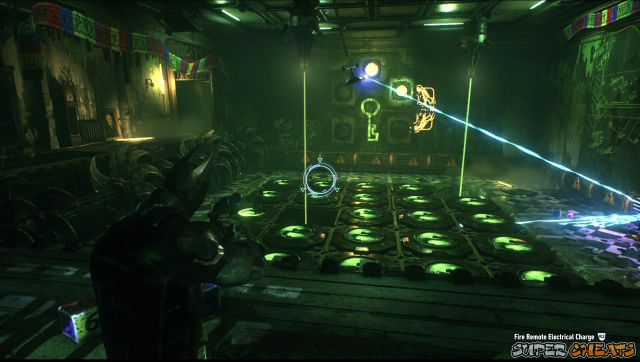
In the third phase, you have to deal with two more lights. This should be a bit easier now since you should be able to get hang of how the puzzle works in the first two attempts. After solving the puzzle, there's no need to dodge the sawblades. Head back to the side of the room where you dropped off so you can crawl on the ceiling. Once done, return to the entrance and get the keys.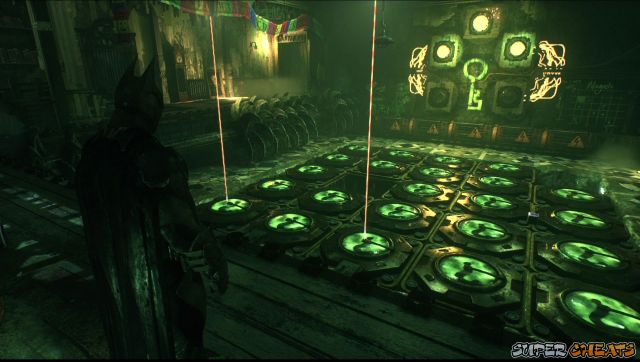
Attempt to leave the Orphanage with Catwoman and the Riddler himself will appear. You have to defeat him and his robots next. Like before, you have to switch with the red and blue riddlerbots depending on the character you're controlling. Riddler will also change the color of the robots from time to time so deal with them accordingly. After destroying all riddlerbots, Riddler will escape and will only battle you once and for all after solving all of his puzzles in the city. Once done, leave the orphanage.
After a long, exhausting task of solving all riddles, collecting trophies, stopping riot bombers, and finding all destructible objects, now it's time to face Riddler once and for all. Return to the Orphanage and operate the pedestal to check your completion rate. The Riddler himself will appear. Like before, you have to beat down all his robots which he will reassemble in a different color.
Catwoman will arrive to help and like before, you have to perform Dual Team Takedowns and switch as you target the colored bots that you can damage. (Blue for Batman, Red for Catwoman) After taking out the first batch, Riddler will lower his shields. Using Catwoman or Batman, get near him and press the attack button to beat him. Do this three more times to completely beat him in battle.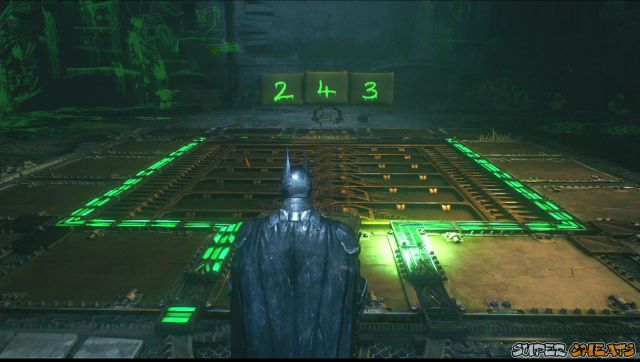
Once done, drive to GCPD and deliver the annoying criminal to his new home. Once done, this case is now closed.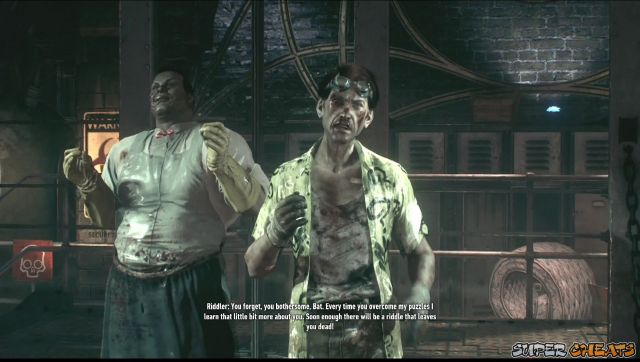
Campaign for Disarmament
You'll unlock this mission through the story while you're tracking down the militia vehicle that took Barbara. When you find a bomb like this, you have to interact with it on foot then defend the position from tank drones until a virus is successfully uploaded. Once done, use the Batmobile's power winch to pull the bomb and trigger a controlled explosion. The method is the same to all other explosive devices scattered in the city.
Bleake Island- The first explosive device that you have to detonate is part of the story and will be counted towards the mission's overall progress. (See video above)
- This one is located near the Falcone Shipping Antenna, southeast of the island. The explosive device is found inside railyard.
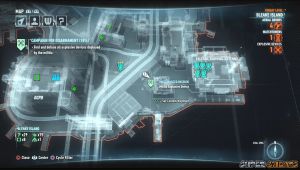
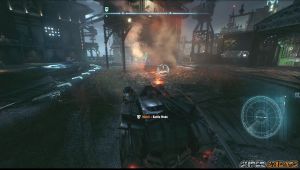
- This explosive device becomes available only after Harley Quinn appears in the main story. This is located in the entrance of Chinatown.
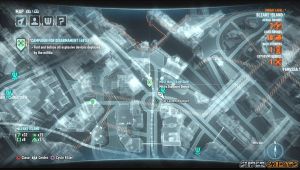
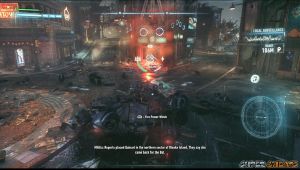
- This becomes available only after repelling the assault in GCPD. It's located in the ditch SW of Panessa Studios. You can also access the short sewer tunnel system inside.
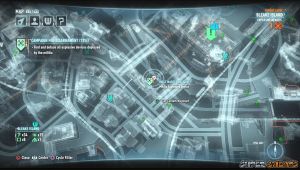
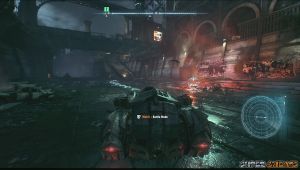
Miagani Island- This one is found under the overpass in the intersection in Kingston.
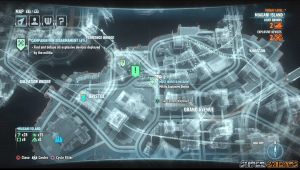
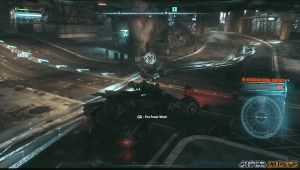
- This is found along Grand Avenue, to the east, in front of Lacey's Deparment Store and Bank of Gotham.
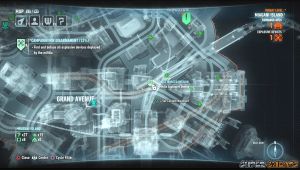
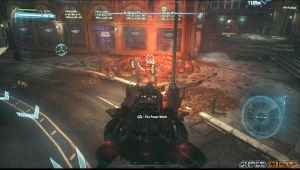
- This is found under the tower near the Miagani Botanical Gardens.
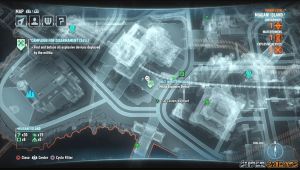
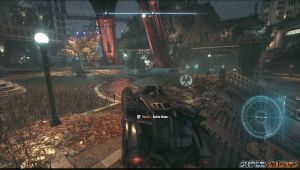
- This explosive device becomes available only after Harley Quinn appears in the main story. This is located in the intersection south of Mercy Bridge.
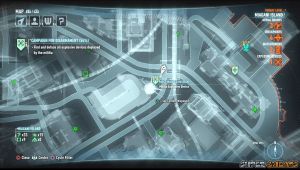
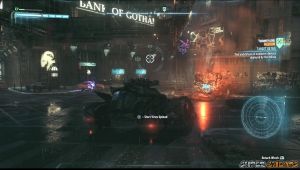
- This becomes available only after repelling the assault in GCPD. It's located in the intersection beside the Bank of Gotham branch in Kingston.
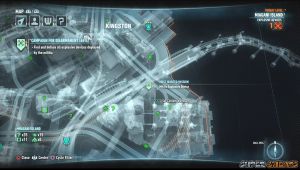
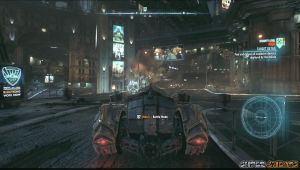
Founder's Island
The drones you'll encounter in this area will introduce airborne drones that will lob explosives that will detonate in a small area, in addition to the Twin Rattlers and Mamba missile drones. The small drones can be taken out using gatling rounds but you have to move quickly to avoid getting trapped in the middle of the crossfire.- This found west of the construction area and east of the airships. The explosive device is located in the middle of an intersection.
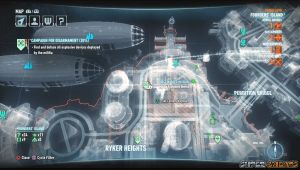
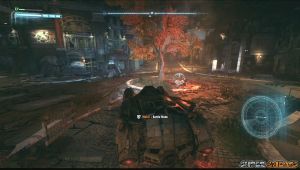 cannot load player config
 - This is found outside the courtyard of Queen Industries building.
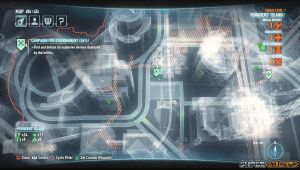
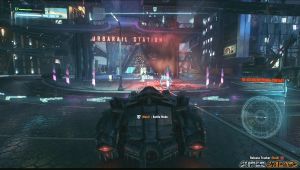
- This becomes available only after repelling the assault in GCPD. This is located in the entrance of Port Adams. To prevent yourself from getting surrounded, fight outside the gate since most of the drones will be coming in from inside. You'll have to deal with reinforcements from the outside too but they're not as many compared to the units within the port's premises. You can also use the gate to funnel the drones and protect yourself from the homing missiles.
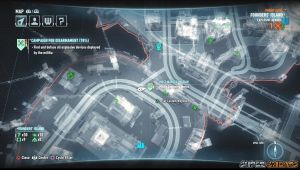
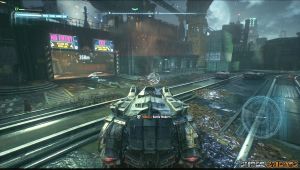
After detonating all the explosive devices, Batman will confront Deathstroke in Grand Avenue. Head there and disable all the Cobra Tanks patrolling the area. It will be better if you have the Batmobile's upgrade that can lure drones from where you shot your cannon, it will be quite easy to dispatch all of them.
Once the Cobra tanks are down, you have to target Deathstroke's tank. This tank doesn't have any gimmick; you just have to attack it up front. However, if you have fully-charged energy, you can unleash all your special attack lock-ons on this single target and eliminate it quite easily. Once done, deliver Deathstroke to the GCPD special lockup to complete the mission.Gotham on Fire
This mission is added after you tracked down the militia vehicle that abducted Oracle and reconstructed the crash site where Oracle threw a scrambler for you to find. Head to the fire station and use the Batmobile's power winch to trigger the building's fire suppression system.
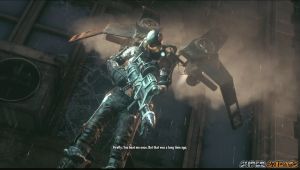
Firefly will burst out of the flame. You have to pursue him and keep on his trail. Avoid the wall of fire he will occasionally leave behind. Keep following him until he runs out of fuel. Then, eject-glide from your Batmobile to catch him in mid-air.
As you progress in the game's story missions, you'll get new intel about the Firefly's activities. Head to the next burning firestation and repeat the process all over again. The last fire station burning located in Otisburg, Founders' Island. You need to bring the Batmobile so you can only tackle this mission once you destroyed the long-range missile launcher as part of the story. Like before, you have to chase Firefly until his gas tank runs dry. Then, do an eject-glide to catch him and beat him up. Batman will bring him to GCPD afterward. Mission complete.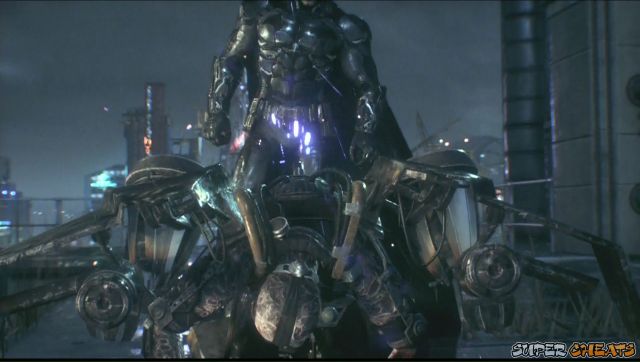
Heir to the Cowl
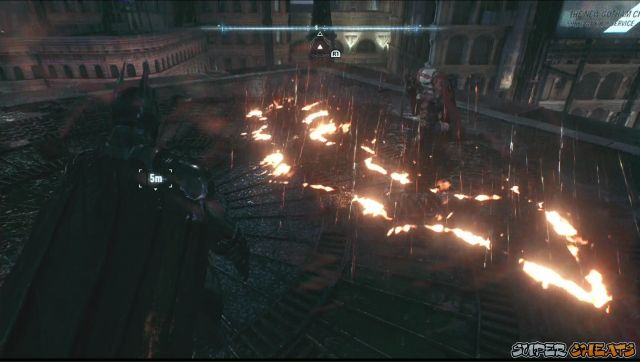
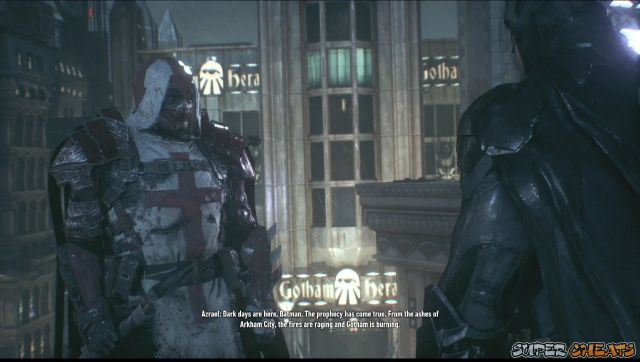
This mission is added after you tracked down the militia vehicle that abducted Oracle and reconstructed the crash site where Oracle threw a scrambler for you to find. Head to the rooftop to find the burning Batman symbol. Talk to Azrael and you'll control him as he proves himself against a mob. You need to complete the challenge without getting hit to prove you're worthy.
Azrael's next location is in Founders' Island, north of Port Adams. Like before, you have to defeat all enemies without getting hit. He's using the same combos and skills as Batman so take out the smaller fries first before beating down the brute.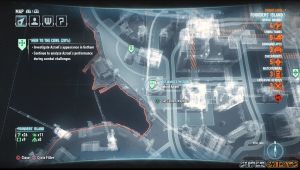
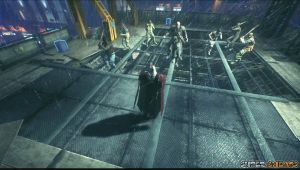
Azrael's next location is in Chinatown. In this challenge, you'll have to deal with a medic and a charged up militia. You have to avoid touching the electrified guy; you can remove the electricity from him by using the Batclaw. Make sure to take out the medic as fast as you can as well.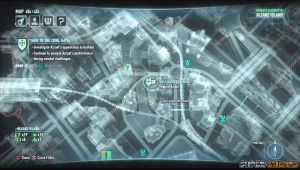
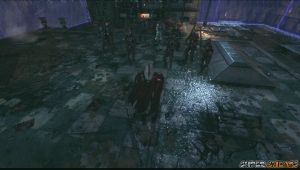
This intel becomes available only after Harley Quinn appears in the main story. Head to Lady Gotham (the lone island in the middle of the city and make your way to the top to find the burning bat symbol. To pass this test, you have to ensure that Azrael doesn't get hit by the elite militia swordsmen.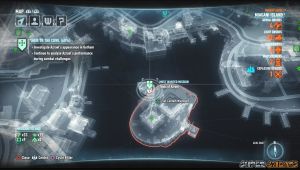
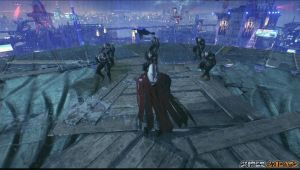
Next, head to the Clocktower to analyze Azrael's unusual neurological activity through the batcomputer. After playing Azrael's memory, replay the footage and examine the parts with strange symbols to complete the waveform and reconstruct the order's real message.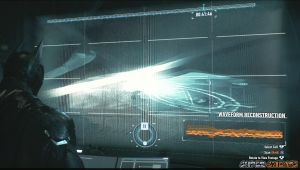
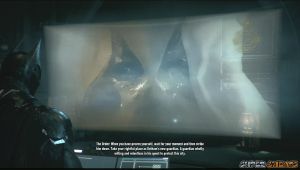
Azrael will appear inside the Clocktower and you'll have to control him. You'll be forced to get the sword on top of the lockers. As Azrael, you'll have to choice whether you'll kill Batman or not. If you choose to break the sword, leave the clocktower through the elevator to complete the mission and close the case.
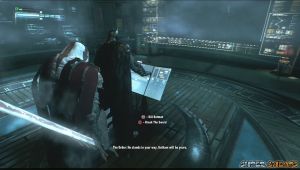
Creature of the Night
You may encounter this creature while you're grappling through the rooftops of Miagani Island. You need to catch up with it in the air and it's flying around buildings, making it hard to spot. It will occasionally shriek and will give you an approximate location and direction where it's heading. Just catch up with it and Batman will be able to take it down and get a blood sample.
Next, head to Chinatown to find Dr. Langstrom's lab. It's located inside an alley. Enter it and go down the elevator. Enter the lab,and inspect the body. Then access the computer nearby. You'll need to create an antidote for Langstrom's condition. You have to rotate the DNA sequence so that the DNA integrity will keep rising. An incorrect strain will decrease the integrity. Once the clean DNA sample has been synthesized, the section of this mission is complete.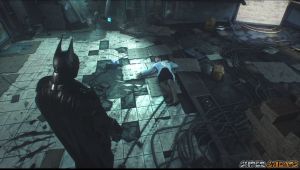
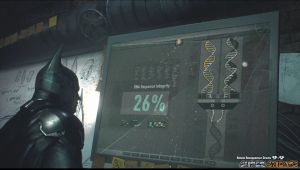
Head to Bleake Island and keep your Detective Mode active as you scour the rooftops in search of the bat creature. You can also listen to the chatter about the sightings. Once you found it, chase after it and glide near enough to grab it and administer the drug. However, the dose doesn't seem to be enough so you have to wait a bit later until you can get new intel about this creature's whereabouts
Finally, the Man Bat will be flying around the Founders' Island skies. I happen to find him after the storyline with Harley Quinn. Like before, glide towards this creature to pummel him and administer a cure. Once the Man Bat is loaded, deliver it to GCPD to lock it up and complete the mission.Occupy Gotham
This mission becomes available as soon as you reached Founder's Island. You have to neutralize the militia towers on the rooftops of the buildings in each of the districts of the city. You have to defeat all guards and place explosive gel on the console to destroy it.
Miagani Island- This is located on the rooftop of the building beside the Heavenly building. Clear the guards out of the range of the auto-turret installed on the adjacent building.
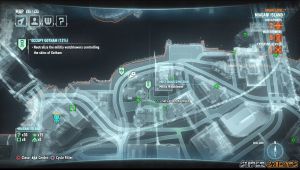
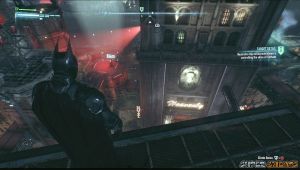
- This outpost is located on top of the hospital rooftop. There are a lot of guards and there are two terminals. One of the terminals is completely unguarded. Destroy it first to disable some of the auto-turrets. Next, study the area first. There are two brutes in the fray, along with some elite guards with stun sticks.
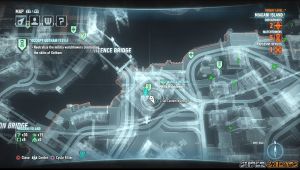
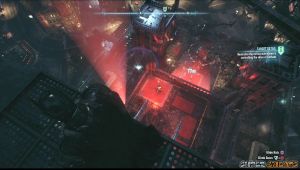
- This is found on an annex connecting two buildings in the Grand Avenue intersection. There are no guards in this watchtower, only auto-turrets. Drop down and take out the auto-turrets beside the outpost terminal.
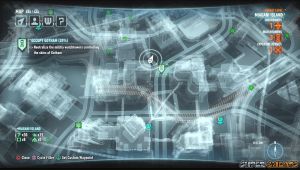
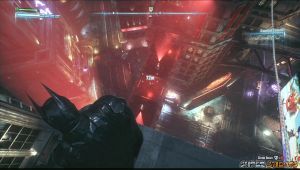
- This is found near the Mainland Bridge, NE of the Wayne Tower. There are two terminals you need to destroy. One is the unguarded terminal on the rooftop controlling the auto-turrets on the walls, and the main console on the annex with the guards. The two main towers have a lone, roaming guards. You can take them out silently to reduce the number of threats you have to deal with. Also, there is a couple of militia medics in the scene as well.
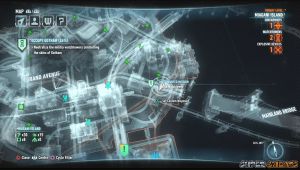
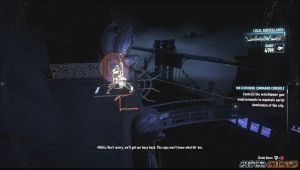
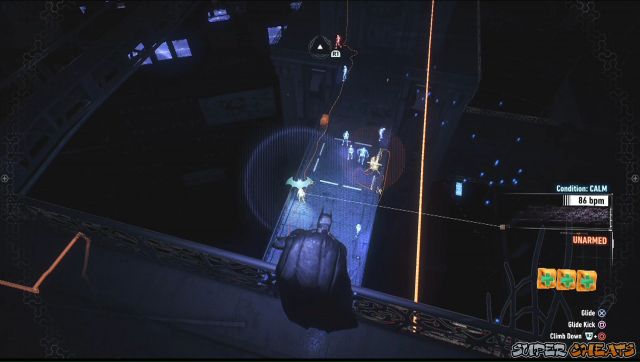
- Found NE of the Orphanage, by the riverside.
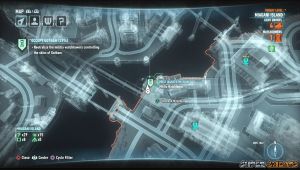
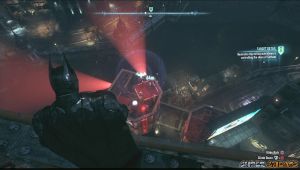
- This becomes available after the incident with Harley Quinn in the storyline. It's located on the rooftop of the Bank of Gotham.

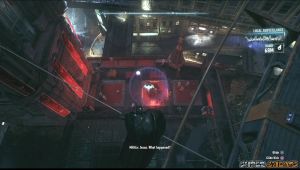
- This becomes available after the incident with Harley Quinn in the storyline. It's located on top of the building previously used by Penguin as a weapon cache. There's a checkpoint located beside it as well.
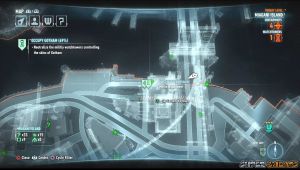
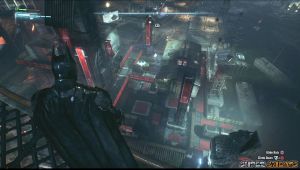
- This becomes available only after repelling the assault in GCPD. This under the tower beside the Botanical Gardens. This is quite easy with only a drone and a handful of guards to defend the area.
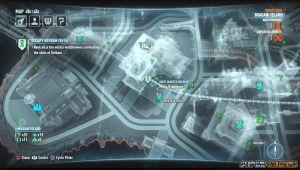
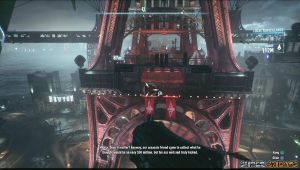
Founder's Island- This is located on the rooftop of the building near the Divinity Church and bridge.
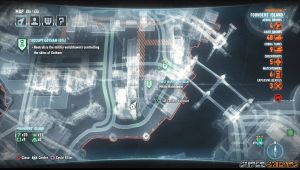
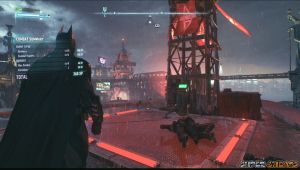
- This outpost is located near Perdition Bridge and Rykes Height.
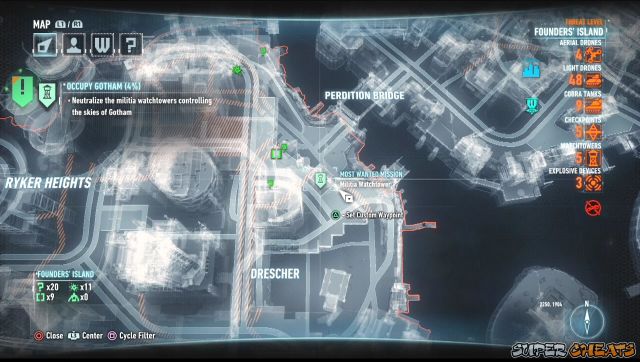
- Found on the building NE of Port Adams and NW of Salvation Bridge. Use the RHD to download the security codes from the controller of the scout drone. Use the drone to take out all the guys inside instantly.
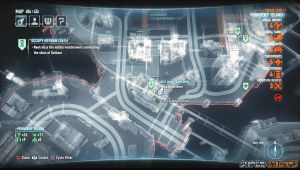
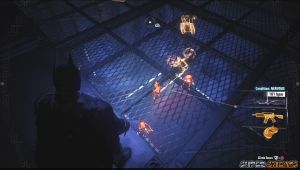
- This is located south of Wayne International Plazas (which is also located near the airships). Disable their weapon caches first using the Disruptor to prevent them from arming themselves.
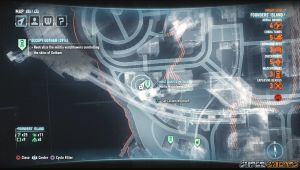
- This watchtower is located directly north of Port Adams. The Otisburg Firestation is burning right beside it as well.
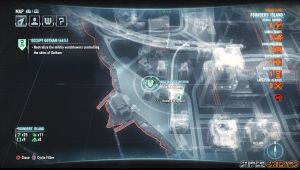

- This becomes available after the incident with Harley Quinn in the storyline. It's located on top of the building in the middle of a construction. This area is not that defended so you'll have an easy way destroying these watchtowers.
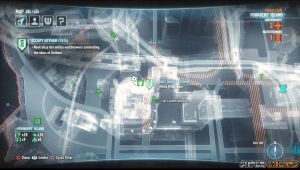
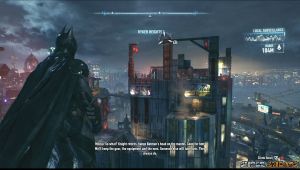
- TThis becomes available only after repelling the assault in GCPD. This is on top of a building under construction. There are also several mini-gunners and soldiers with sensor-deflecting armor who will appear invisible from your Detective Mode in this watchtower. You have to take out the smaller fries first then isolate the mini-gunners one by one. You can also place explosives behind the cracked walls, lure the mini-gunners there using the voice synthesizer and blow them up.
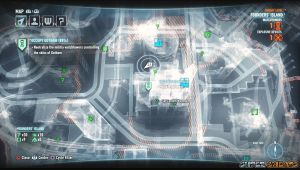
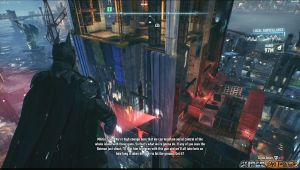
Bleake Island- The only way to enter this is by kicking through the window. Glide from a vantage point and eliminate the two guards inside to easily take out this watchtower.
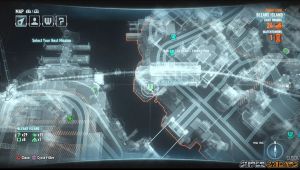
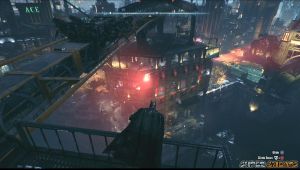
- This watchtower is located near the docks, north of Penitence Bridge in Founders' Island. The console is located at ground level. There are no vents that you can exploit and almost no chance for a silent takedown.
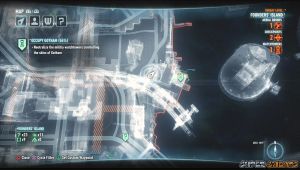

- This watchtower becomes available only after Harley Quinn appears in the main story. This is located in the entrance of Chinatown. There are two drone operators here and some basic militia guards.
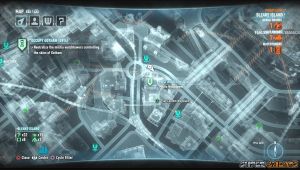
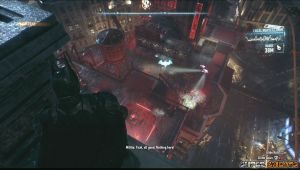
- This becomes available only after repelling the assault in GCPD. This is found NE of the GCPD building.

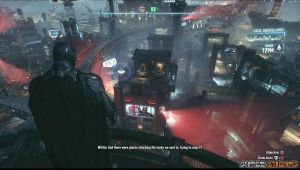
- This becomes available only after repelling the assault in GCPD. This is found directly north of the GCPD building. It will be hard to take this out since the auto-turret above is monitoring the position of the troops all the time. You can have the Batmobile take potshots at the soldiers that can be targeted. Unfortunately, you can't use the voice synthesizer to lure them near the edges so the Batmobile can snipe them. Once you brought down as many as you can, you have to engage them in combat. You have to work fast since the auto-turret on the wall has a rapid-fire setting. If your Batsuit's fully upgraded at this point, you should be able to take on 3-4 militia and quickly take them out via environment or special takedowns.
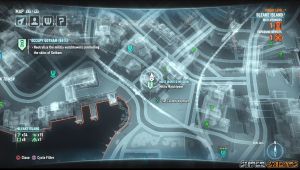
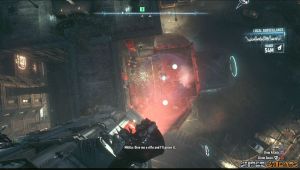
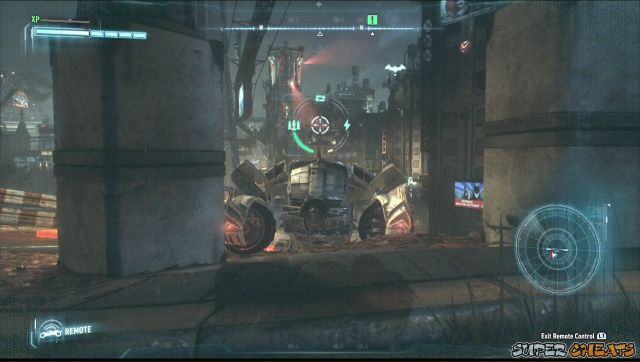
Own the Roads
The first set of checkpoints is found in Founder's Island. The checkpoints are usually enclosed within walls so you go in and defeat all the guards. The barrier surrounding these checkpoints can't be destroyed, even with the Batmobile's cannons so you have to fly in in the middle and defeat all the guards inside. After defeating them, you have to find the commander. Enter Detective Mode to highlight the commander among those who you've beaten down and destroy the checkpoint controller to lower the barricade.
Founders' Island- Located directly west of Perdition Bridge
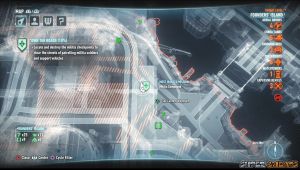
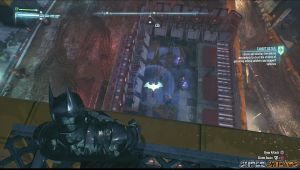
- Located directly west of Penitence Bridge
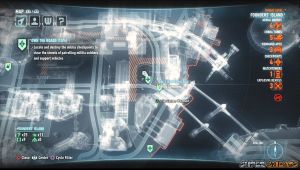
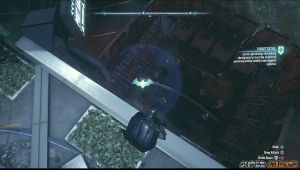
- In the riverside between Penitence and Salvation Bridges. This outpost has fewer men but with two armed guards and two with shock sticks.
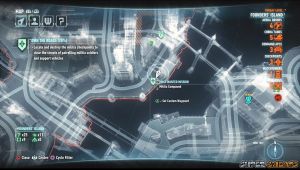
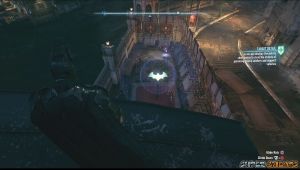
- This checkpoint is located south of Perdition Bridge, in the eastern side of Founders' Island. There are two armed guards here. Disable their weapons then engage them on the ground.
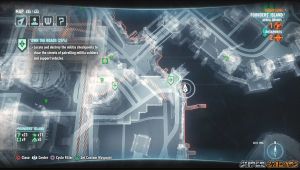
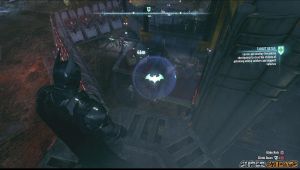
- This checkpoint is inside a building compound. Pull the massive gate NW of the checkpoint using the Batmobile's Power Winch, and eliminate all guards and auto-turrets using the Batmobile's battle mode.

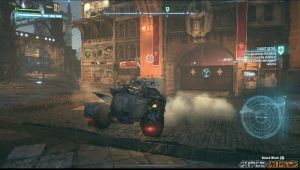
- This becomes available after the incident with Harley Quinn in the storyline. This compound has a lot of sentry drones. It will help if you have purchased the Disruptor upgrade that will destroy the tagged drone when it fires automatically.
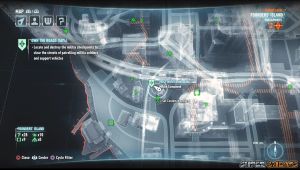
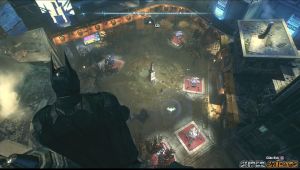
There's also a security box that you can access to remove the barricade on the upper ground. This will allow you to bring in the Batmobile for some extra firepower.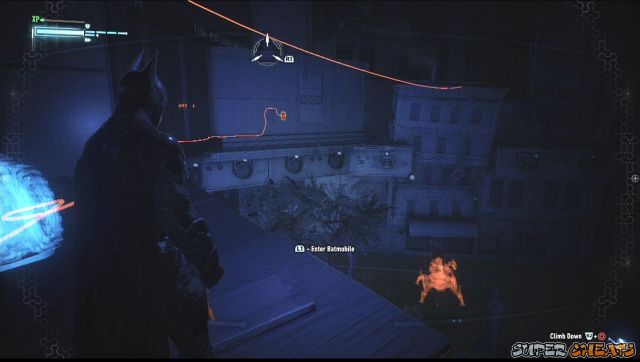
- This is found in the intersection near the abandoned church.
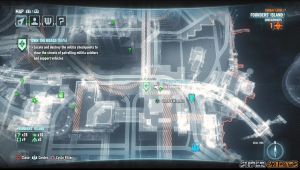
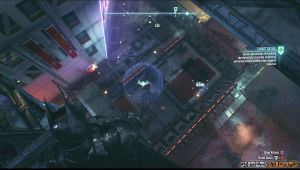
- This checkpoint will only become available once you've rescued Oracle and got the second Batmobile. This is located inside a building on construction in the middle north part of the island. There's a drone sentry inside. Having the capability to sabotage this drone will help immensely in clearing this checkpoint. You can also sneak via underground vent this time and take them out by Fear Multi-takedown. Alternatively, there's also another switch nearby that will open the gate and allow your Batmobile to easily lay waste on them.
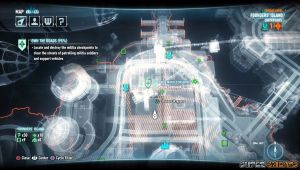
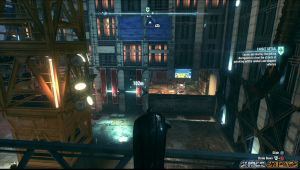
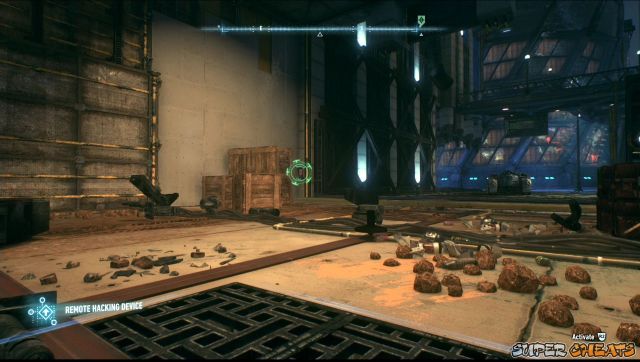
Miagani Island- This is found near Eliott Memorial Hospital.
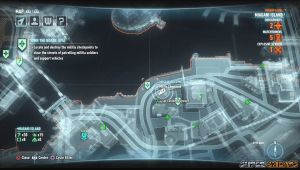

- This is found in the Urbarail Station in Bristol, east of Salvation Bridge. You can easily use the Batmobile to mow down the militia personnel stationed in this outpost.
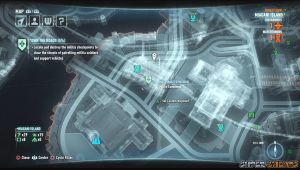
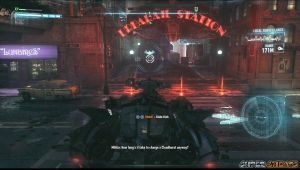
- This becomes available after the incident with Harley Quinn in the storyline. It's located beside the building previously used by Penguin as a weapon cache. There's a watchtower beside it as well.
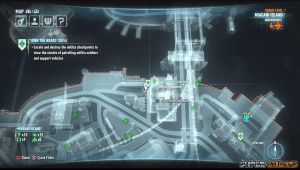
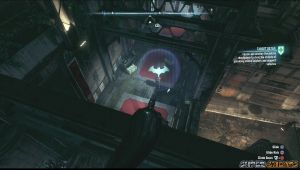
- This becomes available after the incident with Harley Quinn in the storyline. The checkpoint is located inside the compound of the Ranelagh Ferry Terminal. There are couple of checkpoint drones in the compound which you can temporarily blind using your RHD. You can only blind one at a time.
It will be helpful to set up explosives in the lower balcony beside the station and lure the enemies there. You have to lure the checkpoint commander as well so you can get his controller. Take note that this won't disable the drones as well so get out of the area to avoid getting gunned down.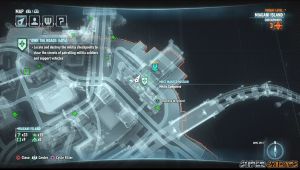
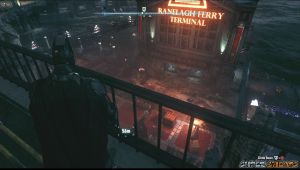
- This becomes available after the incident with Harley Quinn in the storyline. It's located in front of the Orb Theater.

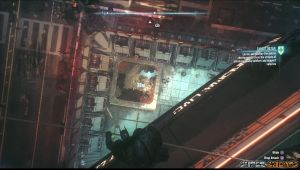
- This checkpoint is found beside the Gotham Globe building.
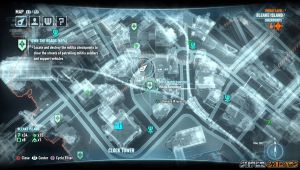
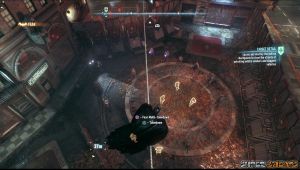
- This checkpoint will only become available once you've rescued Oracle and got the second Batmobile. This is located under the Botanical Gardens. Fortunately, there's a vantage point where you can snipe the drones and the guards using your Batmobile. You can even jump off the ledge and bring the Batmobile inside the checkpoint.
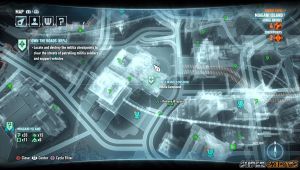
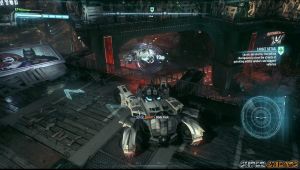
- This is located in the upper level of the Elliott Memorial Hospital. You can also snipe them using your Batmobile from the nearby flyover.
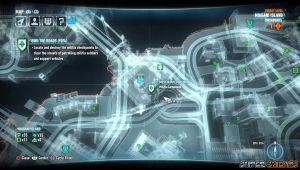
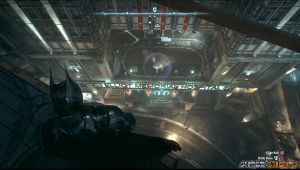
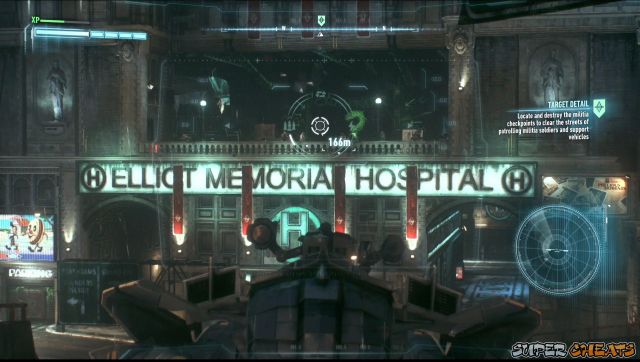
Bleake Island
These checkpoints will only become available once you've rescued Oracle and got the second Batmobile. After finishing at least one more checkpoint, you'll get a call from Deathstroke.- This is found in the middle of Chinatown. There are sentry guns deployed in the entrance and the foot soldiers include most of the variety you've faced so far. There's a line hanging in the middle of the group so you can position yourself there and perform a Fear Multi-takedown. Make sure to use the disruptors too, especially on the medics and armed guards. If you have upgraded your Disruptor, you can even sabotage the stun sticks of the foot solders there. When fighting on the ground, avoid getting in the sentry guns' optical range.
- This compound is located near Scarecrow's Safehouse in Chinatown. There's only one guy here surrounded by sentry guns. You can blind one of the rotating sentry guns, then disable the other while it's rotating away.
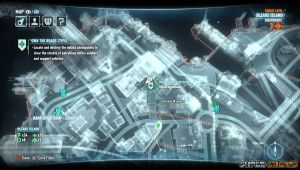
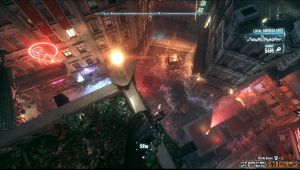
- This is located near Perdition Bridge. You have to defeat the guards outside or just use your RHD to remotely hack the door switch nearby. The checkpoint commander is located inside the building. You have to enter from the side. You can conveniently perform a Fear Multi-takedown from the ledge in the side entrance as well.
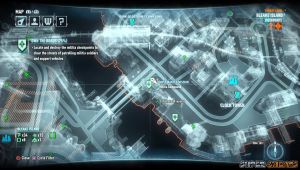
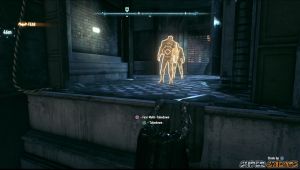
- This checkpoint is located near the clocktower. There are two drone sentries here but that shouldn't be a problem if you have upgraded your Disruptor that will make the drones self-destruct if they attempt to fire at you. The explosion from these drones is also powerful enough to knock down any militia near them.
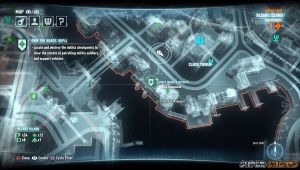
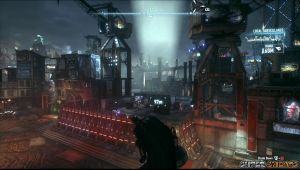
Armored and Dangerous

You'll receive this mission after installing the second Batmobile upgrade after the main story mission in the Miagini Tunnels. APCs will be patrolling the districts with weak or no tank drone presence. After taking down an APC, you have to wait until another one appears so you need to check your Mission Select screen from time to time.
Hunting them down will earn you some extra Wayne Tech upgrade points. Take note that these APCs will have escorts so you have to chase them down while evading RPG fire and firing your immobilizer rounds. Later on, these APCs can fire two RPG rounds at a time and will be driving excellently, often taking you in the sewers and back alleys making it harder for your immobilizer rounds to get a clean lock-on. You can also use your afterburners and sideswipe to crash the escorts off the road. The remaining APCs will have more escorts and will be able to lock-on two rockets at once.
To reveal the Founders' Island APCs, you should destroy the missile launcher as part of the story so you can bring the Batmobile in the district.Gunrunner
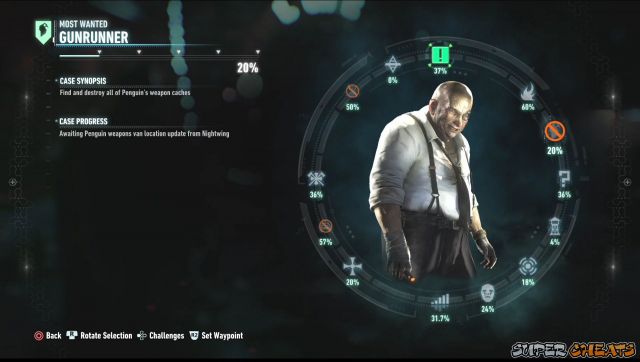
You have to find and destroy all of Penguin's weapon caches. Nightwing will provide you intel about Penguin's weapon delivery vans. Head to the van's location, track the vehicle and spook them. When they try to lose you, head to the rooftops and track them. Keep following them until they reach the Sionis Industries building near the Falcone Shipping Antenna in Bleake Island.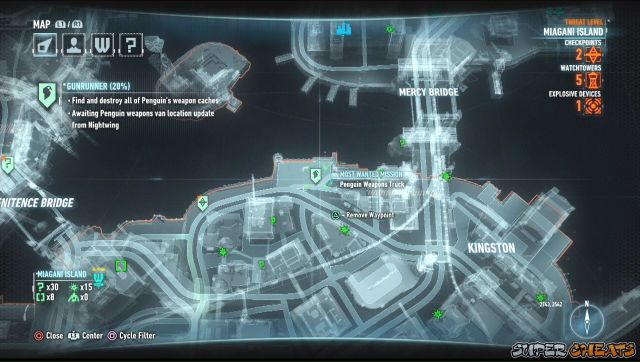
Head inside the building through the side door and hack the console on the other side of the wall using RHD to open the main gate. Remote control the Batmobile and take out the auto-turrets. Find the grate where you can grapple up then operate switch to open the roof covers.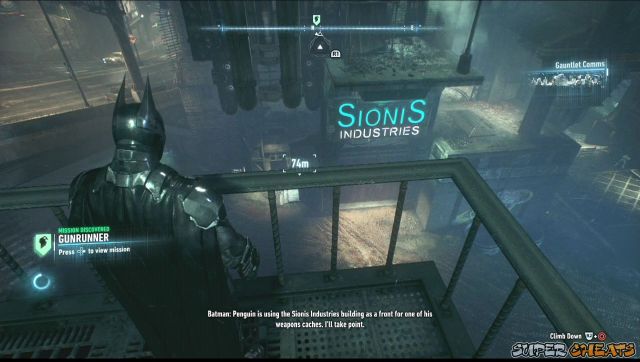
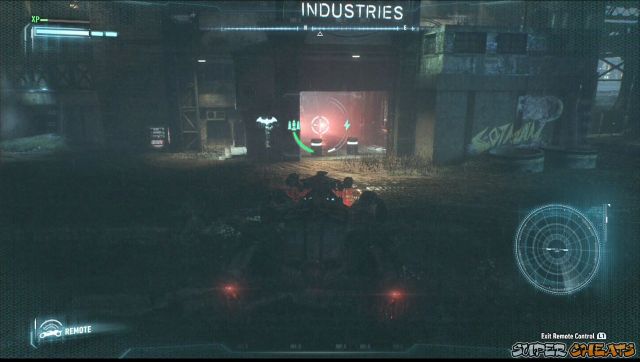
Head to the roof and smash the windows. Once you drop below, beat down the thugs with Nightwing's help. Like before, set the explosive gel on the weapon crates inside the vault then detonate them.
The second intel will become available after you blow up the missile launcher in Founders' Island. Head to the location of the truck and fire your tracker ammo. Next, knock on the truck or call in your Batmobile to scare them. Follow them by gliding from roof to roof until they lead you to one of Penguin's weapon caches.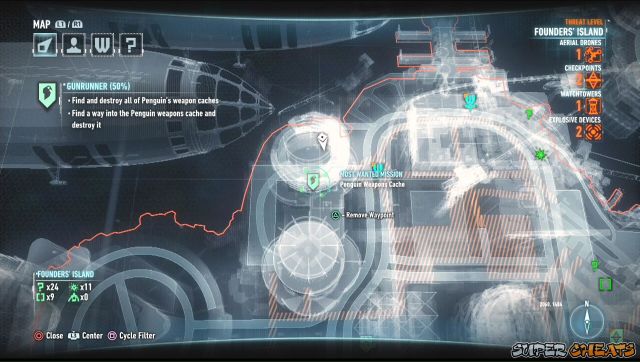
Take out the guard outside the building and enter through the door. Enter the vent nearby then make your way to the cracked wall. Place an explosive gel there, then return to the vent. Get into position behind the two hostiles, detonate the charge then take out the guys nearest to you at the same time. This should knock out all of the men in the room.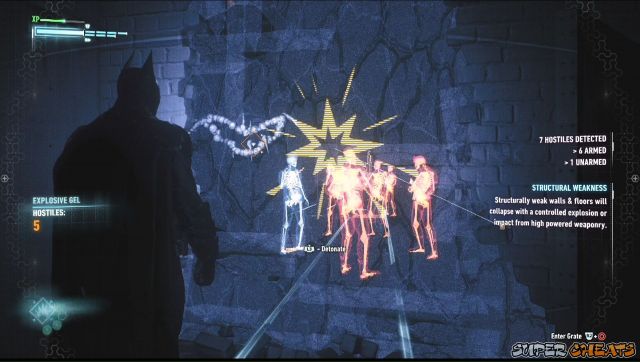
Now use the Bat Claw to pull the grate covering the vent near the ceiling and continue there to find the main weapons cache. Use the disruptor to disable the nearby weapon crate and two of the armed guards. Get into position and use Multi-Fear takedown to whittle their numbers quickly. Detonate the weapons inside the vault to complete this mission.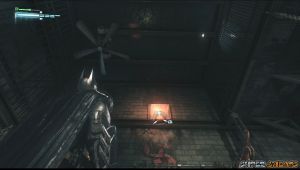
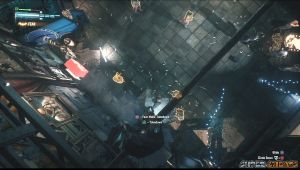
This intel becomes available after Harley Quinn's appearance in the main story. Head to the marked location of the weapon truck in the map then spook the goons, either by knocking at the back of the truck or arriving via the Batmobile. You have to trail them by gliding on the roof until they reach the weapon cache location in the water filtration plant in Bleake Island. Examine the gate where the truck entered so Alfred can give you the location in the tunnel.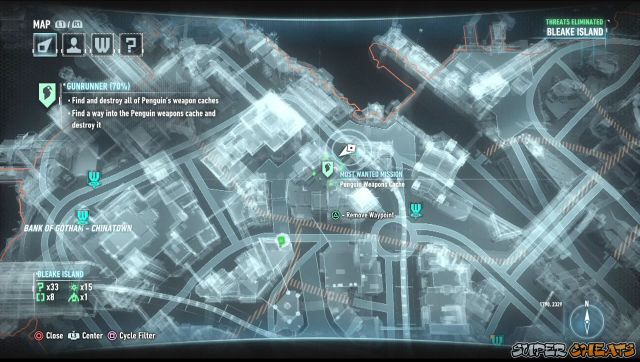
Follow the line leading you to the sewers. There are armed guards there so it will be easier to take them out using the Batmobile's weapon. Head to the room above to find the electric box controlling the barricade below. Pull the lever down and pick up the Riddler Trophy on the table along the way.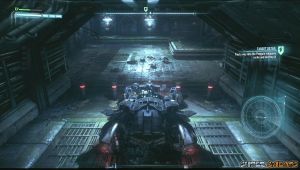
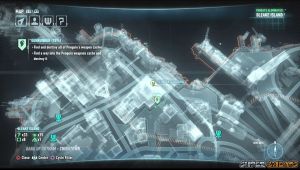
Enter the Batmobile and use the power winch to pull the hanging weight to lift the heavy gate. Get inside The Shaft and position yourself for a Fear Multi-takedown. There are only three grates in the ceiling where you can enter and there are no armed guards inside, except for a blade-weilding brute.

After eliminating the guards inside, set the explosives in the weapon crates and close the vault door. Detonate it afterward. A cutscene will trigger and you'll discover that Nightwing has been captured. Head to Penguin's location to rescue him.
Head to the rooftop and check the area. You can't use your detective mode in this area since there's a strong jamming signal from one of the guards there. If you manage to take out the thug with a backpack, you'll be able to use Detective Mode once again. First, get to a vantage point and take out the sniper first. After eliminating all guards in the rooftop, access the fusebox to open the elevator gate. Drop down until you see Nightwing and the guards surrounding him.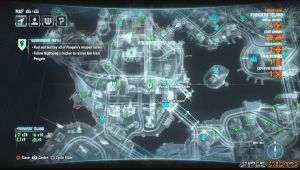
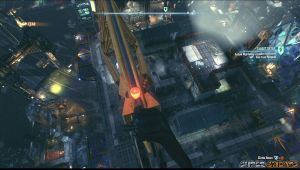
You need to find a way inside and make a surprise entry. Find an opening on the wall where you can crawl in. There's a sentry gun in the next hallway. Disable it with your RHD and destroy it. Open the vent grate and crawl in there. Follow the vent so you can get inside the weak wall behind Nightwing to rescue him.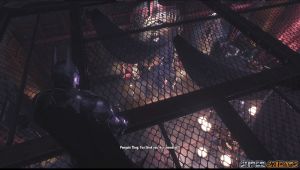
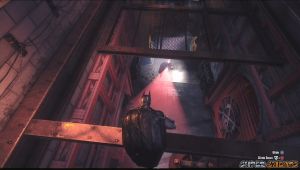
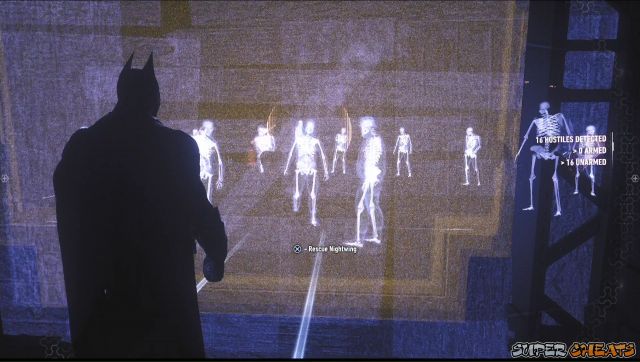
After beating all the goons, set some explosives inside the crate and close the vault door. Penguin will take Nightwing hostage shortly. Perform a dual team takedown and detonate the explosives to destroy the last cache. Now you have to bring Penguin to GCPD lockup to complete this mission and close the case.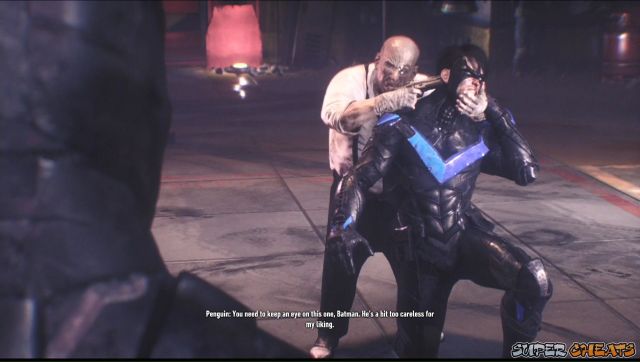
Two-Faced Bandit
Head to the Gotham Bank and enter it. The alarm will be triggered so you don't need to sneak behind the thugs. As long as they can't see you, you can take them by surprise and not get the attention of nearby thugs. Once you took the initial wave of guys out, more will arrive. Just suppress them all to complete the objective. The Smash and Grab AR Challenge will become available.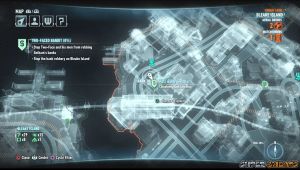
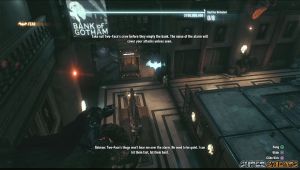
The Drescher Branch is located in Founder's Island. If you'll check this branch out, make sure that you don't get spotted by the heavy militia ground presence.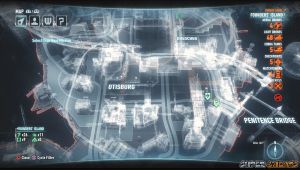
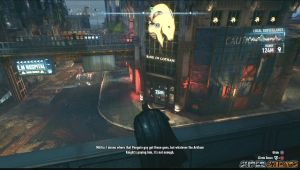
The Kingston Branch will be attacked next after clearing the Drescher branch. This is the largest bank and you have to deal with a lot of robbers and two loading vehicles at the same time. Build fear by doing silent takedowns and use Fear Multi-takedowns to easily take out multiple armed enemies at once. You have to take down 15 hostiles before the money in the bank gets flushed.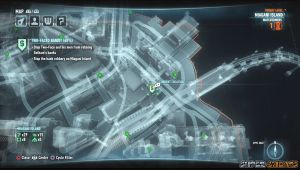
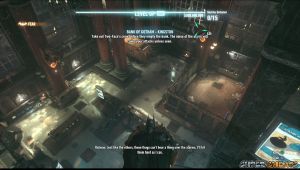
Finally, after taking down the last hostile, Two-Face will appear, along with some militia guards. You have to be quiet now; like before, you have to make silent takedowns so you can use Fear Multi-takedowns. Be careful of detective mode as well since they have a specialist in the group. Use the Disruptor to disable the guns of at least three enemies, including Two-Face.
After systematically taking them all out, knock out Two-Face then deliver him to the QCPD lockup. Mission complete.Friend in Need
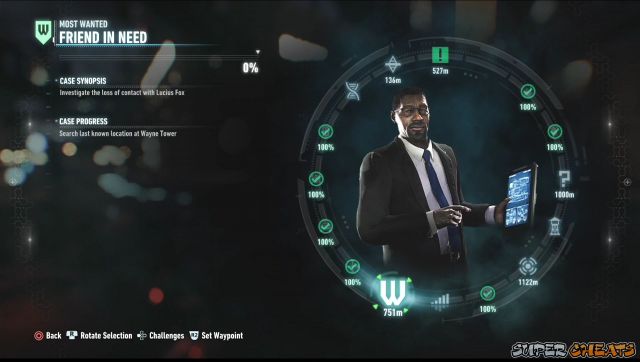
This mission becomes available after the incident with Harley Quinn, as part of the story. Head to the Wayne Tower to start this mission. You have to access it using the elevator in the parking garage. Once you're out, head to the computer and use the retinal scan. Once Fox gets near, press X again to use the retinal scan.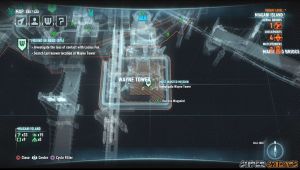

Once the control switches over to the real Batman, approach the door to trigger a short scene to identify the intruder. Head inside the office to confront him. You have to press the counter button at the right time to save Lucius. Just wait until you see him turn his gun on you then press the counter button to disable him. Mission complete.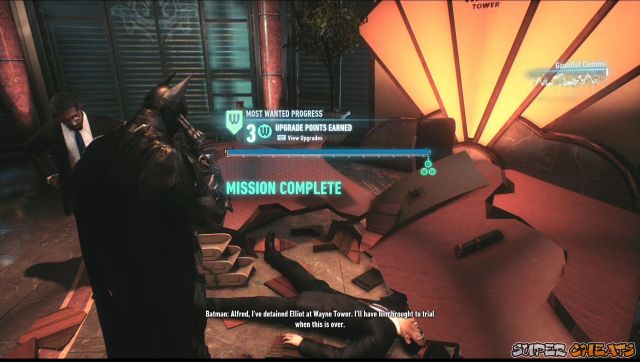
Lamb to the Slaughter
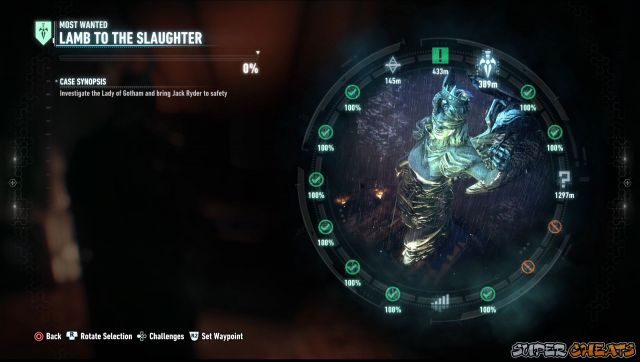
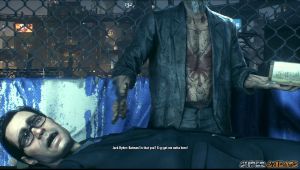

You'll get this mission after clearing the Clock Tower of the militia and restoring Oracle's connection to the mainframe. Head to the Lady of Gotham island in the middle of the city. Head to the location and you'll be placed inside an electrified cage with a crazy mob. Take them all out then use your REC to shut down the generators. Once done, grapple to the grates inside his cage to take him out. Mission complete.
- Located directly west of Perdition Bridge
- This is the very first firefighter you'll rescue once the mission becomes available. Follow the marker which will lead you to Panessa Studios. The firema is inside the building under a crane. You can use your grappling hook to reach that crane and dive attack the thugs inside from the rooftop glass. Defeat them all and free the fireman.


Comments